
Build a Rectangular Planter Box With Concrete Blocks
You'll start building your rectangular planter box with concrete blocks by preparing a level site, gathering necessary materials like lumber, plywood, and weather-resistant fasteners, and assembling the frame with a focus on durability and weather resistance. Next, you'll lay the first course of blocks, ensuring consistent spacing and alignment for a solid base. As you add more courses, you'll alternate block patterns for stability and visual appeal. With a sturdy base and drainage system in place, you'll be ready to add soil and plants, and that's when your planter box will really take shape - but first, get the foundation just right.
Key Takeaways
• Use 2' x 6' or 2' x 8' lumber for the frame and 3/4' or 1' thick plywood or OSB for the bottom and sides of the planter box.
• Ensure a clean and level site, assessing soil type and bearing capacity, and clearing the area of debris and obstructions.
• Lay concrete blocks in a pattern, such as staggered or running bond, maintaining consistent spacing and alignment for stability and drainage.
• Apply a waterproofing membrane to the inside of the planter box and add drainage holes to prevent water seepage and ensure proper drainage.
• Fill the planter box with well-draining potting soil and select plants based on mature size, growth habits, and sun requirements for a cohesive look.
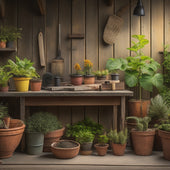
Gather Necessary Materials and Tools
Gather the following materials and tools to build your rectangular planter box:
- 2' x 6' or 2' x 8' lumber for the frame,
- 3/4' or 1' thick plywood or oriented strand board (OSB) for the bottom and sides,
- weather-resistant screws,
- wood glue,
- a drill,
- a circular saw,
- a tape measure,
- a square, and
- safety glasses.
When selecting materials, prioritize durability and weather resistance.
The lumber you choose should be able to withstand outdoor conditions, while the plywood or OSB will provide a sturdy base and sides for your planter.
For tool requirements, a drill and circular saw are essential for cutting and assembling the frame, while a tape measure and square guarantee accurate measurements and angles.
Prepare the Building Site
Clear a flat area of about 2 feet by 4 feet to serve as your building site, ensuring it's free from obstructions and tripping hazards. This will give you a clean slate to work on and prevent any accidents or setbacks.
Next, conduct a site assessment to evaluate the condition of the ground. Check for any slopes, dips, or unevenness that might affect the stability of your planter box. Take note of any existing drainage patterns or water flow in the area, as this may impact the box's placement.
Perform a simple soil testing to determine the soil type and its bearing capacity. You can do this by digging a small test hole and examining the soil composition. This will help you decide if you need to add any extra support or modifications to your planter box design.
Lay the First Course of Blocks
With your building site prepared, you're ready to lay the first course of blocks, starting from the bottom of your planter box design.
Begin by spreading a layer of mortar on the site, using a level to guarantee it's even. Lay the first block, making sure it's aligned with the planter box's outer dimensions. Use a spirit level to check the block's position and a rubber mallet to tap it gently into place.
Continue laying blocks around the perimeter, maintaining a consistent block alignment. Use a string line and stakes to guide you, making sure the blocks remain straight and level. As you lay each block, apply a small amount of mortar to the top and sides, using a pointing trowel to spread it evenly. Use a level to check the block's position and a spirit level to confirm it's plumb.
Focus on achieving a solid, level base course, as it's vital for the planter box's stability. Use a mortar technique that allows for a 1/4-inch gap between blocks, filling it with mortar as you go. This will provide a strong, durable bond and a professional-looking finish.
Add Additional Courses of Blocks
As you continue building your planter box, you'll need to add additional courses of blocks, alternating the pattern to guarantee stability and visual appeal.
You'll want to contemplate the stacking sequence to maintain a level surface and prevent shifting.
Block Pattern Alternatives
You can add visual interest to your planter box by alternating the block pattern in each course, creating a staggered or running bond pattern that adds texture and depth to the exterior. This technique allows you to mix and match different block colors and textures to create a unique design.
Here are some block pattern alternatives you can consider:
| Pattern | Description |
|---|---|
| Staggered | Alternating blocks in each course, creating a random pattern |
| Running Bond | Alternating blocks in each course, creating a continuous pattern |
| Herringbone | Alternating blocks in a zigzag pattern, creating a dynamic design |
When selecting a pattern, consider the block color and texture you're using. For example, if you're using blocks with a rough texture, a staggered pattern can create a visually appealing contrast. If you're using blocks with a smooth texture, a running bond pattern can create a sleek, modern look.
Remember to plan your pattern before you start building, as it can affect the overall structure and stability of your planter box. With a little creativity, you can create a unique and eye-catching design that adds curb appeal to your outdoor space.
Adding Block Layers
Now that you've selected a block pattern, it's time to start building up your planter box by adding additional courses of blocks.
Begin by spreading a layer of sand or gravel to provide a stable base for the next course of blocks. This will guarantee proper drainage and prevent settling. As you add each new layer, make sure to level the blocks carefully to maintain a uniform height. Use a spirit level to check for any deviations from the planter box's design aesthetics.
When adding subsequent layers, stagger the blocks to guarantee a strong bond between courses. This will also improve block maintenance, as it will reduce the likelihood of water seeping between the blocks.
As you build, regularly inspect the planter box's structure to guarantee it remains square and level. Make any necessary adjustments before proceeding to the next layer.
Block Stacking Sequence
With each successive layer, stack the blocks in a staggered pattern to create a strong and stable structure. This sequence guarantees block stability, as each block's weight is evenly distributed, preventing the structure from shifting or toppling. As you add additional courses of blocks, maintain a consistent pattern, alternating the blocks' position to create a strong bond between layers.
To achieve a visually appealing planter box, consider your aesthetic options. You can choose to maintain a uniform pattern or create a unique design by alternating block colors or textures. For added visual interest, consider incorporating decorative blocks or capstones to finish the top course.
When stacking blocks, verify each course is level and plumb, using a spirit level to check for accuracy. Use a rubber mallet to tap each block into place, making sure they're securely seated on the layer below.
As you progress, the planter box will begin to take shape, its sturdy structure and attractive design a reflection of your attention to detail.
Create a Level and Sturdy Base
Now that you've laid the groundwork for your planter box, it's time to focus on creating a level and sturdy base.
You'll need to guarantee the site is prepared correctly, which involves clearing the area of debris and checking for levelness.
Site Preparation Tips
Your planter box's success hinges on a solid foundation, so make sure the site you've chosen is clear of debris and obstructions that could impede construction or compromise the box's stability.
During site selection, evaluate the terrain to verify it's level and even. Check for any slopes or inclines that might affect water drainage or the box's structural integrity. Take note of any existing features, such as trees, gardens, or slopes, that might impact your planter box's placement.
Clear the area of any debris, vegetation, or obstructions that could interfere with construction. Mark out the site's boundaries using stakes and twine to visualize the planter box's footprint.
Perform a thorough terrain evaluation to identify any potential issues, such as uneven ground or poor drainage. Make adjustments to the site as needed to guarantee a sturdy base for your planter box.
Block Placement Essentials
You'll establish a solid base for your planter box by carefully placing blocks on a level surface, guaranteeing a sturdy foundation that won't shift or settle unevenly over time.
Start by laying the first block, making sure it's aligned with the planter's footprint. Use a spirit level to verify it's perfectly horizontal.
Then, use block alignment techniques to position subsequent blocks, maintaining a consistent spacing of about 1/8 inch between each block. This spacing consideration is essential to allow for drainage and prevent water from accumulating in the planter.
As you place each block, gently tap it into position with a rubber mallet to secure a snug fit. Use a string line or chalk line to guide your block placement, making sure they're straight and even.
Add Drainage and Waterproofing
Add a layer of waterproofing membrane to the inside of the planter box, making sure it covers the entire surface to prevent water from seeping into the wood.
Apply it according to the manufacturer's instructions, usually with a brush or roller. This vital step safeguards your planter box from water damage and rot.
Next, focus on drainage solutions.
You can opt for a simple drainage system by drilling 1-2 inch holes in the bottom of the planter box, spaced about 6-8 inches apart.
Alternatively, consider installing a more advanced drainage system, such as a French drain or a drainage mat, to guarantee excess water is efficiently directed away from the planter box.
When choosing a drainage solution, consider factors like the planter box's size, material, and the type of plants you'll be using.
Finish With Cap Blocks and Grout
With the planter box's structure and drainage system in place, it's time to seal the top with cap blocks and grout. You'll need to lay the cap blocks on top of the planter box, ensuring they're level and evenly spaced. Use a spirit level to check the blocks' alignment and make adjustments as needed.
Once the cap blocks are in place, it's time for grout application. Mix the grout according to the manufacturer's instructions and apply it to the gaps between the cap blocks using a grout float. Hold the float at a 45-degree angle to force the grout into the gaps. Remove excess grout with a damp cloth, taking care not to dislodge the cap blocks. Let the grout dry completely, following the manufacturer's instructions.
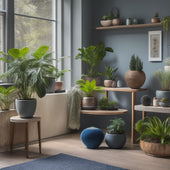
Add Soil and Plants
Now that your planter box is watertight, fill it with a well-draining potting soil that's specifically designed for containers, leaving about an inch at the top for watering.
You'll want to choose a soil type that suits the plants you've selected, so consider factors like moisture levels, pH, and nutrient content. For example, if you're planting succulents, look for a soil with low organic matter and good drainage. If you're planting flowers or veggies, opt for a more nutrient-rich soil.
When selecting plants, think about the mature size, growth habits, and sun requirements of each variety.
You can create a cohesive look by choosing plants with similar textures, colors, or bloom times.
Consider layering plants to create visual interest, with taller plants towards the back and shorter ones towards the front.
Make sure to leave enough space between each plant for proper air circulation and growth.
Frequently Asked Questions
Can I Use Mortar Instead of Masonry Adhesive for Concrete Blocks?
You're wondering if you can use mortar instead of masonry adhesive for concrete blocks.
While mortar has its advantages, like added strength and durability, it's not the best choice for this application.
Mortar is typically used for masonry applications that require high compressive strength, like building foundations or walls.
For your planter box, masonry adhesive is a better fit, as it provides a strong, flexible bond that can withstand outdoor elements and weight variations.
How Often Should I Clean and Maintain My Planter Box?
You'll want to establish a regular cleaning schedule to keep your planter box thriving.
Weekly, remove any debris or dead plant material.
Monthly, inspect for signs of damage or wear.
Every 3-6 months, deep clean the box with a mild detergent and water.
For maintenance tips, check the type of concrete blocks you used, as some may require special care.
Are Concrete Blocks Suitable for Acidic or Alkaline Soil Types?
When working with acidic or alkaline soil, you'll want to evaluate concrete blocks' suitability.
Since concrete has a high pH, it can affect soil acidity. If your soil pH is extreme, it may react with the concrete, altering its structure.
You'll need to guarantee proper drainage considerations, like adding a buffer layer, to prevent waterlogged soil and minimize potential interactions.
Can I Build a Planter Box on a Slope or Uneven Ground?
When building on a slope or uneven ground, you'll need to prioritize slope stability and drainage solutions.
You'll want to create a level foundation, using materials like compacted gravel or sand, to prevent erosion and settling.
Confirm your planter box is designed with a slight tilt to facilitate water flow, and consider installing a French drain or swale to manage excess water.
Is It Necessary to Seal the Concrete Blocks for Waterproofing?
You've probably heard that concrete blocks are impermeable, but that's a myth - they can absorb water, leading to erosion and damage.
When it comes to waterproofing, sealing your concrete blocks is an essential step.
You have various waterproofing options, including silicone-based sealers, acrylic coatings, and epoxy-based paints.
Mastering sealing techniques, such as applying a consistent coat and avoiding puddles, is key to ensuring your planter box remains watertight and durable.
Conclusion
Craft a fascinating concrete creation, carefully constructing your rectangular planter box with concrete blocks.
With each course, your creation comes closer to completion, culminating in a sturdy, sophisticated structure.
Finally, fill with flourishing flora, and your fabulous focal point is finished, flaunting a fusion of form and function.
Related Posts
-
7 Best Concrete Planter Ideas for Indoor Gardens
You're looking for a stylish and low-maintenance way to bring some greenery into your home, and concrete planters off...
-
7 Best Concrete Planter Ideas for Indoor Gardens
You're looking for a stylish and low-maintenance way to bring some greenery into your home, and concrete planters off...
-
7 Best Concrete Planter Ideas for Indoor Gardens
You're looking for a stylish and low-maintenance way to bring some greenery into your home, and concrete planters off...
-
7 Best Concrete Planter Ideas for Indoor Gardens
You're looking for a stylish and low-maintenance way to bring some greenery into your home, and concrete planters off...
-
7 Best Concrete Planter Ideas for Indoor Gardens
You're looking for a stylish and low-maintenance way to bring some greenery into your home, and concrete planters off...
-
7 Best Concrete Planter Ideas for Indoor Gardens
You're looking for a stylish and low-maintenance way to bring some greenery into your home, and concrete planters off...
-
7 Best Concrete Planter Ideas for Indoor Gardens
You're looking for a stylish and low-maintenance way to bring some greenery into your home, and concrete planters off...
-
7 Best Concrete Planter Ideas for Indoor Gardens
You're looking for a stylish and low-maintenance way to bring some greenery into your home, and concrete planters off...
-
7 Best Concrete Planter Ideas for Indoor Gardens
You're looking for a stylish and low-maintenance way to bring some greenery into your home, and concrete planters off...
-
7 Best Concrete Planter Ideas for Indoor Gardens
You're looking for a stylish and low-maintenance way to bring some greenery into your home, and concrete planters off...
-
7 Best Concrete Planter Ideas for Indoor Gardens
You're looking for a stylish and low-maintenance way to bring some greenery into your home, and concrete planters off...
-
7 Best Concrete Planter Ideas for Indoor Gardens
You're looking for a stylish and low-maintenance way to bring some greenery into your home, and concrete planters off...
-
7 Best Concrete Planter Ideas for Indoor Gardens
You're looking for a stylish and low-maintenance way to bring some greenery into your home, and concrete planters off...
-
7 Best Concrete Planter Ideas for Indoor Gardens
You're looking for a stylish and low-maintenance way to bring some greenery into your home, and concrete planters off...
-
7 Best Concrete Planter Ideas for Indoor Gardens
You're looking for a stylish and low-maintenance way to bring some greenery into your home, and concrete planters off...
-
7 Best Concrete Planter Ideas for Indoor Gardens
You're looking for a stylish and low-maintenance way to bring some greenery into your home, and concrete planters off...
-
7 Best Concrete Planter Ideas for Indoor Gardens
You're looking for a stylish and low-maintenance way to bring some greenery into your home, and concrete planters off...
-
7 Best Concrete Planter Ideas for Indoor Gardens
You're looking for a stylish and low-maintenance way to bring some greenery into your home, and concrete planters off...
-
7 Best Concrete Planter Ideas for Indoor Gardens
You're looking for a stylish and low-maintenance way to bring some greenery into your home, and concrete planters off...
-
7 Best Concrete Planter Ideas for Indoor Gardens
You're looking for a stylish and low-maintenance way to bring some greenery into your home, and concrete planters off...
-
7 Best Concrete Planter Ideas for Indoor Gardens
You're looking for a stylish and low-maintenance way to bring some greenery into your home, and concrete planters off...
-
7 Best Concrete Planter Ideas for Indoor Gardens
You're looking for a stylish and low-maintenance way to bring some greenery into your home, and concrete planters off...
-
7 Best Concrete Planter Ideas for Indoor Gardens
You're looking for a stylish and low-maintenance way to bring some greenery into your home, and concrete planters off...
-
What to Know Before Upcycling Concrete Planters
When upcycling concrete planters, you'll want to start by evaluating the planter's size, shape, and condition to guar...
-
What to Know Before Upcycling Concrete Planters
When upcycling concrete planters, you'll want to start by evaluating the planter's size, shape, and condition to guar...
-
What to Know Before Upcycling Concrete Planters
When upcycling concrete planters, you'll want to start by evaluating the planter's size, shape, and condition to guar...
-
What to Know Before Upcycling Concrete Planters
When upcycling concrete planters, you'll want to start by evaluating the planter's size, shape, and condition to guar...
-
What to Know Before Upcycling Concrete Planters
When upcycling concrete planters, you'll want to start by evaluating the planter's size, shape, and condition to guar...
-
What to Know Before Upcycling Concrete Planters
When upcycling concrete planters, you'll want to start by evaluating the planter's size, shape, and condition to guar...
-
What to Know Before Upcycling Concrete Planters
When upcycling concrete planters, you'll want to start by evaluating the planter's size, shape, and condition to guar...
-
What to Know Before Upcycling Concrete Planters
When upcycling concrete planters, you'll want to start by evaluating the planter's size, shape, and condition to guar...
-
What to Know Before Upcycling Concrete Planters
When upcycling concrete planters, you'll want to start by evaluating the planter's size, shape, and condition to guar...
-
What to Know Before Upcycling Concrete Planters
When upcycling concrete planters, you'll want to start by evaluating the planter's size, shape, and condition to guar...
-
What to Know Before Upcycling Concrete Planters
When upcycling concrete planters, you'll want to start by evaluating the planter's size, shape, and condition to guar...
-
What to Know Before Upcycling Concrete Planters
When upcycling concrete planters, you'll want to start by evaluating the planter's size, shape, and condition to guar...
-
What to Know Before Upcycling Concrete Planters
When upcycling concrete planters, you'll want to start by evaluating the planter's size, shape, and condition to guar...
-
What to Know Before Upcycling Concrete Planters
When upcycling concrete planters, you'll want to start by evaluating the planter's size, shape, and condition to guar...
-
What to Know Before Upcycling Concrete Planters
When upcycling concrete planters, you'll want to start by evaluating the planter's size, shape, and condition to guar...
-
What to Know Before Upcycling Concrete Planters
When upcycling concrete planters, you'll want to start by evaluating the planter's size, shape, and condition to guar...
-
What to Know Before Upcycling Concrete Planters
When upcycling concrete planters, you'll want to start by evaluating the planter's size, shape, and condition to guar...
-
What to Know Before Upcycling Concrete Planters
When upcycling concrete planters, you'll want to start by evaluating the planter's size, shape, and condition to guar...
-
What to Know Before Upcycling Concrete Planters
When upcycling concrete planters, you'll want to start by evaluating the planter's size, shape, and condition to guar...
-
What to Know Before Upcycling Concrete Planters
When upcycling concrete planters, you'll want to start by evaluating the planter's size, shape, and condition to guar...
-
What to Know Before Upcycling Concrete Planters
When upcycling concrete planters, you'll want to start by evaluating the planter's size, shape, and condition to guar...
-
What to Know Before Upcycling Concrete Planters
When upcycling concrete planters, you'll want to start by evaluating the planter's size, shape, and condition to guar...
-
What to Know Before Upcycling Concrete Planters
When upcycling concrete planters, you'll want to start by evaluating the planter's size, shape, and condition to guar...
-
What Materials Do You Need for a DIY Planter
You'll need a combination of structural components, soil and compost, drainage materials, and decorative elements to ...
-
What Materials Do You Need for a DIY Planter
You'll need a combination of structural components, soil and compost, drainage materials, and decorative elements to ...
-
What Materials Do You Need for a DIY Planter
You'll need a combination of structural components, soil and compost, drainage materials, and decorative elements to ...
-
What Materials Do You Need for a DIY Planter
You'll need a combination of structural components, soil and compost, drainage materials, and decorative elements to ...
-
What Materials Do You Need for a DIY Planter
You'll need a combination of structural components, soil and compost, drainage materials, and decorative elements to ...
-
What Materials Do You Need for a DIY Planter
You'll need a combination of structural components, soil and compost, drainage materials, and decorative elements to ...
-
What Materials Do You Need for a DIY Planter
You'll need a combination of structural components, soil and compost, drainage materials, and decorative elements to ...
-
What Materials Do You Need for a DIY Planter
You'll need a combination of structural components, soil and compost, drainage materials, and decorative elements to ...
-
What Materials Do You Need for a DIY Planter
You'll need a combination of structural components, soil and compost, drainage materials, and decorative elements to ...
-
What Materials Do You Need for a DIY Planter
You'll need a combination of structural components, soil and compost, drainage materials, and decorative elements to ...
-
What Materials Do You Need for a DIY Planter
You'll need a combination of structural components, soil and compost, drainage materials, and decorative elements to ...
-
What Materials Do You Need for a DIY Planter
You'll need a combination of structural components, soil and compost, drainage materials, and decorative elements to ...
-
What Materials Do You Need for a DIY Planter
You'll need a combination of structural components, soil and compost, drainage materials, and decorative elements to ...
-
What Materials Do You Need for a DIY Planter
You'll need a combination of structural components, soil and compost, drainage materials, and decorative elements to ...
-
What Materials Do You Need for a DIY Planter
You'll need a combination of structural components, soil and compost, drainage materials, and decorative elements to ...
-
What Materials Do You Need for a DIY Planter
You'll need a combination of structural components, soil and compost, drainage materials, and decorative elements to ...
-
What Materials Do You Need for a DIY Planter
You'll need a combination of structural components, soil and compost, drainage materials, and decorative elements to ...
-
What Materials Do You Need for a DIY Planter
You'll need a combination of structural components, soil and compost, drainage materials, and decorative elements to ...
-
What Materials Do You Need for a DIY Planter
You'll need a combination of structural components, soil and compost, drainage materials, and decorative elements to ...
-
What Materials Do You Need for a DIY Planter
You'll need a combination of structural components, soil and compost, drainage materials, and decorative elements to ...
-
What Materials Do You Need for a DIY Planter
You'll need a combination of structural components, soil and compost, drainage materials, and decorative elements to ...
-
What Materials Do You Need for a DIY Planter
You'll need a combination of structural components, soil and compost, drainage materials, and decorative elements to ...
-
What Materials Do You Need for a DIY Planter
You'll need a combination of structural components, soil and compost, drainage materials, and decorative elements to ...
-
What Materials Do You Need for a DIY Planter
You'll need a combination of structural components, soil and compost, drainage materials, and decorative elements to ...
-
What Materials Do You Need for a DIY Planter
You'll need a combination of structural components, soil and compost, drainage materials, and decorative elements to ...
-
What Materials Do You Need for a DIY Planter
You'll need a combination of structural components, soil and compost, drainage materials, and decorative elements to ...
-
What Materials Do You Need for a DIY Planter
You'll need a combination of structural components, soil and compost, drainage materials, and decorative elements to ...
-
What Materials Do You Need for a DIY Planter
You'll need a combination of structural components, soil and compost, drainage materials, and decorative elements to ...
-
What Materials Do You Need for a DIY Planter
You'll need a combination of structural components, soil and compost, drainage materials, and decorative elements to ...
-
What Materials Do You Need for a DIY Planter
You'll need a combination of structural components, soil and compost, drainage materials, and decorative elements to ...


