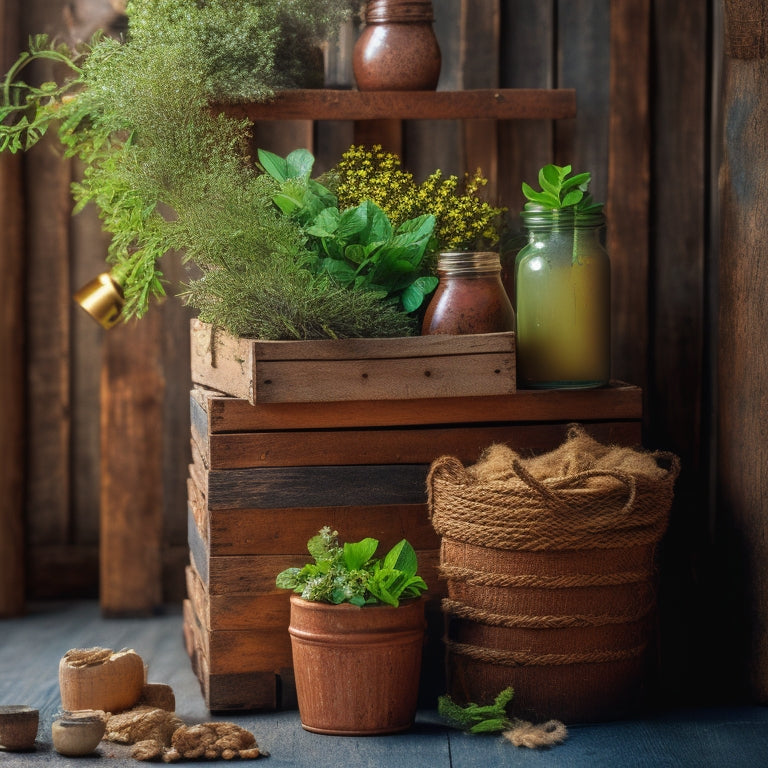
Affordable Materials for DIY Planters on a Budget
You can create unique DIY planters on a budget using affordable materials. Cinder blocks offer a clean look, while repurposed pallets provide a rustic, eco-friendly option. DIY wooden crates can be stained or painted for a modern touch, and inexpensive terra cotta planters can be personalized with paint or decorative tiles. Upcycled metal containers, concrete, and brick planters also offer budget-friendly possibilities. Old boots, low-cost stone, and creative plastic bottle transformations can add a personal touch to your planters. With so many options, you'll be inspired to get creative and turn ordinary materials into extraordinary planters that reflect your personal style.
Key Takeaways
• Cinder blocks, repurposed pallets, and inexpensive terra cotta pots are budget-friendly materials for DIY planters.
• Upcycled metal containers, old boots, and plastic bottles can be transformed into unique planters with a little creativity.
• DIY wooden crate planters offer customization options like staining, painting, and adding casters for mobility.
• Concrete planters can be made with a simple mix ratio, and decorative elements like aggregates or shells can be added for visual interest.
• Brick planters and low-cost stone planters provide a high-end appearance at an affordable price, making them ideal for DIY projects.
Cinder Block Planter Material Options
When selecting cinder blocks for your DIY planter project, you'll find that different material options are available, each with its own set of characteristics that can impact the overall aesthetic and durability of your creation.
You can choose from a range of cinder block designs, including solid, hollow, and split-face blocks, each with its unique visual appeal. Solid blocks provide a clean, uniform look, while hollow blocks offer a more textured, rustic appearance. Split-face blocks, on the other hand, feature a rough, exposed aggregate finish that adds an industrial touch to your planter.
In addition to design, cinder block finishes also vary. You can opt for a standard gray finish or explore other options like colored, stained, or painted blocks to match your desired color scheme. Some manufacturers even offer specialized finishes, such as a weathered or distressed look, to give your planter a unique, aged appearance.
Repurposed Pallet Planter Ideas
By repurposing old pallets, you can create unique and functional planters that add a touch of rustic charm to your outdoor or indoor space. With a little creativity, you can transform these discarded wooden frames into beautiful planters that showcase your favorite plants.
Here are some pallet planter designs to inspire you:
| Design | Description |
|---|---|
| Vertical Planter | Stack pallets to create a tall, space-saving planter perfect for small gardens or balconies. |
| Pallet Box Planter | Disassemble pallets and reassemble them into rectangular planters with a modern twist. |
| Tiered Planter | Create a multi-level planter by stacking pallets of varying sizes, ideal for showcasing different plants. |
| Hanging Planter | Attach pallet slats to a wooden frame to create a unique, wall-mounted planter that adds visual interest. |
These creative pallet uses are not only eco-friendly but also budget-friendly. With a few power tools and some imagination, you can create stunning planters that reflect your personal style. So, get creative and give new life to old pallets!
DIY Wooden Crate Planters
You can also breathe new life into wooden crates, transforming them into charming planters that add a touch of industrial chic to your space. With a variety of wooden crate styles to choose from, you can customize your planter to fit your unique aesthetic. From rustic, weathered crates to sleek, modern designs, the possibilities are endless.
To get started, simply disassemble the crate and sand it down to smooth out any rough edges. You can then stain or paint the wood to match your desired color scheme. Add some drainage holes to the bottom of the crate, and you're ready to plant your favorite flowers, herbs, or succulents.
One of the best things about DIY wooden crate planters is the level of customization they offer. You can add casters for easy mobility, attach a trellis for climbing plants, or even add a lid for a more enclosed planter. With a little creativity, you can turn a simple wooden crate into a one-of-a-kind planter that showcases your personal style.
Inexpensive Terra Cotta Options
Terra cotta pots, often overlooked for their humble appearance, offer a budget-friendly avenue to create stunning planters that add warmth and character to your outdoor or indoor spaces.
You can find budget terra cotta pots at most gardening stores or online marketplaces, usually priced between $5 to $20, depending on the size and design. For a more rustic look, consider using terra cotta alternatives like clay or earthenware pots, which can be just as affordable.
When choosing a terra cotta pot, look for ones with a glazed interior to prevent water from seeping into the soil. You can also upcycle old terra cotta pots by giving them a fresh coat of paint or adding decorative tiles to give them a personalized touch.
To add some visual interest, group multiple small terra cotta pots together or use a large one as a centerpiece. With a little creativity, you can create a beautiful and budget-friendly planter that will elevate your outdoor or indoor decor.
Upcycled Metal Planter Ideas
As you explore upcycled metal planter ideas, you'll discover a treasure trove of creative possibilities.
You'll transform discarded metal containers into unique planters that add an industrial touch to your garden or patio.
From revamping old metal buckets to giving galvanized tubs a fresh new look, you'll find inspiration in these budget-friendly projects.
Old Metal Bucket Revamp
One old metal bucket, once destined for the scrap heap, can be transformed into a charming planter with a little creativity and some TLC. You can give your bucket garden a vintage aesthetic by adding a distressed finish or a fresh coat of paint. Here are some ideas to get you started:
| Step | Materials | Tips |
|---|---|---|
| Clean and prep | Wire brush, soap, and water | Remove rust and grime to guarantee a smooth finish |
| Add a coat of paint | Chalk paint or spray paint | Choose a color that complements your outdoor decor |
| Add a decorative touch | Twine, lace, or stencils | Add a personal touch to make your planter unique |
Once you've transformed your bucket, fill it with your favorite plants or herbs. You can also add a layer of small rocks or broken pottery at the bottom for drainage. With a little creativity, your old metal bucket can become a beautiful and functional planter that adds a touch of rustic charm to your outdoor space.
Galvanized Tub Transformations
You can repurpose a galvanized tub into a stunning planter by adding a decorative exterior and a well-draining interior, perfect for showcasing your favorite flowers, herbs, or succulents. To get started, choose a galvanized tub style that suits your aesthetic, such as a vintage-inspired tub or a sleek, modern design.
Next, prepare the interior by drilling drainage holes and adding a layer of landscape fabric to prevent soil from washing away.
For a rustic look, add a distressed finish or a coat of chalkboard paint to the exterior. Alternatively, you can opt for a more modern aesthetic by painting the tub a bold color or adding a geometric pattern.
DIY planter variations are endless, so don't be afraid to experiment and make it your own. Consider adding a trellis or a decorative trim to give your planter an extra touch.
With a little creativity, you can transform a humble galvanized tub into a beautiful, functional planter that adds charm to any outdoor space.
Rusty Container Makeovers
Transform discarded metal containers into unique planters by embracing their rusty patina and adding a touch of creativity to create visually striking upcycled metal planters. You can breathe new life into old, worn-out containers by using rusty patina techniques that highlight their vintage charm.
Here are some ideas to get you started:
-
Rustic Revamp: Leave the container in its original state, with all its rusty imperfections, and add a pop of color with bold, bright plants.
-
Distressed Chic: Sand down the rough edges and add a coat of clear varnish to enhance the rusty patina, giving it a distressed, vintage look.
-
Metallic Makeover: Paint the container with metallic spray paint in a bold color, like gold or copper, to add a touch of luxury to your upcycled planter.
- Country Charm: Add a decorative twine or rope around the container's handles, giving it a rustic, country-inspired look that's perfect for a garden or patio.
Affordable Concrete Planters
By mixing Portland cement, sand, and water, you can create a durable and modern concrete planter at a fraction of the cost of store-bought options.
To get started, you'll need to prepare a concrete mix, which typically consists of one part cement, two parts sand, and one part water. You can customize the mix to achieve the desired consistency and texture for your planter.
When it comes to planter shapes, the possibilities are endless. You can create geometric shapes like spheres, cylinders, or cubes, or opt for more organic forms like bowls or vases. Use a mold or form to shape the concrete, or get creative and free-form it.
Add some decorative elements like aggregate, shells, or pebbles to give your planter some visual interest.
Once the concrete has set, you can finish it with a sealant to protect it from the elements. Then, simply add your chosen plants and enjoy your new concrete planter.
With a little creativity and some basic materials, you can create a unique and functional planter that adds a touch of industrial chic to your outdoor space.
Budget-Friendly Brick Planters
With minimal investment, old bricks can be repurposed into charming planters that add a touch of rustic elegance to your garden or patio. You can create unique brick planter designs that reflect your personal style and complement your outdoor décor.
Here are 4 ways to create budget-friendly brick planters:
-
Stacked Brick Planters: Simply stack bricks on top of each other, leaving space in between for drainage and aeration. You can add a layer of mortar for extra stability.
-
Brick Border Planters: Use bricks to create a border around a raised bed or a container, adding a decorative touch to your garden.
-
Brick Columns: Build brick columns and top them with a planter or a vase, creating a striking focal point in your outdoor space.
- Brick Wall Planters: Build a short brick wall and add planters on top, creating a beautiful and functional space for your plants.
Old Boot Planter Transformations
When transforming old boots into planters, you'll want to start by selecting the right boot for the job, considering factors like material, size, and shape.
Next, you'll get to add some personality with decorative paint options, thinking about color schemes and finishes that'll complement your plants.
Boot Selection Criteria
Select a boot that has a sturdy sole and a wide, upright shaft to provide stability and ample room for roots to grow. You'll want a boot that can hold its own against the elements and support the weight of the soil and plants.
When choosing the perfect boot, consider the following factors:
-
Boot styles: Look for boots with a classic or rustic design, as they tend to have a more rugged and natural look that will blend well with your garden.
-
Boot materials: Opt for boots made from durable materials like leather, rubber, or synthetic materials that can withstand outdoor conditions.
-
Size and shape: Choose boots with a wide, upright shaft to provide ample room for roots to grow and for easy planting and maintenance.
- Condition: Select boots that are still in good condition, with no major tears or holes, to guarantee they can hold the soil and plants securely.
Decorative Paint Options
Now that you've chosen the perfect boot, it's time to give it a personalized touch with decorative paint options that will elevate your old boot planter's charm. You can choose from a variety of paint types and techniques to create a unique look that reflects your style.
| Paint Type | Characteristics |
|---|---|
| Spray Paint | Quick, easy, and uniform coverage. Ideal for metallic finishes and color blending. |
| Chalk Paint | Matte finish, easy to distress, and great for texture techniques. |
| Eco-Friendly Paint | Non-toxic, low-VOC, and environmentally friendly. Perfect for outdoor use. |
When it comes to design, consider adding stenciled designs or using paint layering to create a one-of-a-kind look. Weather-resistant options are a must for outdoor planters, and finish types like glossy or matte can add an extra layer of visual interest. Don't be afraid to experiment and combine different techniques to create a truly unique piece. With the right paint options, your old boot planter will be transformed into a stunning work of art that adds personality to your garden or indoor space.
Creative Drainage Solutions
Your old boot planter's transformation isn't complete without a well-thought-out drainage system, which is where creative solutions come into play to guarantee your plants thrive. You don't want waterlogged soil ruining your hard work, so it's crucial to get drainage right. Here are some creative drainage solutions to evaluate:
-
Drainage holes: Drill holes in the bottom of your boot planter to allow excess water to escape. You can also add a layer of small rocks or broken pottery at the bottom to improve drainage.
-
Elevated planter placement: Position your boot planter on a pedestal or bricks to improve airflow and drainage. This also adds visual interest to your garden.
-
Drainage materials: Use materials like perlite, vermiculite, or sand to improve soil drainage. These materials allow excess water to pass through while retaining essential nutrients.
- Water reservoir: Create a water reservoir at the bottom of your planter using a plastic bottle or a waterproof container. This will collect excess water and allow your plants to absorb it as needed.
Low-Cost Stone Planters
Transform your outdoor space with stone planters that boast a high-end look without the hefty price tag, as you explore affordable options that balance aesthetics and budget.
You'll appreciate the stone planter benefits, such as durability, weather resistance, and versatility in design. Plus, stone planters can complement any outdoor style, from modern to rustic.
When it comes to stone planter maintenance, you'll be pleased to know it's relatively low-maintenance. Simply clean the planter with mild soap and water, and reseal the stone periodically to maintain its natural color and texture. Additionally, consider using a stone planter with built-in drainage to prevent waterlogged soil.
To find affordable stone planters, look for options made from natural stone, such as bluestone, fieldstone, or river rock. These materials are often less expensive than manufactured stone and offer a unique, organic appearance.
You can also repurpose old stone containers or create your own DIY stone planter using stone tiles or pebbles. With a little creativity, you can create a stunning outdoor space that's both beautiful and budget-friendly.
Creative Plastic Bottle Planters
When you transform plastic bottles into planters, you'll want to master a few essential techniques to get the look you want.
You'll need to decide how to cut your bottles - horizontally, vertically, or at an angle - to create the desired shape and size for your planter.
Then, you can get creative with decorations, such as paint, glitter, or labels, to give your planter a personalized touch.
Bottle Cutting Techniques
Cutting plastic bottles requires precision and patience, but with the right techniques, you can create unique planters that showcase your creativity. When working with plastic bottles, it's crucial to choose the right bottle type and cutting tool for the job. For instance, thicker bottles like soda or juice containers work well with scissors or craft knives, while thinner bottles like water bottles require more precision tools like rotary cutters or razor blades.
Here are some crucial bottle cutting techniques to get you started:
-
Score and snap: Use a craft knife or scissors to score the bottle, then snap it along the line for a clean cut.
-
Rotary cutting: Utilize a rotary cutter to make precise cuts, especially on thinner bottles.
-
Heat cutting: Apply heat to the bottle using a hair dryer or heat gun to make it more pliable and easier to cut.
- Drilling: Use a drill to create holes or patterns on the bottle, adding texture and visual interest to your planter.
Decoration Ideas
Get creative with your plastic bottle planters by adding personal touches, such as paint, glitter, or decoupage, to give them a unique personality that reflects your style. You can add colorful embellishments like stickers, rhinestones, or fabric scraps to create a playful vibe. For a seasonal theme, decorate your planters with themed accessories like mini ornaments for Christmas or pastel-colored decorations for Easter.
To add rustic charm, incorporate natural elements like twine, burlap, or pinecones into your design. Experiment with unique textures by gluing on fabric, lace, or even seashells. For a whimsical design, try pairing plants with contrasting colors or shapes. You can also create a cohesive look by using minimalistic styles, like a monochromatic color scheme or simple, geometric patterns.
To give your planters a vintage touch, distress the plastic or add fake moss for a retro look. Don't be afraid to mix and match different elements to create a look that's all your own. With a little creativity, your plastic bottle planters can become one-of-a-kind masterpieces that add a personal touch to your home decor.
Frequently Asked Questions
Can I Use Pressure-Treated Wood for DIY Planters?
When considering pressure-treated wood for your DIY planters, you'll want to prioritize safety.
The chemicals used in the treatment process can leach into the soil, potentially harming your plants.
Instead, opt for alternative wood options like naturally rot-resistant cedar or cypress.
These choices will provide a durable and safe environment for your plants to thrive.
How Do I Prevent Planters From Cracking in Freezing Weather?
You're building a fortress for your plants, but winter's chill can breach even the sturdiest walls.
To prevent planters from cracking in freezing weather, you'll need to employ expert insulation techniques.
Think of it like wrapping your planter in a cozy blanket - use materials like straw, foam, or even old blankets to shield it from harsh winds and icy temps.
Add a layer of winter protection by applying a waterproof sealant, and your planters will weather the storm like a pro.
Are Ceramic Planters More Expensive Than Terra Cotta Ones?
You're wondering if ceramic planters are more expensive than terra cotta ones.
Generally, ceramic planters are pricier due to their increased durability and resistance to freezing temperatures.
Terra cotta planters, on the other hand, are more affordable, but their porous nature makes them more prone to cracking.
When comparing costs, consider the terra cotta cost per planter versus the ceramic's longer lifespan.
Weighing durability against cost will help you make an informed decision.
Can I Paint or Stain Planters to Match My Outdoor Decor?
You can easily customize your planters to match your outdoor decor by painting or staining them.
Choose from a wide range of color options to complement your exterior design.
When it comes to paint types, consider using outdoor-specific acrylic or latex paints that can withstand the elements.
Make sure to prime the surface first for ideal adhesion and durability.
With a little creativity, you'll have planters that blend seamlessly with your outdoor space.
Do I Need to Add Drainage Holes to My DIY Planters?
What a coincidence that you're thinking about drainage holes just as you're about to add soil to your new planter! You're wise to reflect on this essential step.
Yes, you do need to add drainage holes to prevent waterlogged soil and root rot. The good news is that most planter materials, like plastic or ceramic, can be easily drilled for drainage.
Research different drainage methods, such as holes or mesh, to find the best fit for your planter and plants.
Conclusion
Craft clever containers with creative cast-offs.
Conjure charming cinder block creations, repurpose rustic pallets, and reclaim rough-hewn wooden crates.
Transform tired terra cotta, upcycle unused metal, and breathe new life into battered brick.
Revive retired boots, revamp rough stone, and reimagine plastic bottles.
With these budget-friendly materials, your backyard blooms will burst with beauty, as you cleverly craft a fascinating collection of DIY planters that showcase your skillful salvage savvy.
Related Posts
-
10 Natural Ways to Clean Your Planters
You can transform your planters from grimy to gleaming with these 10 natural cleaning solutions. Mix baking soda and ...
-
10 Natural Ways to Clean Your Planters
You can transform your planters from grimy to gleaming with these 10 natural cleaning solutions. Mix baking soda and ...
-
10 Natural Ways to Clean Your Planters
You can transform your planters from grimy to gleaming with these 10 natural cleaning solutions. Mix baking soda and ...
-
10 Natural Ways to Clean Your Planters
You can transform your planters from grimy to gleaming with these 10 natural cleaning solutions. Mix baking soda and ...
-
10 Natural Ways to Clean Your Planters
You can transform your planters from grimy to gleaming with these 10 natural cleaning solutions. Mix baking soda and ...
-
10 Natural Ways to Clean Your Planters
You can transform your planters from grimy to gleaming with these 10 natural cleaning solutions. Mix baking soda and ...
-
10 Natural Ways to Clean Your Planters
You can transform your planters from grimy to gleaming with these 10 natural cleaning solutions. Mix baking soda and ...
-
10 Natural Ways to Clean Your Planters
You can transform your planters from grimy to gleaming with these 10 natural cleaning solutions. Mix baking soda and ...
-
10 Natural Ways to Clean Your Planters
You can transform your planters from grimy to gleaming with these 10 natural cleaning solutions. Mix baking soda and ...
-
10 Natural Ways to Clean Your Planters
You can transform your planters from grimy to gleaming with these 10 natural cleaning solutions. Mix baking soda and ...
-
10 Natural Ways to Clean Your Planters
You can transform your planters from grimy to gleaming with these 10 natural cleaning solutions. Mix baking soda and ...
-
10 Natural Ways to Clean Your Planters
You can transform your planters from grimy to gleaming with these 10 natural cleaning solutions. Mix baking soda and ...
-
10 Natural Ways to Clean Your Planters
You can transform your planters from grimy to gleaming with these 10 natural cleaning solutions. Mix baking soda and ...
-
10 Natural Ways to Clean Your Planters
You can transform your planters from grimy to gleaming with these 10 natural cleaning solutions. Mix baking soda and ...
-
10 Natural Ways to Clean Your Planters
You can transform your planters from grimy to gleaming with these 10 natural cleaning solutions. Mix baking soda and ...
-
10 Natural Ways to Clean Your Planters
You can transform your planters from grimy to gleaming with these 10 natural cleaning solutions. Mix baking soda and ...
-
10 Natural Ways to Clean Your Planters
You can transform your planters from grimy to gleaming with these 10 natural cleaning solutions. Mix baking soda and ...
-
10 Natural Ways to Clean Your Planters
You can transform your planters from grimy to gleaming with these 10 natural cleaning solutions. Mix baking soda and ...
-
10 Natural Ways to Clean Your Planters
You can transform your planters from grimy to gleaming with these 10 natural cleaning solutions. Mix baking soda and ...
-
10 Natural Ways to Clean Your Planters
You can transform your planters from grimy to gleaming with these 10 natural cleaning solutions. Mix baking soda and ...
-
10 Natural Ways to Clean Your Planters
You can transform your planters from grimy to gleaming with these 10 natural cleaning solutions. Mix baking soda and ...
-
10 Natural Ways to Clean Your Planters
You can transform your planters from grimy to gleaming with these 10 natural cleaning solutions. Mix baking soda and ...
-
10 Natural Ways to Clean Your Planters
You can transform your planters from grimy to gleaming with these 10 natural cleaning solutions. Mix baking soda and ...
-
10 Natural Ways to Clean Your Planters
You can transform your planters from grimy to gleaming with these 10 natural cleaning solutions. Mix baking soda and ...
-
10 Natural Ways to Clean Your Planters
You can transform your planters from grimy to gleaming with these 10 natural cleaning solutions. Mix baking soda and ...
-
10 Natural Ways to Clean Your Planters
You can transform your planters from grimy to gleaming with these 10 natural cleaning solutions. Mix baking soda and ...
-
10 Natural Ways to Clean Your Planters
You can transform your planters from grimy to gleaming with these 10 natural cleaning solutions. Mix baking soda and ...
-
10 Natural Ways to Clean Your Planters
You can transform your planters from grimy to gleaming with these 10 natural cleaning solutions. Mix baking soda and ...
-
10 Natural Ways to Clean Your Planters
You can transform your planters from grimy to gleaming with these 10 natural cleaning solutions. Mix baking soda and ...
-
10 Natural Ways to Clean Your Planters
You can transform your planters from grimy to gleaming with these 10 natural cleaning solutions. Mix baking soda and ...
-
10 Natural Ways to Clean Your Planters
You can transform your planters from grimy to gleaming with these 10 natural cleaning solutions. Mix baking soda and ...
-
10 Natural Ways to Clean Your Planters
You can transform your planters from grimy to gleaming with these 10 natural cleaning solutions. Mix baking soda and ...
-
10 Natural Ways to Clean Your Planters
You can transform your planters from grimy to gleaming with these 10 natural cleaning solutions. Mix baking soda and ...
-
10 Natural Ways to Clean Your Planters
You can transform your planters from grimy to gleaming with these 10 natural cleaning solutions. Mix baking soda and ...
-
10 Natural Ways to Clean Your Planters
You can transform your planters from grimy to gleaming with these 10 natural cleaning solutions. Mix baking soda and ...
-

Irrigation System Design Ideas for Concrete Planters
As you design an irrigation system for your concrete planters, you'll need to balance drainage, moisture retention, a...
-
Irrigation System Design Ideas for Concrete Planters
As you design an irrigation system for your concrete planters, you'll need to balance drainage, moisture retention, a...
-
Irrigation System Design Ideas for Concrete Planters
As you design an irrigation system for your concrete planters, you'll need to balance drainage, moisture retention, a...
-
Irrigation System Design Ideas for Concrete Planters
As you design an irrigation system for your concrete planters, you'll need to balance drainage, moisture retention, a...
-
Irrigation System Design Ideas for Concrete Planters
As you design an irrigation system for your concrete planters, you'll need to balance drainage, moisture retention, a...
-
Irrigation System Design Ideas for Concrete Planters
As you design an irrigation system for your concrete planters, you'll need to balance drainage, moisture retention, a...
-
Irrigation System Design Ideas for Concrete Planters
As you design an irrigation system for your concrete planters, you'll need to balance drainage, moisture retention, a...
-
Irrigation System Design Ideas for Concrete Planters
As you design an irrigation system for your concrete planters, you'll need to balance drainage, moisture retention, a...
-
Irrigation System Design Ideas for Concrete Planters
As you design an irrigation system for your concrete planters, you'll need to balance drainage, moisture retention, a...
-
Irrigation System Design Ideas for Concrete Planters
As you design an irrigation system for your concrete planters, you'll need to balance drainage, moisture retention, a...
-
Irrigation System Design Ideas for Concrete Planters
As you design an irrigation system for your concrete planters, you'll need to balance drainage, moisture retention, a...
-
Irrigation System Design Ideas for Concrete Planters
As you design an irrigation system for your concrete planters, you'll need to balance drainage, moisture retention, a...
-
Irrigation System Design Ideas for Concrete Planters
As you design an irrigation system for your concrete planters, you'll need to balance drainage, moisture retention, a...
-
Irrigation System Design Ideas for Concrete Planters
As you design an irrigation system for your concrete planters, you'll need to balance drainage, moisture retention, a...
-
Irrigation System Design Ideas for Concrete Planters
As you design an irrigation system for your concrete planters, you'll need to balance drainage, moisture retention, a...
-
Irrigation System Design Ideas for Concrete Planters
As you design an irrigation system for your concrete planters, you'll need to balance drainage, moisture retention, a...
-
Irrigation System Design Ideas for Concrete Planters
As you design an irrigation system for your concrete planters, you'll need to balance drainage, moisture retention, a...
-
Irrigation System Design Ideas for Concrete Planters
As you design an irrigation system for your concrete planters, you'll need to balance drainage, moisture retention, a...
-
Irrigation System Design Ideas for Concrete Planters
As you design an irrigation system for your concrete planters, you'll need to balance drainage, moisture retention, a...
-
Irrigation System Design Ideas for Concrete Planters
As you design an irrigation system for your concrete planters, you'll need to balance drainage, moisture retention, a...
-
Irrigation System Design Ideas for Concrete Planters
As you design an irrigation system for your concrete planters, you'll need to balance drainage, moisture retention, a...
-
Irrigation System Design Ideas for Concrete Planters
As you design an irrigation system for your concrete planters, you'll need to balance drainage, moisture retention, a...
-
Irrigation System Design Ideas for Concrete Planters
As you design an irrigation system for your concrete planters, you'll need to balance drainage, moisture retention, a...
-
Irrigation System Design Ideas for Concrete Planters
As you design an irrigation system for your concrete planters, you'll need to balance drainage, moisture retention, a...
-
Irrigation System Design Ideas for Concrete Planters
As you design an irrigation system for your concrete planters, you'll need to balance drainage, moisture retention, a...
-
Irrigation System Design Ideas for Concrete Planters
As you design an irrigation system for your concrete planters, you'll need to balance drainage, moisture retention, a...
-
Irrigation System Design Ideas for Concrete Planters
As you design an irrigation system for your concrete planters, you'll need to balance drainage, moisture retention, a...
-
Irrigation System Design Ideas for Concrete Planters
As you design an irrigation system for your concrete planters, you'll need to balance drainage, moisture retention, a...
-
Irrigation System Design Ideas for Concrete Planters
As you design an irrigation system for your concrete planters, you'll need to balance drainage, moisture retention, a...
-
Irrigation System Design Ideas for Concrete Planters
As you design an irrigation system for your concrete planters, you'll need to balance drainage, moisture retention, a...
-
Irrigation System Design Ideas for Concrete Planters
As you design an irrigation system for your concrete planters, you'll need to balance drainage, moisture retention, a...
-
10 Best Shade Garden Planters Using Concrete Blocks
You're about to discover the perfect way to add industrial chic to your shade garden while ensuring healthy plant gro...
-
10 Best Shade Garden Planters Using Concrete Blocks
You're about to discover the perfect way to add industrial chic to your shade garden while ensuring healthy plant gro...
-
10 Best Shade Garden Planters Using Concrete Blocks
You're about to discover the perfect way to add industrial chic to your shade garden while ensuring healthy plant gro...
-
10 Best Shade Garden Planters Using Concrete Blocks
You're about to discover the perfect way to add industrial chic to your shade garden while ensuring healthy plant gro...
-
10 Best Shade Garden Planters Using Concrete Blocks
You're about to discover the perfect way to add industrial chic to your shade garden while ensuring healthy plant gro...
-
10 Best Shade Garden Planters Using Concrete Blocks
You're about to discover the perfect way to add industrial chic to your shade garden while ensuring healthy plant gro...
-
10 Best Shade Garden Planters Using Concrete Blocks
You're about to discover the perfect way to add industrial chic to your shade garden while ensuring healthy plant gro...
-
10 Best Shade Garden Planters Using Concrete Blocks
You're about to discover the perfect way to add industrial chic to your shade garden while ensuring healthy plant gro...
-
10 Best Shade Garden Planters Using Concrete Blocks
You're about to discover the perfect way to add industrial chic to your shade garden while ensuring healthy plant gro...
-
10 Best Shade Garden Planters Using Concrete Blocks
You're about to discover the perfect way to add industrial chic to your shade garden while ensuring healthy plant gro...
-
10 Best Shade Garden Planters Using Concrete Blocks
You're about to discover the perfect way to add industrial chic to your shade garden while ensuring healthy plant gro...
-
10 Best Shade Garden Planters Using Concrete Blocks
You're about to discover the perfect way to add industrial chic to your shade garden while ensuring healthy plant gro...
-
10 Best Shade Garden Planters Using Concrete Blocks
You're about to discover the perfect way to add industrial chic to your shade garden while ensuring healthy plant gro...
-
10 Best Shade Garden Planters Using Concrete Blocks
You're about to discover the perfect way to add industrial chic to your shade garden while ensuring healthy plant gro...
-
10 Best Shade Garden Planters Using Concrete Blocks
You're about to discover the perfect way to add industrial chic to your shade garden while ensuring healthy plant gro...
-
10 Best Shade Garden Planters Using Concrete Blocks
You're about to discover the perfect way to add industrial chic to your shade garden while ensuring healthy plant gro...
-
10 Best Shade Garden Planters Using Concrete Blocks
You're about to discover the perfect way to add industrial chic to your shade garden while ensuring healthy plant gro...
-
10 Best Shade Garden Planters Using Concrete Blocks
You're about to discover the perfect way to add industrial chic to your shade garden while ensuring healthy plant gro...
-
10 Best Shade Garden Planters Using Concrete Blocks
You're about to discover the perfect way to add industrial chic to your shade garden while ensuring healthy plant gro...
-
10 Best Shade Garden Planters Using Concrete Blocks
You're about to discover the perfect way to add industrial chic to your shade garden while ensuring healthy plant gro...
-
10 Best Shade Garden Planters Using Concrete Blocks
You're about to discover the perfect way to add industrial chic to your shade garden while ensuring healthy plant gro...
-
10 Best Shade Garden Planters Using Concrete Blocks
You're about to discover the perfect way to add industrial chic to your shade garden while ensuring healthy plant gro...
-
10 Best Shade Garden Planters Using Concrete Blocks
You're about to discover the perfect way to add industrial chic to your shade garden while ensuring healthy plant gro...
-
10 Best Shade Garden Planters Using Concrete Blocks
You're about to discover the perfect way to add industrial chic to your shade garden while ensuring healthy plant gro...
-
10 Best Shade Garden Planters Using Concrete Blocks
You're about to discover the perfect way to add industrial chic to your shade garden while ensuring healthy plant gro...
-
10 Best Shade Garden Planters Using Concrete Blocks
You're about to discover the perfect way to add industrial chic to your shade garden while ensuring healthy plant gro...
-
10 Best Shade Garden Planters Using Concrete Blocks
You're about to discover the perfect way to add industrial chic to your shade garden while ensuring healthy plant gro...
-
10 Best Shade Garden Planters Using Concrete Blocks
You're about to discover the perfect way to add industrial chic to your shade garden while ensuring healthy plant gro...
-
10 Best Shade Garden Planters Using Concrete Blocks
You're about to discover the perfect way to add industrial chic to your shade garden while ensuring healthy plant gro...
-
10 Best Shade Garden Planters Using Concrete Blocks
You're about to discover the perfect way to add industrial chic to your shade garden while ensuring healthy plant gro...
-
10 Best Shade Garden Planters Using Concrete Blocks
You're about to discover the perfect way to add industrial chic to your shade garden while ensuring healthy plant gro...
-
10 Best Shade Garden Planters Using Concrete Blocks
You're about to discover the perfect way to add industrial chic to your shade garden while ensuring healthy plant gro...
-
10 Best Shade Garden Planters Using Concrete Blocks
You're about to discover the perfect way to add industrial chic to your shade garden while ensuring healthy plant gro...
-
10 Best Shade Garden Planters Using Concrete Blocks
You're about to discover the perfect way to add industrial chic to your shade garden while ensuring healthy plant gro...
-
10 Best Shade Garden Planters Using Concrete Blocks
You're about to discover the perfect way to add industrial chic to your shade garden while ensuring healthy plant gro...


