
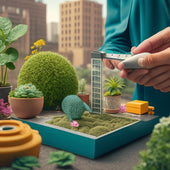
7 Creative Upcycled Planter Tutorials to Try Now
Get ready to transform your outdoor space with these 7 creative upcycled planter tutorials! Start by turning cinder blocks into modern succulent gardens or herb planters, perfect for adding a personal touch to your garden. Take it a step further by painting and personalizing your blocks with vibrant colors and patterns. Then, think vertically and create a stunning flower tower or vertical garden using multiple blocks. You can even build a DIY patio or create rustic planters with a touch of wood glue. With these unique ideas, you'll be well on your way to crafting one-of-a-kind planters that reflect your style, and the best part is, there's more inspiration waiting to be discovered!
Key Takeaways
• Transform cinder blocks into outdoor succulent displays with modern charm by drilling drainage holes and using well-draining potting mix.
• Paint cinder blocks with acrylic, latex, or spray paint, applying primer for better adhesion and waterproofing for durability.
• Create a vertical garden by arranging cinder blocks with drainage solutions like gravel or small rocks, ensuring space for air circulation.
• Upcycle cinder blocks into rustic planters by applying weather-resistant wood glue and filling gaps with drainage solutions before adding soil and plants.
• Experiment with different shapes, sizes, and decorative elements like stones or moss to create unique and functional upcycled planters.
Cinder Block Succulent Garden
Create a stunning outdoor display by transforming a humble cinder block into a thriving succulent garden, perfect for adding a touch of modern charm to your patio or backyard.
Start by preparing your cinder block for planting. Drill a few holes in the bottom for cinder block drainage, ensuring excess water can escape and preventing waterlogged soil.
Next, add a layer of small rocks or broken pottery for extra drainage and aeration. Fill the block about 2/3 with a well-draining potting mix, specifically designed for succulent care.
Now it's time to plant your succulents. Choose a variety of shapes, sizes, and colors to add visual interest. Plant them closely together, leaving enough space for growth.
Water sparingly, as succulents are drought-tolerant. To keep your garden thriving, make sure to provide full sun to partial shade and water only when the soil feels dry to the touch.
With minimal maintenance, your cinder block succulent garden will flourish, becoming a beautiful focal point in your outdoor space.
Painted Cinder Block Planters
Now that you've prepped your cinder blocks, it's time to get creative with paint!
You'll choose a block pattern design that fits your style, whether it's stripes, polka dots, or something more intricate.
Next, pick a vibrant color that'll make your planter pop and get ready to add some personality to your outdoor space.
Block Pattern Designs
Paint a block pattern design on your cinder block planter using stencils or freehand painting to add a pop of color and personality to your outdoor space.
This is a great way to get creative and make your planter truly one-of-a-kind. For block pattern inspiration, look to geometric block designs that feature repeating shapes like chevrons, triangles, or hexagons. You can find stencils with these patterns online or create your own using cardstock and a craft knife.
To get started, clean and prime your cinder block planter to guarantee the paint adheres properly.
Then, use acrylic paint and a small brush to fill in the design. You can also add additional details like lines or dots to give your design extra visual interest.
If you're feeling ambitious, try layering different patterns or colors to create a unique, abstract look.
Remember to seal your design with a clear coat of varnish to protect it from the elements.
With a little patience and creativity, you'll have a beautiful, block-patterned planter that's sure to be the envy of your neighbors.
Vibrant Color Options
With a vibrant color palette, you can turn your plain cinder block planter into a stunning focal point that adds a burst of energy to your outdoor space.
When choosing colors, consider color psychology: cool tones like blues and greens can evoke feelings of calmness, while warm tones like yellows and oranges can stimulate creativity.
To get started, clean and prime your cinder block planter to guarantee the paint adheres well.
Then, select your desired paint color and technique. You can opt for a simple, solid color or get creative with ombre, striped, or marbled paint techniques.
Use a high-quality exterior paint and apply two to three coats, allowing each coat to dry before applying the next.
For added texture and interest, consider adding a clear coat or sealant to protect the paint and give it a glossy finish.
With a little creativity and some paint, you can transform your plain planter into a vibrant, eye-catching piece that reflects your personal style.
Vertical Cinder Block Garden
Building a vertical cinder block garden allows you to maximize your outdoor space while adding a touch of industrial chic to your yard. You'll be surprised at how easy it's to create this unique planter. Start by planning your cinder block arrangement, considering the space you have available and the number of plants you want to feature.
Here's what you'll need to get started:
-
Cinder blocks: You'll need several to create the vertical structure.
-
Soil and plants: Choose plants that thrive in small spaces, like succulents or herbs.
-
Drainage solutions: Add a layer of gravel or small rocks to guarantee excess water doesn't accumulate.
- Decorative touches: Add a personal touch with paint, stencils, or decoupage.
As you build your vertical garden, make certain to leave space between each block for drainage and air circulation. You can also add a trellis or other support system for climbing plants.
With a little creativity, you'll have a stunning and functional planter that showcases your personal style.
Cinder Block Herb Planters
When creating your cinder block herb planters, you'll want to start by selecting the right blocks for the job.
You'll need to take into account what herbs you'll be planting, as some require more space or drainage than others.
Next, you'll get creative with painting and sealing to give your planters a personalized touch.
Block Selection Tips
Selecting the right cinder blocks for your herb planter is crucial, as it will impact the overall look and functionality of your upcycled garden feature. You want to choose blocks that are sturdy, durable, and suitable for outdoor use. Here are some tips to help you make the right selection:
-
Block material selection: Opt for solid concrete blocks or dense aggregate blocks, which can withstand outdoor weather conditions and support the weight of the soil and plants.
-
Block size considerations: Choose blocks that are large enough to hold a decent amount of soil and herbs, but not so large that they're cumbersome to handle. Standard block sizes range from 8x8 inches to 12x12 inches.
-
Condition and cleanliness: Select blocks that are free of cracks, chips, and debris. Clean the blocks thoroughly before using them to guarantee a smooth finish and to prevent any contaminants from affecting your herbs.
- Aesthetics: Consider the color and texture of the blocks, as they can affect the overall look of your planter. You can also paint or stain the blocks to match your desired color scheme.
Herb Choice Considerations
Considering the climate and amount of sunlight your cinder block planter will receive, choose herbs that thrive in similar conditions to guarantee a bountiful harvest. You'll want to select herbs that complement each other regarding growth habits and space requirements. For instance, pair tall herbs like basil or lemongrass with shorter ones like thyme or oregano.
Here's a helpful guide to get you started:
| Herb | Sunlight Requirements |
|---|---|
| Basil | Full sun (6+ hours) |
| Thyme | Partial sun (4-6 hours) |
| Oregano | Partial sun (4-6 hours) |
| Parsley | Partial shade (2-4 hours) |
When planning your herb selection, consider companion planting to enhance herb growth. For example, planting basil with tomatoes can improve their flavor and repel pests. You can also group herbs by their watering needs to ensure each plant receives the right amount of moisture. By choosing the right herbs and planning their arrangement, you'll be on your way to a thriving cinder block herb garden.
Painting and Sealing
Now that you've chosen the perfect herbs for your cinder block planter, it's time to add some personality and protection to your planter by painting and sealing it. This step is essential to not only make your planter visually appealing but also to shield it from the elements and extend its lifespan.
Here's what you'll need to get started:
-
Paint of your choice: Acrylic, latex, or spray paint work well for cinder blocks. Consider a waterproof or weather-resistant paint to guarantee durability.
-
Primer (optional): If your cinder block is particularly porous or you're using a dark color, apply a primer first to guarantee better paint adhesion and coverage.
-
Sealing technique: You can use a clear acrylic spray, varnish, or a waterproofing sealant to protect your paint job and prevent water from seeping into the cinder block.
- Paintbrushes or rollers: Choose the right tools for your paint type and planter size to achieve a smooth, even finish.
Remember to follow the manufacturer's instructions for each product, and apply thin, even coats to avoid drips and unevenness.
With a little creativity and patience, your cinder block planter will be transformed into a vibrant, unique addition to your outdoor space.
DIY Cinder Block Patio
Transform your outdoor space by building a DIY cinder block patio, a budget-friendly and stylish way to create an entertaining area or define different zones in your yard.
To get started, you'll need to prepare the site by leveling the ground and laying down a layer of compacted gravel for drainage. This is essential to prevent water from accumulating and damaging the cinder blocks.
Next, lay the cinder blocks, leaving a small gap between each one for drainage and insulation. You can fill these gaps with sand or small rocks to improve cinder block insulation and prevent weeds from growing.
As you build the patio, make sure to stagger the blocks to create a strong and stable structure.
Cinder Block Flower Tower
Take your cinder block creativity to new heights by building a flower tower that adds a touch of elegance to your outdoor space. This unique planter is perfect for showcasing your favorite flowers, herbs, or succulents.
Here's what you'll need to get started:
- Cinder blocks (at least 6-8)
- Sand or gravel for drainage
- Soil and plants of your choice
- Waterproof glue or mortar for stability
Begin by stacking the cinder blocks in a circular pattern, leaving space in the center for drainage.
Add a layer of sand or gravel at the bottom for drainage solutions, followed by soil and your chosen plants.
Consider plant selection that thrives in vertical spaces, such as trailing vines or compact shrubs.
As you add each layer, use waterproof glue or mortar to secure the blocks in place.
Get creative with your design, adding decorative stones or moss to fill in gaps.
With a little patience and planning, you'll have a stunning flower tower that adds a touch of sophistication to your outdoor space.
Rustic Cinder Block Planters
You can create a charming rustic planter by repurposing cinder blocks into a unique and functional piece for your garden or patio.
Start by gathering your materials: cinder blocks, weather-resistant wood glue, and a trowel.
Begin by applying a layer of wood glue to the top and bottom of each cinder block, then stack them on top of each other to form a rectangular shape. Make certain to alternate the cinder block textures to add visual interest.
Next, use the trowel to fill in the gaps between the blocks with a drainage solution, such as small rocks or broken pottery. This will guarantee that excess water doesn't accumulate in the planter.
Once the glue has dried, add a layer of soil and your chosen plants. To finish, add a decorative touch with some moss or small plants around the edges of the planter.
With these simple steps, you'll have a beautiful rustic planter that adds a touch of industrial chic to your outdoor space.
Plus, the cinder block texture and drainage solutions will help keep your plants happy and healthy.
Get creative and experiment with different shapes and sizes to create a unique piece that reflects your personal style!
Frequently Asked Questions
Can I Use Old Bricks Instead of Cinder Blocks for Planters?
You're wondering if old bricks can replace cinder blocks for planters? Absolutely!
Bricks offer several benefits, like better drainage and a more rustic look.
To create a brick planter, start by cleaning and preparing the bricks. Then, lay a layer of landscape fabric and add soil.
Plant your favorite greens and finish with a decorative top layer.
This upcycled gardening idea is a great way to breathe new life into old materials.
How Do I Prevent Water From Accumulating in the Planters?
When creating your planters, you'll want to prevent water from accumulating inside. To do this, incorporate drainage solutions into your design.
Start by drilling holes in the bottom of your planter to allow excess water to escape.
Add a layer of small rocks or broken pottery for extra moisture control.
Finally, use a well-draining potting mix to keep your plants happy and healthy.
Are Cinder Blocks Safe for Plants With High Acidity Needs?
When choosing a planter for plants with high acidity needs, you'll want to exercise caution with cinder blocks.
While they're a popular upcycle option, cinder blocks can leach lime into the soil, increasing its pH and potentially harming your plants.
To guarantee plant safety, consider lining the cinder block with a barrier, like a plastic container or a thick layer of acidic mulch, to prevent the alkaline materials from affecting the soil's acidity.
Can I Paint Cinder Blocks With Regular Household Paint?
You're wondering if you can paint cinder blocks with regular household paint. Yes, you can!
But keep in mind that the paint's durability might suffer from the block's porous nature. To guarantee a vibrant, long-lasting finish, prime the block first.
Then, use a waterproof sealant to protect the paint from the elements.
With a little prep, you can transform the cinder block's aesthetics and create a unique planter that showcases your personal style.
Do I Need to Seal the Cinder Blocks for Outdoor Use?
Did you know that over 50% of outdoor decorations don't last a full season? You don't want your hard work to fade away!
When it comes to using cinder blocks outdoors, you'll want to guarantee they're protected from the elements. To do this, you'll need to seal them.
Cinder block durability is key, and sealing options range from waterproofing sprays to concrete sealers. You can choose the best method for your project, but make certain to apply a coat or two to safeguard your blocks from rain and sun damage.
Conclusion
You've reached the final brick in the wall - or should I say, the final block in the garden!
With these 7 creative upcycled planter tutorials, you're now equipped to turn humble cinder blocks into thriving oases.
From succulent gardens to herb planters, your outdoor space is about to get a whole lot greener.
So, get building, get planting, and watch your backyard bloom into a masterpiece!
Related Posts
-
10 Essential Tips for Sizing Block Planters Perfectly
When sizing block planters, you need to take into account multiple factors to get it just right. Measure your cinder ...
-
10 Essential Tips for Sizing Block Planters Perfectly
When sizing block planters, you need to take into account multiple factors to get it just right. Measure your cinder ...
-
10 Essential Tips for Sizing Block Planters Perfectly
When sizing block planters, you need to take into account multiple factors to get it just right. Measure your cinder ...
-
10 Essential Tips for Sizing Block Planters Perfectly
When sizing block planters, you need to take into account multiple factors to get it just right. Measure your cinder ...
-
10 Essential Tips for Sizing Block Planters Perfectly
When sizing block planters, you need to take into account multiple factors to get it just right. Measure your cinder ...
-
10 Essential Tips for Sizing Block Planters Perfectly
When sizing block planters, you need to take into account multiple factors to get it just right. Measure your cinder ...
-
10 Essential Tips for Sizing Block Planters Perfectly
When sizing block planters, you need to take into account multiple factors to get it just right. Measure your cinder ...
-
10 Essential Tips for Sizing Block Planters Perfectly
When sizing block planters, you need to take into account multiple factors to get it just right. Measure your cinder ...
-
10 Essential Tips for Sizing Block Planters Perfectly
When sizing block planters, you need to take into account multiple factors to get it just right. Measure your cinder ...
-
10 Essential Tips for Sizing Block Planters Perfectly
When sizing block planters, you need to take into account multiple factors to get it just right. Measure your cinder ...
-
10 Essential Tips for Sizing Block Planters Perfectly
When sizing block planters, you need to take into account multiple factors to get it just right. Measure your cinder ...
-
10 Essential Tips for Sizing Block Planters Perfectly
When sizing block planters, you need to take into account multiple factors to get it just right. Measure your cinder ...
-
10 Essential Tips for Sizing Block Planters Perfectly
When sizing block planters, you need to take into account multiple factors to get it just right. Measure your cinder ...
-
10 Essential Tips for Sizing Block Planters Perfectly
When sizing block planters, you need to take into account multiple factors to get it just right. Measure your cinder ...
-
10 Essential Tips for Sizing Block Planters Perfectly
When sizing block planters, you need to take into account multiple factors to get it just right. Measure your cinder ...
-
10 Essential Tips for Sizing Block Planters Perfectly
When sizing block planters, you need to take into account multiple factors to get it just right. Measure your cinder ...
-
10 Essential Tips for Sizing Block Planters Perfectly
When sizing block planters, you need to take into account multiple factors to get it just right. Measure your cinder ...
-
10 Essential Tips for Sizing Block Planters Perfectly
When sizing block planters, you need to take into account multiple factors to get it just right. Measure your cinder ...
-
10 Essential Tips for Sizing Block Planters Perfectly
When sizing block planters, you need to take into account multiple factors to get it just right. Measure your cinder ...
-
10 Essential Tips for Sizing Block Planters Perfectly
When sizing block planters, you need to take into account multiple factors to get it just right. Measure your cinder ...
-
10 Essential Tips for Sizing Block Planters Perfectly
When sizing block planters, you need to take into account multiple factors to get it just right. Measure your cinder ...
-
10 Essential Tips for Sizing Block Planters Perfectly
When sizing block planters, you need to take into account multiple factors to get it just right. Measure your cinder ...
-
10 Essential Tips for Sizing Block Planters Perfectly
When sizing block planters, you need to take into account multiple factors to get it just right. Measure your cinder ...
-
10 Essential Tips for Sizing Block Planters Perfectly
When sizing block planters, you need to take into account multiple factors to get it just right. Measure your cinder ...
-
10 Essential Tips for Sizing Block Planters Perfectly
When sizing block planters, you need to take into account multiple factors to get it just right. Measure your cinder ...
-
10 Essential Tips for Sizing Block Planters Perfectly
When sizing block planters, you need to take into account multiple factors to get it just right. Measure your cinder ...
-
10 Essential Tips for Sizing Block Planters Perfectly
When sizing block planters, you need to take into account multiple factors to get it just right. Measure your cinder ...
-
10 Essential Tips for Sizing Block Planters Perfectly
When sizing block planters, you need to take into account multiple factors to get it just right. Measure your cinder ...
-
10 Essential Tips for Sizing Block Planters Perfectly
When sizing block planters, you need to take into account multiple factors to get it just right. Measure your cinder ...
-
10 Essential Tips for Sizing Block Planters Perfectly
When sizing block planters, you need to take into account multiple factors to get it just right. Measure your cinder ...
-
10 Essential Tips for Sizing Block Planters Perfectly
When sizing block planters, you need to take into account multiple factors to get it just right. Measure your cinder ...
-
10 Essential Tips for Sizing Block Planters Perfectly
When sizing block planters, you need to take into account multiple factors to get it just right. Measure your cinder ...
-
10 Essential Tips for Sizing Block Planters Perfectly
When sizing block planters, you need to take into account multiple factors to get it just right. Measure your cinder ...
-
10 Essential Tips for Sizing Block Planters Perfectly
When sizing block planters, you need to take into account multiple factors to get it just right. Measure your cinder ...
-
10 Essential Tips for Sizing Block Planters Perfectly
When sizing block planters, you need to take into account multiple factors to get it just right. Measure your cinder ...
-
10 Essential Tips for Sizing Block Planters Perfectly
When sizing block planters, you need to take into account multiple factors to get it just right. Measure your cinder ...
-
10 Essential Tips for Sizing Block Planters Perfectly
When sizing block planters, you need to take into account multiple factors to get it just right. Measure your cinder ...
-
10 Essential Tips for Sizing Block Planters Perfectly
When sizing block planters, you need to take into account multiple factors to get it just right. Measure your cinder ...
-
7 Best Concrete Planter Ideas for Indoor Gardens
You're looking for a stylish and low-maintenance way to bring some greenery into your home, and concrete planters off...
-
7 Best Concrete Planter Ideas for Indoor Gardens
You're looking for a stylish and low-maintenance way to bring some greenery into your home, and concrete planters off...
-
7 Best Concrete Planter Ideas for Indoor Gardens
You're looking for a stylish and low-maintenance way to bring some greenery into your home, and concrete planters off...
-
7 Best Concrete Planter Ideas for Indoor Gardens
You're looking for a stylish and low-maintenance way to bring some greenery into your home, and concrete planters off...
-
7 Best Concrete Planter Ideas for Indoor Gardens
You're looking for a stylish and low-maintenance way to bring some greenery into your home, and concrete planters off...
-
7 Best Concrete Planter Ideas for Indoor Gardens
You're looking for a stylish and low-maintenance way to bring some greenery into your home, and concrete planters off...
-
7 Best Concrete Planter Ideas for Indoor Gardens
You're looking for a stylish and low-maintenance way to bring some greenery into your home, and concrete planters off...
-
7 Best Concrete Planter Ideas for Indoor Gardens
You're looking for a stylish and low-maintenance way to bring some greenery into your home, and concrete planters off...
-
7 Best Concrete Planter Ideas for Indoor Gardens
You're looking for a stylish and low-maintenance way to bring some greenery into your home, and concrete planters off...
-
7 Best Concrete Planter Ideas for Indoor Gardens
You're looking for a stylish and low-maintenance way to bring some greenery into your home, and concrete planters off...
-
7 Best Concrete Planter Ideas for Indoor Gardens
You're looking for a stylish and low-maintenance way to bring some greenery into your home, and concrete planters off...
-
7 Best Concrete Planter Ideas for Indoor Gardens
You're looking for a stylish and low-maintenance way to bring some greenery into your home, and concrete planters off...
-
7 Best Concrete Planter Ideas for Indoor Gardens
You're looking for a stylish and low-maintenance way to bring some greenery into your home, and concrete planters off...
-
7 Best Concrete Planter Ideas for Indoor Gardens
You're looking for a stylish and low-maintenance way to bring some greenery into your home, and concrete planters off...
-
7 Best Concrete Planter Ideas for Indoor Gardens
You're looking for a stylish and low-maintenance way to bring some greenery into your home, and concrete planters off...
-
7 Best Concrete Planter Ideas for Indoor Gardens
You're looking for a stylish and low-maintenance way to bring some greenery into your home, and concrete planters off...
-
7 Best Concrete Planter Ideas for Indoor Gardens
You're looking for a stylish and low-maintenance way to bring some greenery into your home, and concrete planters off...
-
7 Best Concrete Planter Ideas for Indoor Gardens
You're looking for a stylish and low-maintenance way to bring some greenery into your home, and concrete planters off...
-
7 Best Concrete Planter Ideas for Indoor Gardens
You're looking for a stylish and low-maintenance way to bring some greenery into your home, and concrete planters off...
-
7 Best Concrete Planter Ideas for Indoor Gardens
You're looking for a stylish and low-maintenance way to bring some greenery into your home, and concrete planters off...
-
7 Best Concrete Planter Ideas for Indoor Gardens
You're looking for a stylish and low-maintenance way to bring some greenery into your home, and concrete planters off...
-
7 Best Concrete Planter Ideas for Indoor Gardens
You're looking for a stylish and low-maintenance way to bring some greenery into your home, and concrete planters off...
-
7 Best Concrete Planter Ideas for Indoor Gardens
You're looking for a stylish and low-maintenance way to bring some greenery into your home, and concrete planters off...
-
What to Seal Your Planters With for Longevity
When sealing your planters for longevity, it's vital to choose a sealant compatible with your planter material - whet...
-
What to Seal Your Planters With for Longevity
When sealing your planters for longevity, it's vital to choose a sealant compatible with your planter material - whet...
-
What to Seal Your Planters With for Longevity
When sealing your planters for longevity, it's vital to choose a sealant compatible with your planter material - whet...
-
What to Seal Your Planters With for Longevity
When sealing your planters for longevity, it's vital to choose a sealant compatible with your planter material - whet...
-
What to Seal Your Planters With for Longevity
When sealing your planters for longevity, it's vital to choose a sealant compatible with your planter material - whet...
-
What to Seal Your Planters With for Longevity
When sealing your planters for longevity, it's vital to choose a sealant compatible with your planter material - whet...
-
What to Seal Your Planters With for Longevity
When sealing your planters for longevity, it's vital to choose a sealant compatible with your planter material - whet...
-
What to Seal Your Planters With for Longevity
When sealing your planters for longevity, it's vital to choose a sealant compatible with your planter material - whet...
-
What to Seal Your Planters With for Longevity
When sealing your planters for longevity, it's vital to choose a sealant compatible with your planter material - whet...
-
What to Seal Your Planters With for Longevity
When sealing your planters for longevity, it's vital to choose a sealant compatible with your planter material - whet...
-
What to Seal Your Planters With for Longevity
When sealing your planters for longevity, it's vital to choose a sealant compatible with your planter material - whet...
-
What to Seal Your Planters With for Longevity
When sealing your planters for longevity, it's vital to choose a sealant compatible with your planter material - whet...
-
What to Seal Your Planters With for Longevity
When sealing your planters for longevity, it's vital to choose a sealant compatible with your planter material - whet...
-
What to Seal Your Planters With for Longevity
When sealing your planters for longevity, it's vital to choose a sealant compatible with your planter material - whet...
-
What to Seal Your Planters With for Longevity
When sealing your planters for longevity, it's vital to choose a sealant compatible with your planter material - whet...
-
What to Seal Your Planters With for Longevity
When sealing your planters for longevity, it's vital to choose a sealant compatible with your planter material - whet...
-
What to Seal Your Planters With for Longevity
When sealing your planters for longevity, it's vital to choose a sealant compatible with your planter material - whet...
-
What to Seal Your Planters With for Longevity
When sealing your planters for longevity, it's vital to choose a sealant compatible with your planter material - whet...
-
What to Seal Your Planters With for Longevity
When sealing your planters for longevity, it's vital to choose a sealant compatible with your planter material - whet...
-
What to Seal Your Planters With for Longevity
When sealing your planters for longevity, it's vital to choose a sealant compatible with your planter material - whet...
-
What to Seal Your Planters With for Longevity
When sealing your planters for longevity, it's vital to choose a sealant compatible with your planter material - whet...
-
What to Seal Your Planters With for Longevity
When sealing your planters for longevity, it's vital to choose a sealant compatible with your planter material - whet...
-
What to Seal Your Planters With for Longevity
When sealing your planters for longevity, it's vital to choose a sealant compatible with your planter material - whet...
-
What to Seal Your Planters With for Longevity
When sealing your planters for longevity, it's vital to choose a sealant compatible with your planter material - whet...
-
What to Seal Your Planters With for Longevity
When sealing your planters for longevity, it's vital to choose a sealant compatible with your planter material - whet...
-
What to Seal Your Planters With for Longevity
When sealing your planters for longevity, it's vital to choose a sealant compatible with your planter material - whet...
-
What to Seal Your Planters With for Longevity
When sealing your planters for longevity, it's vital to choose a sealant compatible with your planter material - whet...
-
What to Seal Your Planters With for Longevity
When sealing your planters for longevity, it's vital to choose a sealant compatible with your planter material - whet...
-
What to Seal Your Planters With for Longevity
When sealing your planters for longevity, it's vital to choose a sealant compatible with your planter material - whet...
-
What to Seal Your Planters With for Longevity
When sealing your planters for longevity, it's vital to choose a sealant compatible with your planter material - whet...
-
What to Seal Your Planters With for Longevity
When sealing your planters for longevity, it's vital to choose a sealant compatible with your planter material - whet...
-
What to Seal Your Planters With for Longevity
When sealing your planters for longevity, it's vital to choose a sealant compatible with your planter material - whet...


