7 Budget-Friendly Ways to Hydroponic Rooftop Garden
Share
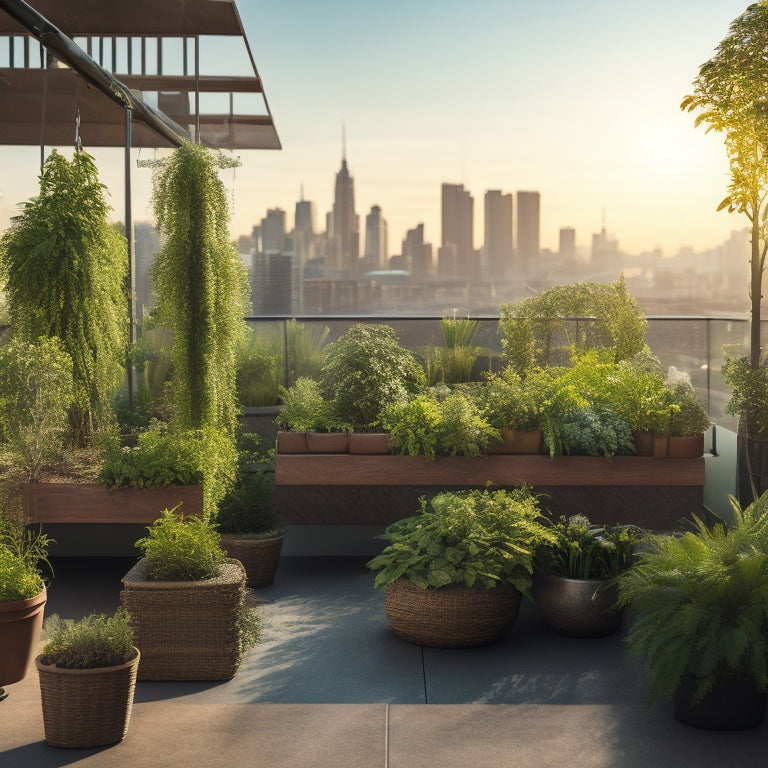
By adopting budget-friendly strategies, you can cultivate a thriving hydroponic rooftop garden without overspending. Start by repurposing old containers, such as plastic bottles, wooden crates, and buckets, as planters or irrigation systems. Design a DIY hydroponic system that maximizes yields and minimizes waste, and opt for affordable nutrients like calcium nitrate and potassium nitrate. Efficiently use vertical space by stacking planters and trellises, and choose cost-effective growing mediums like coco coir or peat moss-perlite mix. Select budget-friendly crops like herbs, leafy greens, and cherry tomatoes, and get creative with trellising solutions using old pallets, bamboo stakes, or recycled metal grids. As you explore these budget-friendly ways, you'll uncover even more innovative solutions to elevate your hydroponic rooftop garden.
Key Takeaways
• Repurpose old containers like plastic bottles, wooden crates, and buckets to create planters, irrigation systems, and trellises, reducing waste and costs.
• Design a DIY hydroponic system with a focus on efficiency, choosing the right layout, system type, and essential components to maximize yields and minimize waste.
• Manage nutrients effectively by creating a DIY nutrient blend, monitoring pH levels, and making gradual adjustments to prevent shock to plants and promote healthy growth.
• Optimize space usage by implementing vertical planting techniques, stacking planters, and training plants to climb trellises, increasing yield while minimizing rooftop space.
• Select budget-friendly crops like leafy greens, cherry tomatoes, and herbs that mature quickly, have high yields, and are easy to grow in hydroponic systems.
Repurpose Old Containers Wisely
Use old plastic bottles, wooden crates, or retired buckets to create a budget-friendly hydroponic rooftop garden by repurposing them as planters, trellises, or irrigation systems. You'll be surprised at how creative upcycling can transform discarded items into functional components of your hydroponic setup.
When selecting container types, consider the size, material, and drainage capabilities of each item. For instance, plastic bottles can be converted into self-watering planters or mini-greenhouses, while wooden crates can serve as planters or trellises. Retired buckets can be repurposed as reservoirs for your irrigation system or as planters for larger plants.
Be sure to clean and disinfect each container before use to prevent contamination. By repurposing old containers, you'll not only reduce waste but also save money on startup costs.
With a little creativity, you can create a thriving hydroponic rooftop garden that's both eco-friendly and budget-friendly. By choosing the right container types and applying creative upcycling techniques, you'll be well on your way to growing a bountiful harvest in your rooftop oasis.
DIY Hydroponic System Setup
Now that you've repurposed your containers, it's time to set up your DIY hydroponic system.
You'll need to decide on a system design that suits your space and plants, gather the necessary components, and assemble everything correctly.
In this section, we'll walk you through the key considerations and steps to get your system up and running.
System Design Options
When setting up a DIY hydroponic system, you'll need to decide on a design that suits your rooftop garden's specific needs and space constraints. You'll want to prioritize system efficiency to maximize your yields while minimizing energy consumption and waste.
Consider a vertical or horizontal layout, depending on the space available and the type of plants you're growing. For sustainable materials, opt for recycled or repurposed containers, such as old PVC pipes or plastic bottles, to create your hydroponic system. This won't only reduce waste but also save you money.
Another key consideration is the type of hydroponic system you want to implement. You can choose from NFT (nutrient film technique), DWC (deep water culture), or Ebb and Flow systems, each with their own advantages and disadvantages.
NFT systems, for instance, are great for space-saving and water efficiency, while DWC systems are ideal for larger plants that require more nutrients. Whichever design you choose, make sure it's scalable and adaptable to your rooftop garden's evolving needs.
Key Components Needed
To set up a DIY hydroponic system, you'll need to gather several essential components that work together to provide your plants with the necessary nutrients, water, and oxygen.
These components include a reservoir to hold the nutrient-rich solution, a pump to circulate the solution, and a delivery system to distribute it to the plants. You'll also need hydroponic equipment such as grow tubes or a trellis system to support the plants.
A key aspect of hydroponic gardening is nutrient delivery. You'll need to choose a nutrient solution specifically formulated for hydroponics, as well as a method for delivering it to the plants. This can be achieved through a drip irrigation system, which releases the solution directly to the roots, or through a misting system, which sprays a fine mist of solution onto the leaves and roots.
Additionally, you'll need to take into account the lighting and climate control for your rooftop garden. This may include LED grow lights, a thermostat, and a humidistat to maintain ideal growing conditions.
Setup and Assembly
With your components gathered, you can begin assembling your DIY hydroponic system by connecting the reservoir to the pump, ensuring a secure and watertight seal.
Next, attach the irrigation system to the pump, making sure all connections are snug and leak-free. Connect the tubes to the grow bed, ensuring proper water flow and distribution.
Mount the grow bed on your rooftop, taking care to secure it firmly to withstand wind and weather. Connect the pH and nutrient sensors to the controller, which will monitor and adjust the nutrient solution accordingly.
Finally, plant your chosen crops, making sure they receive adequate support and spacing.
As you assemble your DIY hydroponic system, remember the hydroponic benefits of increased crop yields, water efficiency, and reduced land use.
Your rooftop garden won't only provide fresh produce but also contribute to rooftop sustainability by reducing the urban heat island effect and increasing biodiversity.
With careful planning and assembly, you'll be enjoying a thriving, budget-friendly hydroponic rooftop garden in no time.
Opt for Affordable Nutrients
When setting up your budget-friendly hydroponic rooftop garden, you'll need to prioritize affordable nutrients to keep costs low.
You can concoct your own DIY nutrient blends using readily available ingredients, which can be just as effective as commercial options.
DIY Nutrient Blends
You can greatly cut costs by mixing your own hydroponic nutrient blends, a strategy that allows you to tailor formulas to your plants' specific needs. By selecting the right nutrient sources, you can create a customized blend that meets your plants' requirements. For instance, you can use calcium nitrate as a source of calcium and nitrogen, while potassium nitrate provides potassium and nitrogen.
To guarantee ideal nutrient uptake, it's important to understand the different nutrient sources and their roles in plant growth.
When it comes to blending techniques, it's vital to follow a precise formula to avoid over- or under-fertilization. Start by calculating the total nutrient requirement for your plants, then adjust the blend accordingly. You can use online resources or consult with hydroponic experts to develop a customized formula.
Remember to store your DIY nutrient blend in a cool, dry place to maintain its potency. With the right nutrient sources and blending techniques, you can create an effective and cost-efficient hydroponic nutrient blend that promotes healthy plant growth.
Economical Ph Controls
Maintaining ideal pH levels is vital in hydroponic systems, and opting for affordable pH controls can greatly reduce overall costs without compromising plant health.
You can achieve this by investing in a reliable pH testing kit, which will allow you to monitor your system's pH levels accurately. For pH adjustments, consider using a combination of pH-up and pH-down solutions, which are often more cost-effective than specialized pH adjusters.
When selecting a pH testing kit, look for one that's specifically designed for hydroponics and has a high level of accuracy. You'll also want to make sure it's easy to use and calibrate.
For pH adjustments, start by making small incremental changes and monitoring the effects on your plants. It's also important to adjust your pH levels gradually to avoid shocking your plants.
Utilize Vertical Space Efficiently
Maximize your rooftop garden's productivity by stacking planters and trellises to take advantage of every available inch, thereby creating a lush, vertically-layered oasis.
By utilizing vertical planting techniques, you'll increase your yield while minimizing space usage. This approach allows you to grow more plants in a smaller area, making the most of your rooftop's dimensions.
To maximize sunlight exposure, position your planters and trellises in a way that allows each layer to receive adequate light. Consider using a south-facing orientation to capitalize on natural sunlight.
When selecting plants, choose varieties that thrive in vertical gardens, such as vining tomatoes or cucumbers. Train these plants to climb up trellises or other supports, further optimizing your vertical space.
By stacking planters and utilizing vertical planting techniques, you'll create a thriving rooftop garden that's both productive and visually stunning.
With careful planning and execution, you can turn your rooftop into a verdant oasis that's perfect for growing your favorite fruits and veggies.
Choose Low-Cost Growing Medium
By selecting a cost-effective growing medium, such as coco coir or a mix of peat moss and perlite, you can greatly reduce the overall expense of your hydroponic rooftop garden.
Coco coir, a byproduct of coconut processing, is a popular choice due to its high water retention capacity, aeration, and eco-friendliness. It's also relatively inexpensive compared to other mediums.
Another option is a vermiculite mixture, which provides excellent drainage and aeration while being gentle on roots. You can create your own mix by combining vermiculite with peat moss or coconut coir to achieve the perfect balance for your plants.
When choosing a growing medium, consider factors like water retention, pH levels, and aeration to guarantee ideal plant growth. Avoid using soil, as it can clog your hydroponic system and lead to root rot.
Select Budget-Friendly Crops
You'll want to choose crops that not only thrive in a hydroponic environment but also provide a high yield at a low cost, making your rooftop garden a budget-friendly success.
When selecting crops, prioritize easy-to-grow herbs like basil, cilantro, and parsley, which require minimal maintenance and can be harvested in as little as two weeks. These herbs are perfect for adding fresh flavor to a variety of dishes without breaking the bank.
For budget-friendly vegetables, consider leafy greens like lettuce, kale, and spinach. These crops aren't only affordable but also mature quickly, allowing you to harvest them in as few as 20 days.
Other budget-friendly options include cherry tomatoes, cucumbers, and carrots, which can be grown using a hydroponic system and harvested in under 60 days.
Get Creative With Trellising
Frequently, hydroponic crops like cherry tomatoes, cucumbers, and carrots require vertical support to grow efficiently, and trellising can help optimize space in your rooftop garden.
By implementing creative trellising techniques, you can make the most of your rooftop's vertical space, allowing your plants to grow upwards and outwards. This not only saves space but also promotes healthy growth and increases yields.
To get creative with trellising, consider using the following materials:
-
Old wooden pallets: Repurpose them into a trellis by attaching strings or wires to support your plants.
-
Bamboo stakes: Inexpensive and eco-friendly, they can be used to create a simple yet effective trellis system.
-
Recycled metal grids: Transform them into a trellis by attaching plant clips or ties to support your crops.
- DIY netting: Create a makeshift trellis by stretching netting between two wooden or metal frames, providing a sturdy support for your plants.
Frequently Asked Questions
Can I Use a Hydroponic System Indoors With Limited Natural Light?
You can thrive with indoor hydroponics despite limited natural light by optimizing indoor lighting setups and supplementing with hydroponic nutrients, ensuring your plants receive the necessary spectrum and intensity for healthy growth.
How Often Should I Monitor and Adjust the Ph Level of My System?
You should monitor your system's pH level daily, using pH testing to guarantee ideal nutrient balance, as even slight deviations can impact plant growth, and adjust accordingly to maintain a stable range between 5.5 and 6.5.
Are There Any Specific Hydroponic Methods Better Suited for Rooftop Gardens?
When selecting a hydroponic method for your rooftop garden, you'll find that vertical gardening systems, like nutrient film technique (NFT) or drip irrigation, are well-suited due to their space efficiency and precise control over nutrient solutions.
Can I Grow Root Vegetables Like Carrots and Potatoes Hydroponically?
Imagine growing crunchy carrots in a rooftop hydroponic system like the one at Brooklyn's Eagle Street Rooftop Farm. You can, but it's essential to understand that hydroponic root crops like carrots and potatoes require precise nutrient requirements, which can be challenging to meet.
How Do I Prevent Pests and Diseases in a Hydroponic Rooftop Garden?
You'll prevent pests and diseases in your hydroponic rooftop garden by implementing a robust pest management system, ensuring good air circulation, and following strict disease prevention protocols, like sterilizing equipment and monitoring plant health closely.
Related Posts
-

10 Essential Steps to Upcycle Concrete Planters
You've decided to breathe new life into those old concrete planters lying around, and you're ready to transform them ...
-

10 Essential Steps to Upcycle Concrete Planters
You've decided to breathe new life into those old concrete planters lying around, and you're ready to transform them ...
-

10 Essential Steps to Upcycle Concrete Planters
You've decided to breathe new life into those old concrete planters lying around, and you're ready to transform them ...
-

10 Essential Steps to Upcycle Concrete Planters
You've decided to breathe new life into those old concrete planters lying around, and you're ready to transform them ...
-

10 Essential Steps to Upcycle Concrete Planters
You've decided to breathe new life into those old concrete planters lying around, and you're ready to transform them ...
-

10 Essential Steps to Upcycle Concrete Planters
You've decided to breathe new life into those old concrete planters lying around, and you're ready to transform them ...
-

10 Essential Steps to Upcycle Concrete Planters
You've decided to breathe new life into those old concrete planters lying around, and you're ready to transform them ...
-

10 Essential Steps to Upcycle Concrete Planters
You've decided to breathe new life into those old concrete planters lying around, and you're ready to transform them ...
-

10 Essential Steps to Upcycle Concrete Planters
You've decided to breathe new life into those old concrete planters lying around, and you're ready to transform them ...
-

10 Essential Steps to Upcycle Concrete Planters
You've decided to breathe new life into those old concrete planters lying around, and you're ready to transform them ...
-

10 Essential Steps to Upcycle Concrete Planters
You've decided to breathe new life into those old concrete planters lying around, and you're ready to transform them ...
-

10 Essential Steps to Upcycle Concrete Planters
You've decided to breathe new life into those old concrete planters lying around, and you're ready to transform them ...
-

10 Essential Steps to Upcycle Concrete Planters
You've decided to breathe new life into those old concrete planters lying around, and you're ready to transform them ...
-

10 Essential Steps to Upcycle Concrete Planters
You've decided to breathe new life into those old concrete planters lying around, and you're ready to transform them ...
-

10 Essential Steps to Upcycle Concrete Planters
You've decided to breathe new life into those old concrete planters lying around, and you're ready to transform them ...
-

10 Essential Steps to Upcycle Concrete Planters
You've decided to breathe new life into those old concrete planters lying around, and you're ready to transform them ...
-

10 Essential Steps to Upcycle Concrete Planters
You've decided to breathe new life into those old concrete planters lying around, and you're ready to transform them ...
-

10 Essential Steps to Upcycle Concrete Planters
You've decided to breathe new life into those old concrete planters lying around, and you're ready to transform them ...
-

10 Essential Steps to Upcycle Concrete Planters
You've decided to breathe new life into those old concrete planters lying around, and you're ready to transform them ...
-

10 Essential Steps to Upcycle Concrete Planters
You've decided to breathe new life into those old concrete planters lying around, and you're ready to transform them ...
-

10 Essential Steps to Upcycle Concrete Planters
You've decided to breathe new life into those old concrete planters lying around, and you're ready to transform them ...
-

10 Essential Steps to Upcycle Concrete Planters
You've decided to breathe new life into those old concrete planters lying around, and you're ready to transform them ...
-

10 Essential Steps to Upcycle Concrete Planters
You've decided to breathe new life into those old concrete planters lying around, and you're ready to transform them ...
-

10 Essential Steps to Upcycle Concrete Planters
You've decided to breathe new life into those old concrete planters lying around, and you're ready to transform them ...
-

10 Essential Steps to Upcycle Concrete Planters
You've decided to breathe new life into those old concrete planters lying around, and you're ready to transform them ...
-

10 Essential Steps to Upcycle Concrete Planters
You've decided to breathe new life into those old concrete planters lying around, and you're ready to transform them ...
-

10 Essential Steps to Upcycle Concrete Planters
You've decided to breathe new life into those old concrete planters lying around, and you're ready to transform them ...
-

10 Essential Steps to Upcycle Concrete Planters
You've decided to breathe new life into those old concrete planters lying around, and you're ready to transform them ...
-

10 Essential Steps to Upcycle Concrete Planters
You've decided to breathe new life into those old concrete planters lying around, and you're ready to transform them ...
-

Preventing Soil Settlement in DIY Planters
To prevent soil settlement in your DIY planters, you'll want to focus on selecting a well-balanced soil mix with good...
-

Preventing Soil Settlement in DIY Planters
To prevent soil settlement in your DIY planters, you'll want to focus on selecting a well-balanced soil mix with good...
-

Preventing Soil Settlement in DIY Planters
To prevent soil settlement in your DIY planters, you'll want to focus on selecting a well-balanced soil mix with good...
-

Preventing Soil Settlement in DIY Planters
To prevent soil settlement in your DIY planters, you'll want to focus on selecting a well-balanced soil mix with good...
-

Preventing Soil Settlement in DIY Planters
To prevent soil settlement in your DIY planters, you'll want to focus on selecting a well-balanced soil mix with good...
-

Preventing Soil Settlement in DIY Planters
To prevent soil settlement in your DIY planters, you'll want to focus on selecting a well-balanced soil mix with good...
-

Preventing Soil Settlement in DIY Planters
To prevent soil settlement in your DIY planters, you'll want to focus on selecting a well-balanced soil mix with good...
-

Preventing Soil Settlement in DIY Planters
To prevent soil settlement in your DIY planters, you'll want to focus on selecting a well-balanced soil mix with good...
-

Preventing Soil Settlement in DIY Planters
To prevent soil settlement in your DIY planters, you'll want to focus on selecting a well-balanced soil mix with good...
-

Preventing Soil Settlement in DIY Planters
To prevent soil settlement in your DIY planters, you'll want to focus on selecting a well-balanced soil mix with good...
-

Preventing Soil Settlement in DIY Planters
To prevent soil settlement in your DIY planters, you'll want to focus on selecting a well-balanced soil mix with good...
-

Preventing Soil Settlement in DIY Planters
To prevent soil settlement in your DIY planters, you'll want to focus on selecting a well-balanced soil mix with good...
-

Preventing Soil Settlement in DIY Planters
To prevent soil settlement in your DIY planters, you'll want to focus on selecting a well-balanced soil mix with good...
-

Preventing Soil Settlement in DIY Planters
To prevent soil settlement in your DIY planters, you'll want to focus on selecting a well-balanced soil mix with good...
-

Preventing Soil Settlement in DIY Planters
To prevent soil settlement in your DIY planters, you'll want to focus on selecting a well-balanced soil mix with good...
-

Preventing Soil Settlement in DIY Planters
To prevent soil settlement in your DIY planters, you'll want to focus on selecting a well-balanced soil mix with good...
-

Preventing Soil Settlement in DIY Planters
To prevent soil settlement in your DIY planters, you'll want to focus on selecting a well-balanced soil mix with good...
-

Preventing Soil Settlement in DIY Planters
To prevent soil settlement in your DIY planters, you'll want to focus on selecting a well-balanced soil mix with good...
-

Preventing Soil Settlement in DIY Planters
To prevent soil settlement in your DIY planters, you'll want to focus on selecting a well-balanced soil mix with good...
-

Preventing Soil Settlement in DIY Planters
To prevent soil settlement in your DIY planters, you'll want to focus on selecting a well-balanced soil mix with good...
-

Preventing Soil Settlement in DIY Planters
To prevent soil settlement in your DIY planters, you'll want to focus on selecting a well-balanced soil mix with good...
-

Preventing Soil Settlement in DIY Planters
To prevent soil settlement in your DIY planters, you'll want to focus on selecting a well-balanced soil mix with good...
-

Preventing Soil Settlement in DIY Planters
To prevent soil settlement in your DIY planters, you'll want to focus on selecting a well-balanced soil mix with good...
-

Preventing Soil Settlement in DIY Planters
To prevent soil settlement in your DIY planters, you'll want to focus on selecting a well-balanced soil mix with good...
-

3 Best Roof Garden Drainage Solutions for Planters
When designing your roof garden, you'll want to implement a planter drainage system that guarantees water flows freel...
-

3 Best Roof Garden Drainage Solutions for Planters
When designing your roof garden, you'll want to implement a planter drainage system that guarantees water flows freel...
-

3 Best Roof Garden Drainage Solutions for Planters
When designing your roof garden, you'll want to implement a planter drainage system that guarantees water flows freel...
-

3 Best Roof Garden Drainage Solutions for Planters
When designing your roof garden, you'll want to implement a planter drainage system that guarantees water flows freel...
-

3 Best Roof Garden Drainage Solutions for Planters
When designing your roof garden, you'll want to implement a planter drainage system that guarantees water flows freel...
-

3 Best Roof Garden Drainage Solutions for Planters
When designing your roof garden, you'll want to implement a planter drainage system that guarantees water flows freel...
-

3 Best Roof Garden Drainage Solutions for Planters
When designing your roof garden, you'll want to implement a planter drainage system that guarantees water flows freel...
-

3 Best Roof Garden Drainage Solutions for Planters
When designing your roof garden, you'll want to implement a planter drainage system that guarantees water flows freel...
-

3 Best Roof Garden Drainage Solutions for Planters
When designing your roof garden, you'll want to implement a planter drainage system that guarantees water flows freel...
-

3 Best Roof Garden Drainage Solutions for Planters
When designing your roof garden, you'll want to implement a planter drainage system that guarantees water flows freel...
-

3 Best Roof Garden Drainage Solutions for Planters
When designing your roof garden, you'll want to implement a planter drainage system that guarantees water flows freel...
-

3 Best Roof Garden Drainage Solutions for Planters
When designing your roof garden, you'll want to implement a planter drainage system that guarantees water flows freel...
-

3 Best Roof Garden Drainage Solutions for Planters
When designing your roof garden, you'll want to implement a planter drainage system that guarantees water flows freel...


