3 Easy Homemade Fertilizers for Rooftop Vegetable Gardens
Share
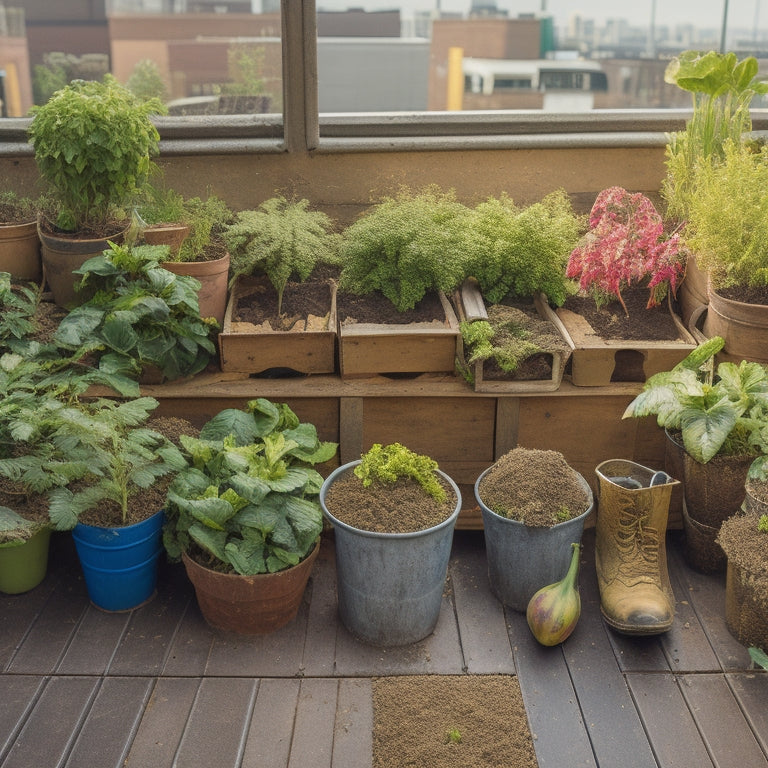
You're likely already collecting kitchen scraps and organic waste that can be converted into nutrient-rich fertilizers for your rooftop vegetable garden, reducing your reliance on commercial products and creating a more sustainable gardening practice. Composting is a great place to start, using materials like fruit and vegetable peels, tea bags, and coffee grounds. You can also create a DIY compost bin with a sturdy frame, wire mesh, and carbon-rich bedding. For an alternative, try making a banana peel fertilizer or an Epsom salt solution to provide essential micronutrients. By exploring these options, you'll discover even more ways to turn waste into valuable nutrients for your rooftop garden.
Composting 101 for Rooftop Gardens
You can turn kitchen scraps, fallen leaves, and other organic materials into a nutrient-rich fertilizer for your rooftop garden by composting them correctly. This process involves breaking down organic waste into a valuable resource that will enrich your soil and promote healthy plant growth.
To get started, identify the right materials to compost, such as fruit and vegetable peels, tea bags, and coffee grounds. Avoid adding meat, dairy, and oily foods as they can attract pests and create unpleasant odors.
When composting, aim for a mix of 'green' materials (like kitchen scraps) and 'brown' materials (like dried leaves or newspaper). Keep the pile moist, like a damp sponge, and turn it regularly to ensure adequate oxygen flow. Monitor the temperature, which should reach 130-140°F (54-60°C) within a few days, indicating that decomposition is underway.
After several weeks, your compost will be ready to use, providing your rooftop garden with a nutrient-rich soil amendment that will support vigorous plant growth and reduce your reliance on synthetic fertilizers.
DIY Compost Bin Essentials
When building a DIY compost bin, start by selecting a location that receives partial shade and is well-ventilated, as this will help regulate temperature and odors. This is essential, as a well-designed compost bin will break down organic matter efficiently and produce a nutrient-rich fertilizer for your rooftop garden.
Next, consider the materials you'll need to build your compost bin. Here's a breakdown of the essentials:
| Component | Description |
|---|---|
| Frame | A sturdy structure to hold the compost materials |
| Wire mesh | Allows air to circulate and keeps pests out |
| Lid | Easy access for adding materials and monitoring progress |
| Drainage | A system to remove excess liquid and prevent waterlogging |
| Bedding | A carbon-rich material (e.g., straw or shredded newspaper) to absorb moisture |
Understanding vermicomposting basics, which involve using worms to break down organic matter, can also enhance your composting experience. Additionally, incorporating green manure benefits, such as using cover crops to enrich soil health, can further improve the fertility of your rooftop garden. By following these DIY compost bin essentials, you'll be well on your way to creating a thriving and sustainable garden.
Turning Waste Into Nutrients
Turning Waste Into Nutrients
By rechanneling kitchen scraps, fallen leaves, and other organic waste into your DIY compost bin, you're converting would-be trash into a nutrient-dense fertilizer for your rooftop vegetable garden. This process not only reduces waste but also creates a valuable resource for your plants.
As the materials break down, they release essential micronutrients and macronutrients that promote healthy plant growth and nutrition.
Here are three key benefits of using composted waste as fertilizer:
-
Rich in micronutrients: Compost provides a broad spectrum of micronutrients, including copper, zinc, and boron, which are essential for plant nutrition.
-
Improves soil structure: Compost helps to improve soil aeration, water retention, and drainage, creating a more hospitable environment for root growth.
-
Boosts microbial activity: Compost is teeming with beneficial microorganisms that help to break down organic matter, solubilize minerals, and fight off plant pathogens.
Frequently Asked Questions
Can I Use Homemade Fertilizer on My Indoor Plants Too?
You can definitely use homemade fertilizers on your indoor plants, skipping commercial products with harsh chemicals. Homemade fertilizers provide a natural, nutrient-rich boost, promoting healthy indoor plant care and thriving houseplants that bring you joy and freedom.
How Often Should I Fertilize My Rooftop Vegetable Garden?
You'll want to fertilize your rooftop veggie garden every 1-2 weeks during peak growth, using organic fertilizers that release nutrients slowly, unlike synthetic ones that can burn roots; adjust frequency based on plant type and climate.
Are Homemade Fertilizers Safe for Pets and Children?
When crafting your garden oasis, you'll want to make sure the little ones and furry friends are safe. Rest assured, homemade fertilizers can be a pet- and child-friendly choice, minimizing environmental harm while promoting best nutrient absorption.
Can I Mix Homemade Fertilizers With Commercial Ones?
You're wondering if you can mix homemade fertilizers with commercial ones. While it's possible, be cautious as it may dilute the homemade fertilizer benefits. Mixing fertilizer types can lead to unpredictable results, so it's best to use them separately to maximize their effectiveness.
How Long Does It Take to See Results From Homemade Fertilizers?
"You'll be blown away by the rapid transformation! With homemade fertilizers, you can expect to see astonishing growth in as little as 7-10 days, depending on application frequency and growth expectations - get ready to harvest your bounty!"
Related Posts
-

10 Natural Ways to Clean Your Planters
You can transform your planters from grimy to gleaming with these 10 natural cleaning solutions. Mix baking soda and ...
-

10 Natural Ways to Clean Your Planters
You can transform your planters from grimy to gleaming with these 10 natural cleaning solutions. Mix baking soda and ...
-

10 Natural Ways to Clean Your Planters
You can transform your planters from grimy to gleaming with these 10 natural cleaning solutions. Mix baking soda and ...
-

10 Natural Ways to Clean Your Planters
You can transform your planters from grimy to gleaming with these 10 natural cleaning solutions. Mix baking soda and ...
-

10 Natural Ways to Clean Your Planters
You can transform your planters from grimy to gleaming with these 10 natural cleaning solutions. Mix baking soda and ...
-

10 Natural Ways to Clean Your Planters
You can transform your planters from grimy to gleaming with these 10 natural cleaning solutions. Mix baking soda and ...
-

10 Natural Ways to Clean Your Planters
You can transform your planters from grimy to gleaming with these 10 natural cleaning solutions. Mix baking soda and ...
-

10 Natural Ways to Clean Your Planters
You can transform your planters from grimy to gleaming with these 10 natural cleaning solutions. Mix baking soda and ...
-

10 Natural Ways to Clean Your Planters
You can transform your planters from grimy to gleaming with these 10 natural cleaning solutions. Mix baking soda and ...
-

10 Natural Ways to Clean Your Planters
You can transform your planters from grimy to gleaming with these 10 natural cleaning solutions. Mix baking soda and ...
-

10 Natural Ways to Clean Your Planters
You can transform your planters from grimy to gleaming with these 10 natural cleaning solutions. Mix baking soda and ...
-

10 Natural Ways to Clean Your Planters
You can transform your planters from grimy to gleaming with these 10 natural cleaning solutions. Mix baking soda and ...
-

10 Natural Ways to Clean Your Planters
You can transform your planters from grimy to gleaming with these 10 natural cleaning solutions. Mix baking soda and ...
-

10 Natural Ways to Clean Your Planters
You can transform your planters from grimy to gleaming with these 10 natural cleaning solutions. Mix baking soda and ...
-

10 Natural Ways to Clean Your Planters
You can transform your planters from grimy to gleaming with these 10 natural cleaning solutions. Mix baking soda and ...
-

10 Natural Ways to Clean Your Planters
You can transform your planters from grimy to gleaming with these 10 natural cleaning solutions. Mix baking soda and ...
-

10 Natural Ways to Clean Your Planters
You can transform your planters from grimy to gleaming with these 10 natural cleaning solutions. Mix baking soda and ...
-

10 Natural Ways to Clean Your Planters
You can transform your planters from grimy to gleaming with these 10 natural cleaning solutions. Mix baking soda and ...
-

10 Natural Ways to Clean Your Planters
You can transform your planters from grimy to gleaming with these 10 natural cleaning solutions. Mix baking soda and ...
-

10 Natural Ways to Clean Your Planters
You can transform your planters from grimy to gleaming with these 10 natural cleaning solutions. Mix baking soda and ...
-

10 Natural Ways to Clean Your Planters
You can transform your planters from grimy to gleaming with these 10 natural cleaning solutions. Mix baking soda and ...
-

10 Natural Ways to Clean Your Planters
You can transform your planters from grimy to gleaming with these 10 natural cleaning solutions. Mix baking soda and ...
-

10 Natural Ways to Clean Your Planters
You can transform your planters from grimy to gleaming with these 10 natural cleaning solutions. Mix baking soda and ...
-

10 Natural Ways to Clean Your Planters
You can transform your planters from grimy to gleaming with these 10 natural cleaning solutions. Mix baking soda and ...
-

10 Natural Ways to Clean Your Planters
You can transform your planters from grimy to gleaming with these 10 natural cleaning solutions. Mix baking soda and ...
-

10 Natural Ways to Clean Your Planters
You can transform your planters from grimy to gleaming with these 10 natural cleaning solutions. Mix baking soda and ...
-

10 Natural Ways to Clean Your Planters
You can transform your planters from grimy to gleaming with these 10 natural cleaning solutions. Mix baking soda and ...
-

10 Natural Ways to Clean Your Planters
You can transform your planters from grimy to gleaming with these 10 natural cleaning solutions. Mix baking soda and ...
-

10 Natural Ways to Clean Your Planters
You can transform your planters from grimy to gleaming with these 10 natural cleaning solutions. Mix baking soda and ...
-

10 Natural Ways to Clean Your Planters
You can transform your planters from grimy to gleaming with these 10 natural cleaning solutions. Mix baking soda and ...
-

10 Natural Ways to Clean Your Planters
You can transform your planters from grimy to gleaming with these 10 natural cleaning solutions. Mix baking soda and ...
-

10 Natural Ways to Clean Your Planters
You can transform your planters from grimy to gleaming with these 10 natural cleaning solutions. Mix baking soda and ...
-

10 Natural Ways to Clean Your Planters
You can transform your planters from grimy to gleaming with these 10 natural cleaning solutions. Mix baking soda and ...
-

10 Natural Ways to Clean Your Planters
You can transform your planters from grimy to gleaming with these 10 natural cleaning solutions. Mix baking soda and ...
-

10 Natural Ways to Clean Your Planters
You can transform your planters from grimy to gleaming with these 10 natural cleaning solutions. Mix baking soda and ...
-

Preventing Soil Settlement in DIY Planters
To prevent soil settlement in your DIY planters, you'll want to focus on selecting a well-balanced soil mix with good...
-

Preventing Soil Settlement in DIY Planters
To prevent soil settlement in your DIY planters, you'll want to focus on selecting a well-balanced soil mix with good...
-

Preventing Soil Settlement in DIY Planters
To prevent soil settlement in your DIY planters, you'll want to focus on selecting a well-balanced soil mix with good...
-

Preventing Soil Settlement in DIY Planters
To prevent soil settlement in your DIY planters, you'll want to focus on selecting a well-balanced soil mix with good...
-

Preventing Soil Settlement in DIY Planters
To prevent soil settlement in your DIY planters, you'll want to focus on selecting a well-balanced soil mix with good...
-

Preventing Soil Settlement in DIY Planters
To prevent soil settlement in your DIY planters, you'll want to focus on selecting a well-balanced soil mix with good...
-

Preventing Soil Settlement in DIY Planters
To prevent soil settlement in your DIY planters, you'll want to focus on selecting a well-balanced soil mix with good...
-

Preventing Soil Settlement in DIY Planters
To prevent soil settlement in your DIY planters, you'll want to focus on selecting a well-balanced soil mix with good...
-

Preventing Soil Settlement in DIY Planters
To prevent soil settlement in your DIY planters, you'll want to focus on selecting a well-balanced soil mix with good...
-

Preventing Soil Settlement in DIY Planters
To prevent soil settlement in your DIY planters, you'll want to focus on selecting a well-balanced soil mix with good...
-

Preventing Soil Settlement in DIY Planters
To prevent soil settlement in your DIY planters, you'll want to focus on selecting a well-balanced soil mix with good...
-

Preventing Soil Settlement in DIY Planters
To prevent soil settlement in your DIY planters, you'll want to focus on selecting a well-balanced soil mix with good...
-

Preventing Soil Settlement in DIY Planters
To prevent soil settlement in your DIY planters, you'll want to focus on selecting a well-balanced soil mix with good...
-

Preventing Soil Settlement in DIY Planters
To prevent soil settlement in your DIY planters, you'll want to focus on selecting a well-balanced soil mix with good...
-

Preventing Soil Settlement in DIY Planters
To prevent soil settlement in your DIY planters, you'll want to focus on selecting a well-balanced soil mix with good...
-

Preventing Soil Settlement in DIY Planters
To prevent soil settlement in your DIY planters, you'll want to focus on selecting a well-balanced soil mix with good...
-

Preventing Soil Settlement in DIY Planters
To prevent soil settlement in your DIY planters, you'll want to focus on selecting a well-balanced soil mix with good...
-

Preventing Soil Settlement in DIY Planters
To prevent soil settlement in your DIY planters, you'll want to focus on selecting a well-balanced soil mix with good...
-

Preventing Soil Settlement in DIY Planters
To prevent soil settlement in your DIY planters, you'll want to focus on selecting a well-balanced soil mix with good...
-

Preventing Soil Settlement in DIY Planters
To prevent soil settlement in your DIY planters, you'll want to focus on selecting a well-balanced soil mix with good...
-

Preventing Soil Settlement in DIY Planters
To prevent soil settlement in your DIY planters, you'll want to focus on selecting a well-balanced soil mix with good...
-

Preventing Soil Settlement in DIY Planters
To prevent soil settlement in your DIY planters, you'll want to focus on selecting a well-balanced soil mix with good...
-

Preventing Soil Settlement in DIY Planters
To prevent soil settlement in your DIY planters, you'll want to focus on selecting a well-balanced soil mix with good...
-

Preventing Soil Settlement in DIY Planters
To prevent soil settlement in your DIY planters, you'll want to focus on selecting a well-balanced soil mix with good...
-

Why Invest in Specialized Planter Tools
You'll greatly boost your gardening success and yields by leveraging specialized planter tools that cater to the uniq...
-

Why Invest in Specialized Planter Tools
You'll greatly boost your gardening success and yields by leveraging specialized planter tools that cater to the uniq...
-

Why Invest in Specialized Planter Tools
You'll greatly boost your gardening success and yields by leveraging specialized planter tools that cater to the uniq...
-

Why Invest in Specialized Planter Tools
You'll greatly boost your gardening success and yields by leveraging specialized planter tools that cater to the uniq...
-

Why Invest in Specialized Planter Tools
You'll greatly boost your gardening success and yields by leveraging specialized planter tools that cater to the uniq...
-

Why Invest in Specialized Planter Tools
You'll greatly boost your gardening success and yields by leveraging specialized planter tools that cater to the uniq...
-

Why Invest in Specialized Planter Tools
You'll greatly boost your gardening success and yields by leveraging specialized planter tools that cater to the uniq...
-

Why Invest in Specialized Planter Tools
You'll greatly boost your gardening success and yields by leveraging specialized planter tools that cater to the uniq...
-

Why Invest in Specialized Planter Tools
You'll greatly boost your gardening success and yields by leveraging specialized planter tools that cater to the uniq...
-

Why Invest in Specialized Planter Tools
You'll greatly boost your gardening success and yields by leveraging specialized planter tools that cater to the uniq...
-

Why Invest in Specialized Planter Tools
You'll greatly boost your gardening success and yields by leveraging specialized planter tools that cater to the uniq...
-

Why Invest in Specialized Planter Tools
You'll greatly boost your gardening success and yields by leveraging specialized planter tools that cater to the uniq...
-

Why Invest in Specialized Planter Tools
You'll greatly boost your gardening success and yields by leveraging specialized planter tools that cater to the uniq...
-

Why Invest in Specialized Planter Tools
You'll greatly boost your gardening success and yields by leveraging specialized planter tools that cater to the uniq...
-

Why Invest in Specialized Planter Tools
You'll greatly boost your gardening success and yields by leveraging specialized planter tools that cater to the uniq...
-

Why Invest in Specialized Planter Tools
You'll greatly boost your gardening success and yields by leveraging specialized planter tools that cater to the uniq...
-

Why Invest in Specialized Planter Tools
You'll greatly boost your gardening success and yields by leveraging specialized planter tools that cater to the uniq...
-

Why Invest in Specialized Planter Tools
You'll greatly boost your gardening success and yields by leveraging specialized planter tools that cater to the uniq...
-

Why Invest in Specialized Planter Tools
You'll greatly boost your gardening success and yields by leveraging specialized planter tools that cater to the uniq...
-

Why Invest in Specialized Planter Tools
You'll greatly boost your gardening success and yields by leveraging specialized planter tools that cater to the uniq...
-

Why Invest in Specialized Planter Tools
You'll greatly boost your gardening success and yields by leveraging specialized planter tools that cater to the uniq...
-

Why Invest in Specialized Planter Tools
You'll greatly boost your gardening success and yields by leveraging specialized planter tools that cater to the uniq...
-

Why Invest in Specialized Planter Tools
You'll greatly boost your gardening success and yields by leveraging specialized planter tools that cater to the uniq...
-

Why Invest in Specialized Planter Tools
You'll greatly boost your gardening success and yields by leveraging specialized planter tools that cater to the uniq...
-

Why Invest in Specialized Planter Tools
You'll greatly boost your gardening success and yields by leveraging specialized planter tools that cater to the uniq...


