3 Budget-Friendly Tips for DIY Planter Construction
When building a DIY planter, you'll want to allocate 50-70% of your budget for high-quality concrete blocks that fit your design style, whether it's modern, rustic, or a mix. To save on materials, repurpose items like old pallets, crates, or plastic bottles to create unique planters with a whimsical touch. Additionally, choose cost-effective cinder blocks with a smooth texture and consistent color tone that complement your surroundings. By making these smart choices, you'll not only stay within your budget but also create a stunning planter that showcases your personal style - and that's just the starting point for your DIY project.
Key Takeaways
• Allocate 50-70% of the budget for concrete blocks, considering size and quality, to ensure a sturdy planter base.
• Repurpose existing materials like old pallets, crates, and boxes to create unique planters and reduce waste.
• Choose cost-effective cinder blocks with a smooth texture and consistent color tone to save on material costs.
• Factor in costs for sand, gravel, or base materials to ensure stability and drainage in the planter.
• Upcycle containers like plastic bottles, tin cans, and reclaimed wood to add whimsical elements to the garden.
DIY Block Project Budget Breakdown
As you begin planning your DIY block project, allocate approximately 50-70% of your budget to the concrete blocks themselves, depending on the size and quality you choose. This will give you the foundation for your planter's structure and aesthetic.
Next, consider the block planter styles you want to achieve – modern, rustic, or a mix of both. This will influence your block selection and overall design.
You'll also need to budget for construction tools, such as a level, trowel, and joint chisel, which will assist in precise block placement and finishing touches. Don't forget to factor in the cost of sand, gravel, or other base materials that provide stability and drainage for your planter.
A well-thought-out budget breakdown will guarantee you're prepared for each stage of your DIY project. By allocating your resources wisely, you'll be able to bring your unique block planter vision to life.
With a clear plan and the right materials, you'll be on your way to creating a stunning and functional outdoor feature that showcases your creativity.
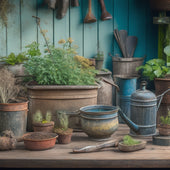
Cost-Effective Cinder Block Selection
When selecting cinder blocks for your DIY planter, you'll want to prioritize blocks with a smooth, even texture and a consistent color tone to guarantee a visually appealing structure.
Cinder blocks come in various types, including face blocks, utility blocks, and split-face blocks, each with its unique characteristics. Face blocks, with their smooth surface, are ideal for visible areas, while utility blocks are better suited for structural support. Split-face blocks offer a rustic, textured look, perfect for adding depth to your design.
Aesthetic considerations play a significant role in cinder block selection. Consider the color palette you want to achieve and choose blocks that complement it. You can opt for a uniform color tone or mix and match different shades for a unique, eye-catching effect.
Additionally, think about the block's texture and how it will interact with the surrounding environment. By choosing the right cinder block type and considering aesthetic factors, you'll create a stunning DIY planter that not only adds functionality but also becomes a focal point in your outdoor space.
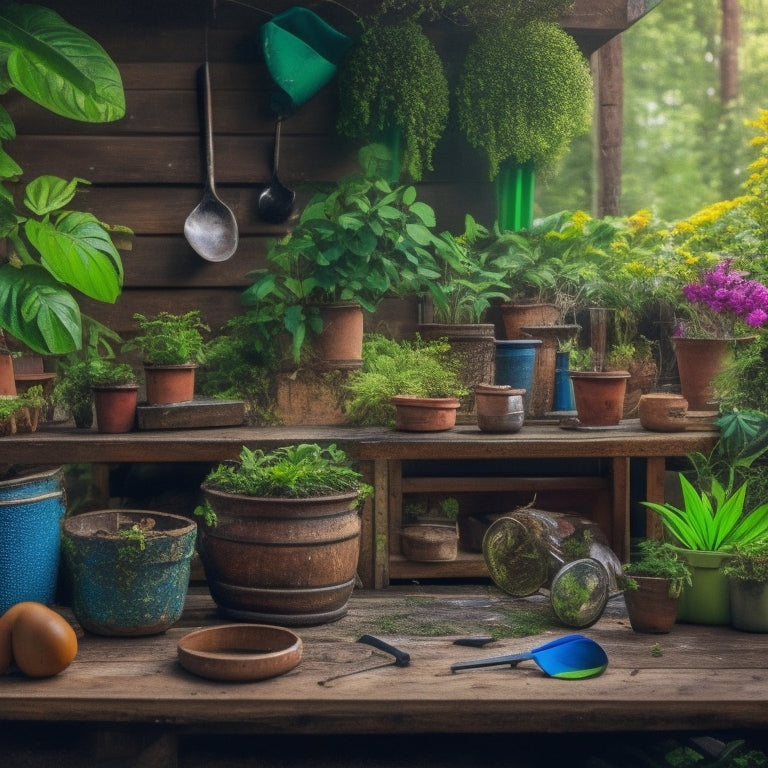
Repurposing Materials for Savings
You can maximize your DIY planter's budget by repurposing materials you already have on hand, giving new life to items that would otherwise be discarded.
Think beyond traditional planters and explore your home for hidden gems. Old pallets, crates, and boxes can be transformed into unique planters with a little creativity. Upcycled containers, like plastic bottles or tin cans, can add a whimsical touch to your garden. Even broken pottery or ceramic fragments can be repurposed as decorative accents.
When it comes to building the planter's structure, consider using reclaimed wood instead of new lumber. Reclaimed wood adds a rustic charm and can be sourced from old fencing, decking, or even shipping pallets.
You can also repurpose old bricks, stones, or concrete blocks to create a one-of-a-kind planter. By repurposing materials, you'll not only save money but also reduce waste and create a truly unique planter that reflects your personal style.
Frequently Asked Questions
Can I Use DIY Planters for Indoor or Outdoor Spaces?
As you dip your toes into the world of DIY planters, you're probably wondering: can I use them for indoor or outdoor spaces?
The answer is a resounding yes! You can bring the outdoors in by incorporating DIY planters into your indoor aesthetics, adding a touch of greenery to your living room or kitchen.
Conversely, you can take your planters outside, leveraging their outdoor versatility to create a lush oasis on your patio or deck.
Do I Need Special Tools for Planter Construction?
When constructing a planter, you'll likely need some essential materials, but don't worry, you won't need a fancy toolkit.
You can often find tool alternatives that'll get the job done. For instance, use a hammer instead of a mallet, or a screwdriver instead of a drill.
With a little creativity, you can repurpose items you already have on hand.
Focus on gathering the necessary materials, like wood, soil, and plants, and get ready to release your inner DIY designer!
How Do I Prevent Planters From Cracking or Breaking?
As you envision your lush oasis, don't let cracks and breaks shatter your dreams.
To prevent planter catastrophes, you'll want to choose durable materials that can withstand the whims of weather conditions.
Opt for weather-resistant materials like ceramic, concrete, or recycled plastic, which can brave the elements.
Avoid porous materials that absorb moisture, like terra cotta, and instead, seal them with a waterproof coating to guarantee your planter remains intact and your plants thrive.
Are DIY Planters Suitable for Large or Heavy Plants?
When considering DIY planters for large or heavy plants, you'll want to think about plant weight considerations. Will your planter support the mature weight of the plant, plus soil and water?
Look for sturdy materials and designs that distribute weight evenly.
Don't forget soil drainage solutions, like built-in reservoirs or mesh liners, to prevent waterlogged soil and root rot.
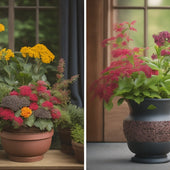
Can I Customize Planters With Different Shapes or Colors?
Imagine walking through a vibrant art gallery, where each piece is a reflection of the artist's personality.
That's exactly what you can create with your planters! You can customize them with different shapes or colors to reflect your unique style.
Think beyond traditional rectangular planters and explore unique designs, like geometric shapes or abstract forms.
With a wide range of color palettes to choose from, you can create a stunning visual display that's truly one-of-a-kind.
Conclusion
As you step back to admire your handiwork, your DIY planter takes shape, a masterpiece born from scraps and creativity.
Like a puzzle, each block and material falls into place, a proof of your resourcefulness.
Your wallet smiles, too, knowing you've saved big without sacrificing style.
With these budget-friendly tips, you've turned a bland space into a vibrant oasis, proving that beauty doesn't have to break the bank.
Related Posts
-
10 Essential Soil Tips for DIY Planters
You can greatly improve your DIY planter's chances of success by understanding and implementing the essential soil ti...
-
10 Essential Soil Tips for DIY Planters
You can greatly improve your DIY planter's chances of success by understanding and implementing the essential soil ti...
-
10 Essential Soil Tips for DIY Planters
You can greatly improve your DIY planter's chances of success by understanding and implementing the essential soil ti...
-
10 Essential Soil Tips for DIY Planters
You can greatly improve your DIY planter's chances of success by understanding and implementing the essential soil ti...
-
10 Essential Soil Tips for DIY Planters
You can greatly improve your DIY planter's chances of success by understanding and implementing the essential soil ti...
-
10 Essential Soil Tips for DIY Planters
You can greatly improve your DIY planter's chances of success by understanding and implementing the essential soil ti...
-
10 Essential Soil Tips for DIY Planters
You can greatly improve your DIY planter's chances of success by understanding and implementing the essential soil ti...
-
10 Essential Soil Tips for DIY Planters
You can greatly improve your DIY planter's chances of success by understanding and implementing the essential soil ti...
-
10 Essential Soil Tips for DIY Planters
You can greatly improve your DIY planter's chances of success by understanding and implementing the essential soil ti...
-
10 Essential Soil Tips for DIY Planters
You can greatly improve your DIY planter's chances of success by understanding and implementing the essential soil ti...
-
10 Essential Soil Tips for DIY Planters
You can greatly improve your DIY planter's chances of success by understanding and implementing the essential soil ti...
-
10 Essential Soil Tips for DIY Planters
You can greatly improve your DIY planter's chances of success by understanding and implementing the essential soil ti...
-
10 Essential Soil Tips for DIY Planters
You can greatly improve your DIY planter's chances of success by understanding and implementing the essential soil ti...
-
10 Essential Soil Tips for DIY Planters
You can greatly improve your DIY planter's chances of success by understanding and implementing the essential soil ti...
-
10 Essential Soil Tips for DIY Planters
You can greatly improve your DIY planter's chances of success by understanding and implementing the essential soil ti...
-
10 Essential Soil Tips for DIY Planters
You can greatly improve your DIY planter's chances of success by understanding and implementing the essential soil ti...
-
10 Essential Soil Tips for DIY Planters
You can greatly improve your DIY planter's chances of success by understanding and implementing the essential soil ti...
-
10 Essential Soil Tips for DIY Planters
You can greatly improve your DIY planter's chances of success by understanding and implementing the essential soil ti...
-
10 Essential Soil Tips for DIY Planters
You can greatly improve your DIY planter's chances of success by understanding and implementing the essential soil ti...
-
10 Essential Soil Tips for DIY Planters
You can greatly improve your DIY planter's chances of success by understanding and implementing the essential soil ti...
-
10 Essential Soil Tips for DIY Planters
You can greatly improve your DIY planter's chances of success by understanding and implementing the essential soil ti...
-
10 Essential Soil Tips for DIY Planters
You can greatly improve your DIY planter's chances of success by understanding and implementing the essential soil ti...
-
10 Essential Soil Tips for DIY Planters
You can greatly improve your DIY planter's chances of success by understanding and implementing the essential soil ti...
-
10 Essential Soil Tips for DIY Planters
You can greatly improve your DIY planter's chances of success by understanding and implementing the essential soil ti...
-
10 Essential Soil Tips for DIY Planters
You can greatly improve your DIY planter's chances of success by understanding and implementing the essential soil ti...
-
10 Essential Soil Tips for DIY Planters
You can greatly improve your DIY planter's chances of success by understanding and implementing the essential soil ti...
-
10 Essential Soil Tips for DIY Planters
You can greatly improve your DIY planter's chances of success by understanding and implementing the essential soil ti...
-
10 Essential Soil Tips for DIY Planters
You can greatly improve your DIY planter's chances of success by understanding and implementing the essential soil ti...
-
10 Essential Soil Tips for DIY Planters
You can greatly improve your DIY planter's chances of success by understanding and implementing the essential soil ti...
-
10 Essential Soil Tips for DIY Planters
You can greatly improve your DIY planter's chances of success by understanding and implementing the essential soil ti...
-
10 Essential Soil Tips for DIY Planters
You can greatly improve your DIY planter's chances of success by understanding and implementing the essential soil ti...
-
10 Essential Soil Tips for DIY Planters
You can greatly improve your DIY planter's chances of success by understanding and implementing the essential soil ti...
-
10 Essential Soil Tips for DIY Planters
You can greatly improve your DIY planter's chances of success by understanding and implementing the essential soil ti...
-
10 Essential Soil Tips for DIY Planters
You can greatly improve your DIY planter's chances of success by understanding and implementing the essential soil ti...
-
10 Essential Soil Tips for DIY Planters
You can greatly improve your DIY planter's chances of success by understanding and implementing the essential soil ti...
-
10 Essential Soil Tips for DIY Planters
You can greatly improve your DIY planter's chances of success by understanding and implementing the essential soil ti...
-
10 Essential Soil Tips for DIY Planters
You can greatly improve your DIY planter's chances of success by understanding and implementing the essential soil ti...
-
How Much Do Concrete Planters Weigh
When creating a concrete planter, you'll need to take into account the weight implications of your design. The type a...
-
How Much Do Concrete Planters Weigh
When creating a concrete planter, you'll need to take into account the weight implications of your design. The type a...
-
How Much Do Concrete Planters Weigh
When creating a concrete planter, you'll need to take into account the weight implications of your design. The type a...
-
How Much Do Concrete Planters Weigh
When creating a concrete planter, you'll need to take into account the weight implications of your design. The type a...
-
How Much Do Concrete Planters Weigh
When creating a concrete planter, you'll need to take into account the weight implications of your design. The type a...
-
How Much Do Concrete Planters Weigh
When creating a concrete planter, you'll need to take into account the weight implications of your design. The type a...
-
How Much Do Concrete Planters Weigh
When creating a concrete planter, you'll need to take into account the weight implications of your design. The type a...
-
How Much Do Concrete Planters Weigh
When creating a concrete planter, you'll need to take into account the weight implications of your design. The type a...
-
How Much Do Concrete Planters Weigh
When creating a concrete planter, you'll need to take into account the weight implications of your design. The type a...
-
How Much Do Concrete Planters Weigh
When creating a concrete planter, you'll need to take into account the weight implications of your design. The type a...
-
How Much Do Concrete Planters Weigh
When creating a concrete planter, you'll need to take into account the weight implications of your design. The type a...
-
How Much Do Concrete Planters Weigh
When creating a concrete planter, you'll need to take into account the weight implications of your design. The type a...
-
How Much Do Concrete Planters Weigh
When creating a concrete planter, you'll need to take into account the weight implications of your design. The type a...
-
How Much Do Concrete Planters Weigh
When creating a concrete planter, you'll need to take into account the weight implications of your design. The type a...
-
How Much Do Concrete Planters Weigh
When creating a concrete planter, you'll need to take into account the weight implications of your design. The type a...
-
How Much Do Concrete Planters Weigh
When creating a concrete planter, you'll need to take into account the weight implications of your design. The type a...
-
How Much Do Concrete Planters Weigh
When creating a concrete planter, you'll need to take into account the weight implications of your design. The type a...
-
How Much Do Concrete Planters Weigh
When creating a concrete planter, you'll need to take into account the weight implications of your design. The type a...
-
How Much Do Concrete Planters Weigh
When creating a concrete planter, you'll need to take into account the weight implications of your design. The type a...
-
How Much Do Concrete Planters Weigh
When creating a concrete planter, you'll need to take into account the weight implications of your design. The type a...
-
How Much Do Concrete Planters Weigh
When creating a concrete planter, you'll need to take into account the weight implications of your design. The type a...
-
How Much Do Concrete Planters Weigh
When creating a concrete planter, you'll need to take into account the weight implications of your design. The type a...
-
How Much Do Concrete Planters Weigh
When creating a concrete planter, you'll need to take into account the weight implications of your design. The type a...
-
How Much Do Concrete Planters Weigh
When creating a concrete planter, you'll need to take into account the weight implications of your design. The type a...
-
How Much Do Concrete Planters Weigh
When creating a concrete planter, you'll need to take into account the weight implications of your design. The type a...
-
How Much Do Concrete Planters Weigh
When creating a concrete planter, you'll need to take into account the weight implications of your design. The type a...
-
How Much Do Concrete Planters Weigh
When creating a concrete planter, you'll need to take into account the weight implications of your design. The type a...
-
How Much Do Concrete Planters Weigh
When creating a concrete planter, you'll need to take into account the weight implications of your design. The type a...
-
How Much Do Concrete Planters Weigh
When creating a concrete planter, you'll need to take into account the weight implications of your design. The type a...
-
Inspect and Revive Second-Hand Tools for Planters
When inspecting and reviving second-hand tools for planters, prioritize tools with sturdy builds and functional parts...
-
Inspect and Revive Second-Hand Tools for Planters
When inspecting and reviving second-hand tools for planters, prioritize tools with sturdy builds and functional parts...
-
Inspect and Revive Second-Hand Tools for Planters
When inspecting and reviving second-hand tools for planters, prioritize tools with sturdy builds and functional parts...
-
Inspect and Revive Second-Hand Tools for Planters
When inspecting and reviving second-hand tools for planters, prioritize tools with sturdy builds and functional parts...
-
Inspect and Revive Second-Hand Tools for Planters
When inspecting and reviving second-hand tools for planters, prioritize tools with sturdy builds and functional parts...
-
Inspect and Revive Second-Hand Tools for Planters
When inspecting and reviving second-hand tools for planters, prioritize tools with sturdy builds and functional parts...
-
Inspect and Revive Second-Hand Tools for Planters
When inspecting and reviving second-hand tools for planters, prioritize tools with sturdy builds and functional parts...
-
Inspect and Revive Second-Hand Tools for Planters
When inspecting and reviving second-hand tools for planters, prioritize tools with sturdy builds and functional parts...
-
Inspect and Revive Second-Hand Tools for Planters
When inspecting and reviving second-hand tools for planters, prioritize tools with sturdy builds and functional parts...
-
Inspect and Revive Second-Hand Tools for Planters
When inspecting and reviving second-hand tools for planters, prioritize tools with sturdy builds and functional parts...
-
Inspect and Revive Second-Hand Tools for Planters
When inspecting and reviving second-hand tools for planters, prioritize tools with sturdy builds and functional parts...
-
Inspect and Revive Second-Hand Tools for Planters
When inspecting and reviving second-hand tools for planters, prioritize tools with sturdy builds and functional parts...
-
Inspect and Revive Second-Hand Tools for Planters
When inspecting and reviving second-hand tools for planters, prioritize tools with sturdy builds and functional parts...
-
Inspect and Revive Second-Hand Tools for Planters
When inspecting and reviving second-hand tools for planters, prioritize tools with sturdy builds and functional parts...
-
Inspect and Revive Second-Hand Tools for Planters
When inspecting and reviving second-hand tools for planters, prioritize tools with sturdy builds and functional parts...
-
Inspect and Revive Second-Hand Tools for Planters
When inspecting and reviving second-hand tools for planters, prioritize tools with sturdy builds and functional parts...
-
Inspect and Revive Second-Hand Tools for Planters
When inspecting and reviving second-hand tools for planters, prioritize tools with sturdy builds and functional parts...
-
Inspect and Revive Second-Hand Tools for Planters
When inspecting and reviving second-hand tools for planters, prioritize tools with sturdy builds and functional parts...
-
Inspect and Revive Second-Hand Tools for Planters
When inspecting and reviving second-hand tools for planters, prioritize tools with sturdy builds and functional parts...
-
Inspect and Revive Second-Hand Tools for Planters
When inspecting and reviving second-hand tools for planters, prioritize tools with sturdy builds and functional parts...
-
Inspect and Revive Second-Hand Tools for Planters
When inspecting and reviving second-hand tools for planters, prioritize tools with sturdy builds and functional parts...
-
Inspect and Revive Second-Hand Tools for Planters
When inspecting and reviving second-hand tools for planters, prioritize tools with sturdy builds and functional parts...
-
Inspect and Revive Second-Hand Tools for Planters
When inspecting and reviving second-hand tools for planters, prioritize tools with sturdy builds and functional parts...
-
Inspect and Revive Second-Hand Tools for Planters
When inspecting and reviving second-hand tools for planters, prioritize tools with sturdy builds and functional parts...
-
Inspect and Revive Second-Hand Tools for Planters
When inspecting and reviving second-hand tools for planters, prioritize tools with sturdy builds and functional parts...
-
Inspect and Revive Second-Hand Tools for Planters
When inspecting and reviving second-hand tools for planters, prioritize tools with sturdy builds and functional parts...


