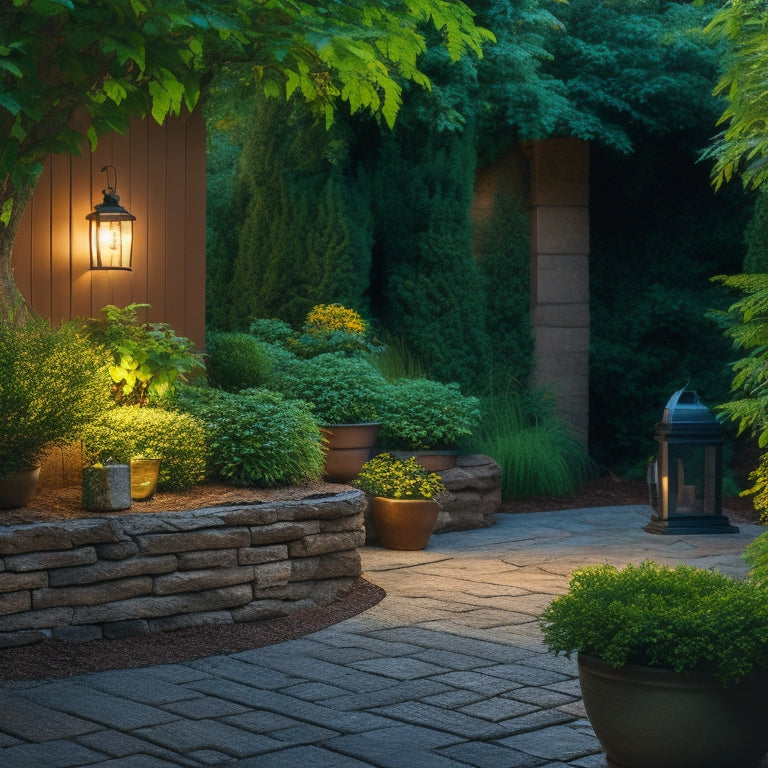
Why You Need a Cinder Block Planter Wall Guide
When building a cinder block planter wall, accuracy is key to avoiding costly mistakes and ensuring a structurally sound, visually appealing final product. You'll need to calculate the correct quantity of blocks, considering dimensions, wall height, and design complexity. Factors like block size, mortar joints, and drainage requirements will impact your calculations. Without a thorough guide, it's easy to miscalculate soil and gravel needs or overlook essential design elements. By following a detailed guide, you'll be able to visualize your project, make informed decisions, and bring your design to life - and with the right approach, you'll reveal the full potential of your cinder block planter wall.
Key Takeaways
• A cinder block planter wall guide helps ensure accurate calculations, avoiding costly mistakes and material waste.
• It provides a comprehensive understanding of block quantity, dimensions, and layout patterns for a successful build.
• A guide helps in considering factors like drainage, aesthetic enhancements, and structural integrity to create a durable wall.
• It offers a systematic approach to planning, preparing, and executing the construction process, reducing intimidation and improving focus.
• By following a guide, you can create a beautiful and functional planter wall that meets your outdoor decor and personal style.
Understanding Cinder Block Quantity
To determine how many cinder blocks you'll need for your planter wall, start by calculating the total square footage of your wall area.
Measure the length and width of your wall in feet, and multiply them together to get the total square footage. For example, a wall that's 10 feet long and 3 feet wide would have a total square footage of 30 square feet.
Next, consider the type of cinder block you'll be using. Standard blocks are typically 8 inches by 8 inches by 16 inches, but you may want to use half-blocks or quarter-blocks for a more intricate design.
Calculate how many blocks you'll need based on the square footage of your wall and the size of your blocks.
Calculating Wall Dimensions Accurately
When calculating your cinder block planter wall's dimensions, you'll need to contemplate three critical points: wall height, block count estimates, and layout pattern options.
You'll want to carefully measure your space to determine the ideal wall height, ensuring it fits your planters and complements the surrounding area.
Wall Height Considerations
You'll need to calculate the wall height carefully, taking into account the block size, mortar joints, and any additional features like capstones or decorative elements, to guarantee your cinder block planter wall is both sturdy and visually appealing.
To do this, start by determining the total height you want your wall to be, then subtract the thickness of the capstone or top course of blocks.
Next, calculate the total height of the blocks themselves, taking into account the size and number of courses you'll need.
Don't forget to factor in the mortar joints, which typically add about 3/8 inch per course.
Consider incorporating drainage solutions, such as a slight incline or weep holes, to ensure water doesn't accumulate behind the wall.
Aesthetic enhancements, like alternating block patterns or colored mortar, can also impact the overall height.
Block Count Estimates
Accurate block count estimates hinge on precise calculations of your wall's dimensions, which involve measuring its length, width, and height in blocks.
To do this, you'll need to convert your wall's measurements from feet to blocks. A standard cinder block is 8 inches long, 8 inches wide, and 16 inches tall, so you'll need to divide your wall's length, width, and height by these dimensions to get the total number of blocks needed. For example, if your wall is 10 feet long, you'll need 15 blocks (10 feet x 12 inches/foot ÷ 8 inches/block).
When calculating your block count, consider the wall aesthetics you want to achieve. Will you be creating a staggered pattern or a straight wall? This will impact the number of blocks you need.
Additionally, think about your planting tips – will you be using a single layer of plants or multiple layers? This will also affect your block count.
Layout Pattern Options
Determine the layout pattern for your cinder block planter wall by deciding on a staggered or straight design, as this will greatly impact the overall dimensions and block count.
A staggered design, where each course is offset by half a block, adds visual interest and creates a more dynamic look. It also provides better structural integrity and allows for easier drainage solutions.
On the other hand, a straight design creates a clean, linear look that's perfect for modern design aesthetics.
When calculating wall dimensions, consider the block size and the desired wall height. For a staggered design, you'll need to account for the offset blocks, which will affect the overall width of the wall.
Use a level and string line to guarantee accurate course alignment and levelness. Take into account the thickness of the blocks, mortar, and any additional materials like capstones or edging.
Remember to calculate the total block count, including corner blocks and any cut blocks needed for the design.
With a clear understanding of your layout pattern, you'll be able to accurately plan and execute your cinder block planter wall, achieving a beautiful and functional design that meets your needs.
Factors Affecting Block Requirements
The number of cinder blocks required for your planter wall project depends on several key factors, including the wall's dimensions, block size, and desired design complexity.
As you plan your project, consider the following key considerations that will impact your block requirements:
-
Wall dimensions: The length, width, and height of your wall will directly affect the number of blocks you need. Be sure to account for any corners, curves, or other design features that may require additional blocks.
-
Block size: The size of your cinder blocks will also impact your overall block requirements. Larger blocks may cover more surface area, but may be heavier and more difficult to work with.
-
Design complexity: The complexity of your design, including features like drainage solutions, plant selection, and decorative elements, will also influence your block requirements. More intricate designs may require more blocks to achieve the desired look.
Measuring Soil and Gravel Needs
You'll need to calculate the volume of soil and gravel required for your planter wall, considering the wall's dimensions and the depth of the planting area. To do this, multiply the length, width, and height of the wall to get the total volume in cubic feet. Then, subtract the volume of the cinder blocks and any other obstructions to get the total volume of the planting area.
When selecting soil types, consider the specific needs of the plants you'll be using. Will they thrive in well-draining soil or require more moisture? You may need to incorporate drainage solutions, such as perlite or vermiculite, to guarantee healthy root growth.
For the gravel layer, aim for a depth of 2-3 inches to facilitate drainage and prevent waterlogged soil.
Remember to account for the compaction of the soil and gravel as you fill the planter wall. You may need to add 10-15% to your calculations to guarantee you have enough material.
Choosing the Right Block Size
With your planter wall's dimensions in mind, select a block size that allows for efficient stacking and adequate structural integrity. You want to ascertain that your blocks fit together seamlessly, with minimal cutting and waste. A standard block size of 8x8x16 inches is a good starting point, but you may need to adjust based on your specific design.
When choosing the right block size, consider the following factors:
-
Block textures: Do you prefer a smooth, sleek finish or a more rustic, split-face texture? Different textures can affect the overall aesthetic of your planter wall.
-
Color options: Cinder blocks come in a range of colors, from neutral grays and beiges to bold reds and oranges. Select a color that complements your outdoor decor and personal style.
-
Stacking pattern: Will you use a running bond pattern, where each block overlaps the one below it, or a stack bond pattern, where blocks are stacked directly on top of each other? Your block size will influence your stacking pattern.
Avoiding Common Calculation Mistakes
As you prepare to build your cinder block planter wall, you'll need to crunch some numbers to get it just right.
You'll want to double-check your measurements to avoid costly mistakes, ensuring you have the correct block count and arrangement.
Measure Twice, Calculate Once
Accurate calculations rely on precise measurements, so take the time to double-check your numbers to avoid costly mistakes.
When building a cinder block planter wall, it's essential to guarantee your calculations are spot on to achieve the desired design aesthetics. A small miscalculation can lead to a wall that's uneven, unstable, or worse, collapses.
To avoid common calculation mistakes, remember:
-
Account for block size and spacing: Make sure to include the size of the blocks and the gaps between them in your calculations to get an accurate total count.
-
Consider the wall's height and width: Don't forget to calculate the total number of blocks needed for each course (layer) and the total number of courses required to reach the desired height.
-
Factor in corner blocks and caps: Remember to include the number of corner blocks and cap blocks needed to complete the wall, as these can add up quickly.
Accurate Block Count Matters
You'll need to tabulate the exact number of blocks required for your cinder block planter wall, considering the calculations you've made so far, to guarantee you have enough materials before construction begins. A single misstep in your calculations can lead to a shortage of blocks, affecting the overall block aesthetics of your planter wall.
To avoid this, create a detailed block count table, like the one below, to keep track of your calculations:
| Layer | Blocks per Layer | Total Blocks |
|---|---|---|
| Base Layer | 10 | 10 |
| Middle Layer | 8 | 18 |
| Top Layer | 6 | 24 |
| Cap Layer | 4 | 28 |
When calculating the number of blocks needed, remember to account for drainage solutions, such as leaving space for weep holes or using drainage blocks. These details may seem minor, but they can greatly impact the overall structure and functionality of your planter wall.
Simplifying the Building Process
By breaking down the construction process into manageable tasks, you can tackle each component of your cinder block planter wall individually, making the overall project feel less intimidating. This approach allows you to focus on specific aspects of the build, guaranteeing that each element is executed with precision and care.
To simplify the building process, consider the following key factors:
Design Aesthetics: Plan the layout and design of your planter wall before starting construction. This will help you visualize the final product and make adjustments as needed to achieve the desired look.
Drainage Solutions: Ensure proper water drainage by incorporating a drainage system, such as a French drain or a layer of gravel, to prevent waterlogged soil and erosion.
Material Preparation: Prepare all necessary materials, including cinder blocks, sand, and mortar, before starting construction to avoid delays and guarantee a smooth build process.
Frequently Asked Questions
Can I Use Old or Recycled Cinder Blocks for My Planter Wall?
When building your planter wall, you're wondering if you can use old or recycled cinder blocks.
You can, but consider the cinder block durability. Recycled materials may be weakened, affecting your wall's structural integrity.
Inspect the blocks for cracks, crumbling, or excessive wear. If they're still sturdy, they'll work fine.
Just make sure they're clean and dry before construction to prevent moisture issues.
How Do I Prepare the Ground Before Building My Cinder Block Wall?
Before building your cinder block wall, you'll need to prepare the ground.
Start by ensuring the area is level; use a transit level or laser level to check the ground's elevation.
Next, consider drainage - you don't want water accumulating behind your wall. Create a slight slope (about 1-2%) to direct water away from the wall.
Remove any debris, vegetation, or obstructions, and compact the soil to create a solid base for your wall.
Are Cinder Block Planter Walls Suitable for All Types of Plants?
You'll be tempted to think cinder block planter walls are a free-for-all for any plant, but think again! Not all plants are created equal, and some demand more TLC than others.
When selecting plants, consider their root depth and growth habits to guarantee a harmonious coexistence. For instance, plants with deep taproots require more soil depth, while sprawling vines need ample support.
Choose wisely, and your cinder block planter wall will thrive!
Can I Build a Cinder Block Planter Wall on a Slope?
When building a cinder block planter wall on a slope, you'll need to prioritize slope drainage and retaining soil.
Start by evaluating the slope's gradient and determining the wall's height.
You'll want to guarantee the base of the wall is level and secure, using a compacted gravel base and reinforced footing.
Then, stagger the blocks to create a stepped design, allowing water to flow freely and preventing soil erosion.
Do I Need to Seal My Cinder Block Planter Wall to Protect It From the Weather?
Will your cinder block planter wall be able to withstand the fury of Mother Nature?
To protect it from the weather, you'll want to seal it. Unsealed cinder blocks can absorb water, leading to moisture retention and potential damage.
Conclusion
You've finally nailed down your cinder block planter wall design, and it's time to bring it to life.
Now that you've got a solid understanding of the materials and calculations involved, you can stop scratching your head and start building.
With a clear plan in hand, you can 'hammer out' the details and create a stunning outdoor feature that'll be the envy of the neighborhood.
By following this guide, you'll be well on your way to a beautiful, functional, and structurally sound planter wall that'll thrive for years to come.
Related Posts
-
Irrigation Solutions for Raised Bed Planters Made Easy
You can optimize your raised bed planters' irrigation system by understanding the complex interplay between soil type...
-
Irrigation Solutions for Raised Bed Planters Made Easy
You can optimize your raised bed planters' irrigation system by understanding the complex interplay between soil type...
-
Irrigation Solutions for Raised Bed Planters Made Easy
You can optimize your raised bed planters' irrigation system by understanding the complex interplay between soil type...
-
Irrigation Solutions for Raised Bed Planters Made Easy
You can optimize your raised bed planters' irrigation system by understanding the complex interplay between soil type...
-
Irrigation Solutions for Raised Bed Planters Made Easy
You can optimize your raised bed planters' irrigation system by understanding the complex interplay between soil type...
-
Irrigation Solutions for Raised Bed Planters Made Easy
You can optimize your raised bed planters' irrigation system by understanding the complex interplay between soil type...
-
Irrigation Solutions for Raised Bed Planters Made Easy
You can optimize your raised bed planters' irrigation system by understanding the complex interplay between soil type...
-
Irrigation Solutions for Raised Bed Planters Made Easy
You can optimize your raised bed planters' irrigation system by understanding the complex interplay between soil type...
-
Irrigation Solutions for Raised Bed Planters Made Easy
You can optimize your raised bed planters' irrigation system by understanding the complex interplay between soil type...
-
Irrigation Solutions for Raised Bed Planters Made Easy
You can optimize your raised bed planters' irrigation system by understanding the complex interplay between soil type...
-
Irrigation Solutions for Raised Bed Planters Made Easy
You can optimize your raised bed planters' irrigation system by understanding the complex interplay between soil type...
-
Irrigation Solutions for Raised Bed Planters Made Easy
You can optimize your raised bed planters' irrigation system by understanding the complex interplay between soil type...
-
Irrigation Solutions for Raised Bed Planters Made Easy
You can optimize your raised bed planters' irrigation system by understanding the complex interplay between soil type...
-
Irrigation Solutions for Raised Bed Planters Made Easy
You can optimize your raised bed planters' irrigation system by understanding the complex interplay between soil type...
-
Irrigation Solutions for Raised Bed Planters Made Easy
You can optimize your raised bed planters' irrigation system by understanding the complex interplay between soil type...
-
Irrigation Solutions for Raised Bed Planters Made Easy
You can optimize your raised bed planters' irrigation system by understanding the complex interplay between soil type...
-
Irrigation Solutions for Raised Bed Planters Made Easy
You can optimize your raised bed planters' irrigation system by understanding the complex interplay between soil type...
-
Irrigation Solutions for Raised Bed Planters Made Easy
You can optimize your raised bed planters' irrigation system by understanding the complex interplay between soil type...
-
Irrigation Solutions for Raised Bed Planters Made Easy
You can optimize your raised bed planters' irrigation system by understanding the complex interplay between soil type...
-
Irrigation Solutions for Raised Bed Planters Made Easy
You can optimize your raised bed planters' irrigation system by understanding the complex interplay between soil type...
-
Irrigation Solutions for Raised Bed Planters Made Easy
You can optimize your raised bed planters' irrigation system by understanding the complex interplay between soil type...
-
Irrigation Solutions for Raised Bed Planters Made Easy
You can optimize your raised bed planters' irrigation system by understanding the complex interplay between soil type...
-
Irrigation Solutions for Raised Bed Planters Made Easy
You can optimize your raised bed planters' irrigation system by understanding the complex interplay between soil type...
-
Irrigation Solutions for Raised Bed Planters Made Easy
You can optimize your raised bed planters' irrigation system by understanding the complex interplay between soil type...
-
Irrigation Solutions for Raised Bed Planters Made Easy
You can optimize your raised bed planters' irrigation system by understanding the complex interplay between soil type...
-
Irrigation Solutions for Raised Bed Planters Made Easy
You can optimize your raised bed planters' irrigation system by understanding the complex interplay between soil type...
-
Irrigation Solutions for Raised Bed Planters Made Easy
You can optimize your raised bed planters' irrigation system by understanding the complex interplay between soil type...
-
Irrigation Solutions for Raised Bed Planters Made Easy
You can optimize your raised bed planters' irrigation system by understanding the complex interplay between soil type...
-
3 Best Space-Saving Gardening Ideas for Urban Renters
You can turn even the smallest urban space into a lush oasis by utilizing clever space-saving gardening ideas. Maximi...
-
3 Best Space-Saving Gardening Ideas for Urban Renters
You can turn even the smallest urban space into a lush oasis by utilizing clever space-saving gardening ideas. Maximi...
-
3 Best Space-Saving Gardening Ideas for Urban Renters
You can turn even the smallest urban space into a lush oasis by utilizing clever space-saving gardening ideas. Maximi...
-
3 Best Space-Saving Gardening Ideas for Urban Renters
You can turn even the smallest urban space into a lush oasis by utilizing clever space-saving gardening ideas. Maximi...
-
3 Best Space-Saving Gardening Ideas for Urban Renters
You can turn even the smallest urban space into a lush oasis by utilizing clever space-saving gardening ideas. Maximi...
-
3 Best Space-Saving Gardening Ideas for Urban Renters
You can turn even the smallest urban space into a lush oasis by utilizing clever space-saving gardening ideas. Maximi...
-
3 Best Space-Saving Gardening Ideas for Urban Renters
You can turn even the smallest urban space into a lush oasis by utilizing clever space-saving gardening ideas. Maximi...
-
3 Best Space-Saving Gardening Ideas for Urban Renters
You can turn even the smallest urban space into a lush oasis by utilizing clever space-saving gardening ideas. Maximi...
-
3 Best Space-Saving Gardening Ideas for Urban Renters
You can turn even the smallest urban space into a lush oasis by utilizing clever space-saving gardening ideas. Maximi...
-
3 Best Space-Saving Gardening Ideas for Urban Renters
You can turn even the smallest urban space into a lush oasis by utilizing clever space-saving gardening ideas. Maximi...
-
3 Best Space-Saving Gardening Ideas for Urban Renters
You can turn even the smallest urban space into a lush oasis by utilizing clever space-saving gardening ideas. Maximi...
-
3 Best Space-Saving Gardening Ideas for Urban Renters
You can turn even the smallest urban space into a lush oasis by utilizing clever space-saving gardening ideas. Maximi...
-
3 Best Space-Saving Gardening Ideas for Urban Renters
You can turn even the smallest urban space into a lush oasis by utilizing clever space-saving gardening ideas. Maximi...
-
3 Best Space-Saving Gardening Ideas for Urban Renters
You can turn even the smallest urban space into a lush oasis by utilizing clever space-saving gardening ideas. Maximi...
-
7 Best Concrete Planter Ideas for Indoor Gardens
You're looking for a stylish and low-maintenance way to bring some greenery into your home, and concrete planters off...
-
7 Best Concrete Planter Ideas for Indoor Gardens
You're looking for a stylish and low-maintenance way to bring some greenery into your home, and concrete planters off...
-
7 Best Concrete Planter Ideas for Indoor Gardens
You're looking for a stylish and low-maintenance way to bring some greenery into your home, and concrete planters off...
-
7 Best Concrete Planter Ideas for Indoor Gardens
You're looking for a stylish and low-maintenance way to bring some greenery into your home, and concrete planters off...
-
7 Best Concrete Planter Ideas for Indoor Gardens
You're looking for a stylish and low-maintenance way to bring some greenery into your home, and concrete planters off...
-
7 Best Concrete Planter Ideas for Indoor Gardens
You're looking for a stylish and low-maintenance way to bring some greenery into your home, and concrete planters off...
-
7 Best Concrete Planter Ideas for Indoor Gardens
You're looking for a stylish and low-maintenance way to bring some greenery into your home, and concrete planters off...
-
7 Best Concrete Planter Ideas for Indoor Gardens
You're looking for a stylish and low-maintenance way to bring some greenery into your home, and concrete planters off...
-
7 Best Concrete Planter Ideas for Indoor Gardens
You're looking for a stylish and low-maintenance way to bring some greenery into your home, and concrete planters off...
-
7 Best Concrete Planter Ideas for Indoor Gardens
You're looking for a stylish and low-maintenance way to bring some greenery into your home, and concrete planters off...
-
7 Best Concrete Planter Ideas for Indoor Gardens
You're looking for a stylish and low-maintenance way to bring some greenery into your home, and concrete planters off...
-
7 Best Concrete Planter Ideas for Indoor Gardens
You're looking for a stylish and low-maintenance way to bring some greenery into your home, and concrete planters off...
-
7 Best Concrete Planter Ideas for Indoor Gardens
You're looking for a stylish and low-maintenance way to bring some greenery into your home, and concrete planters off...
-
7 Best Concrete Planter Ideas for Indoor Gardens
You're looking for a stylish and low-maintenance way to bring some greenery into your home, and concrete planters off...
-
7 Best Concrete Planter Ideas for Indoor Gardens
You're looking for a stylish and low-maintenance way to bring some greenery into your home, and concrete planters off...
-
7 Best Concrete Planter Ideas for Indoor Gardens
You're looking for a stylish and low-maintenance way to bring some greenery into your home, and concrete planters off...
-
7 Best Concrete Planter Ideas for Indoor Gardens
You're looking for a stylish and low-maintenance way to bring some greenery into your home, and concrete planters off...
-
7 Best Concrete Planter Ideas for Indoor Gardens
You're looking for a stylish and low-maintenance way to bring some greenery into your home, and concrete planters off...
-
7 Best Concrete Planter Ideas for Indoor Gardens
You're looking for a stylish and low-maintenance way to bring some greenery into your home, and concrete planters off...
-
7 Best Concrete Planter Ideas for Indoor Gardens
You're looking for a stylish and low-maintenance way to bring some greenery into your home, and concrete planters off...
-
7 Best Concrete Planter Ideas for Indoor Gardens
You're looking for a stylish and low-maintenance way to bring some greenery into your home, and concrete planters off...
-
7 Best Concrete Planter Ideas for Indoor Gardens
You're looking for a stylish and low-maintenance way to bring some greenery into your home, and concrete planters off...
-
7 Best Concrete Planter Ideas for Indoor Gardens
You're looking for a stylish and low-maintenance way to bring some greenery into your home, and concrete planters off...


