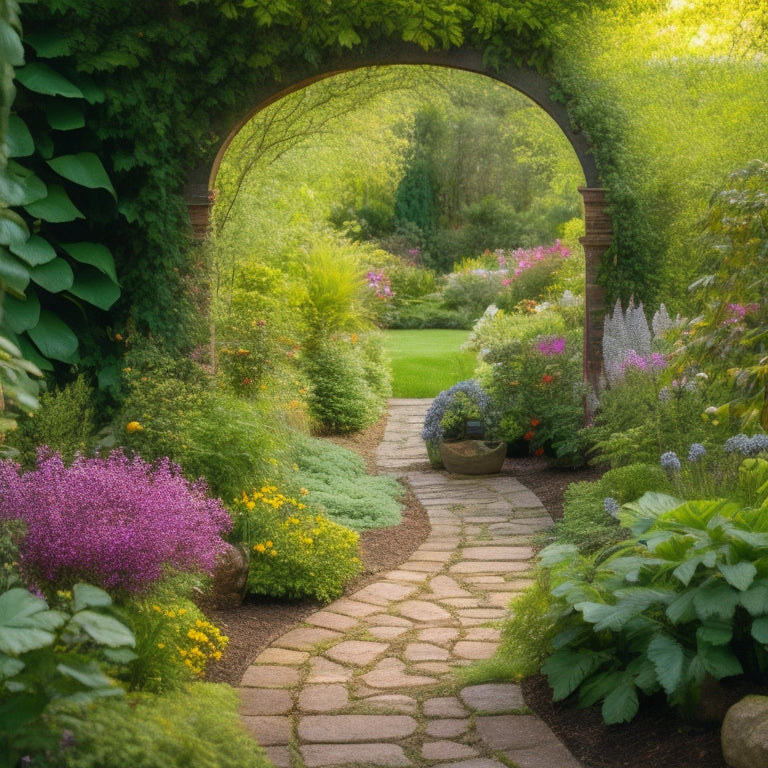
Why Propagate Vertically for a Thriving Garden?
By propagating vertically, you can access a thriving garden with increased crop yields, improved air circulation, and efficient water distribution. This method maximizes space, reduces soil erosion, and promotes healthy root growth. With techniques like stem cutting, leaf node planting, and air layering, you'll be able to stimulate root development and increase your chances of successful propagation. Additionally, vertical gardening solutions, such as hydroponic setups and trellis training systems, will help you make the most of your space. As you explore these methods, you'll discover even more ways to optimize your garden's performance and take your green thumb to the next level.
Key Takeaways
• Vertical propagation maximizes space, ideal for small gardens or indoor spaces, allowing for more plants in a smaller area.
• It promotes healthy root growth and aeration, reducing soil erosion and disease spread, and enhancing plant diversity.
• Vertical gardens provide complete control over nutrient intake, pH levels, and temperature, leading to faster growth rates and increased yields.
• This method reduces water waste by up to 50% through targeted delivery systems, minimizing evaporation and runoff, and enhancing soil health.
• Vertical propagation encourages strong root development, healthy foliage, and precise control of water amounts, resulting in a thriving and productive garden.
Stem Cutting Propagation Method
You can obtain new plants by cutting stems from mature, healthy parent plants, a process that stimulates root growth and promotes successful propagation. This method offers several propagation benefits, including increased crop yields, reduced soil erosion, and enhanced plant diversity.
To guarantee ideal results, it's crucial to master cutting techniques. Start by selecting stems with at least two nodes, as these will produce roots more efficiently. Cut the stem at a 45-degree angle, just above a node, using a clean, sharp tool to prevent damage.
Remove lower leaves, leaving only a few at the top to reduce transpiration. Then, dip the cut end in rooting hormone to stimulate root growth. Plant the cutting in a well-draining medium, and maintain high humidity to promote root development.
Leaf Node Planting Technique
By leveraging the leaf node planting technique, gardeners can capitalize on the natural growth patterns of plants, where new roots and shoots emerge from the nodes located at the base of leaves. This method allows you to take advantage of leaf propagation, promoting healthy node growth and increasing your chances of successful plant propagation.
To implement this technique, you'll need to:
| Leaf Node Type | Cutting Location | Node Growth Expectation |
|---|---|---|
| Axillary Node | Where leaf meets stem | High chance of new roots and shoots |
| Internodal Segment | Between leaf nodes | Moderate chance of new roots and shoots |
| Apical Node | At the tip of the stem | Low chance of new roots, high chance of new shoots |
When selecting leaf nodes, look for areas with high concentrations of growth hormones, as these will have a higher success rate. Make clean cuts, and plant the nodes in a well-draining medium, providing adequate moisture and light. With proper care, you'll be rewarded with new plants, propagated from the leaf nodes.
Air Layering for Roots
While leveraging leaf node planting technique, you can further enhance root development by using air layering, a method that encourages roots to form on the mother plant before it's cut and potted.
This technique allows you to control the rooting process, increasing the chances of successful propagation. To air layer, you'll need to wound the stem, apply a rooting hormone, and surround the area with a moist medium like sphagnum moss or coconut coir. As roots develop, you can monitor their progress and make adjustments as needed.
One of the significant air layering benefits is that it reduces transplant shock, as the roots are already established before separation from the mother plant.
Additionally, air layering enables you to propagate plants with more precision, as you can select the exact node where roots will form. When done correctly, air layering can increase your chances of successful propagation, saving you time and resources.
Water Sprouting System
When you implement a water sprouting system in your vertical garden, you'll notice a significant improvement in efficient water distribution, which allows your plants to receive the right amount of moisture exactly where they need it.
This, in turn, reduces water waste and guarantees that your garden isn't over- or under-watered.
Efficient Water Distribution
Implementing a water sprouting system allows you to deliver water directly to the roots of your plants, reducing evaporation and runoff. This targeted approach guarantees that your plants receive the right amount of water, exactly where they need it. By using a drip irrigation system, you can optimize water distribution, minimizing waste and promoting healthy plant growth. This method also enhances moisture retention in the soil, reducing the need for frequent watering.
As you design your water sprouting system, consider the specific needs of your plants. Different species require varying levels of moisture, so it's crucial to tailor your system to meet their unique requirements. By doing so, you'll create an environment that fosters strong root development, promotes healthy foliage, and supports overall plant vigor.
With efficient water distribution, you'll be able to closely monitor and control the water intake of your plants, guaranteeing they receive the perfect balance of moisture and nutrients. By taking control of water distribution, you'll be well on your way to creating a thriving, vertically propagated garden.
Reduced Water Waste
By adopting a water sprouting system, you can reduce water waste by up to 50%, as the targeted delivery of water directly to the roots minimizes evaporation and runoff. This efficient approach to watering allows you to take control of your water usage, making it an essential water conservation strategy for your garden.
Here are some key benefits of a water sprouting system:
-
Reduced evaporation: Water is delivered directly to the roots, reducing the amount of water lost to evaporation.
-
Minimized runoff: Targeted watering eliminates excess water that would otherwise flow away from the plants.
-
Enhanced water usage: You can precisely control the amount of water your plants receive, ensuring they get exactly what they need.
-
Improved soil health: By delivering water directly to the roots, you promote healthy soil microbiology and structure.
-
Increased crop yields: With ideal water delivery, your plants will thrive, leading to increased crop yields and a more productive garden.
Automated Irrigation Control
With an automated irrigation control system integrated into your water sprouting setup, you can program precise watering schedules and frequencies to enhance plant growth and maximize resource efficiency.
This advanced system allows you to tailor watering sessions to your plants' specific needs, guaranteeing they receive the right amount of moisture at the right time. By incorporating drip irrigation, you can deliver water directly to the roots, reducing evaporation and runoff.
Moisture sensors can be integrated into the system to monitor soil moisture levels, providing real-time data to adjust watering schedules accordingly. This guarantees your plants receive the ideal amount of water, without over- or under-watering.
Automated irrigation control also enables you to schedule watering during cooler parts of the day, reducing evapotranspiration and minimizing water loss. With this level of precision, you can rest assured your plants are receiving the perfect amount of water, resulting in healthier growth, increased yields, and reduced resource waste.
Division and Replanting
As you explore division and replanting, you'll need to section established plants to encourage healthy growth.
You'll also need to separate overcrowded roots, an essential step in promoting aeration and preventing disease.
Sectioning Established Plants
You'll need to dig up entire clumps of established plants, gently teasing apart their roots to section them into smaller, manageable portions for replanting. This process requires care to avoid damaging the roots, which can impact root health and ultimately affect the plant's overall performance.
As you section the plants, consider the following key factors to guarantee successful replanting:
Assess root health: Inspect the roots for signs of disease, damage, or rot, and trim or remove affected areas to prevent the spread of infection.
Determine ideal plant spacing: Research the mature size of the plant and space sections accordingly to prevent overcrowding and promote healthy growth.
Handle roots with care: Avoid exposing roots to air, light, or extreme temperatures, and replant sections as soon as possible to minimize shock.
Replant in well-draining soil: Prepare the soil with organic matter and fertilizers to provide a nutrient-rich environment for the replanted sections.
Monitor and adjust: Keep a close eye on the replanted sections, adjusting soil moisture, sunlight, and fertilization as needed to guarantee a thriving garden.
Separating Overcrowded Roots
After sectioning established plants, it's common to encounter overcrowded roots that require division and replanting to promote healthy growth and prevent root-bound conditions.
You'll need to carefully tease apart the tangled roots, working from the bottom up to identify natural separation points. Gently wash away any soil or debris to expose the roots, taking care not to damage them.
As you separate the roots, inspect them for signs of disease or damage, removing any affected areas to maintain root health. This process can be time-consuming, but it's essential for growth optimization.
By dividing and replanting, you're giving each section of roots the space it needs to thrive, allowing for stronger, more vigorous growth. Remember to handle the roots gently, as rough handling can cause damage and set back growth.
Replanting Healthy Segments
With the roots carefully separated and cleaned, replant the healthy segments in fresh, well-draining soil, making sure each division has at least one growing point or 'eye' to facilitate new growth. This step is essential for segment rejuvenation, as it allows the newly separated roots to thrive in their new environment.
When replanting, keep the following tips in mind:
-
Handle the roots gently to avoid damaging them and compromising root health.
-
Plant the divisions at the same depth as they were previously, and water well to settle the soil.
-
Space the replanted segments far enough apart to allow for proper air circulation and sunlight penetration.
-
Mulch around the base of the plants to retain moisture and suppress weeds.
-
Monitor the replanted segments closely, and adjust watering and fertilization schedules as needed to promote healthy growth.
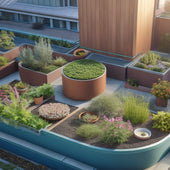
Vertical Hydroponic Setup
In a vertical hydroponic setup, plants are suspended in the air, their roots dangling in a nutrient-rich solution that's precisely controlled to meet their every need. You'll maximize vertical space utilization, making it ideal for indoor gardening where space is limited. By doing so, you'll reap the benefits of indoor gardening, such as year-round growing, pest control, and reduced water consumption.
In this setup, you have complete control over the nutrient intake, pH levels, and temperature, ensuring peak growing conditions. You can monitor and adjust the solution's parameters to cater to the specific needs of each plant species. This level of precision allows you to fine-tune the growing environment, resulting in faster growth rates, increased yields, and healthier plants.
With a vertical hydroponic setup, you'll be able to harvest more crops in a smaller area, making it a highly efficient way to garden. By taking advantage of vertical space, you'll access the full potential of your indoor garden, enjoying a thriving and productive harvest.
DIY Trellis Training System
You can replicate the benefits of a vertical hydroponic setup using a DIY trellis training system, where you strategically support and guide plant growth upwards using a trellis or other support structure. This approach allows you to maximize space, increase yields, and add visual appeal to your garden. By designing a custom trellis system, you can tailor it to your specific plant needs and garden layout.
Here are some key considerations for your DIY trellis training system:
-
Choose the right material: Select a sturdy, weather-resistant material for your trellis, such as wood, metal, or PVC.
-
Enhance trellis design: Design your trellis to provide adequate support and air circulation for your plants, with a sturdy base and adjustable height settings.
-
Select compatible plants: Choose plants that thrive in vertical gardening conditions, such as vining vegetables, flowers, or herbs.
-
Train your plants: Gently guide your plants to grow up the trellis using twine, clips, or other training aids.
-
Monitor and adjust: Regularly inspect your trellis system and make adjustments as needed to guarantee ideal plant growth and support.
Wall Mounted Planters Guide
Wall-mounted planters offer a space-saving solution for gardeners, allowing them to cultivate a variety of plants on even the most limited wall spaces. By utilizing vertical gardening techniques, you can maximize your garden's potential while minimizing its footprint. One of the significant wall planter benefits is the ability to add greenery to areas that were previously thought to be unusable.
When choosing a wall-mounted planter, consider the following factors:
| Planter Type | Description |
|---|---|
| Modular Planters | Interlocking planters that can be arranged to fit your wall space |
| Pocket Planters | Soft, fabric pockets that can be attached to a wall |
| Flat-Back Planters | Planters with a flat back that can be mounted directly to the wall |
Soilless Mix Propagation Tips
By switching to soilless mix propagation, your thriving garden can benefit from improved aeration, water retention, and faster root development. This method offers several soilless advantages, allowing you to exert greater control over your plants' growth.
To get the most out of soilless mix propagation, follow these essential tips:
-
Monitor pH levels: Soilless mixes can be sensitive to pH fluctuations, so regularly test and adjust the pH to guarantee ideal conditions.
-
Optimize water delivery: Soilless mixes require precise watering to prevent waterlogging or drying out. Use a well-draining mix and adjust your irrigation schedule accordingly.
-
Provide adequate aeration: Confirm your soilless mix has sufficient aeration to promote healthy root growth. Use a mix specifically designed for propagation or add perlite/vermiculite to improve aeration.
-
Maintain consistent temperatures: Soilless mixes can be temperature-sensitive, so keep your propagation area at a consistent temperature between 65-75°F (18-24°C).
-
Monitor nutrient levels: Soilless mixes may require additional fertilization. Regularly test nutrient levels and adjust your fertilization schedule as needed.
Frequently Asked Questions
Can Vertically Propagated Plants Be Grown in Small Indoor Spaces?
You can successfully grow vertically propagated plants in small indoor spaces by optimizing space efficiency through strategic plant placement, utilizing wall-mounted systems, and selecting compact varieties, ensuring a thriving indoor gardening experience.
How Often Should I Water My Vertically Propagated Plants?
You'll need to monitor moisture levels closely, watering your vertically propagated plants when the top 1-2 inches of soil feel dry to the touch, usually every 2-3 days, depending on temperature and humidity.
Are Vertically Propagated Plants More Prone to Pests and Diseases?
You'll find that vertically propagated plants aren't inherently more prone to pests and diseases; in fact, their close proximity can foster pest resistance and disease prevention through increased air circulation and better light penetration.
Can I Use Vertical Propagation for Root Vegetables Like Carrots?
You're wondering if vertical propagation is suitable for root veggies like carrots. Honestly, it's a bit tricky, as carrot varieties require specific soil depths, making vertical setups challenging; however, you can experiment with shallow-rooted varieties and adapt your system accordingly.
Will Vertically Propagated Plants Require More Maintenance Than Others?
You'll find that vertically propagated plants demand more precise maintenance techniques, as their unique growth requirements necessitate careful pruning, watering, and training to thrive, requiring your close attention to guarantee ideal results.
Related Posts
-
3 Best Roof Garden Drainage Solutions for Planters
When designing your roof garden, you'll want to implement a planter drainage system that guarantees water flows freel...
-
3 Best Roof Garden Drainage Solutions for Planters
When designing your roof garden, you'll want to implement a planter drainage system that guarantees water flows freel...
-
3 Best Roof Garden Drainage Solutions for Planters
When designing your roof garden, you'll want to implement a planter drainage system that guarantees water flows freel...
-
3 Best Roof Garden Drainage Solutions for Planters
When designing your roof garden, you'll want to implement a planter drainage system that guarantees water flows freel...
-
3 Best Roof Garden Drainage Solutions for Planters
When designing your roof garden, you'll want to implement a planter drainage system that guarantees water flows freel...
-
3 Best Roof Garden Drainage Solutions for Planters
When designing your roof garden, you'll want to implement a planter drainage system that guarantees water flows freel...
-
3 Best Roof Garden Drainage Solutions for Planters
When designing your roof garden, you'll want to implement a planter drainage system that guarantees water flows freel...
-
3 Best Roof Garden Drainage Solutions for Planters
When designing your roof garden, you'll want to implement a planter drainage system that guarantees water flows freel...
-
3 Best Roof Garden Drainage Solutions for Planters
When designing your roof garden, you'll want to implement a planter drainage system that guarantees water flows freel...
-
3 Best Roof Garden Drainage Solutions for Planters
When designing your roof garden, you'll want to implement a planter drainage system that guarantees water flows freel...
-
3 Best Roof Garden Drainage Solutions for Planters
When designing your roof garden, you'll want to implement a planter drainage system that guarantees water flows freel...
-
3 Best Roof Garden Drainage Solutions for Planters
When designing your roof garden, you'll want to implement a planter drainage system that guarantees water flows freel...
-
3 Best Roof Garden Drainage Solutions for Planters
When designing your roof garden, you'll want to implement a planter drainage system that guarantees water flows freel...
-

What Makes a Good Used Trowel for Planters
When searching for a good used trowel for planters, you'll want to prioritize corrosion-resistant materials like stai...
-
What Makes a Good Used Trowel for Planters
When searching for a good used trowel for planters, you'll want to prioritize corrosion-resistant materials like stai...
-
What Makes a Good Used Trowel for Planters
When searching for a good used trowel for planters, you'll want to prioritize corrosion-resistant materials like stai...
-
What Makes a Good Used Trowel for Planters
When searching for a good used trowel for planters, you'll want to prioritize corrosion-resistant materials like stai...
-
What Makes a Good Used Trowel for Planters
When searching for a good used trowel for planters, you'll want to prioritize corrosion-resistant materials like stai...
-
What Makes a Good Used Trowel for Planters
When searching for a good used trowel for planters, you'll want to prioritize corrosion-resistant materials like stai...
-
What Makes a Good Used Trowel for Planters
When searching for a good used trowel for planters, you'll want to prioritize corrosion-resistant materials like stai...
-
What Makes a Good Used Trowel for Planters
When searching for a good used trowel for planters, you'll want to prioritize corrosion-resistant materials like stai...
-
What Makes a Good Used Trowel for Planters
When searching for a good used trowel for planters, you'll want to prioritize corrosion-resistant materials like stai...
-
What Makes a Good Used Trowel for Planters
When searching for a good used trowel for planters, you'll want to prioritize corrosion-resistant materials like stai...
-
What Makes a Good Used Trowel for Planters
When searching for a good used trowel for planters, you'll want to prioritize corrosion-resistant materials like stai...
-
What Makes a Good Used Trowel for Planters
When searching for a good used trowel for planters, you'll want to prioritize corrosion-resistant materials like stai...
-
What Makes a Good Used Trowel for Planters
When searching for a good used trowel for planters, you'll want to prioritize corrosion-resistant materials like stai...
-
What Makes a Good Used Trowel for Planters
When searching for a good used trowel for planters, you'll want to prioritize corrosion-resistant materials like stai...
-
What Makes a Good Used Trowel for Planters
When searching for a good used trowel for planters, you'll want to prioritize corrosion-resistant materials like stai...
-
What Makes a Good Used Trowel for Planters
When searching for a good used trowel for planters, you'll want to prioritize corrosion-resistant materials like stai...
-
What Makes a Good Used Trowel for Planters
When searching for a good used trowel for planters, you'll want to prioritize corrosion-resistant materials like stai...
-
What Makes a Good Used Trowel for Planters
When searching for a good used trowel for planters, you'll want to prioritize corrosion-resistant materials like stai...
-
What Makes a Good Used Trowel for Planters
When searching for a good used trowel for planters, you'll want to prioritize corrosion-resistant materials like stai...
-
What Makes a Good Used Trowel for Planters
When searching for a good used trowel for planters, you'll want to prioritize corrosion-resistant materials like stai...
-
What Makes a Good Used Trowel for Planters
When searching for a good used trowel for planters, you'll want to prioritize corrosion-resistant materials like stai...
-
What Makes a Good Used Trowel for Planters
When searching for a good used trowel for planters, you'll want to prioritize corrosion-resistant materials like stai...
-
What Makes a Good Used Trowel for Planters
When searching for a good used trowel for planters, you'll want to prioritize corrosion-resistant materials like stai...
-
What Makes a Good Used Trowel for Planters
When searching for a good used trowel for planters, you'll want to prioritize corrosion-resistant materials like stai...
-
Succulent-Friendly Drainage Solutions for Block Planters
You can create a succulent-friendly drainage system in your cinder block planters by drilling holes in the bottom of ...
-
Succulent-Friendly Drainage Solutions for Block Planters
You can create a succulent-friendly drainage system in your cinder block planters by drilling holes in the bottom of ...
-
Succulent-Friendly Drainage Solutions for Block Planters
You can create a succulent-friendly drainage system in your cinder block planters by drilling holes in the bottom of ...
-
Succulent-Friendly Drainage Solutions for Block Planters
You can create a succulent-friendly drainage system in your cinder block planters by drilling holes in the bottom of ...
-
Succulent-Friendly Drainage Solutions for Block Planters
You can create a succulent-friendly drainage system in your cinder block planters by drilling holes in the bottom of ...
-
Succulent-Friendly Drainage Solutions for Block Planters
You can create a succulent-friendly drainage system in your cinder block planters by drilling holes in the bottom of ...
-
Succulent-Friendly Drainage Solutions for Block Planters
You can create a succulent-friendly drainage system in your cinder block planters by drilling holes in the bottom of ...
-
Succulent-Friendly Drainage Solutions for Block Planters
You can create a succulent-friendly drainage system in your cinder block planters by drilling holes in the bottom of ...
-
Succulent-Friendly Drainage Solutions for Block Planters
You can create a succulent-friendly drainage system in your cinder block planters by drilling holes in the bottom of ...
-
Succulent-Friendly Drainage Solutions for Block Planters
You can create a succulent-friendly drainage system in your cinder block planters by drilling holes in the bottom of ...
-
Succulent-Friendly Drainage Solutions for Block Planters
You can create a succulent-friendly drainage system in your cinder block planters by drilling holes in the bottom of ...
-
Succulent-Friendly Drainage Solutions for Block Planters
You can create a succulent-friendly drainage system in your cinder block planters by drilling holes in the bottom of ...
-
Succulent-Friendly Drainage Solutions for Block Planters
You can create a succulent-friendly drainage system in your cinder block planters by drilling holes in the bottom of ...
-
Succulent-Friendly Drainage Solutions for Block Planters
You can create a succulent-friendly drainage system in your cinder block planters by drilling holes in the bottom of ...
-
Succulent-Friendly Drainage Solutions for Block Planters
You can create a succulent-friendly drainage system in your cinder block planters by drilling holes in the bottom of ...


