
Why DIY Planters Need Specialized Planning Tools
As you design your DIY planter, you'll need to visualize your planter's shape, color scheme, and texture to guarantee a cohesive look. You'll also need to calculate the right cinder blocks, taking into account weight capacity, erosion resistance, and aesthetic integration. In addition, you must confirm structural integrity by verifying load-bearing capacity, calculating soil depth, and strategically placing decorative elements. To top it off, you'll need to plan for irrigation, drainage, and maintenance. With so many interconnected factors to evaluate, specialized planning tools are essential to bring your vision to life and uncover the secrets to creating a thriving, long-lasting planter.
Key Takeaways
• DIY planters require specialized planning tools to ensure structural integrity, stability, and material strength to support soil and plant weight.
• Effective planning prevents common mistakes, such as inadequate drainage, poor weight distribution, and insufficient material strength.
• Customized planning tools help DIYers visualize and calculate planter design, material selection, and irrigation systems for optimal results.
• Without specialized planning tools, DIY planters may be prone to collapse, waterlogging, or plant death, leading to wasted resources and time.
• Specialized planning tools enable DIYers to create functional, aesthetically pleasing planters that align with their personal style and outdoor decor.
Visualizing Your Planter Design
As you stand amidst a sea of empty pots, scattered seeds, and tangled twine, envision the perfect planter design that will bring your botanical vision to life. You're not just creating a container for plants; you're crafting a visual masterpiece that will elevate your outdoor space.
To begin, consider the color schemes that will harmonize with your surroundings. Will you opt for earthy tones that blend with the natural environment or bold hues that add a pop of personality?
Next, think about the planter shapes that will complement your chosen colors. Rectangular planters provide a modern, sleek look, while rounded ones add a touch of whimsy. Perhaps you'll combine different shapes to create a unique, eye-catching design.
Visualize the texture and material of your planters, too - will they be sleek and glossy or rough and rustic? By carefully considering these elements, you'll create a cohesive, stunning planter design that showcases your green thumb and personal style.
Calculating Materials and Costs
As you finalize your planter design, you'll need to calculate the materials required to bring it to life.
Take out your measuring tape and calculator to estimate the quantity of lumber, soil, and other resources you'll need, ensuring you have a clear picture of the materials and costs involved.
Material Quantity Estimation
You'll need to accurately estimate the quantity of materials required for your DIY planter project to avoid costly mistakes and guarantee a successful outcome. This is where careful planning and attention to detail come into play. In order to get started, review your plant type selection and soil composition analysis to determine the specific requirements for your plants.
Here are some key factors to evaluate when estimating material quantities:
-
Soil volume: Calculate the amount of soil needed based on the planter's dimensions and the soil composition analysis.
-
Container size: Verify the planter is large enough to accommodate the mature size of the plants and the required soil volume.
-
Drainage materials: Estimate the amount of drainage materials, such as gravel or perlite, needed to prevent waterlogged soil.
-
Irrigation system: Determine the length and type of irrigation tubing required to reach all plants.
-
Decorative elements: Calculate the quantity of decorative elements, such as rocks or mulch, needed to achieve the desired aesthetic.
Budget-Friendly Resource Allocation
By allocating resources efficiently, you can create a stunning DIY planter while staying within your budget. It starts with calculating the costs of materials.
To achieve cost-effective solutions, you'll need to accurately estimate the quantity of each material required. This will help you avoid overbuying or wasting resources. Begin by itemizing every material needed, from the planter itself to soil, plants, and decorative elements.
Next, research the prices of each item at local suppliers or online retailers. Be sure to factor in any discounts or promotions that can help reduce costs.
Using a spreadsheet or resource management tool, create a detailed breakdown of the costs associated with each material. This will enable you to visualize your expenses and make adjustments as needed.
Ensuring Structural Integrity
When building your DIY planter, you'll need to verify it can support the weight of the soil, plants, and any external forces like wind or water.
You'll want to evaluate the load-bearing capacity of your materials, taking into account their strength and durability.
Load-Bearing Capacity Matters
Structural integrity relies on your planter's ability to support the combined weight of the soil, plant, and any additional decorative elements, making load-bearing capacity a critical consideration in your DIY project.
You need to verify that your planter can handle the weight of the materials without compromising its structure. Load-bearing capacity isn't just about the weight of the soil and plant, but also about how the weight is distributed throughout the planter.
To achieve ideal load distribution and weight management, consider the following:
-
Soil depth and density: Calculate the weight of the soil based on its depth and density to determine the maximum load your planter can handle.
-
Plant size and weight: Choose plants that are proportionate to the size of your planter to avoid overloading it.
-
Decorative element placement: Strategically place decorative elements, such as stones or ornaments, to avoid concentrating weight in one area.
-
Planter material and design: Select a planter material and design that can support the expected weight, taking into account factors like material strength and drainage.
-
Weight distribution patterns: Visualize how the weight will be distributed throughout the planter to identify potential weak points and make adjustments accordingly.
Material Strength Considerations
You'll want to scrutinize the planter material's inherent strength, taking into account its tensile, compressive, and shear resistance to ascertain it can withstand the cumulative weight and stress exerted by the soil, plant, and decorative elements. This is vital in preventing material fatigue, which can lead to structural failure and compromise the planter's overall integrity.
When selecting materials, consider the following factors:
| Material Property | Consideration |
|---|---|
| Tensile Strength | Can it withstand pulling forces from wind or plant growth? |
| Compressive Strength | Can it handle the weight of soil and decorative elements? |
| Shear Resistance | Can it resist deformation from lateral forces like wind or water? |
| Environmental Impact | Will the material degrade or corrode over time, affecting its strength? |
Stability Against External Forces
To guarantee your DIY planter remains upright and intact, it's important to design it with stability against external forces in mind, as these can exert tremendous pressure on the planter's foundation and walls. You need to take into account the planter's structural integrity to make sure it can withstand various external forces.
When designing your planter, keep the following factors in mind:
-
Wind resistance: Calculate the planter's center of gravity and make sure it's low enough to resist wind forces. A wider base and a lower center of gravity will improve stability.
-
Seismic stability: If you live in an earthquake-prone area, design your planter to withstand seismic activity. Use reinforced materials and a sturdy foundation to prevent the planter from toppling over.
-
Soil pressure: Think about the weight and moisture content of the soil, as well as the planter's capacity to hold it. A sturdy foundation and drainage system are vital to prevent soil pressure from causing the planter to collapse.
-
Water resistance: If your planter will be exposed to water or high humidity, make sure it's made from materials that can withstand water damage and corrosion.
-
Weight distribution: Make sure the planter's weight is evenly distributed to prevent it from tipping over or collapsing under its own weight.
Selecting the Right Cinder Blocks
For your DIY planters, choose cinder blocks that are specifically designed for outdoor use, with a dense, uniform texture and a weather-resistant coating to withstand the elements.
You'll want to select blocks that can support the weight of the soil and plants while resisting erosion and cracking. When it comes to cinder block types, you'll find that there are standard, half-high, and mini blocks to suit your planter's size and design.
Take into account the color options as well, ranging from neutral tones like gray and beige to bold colors like red and blue. These options will allow you to customize your planter's aesthetic to fit your outdoor decor.
Visually inspect the blocks for any cracks, chips, or signs of wear before purchasing. Verify the blocks are free of debris and have a smooth, even surface.
You may also want to examine the block's weight capacity, especially if you're planning to create a multi-tiered planter or use large plants.
Measuring and Marking Spaces
With your cinder blocks selected, measure the length, width, and height of each block to determine the ideal arrangement for your planter's design, taking note of any obstructions or irregularities that may affect the layout. This step is essential in guaranteeing the best space utilization. As you measure, visualize how each block will fit together to create the desired shape and structure.
To guarantee accurate measurements, use a combination of marking techniques such as:
-
String and stakes: to create a grid system and mark the boundaries of your planter
-
Chalk lines: to mark the center point of each block and create a visual guide
-
Tape measure and level: to guarantee accurate measurements and level surfaces
-
Graph paper: to create a scale drawing of your planter's design
-
Color-coding: to differentiate between different components of your planter, such as drainage and soil layers
Preparing Soil and Drains
You'll need to prepare a well-draining soil mixture and an effective drainage system to guarantee the health and longevity of your plants. This involves selecting the right soil types for your planter's specific needs.
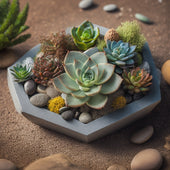
For instance, if you're planting succulents, you'll want a soil mixture with high sand content to guarantee good drainage. On the other hand, if you're planting ferns, you'll need a soil rich in organic matter to retain moisture.
To create an effective drainage system, you'll need to incorporate drainage solutions such as perlite, vermiculite, or peat moss into your soil mixture. These materials help to break up clay soils, improve aeration, and prevent waterlogging.
You can also add a layer of small rocks or broken pottery at the bottom of your planter to improve drainage further. Visualize the water flowing freely through the soil, carrying excess nutrients and salts away from your plants' roots.
Planning for Irrigation Systems
As you design your DIY planter, consider the irrigation system that will deliver the right amount of water to your plants' roots, as inadequate moisture can lead to wilted leaves and stunted growth.
A well-planned irrigation system guarantees your plants receive the exact amount of water they need, when they need it. This is especially vital for plants with specific watering requirements.
To create an efficient irrigation system, consider the following:
-
Drip irrigation: deliver water directly to the roots, reducing evaporation and runoff.
-
Rainwater harvesting: collect and store rainwater for irrigation, reducing your water bill and environmental impact.
-
Moisture sensors: monitor soil moisture levels, automatically adjusting water delivery as needed.
-
Water timers: schedule watering sessions to guarantee consistency and prevent overwatering.
-
Drainage management: design a system that prevents waterlogged soil and root rot.
Budgeting Time and Labor
Now that you've optimized your DIY planter's irrigation system, allocate sufficient time and labor to bring your project to life, guaranteeing every component is properly installed and functioning in harmony.
Effective time management is essential to avoid delays and guarantee a successful project. Begin by breaking down your project into manageable tasks, estimating the time required for each, and scheduling them accordingly.
Be realistic about your labor efficiency, taking into account your skill level, available tools, and physical limitations.
Visualize your project's timeline, identifying potential bottlenecks and areas where you can optimize labor efficiency. Consider delegating tasks or seeking assistance when necessary.
Remember to factor in contingency time for unexpected setbacks or adjustments. By streamlining your workflow and allocating sufficient time and labor, you'll be able to execute your plan with precision and confidence.
This attention to detail will pay off in the long run, guaranteeing your DIY planter is a thriving, self-sustaining ecosystem that meets your exacting standards.
Frequently Asked Questions
Can I Use DIY Planters on a Sloping or Uneven Surface?
When working with sloping or uneven surfaces, you'll need specialized sloping solutions to guarantee your DIY planters stay upright and secure.
Start by evaluating the surface's gradient and adjusting your planter's base accordingly. Use adjustable feet or wedges to level the planter, and consider adding a stabilizing grid or retaining wall for added support.
Visualize the final setup and make adjustments as needed to achieve a balanced, visually appealing arrangement.
How Do I Prevent Pests and Rodents From Damaging My Planters?
As you carefully craft your DIY planters, don't let pests and rodents rain on your parade! To prevent these unwanted guests from crashing the party, you'll need to implement some serious pest control measures.
Start by using rodent-deterrent materials like copper mesh or hardware cloth to line the bottom of your planters.
Next, add a layer of pest-repelling mulch, such as cinnamon or cayenne pepper, to keep those pesky critters at bay.
Are There Any Specific Building Codes for DIY Planters in My Area?
You'll want to check with your local government to determine if there are specific building codes for DIY planters in your area.
Research local regulations regarding planter dimensions, material usage, and weight capacity to guarantee compliance.
Measure and visualize your planter's footprint to confirm it meets local ordinances.
Don't risk getting fined or forced to dismantle your planter; take the time to verify the regulations before breaking ground.
Can I Use Recycled Materials for My DIY Planter Project?
You're considering using recycled materials for your DIY planter project, which is a great idea!
With upcycling techniques, you can transform discarded items into functional planters.
However, you need to guarantee the material durability can withstand outdoor conditions. Assess the materials' water resistance, UV stability, and structural integrity before selecting them.
For instance, old pallets might be perfect for a rustic planter, but a plastic bottle mightn't hold up to harsh weather.
How Do I Properly Winterize My DIY Planters for Harsh Weather?
Imagine your DIY planter as a cozy cabin - you want to protect it from harsh winter weather.
To winterize your planters, you'll need to insulate them properly. Start by adding a layer of straw or shredded newspaper to the planter's bottom and sides, then wrap it with burlap or a frost blanket.
You can also use insulation options like foam sheets or reflective tape to keep the cold out.
Proper winterizing techniques will guarantee your plants thrive come springtime.
Conclusion
As you stand before your empty yard, envisioning the lush oasis you're about to create, remember that a successful DIY planter project hinges on meticulous planning.
Every calculated move, every carefully selected cinder block, and every measured inch will either make or break your masterpiece.
Will you rise to the challenge, or will your creation crumble beneath the weight of neglect?
The fate of your garden hangs in the balance, waiting for you to take the first deliberate step.
Related Posts
-
Why Succulents Thrive in DIY Concrete Planters
You've likely noticed that succulents seem to flourish in DIY concrete planters, and it's not just a coincidence - th...
-
Why Succulents Thrive in DIY Concrete Planters
You've likely noticed that succulents seem to flourish in DIY concrete planters, and it's not just a coincidence - th...
-
Why Succulents Thrive in DIY Concrete Planters
You've likely noticed that succulents seem to flourish in DIY concrete planters, and it's not just a coincidence - th...
-
Why Succulents Thrive in DIY Concrete Planters
You've likely noticed that succulents seem to flourish in DIY concrete planters, and it's not just a coincidence - th...
-
Why Succulents Thrive in DIY Concrete Planters
You've likely noticed that succulents seem to flourish in DIY concrete planters, and it's not just a coincidence - th...
-
Why Succulents Thrive in DIY Concrete Planters
You've likely noticed that succulents seem to flourish in DIY concrete planters, and it's not just a coincidence - th...
-
Why Succulents Thrive in DIY Concrete Planters
You've likely noticed that succulents seem to flourish in DIY concrete planters, and it's not just a coincidence - th...
-
Why Succulents Thrive in DIY Concrete Planters
You've likely noticed that succulents seem to flourish in DIY concrete planters, and it's not just a coincidence - th...
-
Why Succulents Thrive in DIY Concrete Planters
You've likely noticed that succulents seem to flourish in DIY concrete planters, and it's not just a coincidence - th...
-
Why Succulents Thrive in DIY Concrete Planters
You've likely noticed that succulents seem to flourish in DIY concrete planters, and it's not just a coincidence - th...
-
Why Succulents Thrive in DIY Concrete Planters
You've likely noticed that succulents seem to flourish in DIY concrete planters, and it's not just a coincidence - th...
-
Why Succulents Thrive in DIY Concrete Planters
You've likely noticed that succulents seem to flourish in DIY concrete planters, and it's not just a coincidence - th...
-
Why Succulents Thrive in DIY Concrete Planters
You've likely noticed that succulents seem to flourish in DIY concrete planters, and it's not just a coincidence - th...
-
Why Succulents Thrive in DIY Concrete Planters
You've likely noticed that succulents seem to flourish in DIY concrete planters, and it's not just a coincidence - th...
-
Why Succulents Thrive in DIY Concrete Planters
You've likely noticed that succulents seem to flourish in DIY concrete planters, and it's not just a coincidence - th...
-
Why Succulents Thrive in DIY Concrete Planters
You've likely noticed that succulents seem to flourish in DIY concrete planters, and it's not just a coincidence - th...
-
Why Succulents Thrive in DIY Concrete Planters
You've likely noticed that succulents seem to flourish in DIY concrete planters, and it's not just a coincidence - th...
-
What Makes Concrete Planters Perfect for Succulents
You've found that concrete planters offer the perfect combination of durability, drainage, and design versatility to ...
-
What Makes Concrete Planters Perfect for Succulents
You've found that concrete planters offer the perfect combination of durability, drainage, and design versatility to ...
-
What Makes Concrete Planters Perfect for Succulents
You've found that concrete planters offer the perfect combination of durability, drainage, and design versatility to ...
-
What Makes Concrete Planters Perfect for Succulents
You've found that concrete planters offer the perfect combination of durability, drainage, and design versatility to ...
-
What Makes Concrete Planters Perfect for Succulents
You've found that concrete planters offer the perfect combination of durability, drainage, and design versatility to ...
-
What Makes Concrete Planters Perfect for Succulents
You've found that concrete planters offer the perfect combination of durability, drainage, and design versatility to ...
-
What Makes Concrete Planters Perfect for Succulents
You've found that concrete planters offer the perfect combination of durability, drainage, and design versatility to ...
-
What Makes Concrete Planters Perfect for Succulents
You've found that concrete planters offer the perfect combination of durability, drainage, and design versatility to ...
-
What Makes Concrete Planters Perfect for Succulents
You've found that concrete planters offer the perfect combination of durability, drainage, and design versatility to ...
-
What Makes Concrete Planters Perfect for Succulents
You've found that concrete planters offer the perfect combination of durability, drainage, and design versatility to ...
-
What Makes Concrete Planters Perfect for Succulents
You've found that concrete planters offer the perfect combination of durability, drainage, and design versatility to ...
-
What Makes Concrete Planters Perfect for Succulents
You've found that concrete planters offer the perfect combination of durability, drainage, and design versatility to ...
-
What Makes Concrete Planters Perfect for Succulents
You've found that concrete planters offer the perfect combination of durability, drainage, and design versatility to ...
-
What Makes Concrete Planters Perfect for Succulents
You've found that concrete planters offer the perfect combination of durability, drainage, and design versatility to ...
-
What Makes Concrete Planters Perfect for Succulents
You've found that concrete planters offer the perfect combination of durability, drainage, and design versatility to ...
-
What Makes Concrete Planters Perfect for Succulents
You've found that concrete planters offer the perfect combination of durability, drainage, and design versatility to ...
-
What Makes Concrete Planters Perfect for Succulents
You've found that concrete planters offer the perfect combination of durability, drainage, and design versatility to ...
-
What Makes Concrete Planters Perfect for Succulents
You've found that concrete planters offer the perfect combination of durability, drainage, and design versatility to ...
-
What Makes Concrete Planters Perfect for Succulents
You've found that concrete planters offer the perfect combination of durability, drainage, and design versatility to ...
-
What Makes Concrete Planters Perfect for Succulents
You've found that concrete planters offer the perfect combination of durability, drainage, and design versatility to ...
-
What Makes Concrete Planters Perfect for Succulents
You've found that concrete planters offer the perfect combination of durability, drainage, and design versatility to ...
-
What Makes Concrete Planters Perfect for Succulents
You've found that concrete planters offer the perfect combination of durability, drainage, and design versatility to ...
-
What Makes Concrete Planters Perfect for Succulents
You've found that concrete planters offer the perfect combination of durability, drainage, and design versatility to ...
-
What Makes Concrete Planters Perfect for Succulents
You've found that concrete planters offer the perfect combination of durability, drainage, and design versatility to ...
-
What Makes Concrete Planters Perfect for Succulents
You've found that concrete planters offer the perfect combination of durability, drainage, and design versatility to ...
-
What Makes Concrete Planters Perfect for Succulents
You've found that concrete planters offer the perfect combination of durability, drainage, and design versatility to ...
-
What Makes Concrete Planters Perfect for Succulents
You've found that concrete planters offer the perfect combination of durability, drainage, and design versatility to ...
-
What Makes Concrete Planters Perfect for Succulents
You've found that concrete planters offer the perfect combination of durability, drainage, and design versatility to ...
-
What Makes Concrete Planters Perfect for Succulents
You've found that concrete planters offer the perfect combination of durability, drainage, and design versatility to ...
-
What Makes Concrete Planters Perfect for Succulents
You've found that concrete planters offer the perfect combination of durability, drainage, and design versatility to ...
-
What Makes Concrete Planters Perfect for Succulents
You've found that concrete planters offer the perfect combination of durability, drainage, and design versatility to ...
-
What Makes Concrete Planters Perfect for Succulents
You've found that concrete planters offer the perfect combination of durability, drainage, and design versatility to ...
-
What Makes Concrete Planters Perfect for Succulents
You've found that concrete planters offer the perfect combination of durability, drainage, and design versatility to ...
-
What Makes Concrete Planters Perfect for Succulents
You've found that concrete planters offer the perfect combination of durability, drainage, and design versatility to ...
-
What Makes Concrete Planters Perfect for Succulents
You've found that concrete planters offer the perfect combination of durability, drainage, and design versatility to ...
-
What Makes Concrete Planters Perfect for Succulents
You've found that concrete planters offer the perfect combination of durability, drainage, and design versatility to ...
-
What Makes Concrete Planters Perfect for Succulents
You've found that concrete planters offer the perfect combination of durability, drainage, and design versatility to ...
-
Why Invest in Specialized Planter Tools
You'll greatly boost your gardening success and yields by leveraging specialized planter tools that cater to the uniq...
-
Why Invest in Specialized Planter Tools
You'll greatly boost your gardening success and yields by leveraging specialized planter tools that cater to the uniq...
-
Why Invest in Specialized Planter Tools
You'll greatly boost your gardening success and yields by leveraging specialized planter tools that cater to the uniq...
-
Why Invest in Specialized Planter Tools
You'll greatly boost your gardening success and yields by leveraging specialized planter tools that cater to the uniq...
-
Why Invest in Specialized Planter Tools
You'll greatly boost your gardening success and yields by leveraging specialized planter tools that cater to the uniq...
-
Why Invest in Specialized Planter Tools
You'll greatly boost your gardening success and yields by leveraging specialized planter tools that cater to the uniq...
-
Why Invest in Specialized Planter Tools
You'll greatly boost your gardening success and yields by leveraging specialized planter tools that cater to the uniq...
-
Why Invest in Specialized Planter Tools
You'll greatly boost your gardening success and yields by leveraging specialized planter tools that cater to the uniq...
-
Why Invest in Specialized Planter Tools
You'll greatly boost your gardening success and yields by leveraging specialized planter tools that cater to the uniq...
-
Why Invest in Specialized Planter Tools
You'll greatly boost your gardening success and yields by leveraging specialized planter tools that cater to the uniq...
-
Why Invest in Specialized Planter Tools
You'll greatly boost your gardening success and yields by leveraging specialized planter tools that cater to the uniq...
-
Why Invest in Specialized Planter Tools
You'll greatly boost your gardening success and yields by leveraging specialized planter tools that cater to the uniq...
-
Why Invest in Specialized Planter Tools
You'll greatly boost your gardening success and yields by leveraging specialized planter tools that cater to the uniq...
-
Why Invest in Specialized Planter Tools
You'll greatly boost your gardening success and yields by leveraging specialized planter tools that cater to the uniq...
-
Why Invest in Specialized Planter Tools
You'll greatly boost your gardening success and yields by leveraging specialized planter tools that cater to the uniq...
-
Why Invest in Specialized Planter Tools
You'll greatly boost your gardening success and yields by leveraging specialized planter tools that cater to the uniq...
-
Why Invest in Specialized Planter Tools
You'll greatly boost your gardening success and yields by leveraging specialized planter tools that cater to the uniq...
-
Why Invest in Specialized Planter Tools
You'll greatly boost your gardening success and yields by leveraging specialized planter tools that cater to the uniq...
-
Why Invest in Specialized Planter Tools
You'll greatly boost your gardening success and yields by leveraging specialized planter tools that cater to the uniq...
-
Why Invest in Specialized Planter Tools
You'll greatly boost your gardening success and yields by leveraging specialized planter tools that cater to the uniq...
-
Why Invest in Specialized Planter Tools
You'll greatly boost your gardening success and yields by leveraging specialized planter tools that cater to the uniq...
-
Why Invest in Specialized Planter Tools
You'll greatly boost your gardening success and yields by leveraging specialized planter tools that cater to the uniq...
-
Why Invest in Specialized Planter Tools
You'll greatly boost your gardening success and yields by leveraging specialized planter tools that cater to the uniq...
-
Why Invest in Specialized Planter Tools
You'll greatly boost your gardening success and yields by leveraging specialized planter tools that cater to the uniq...
-
Why Invest in Specialized Planter Tools
You'll greatly boost your gardening success and yields by leveraging specialized planter tools that cater to the uniq...


