What You Need to Build a Cinder Planter
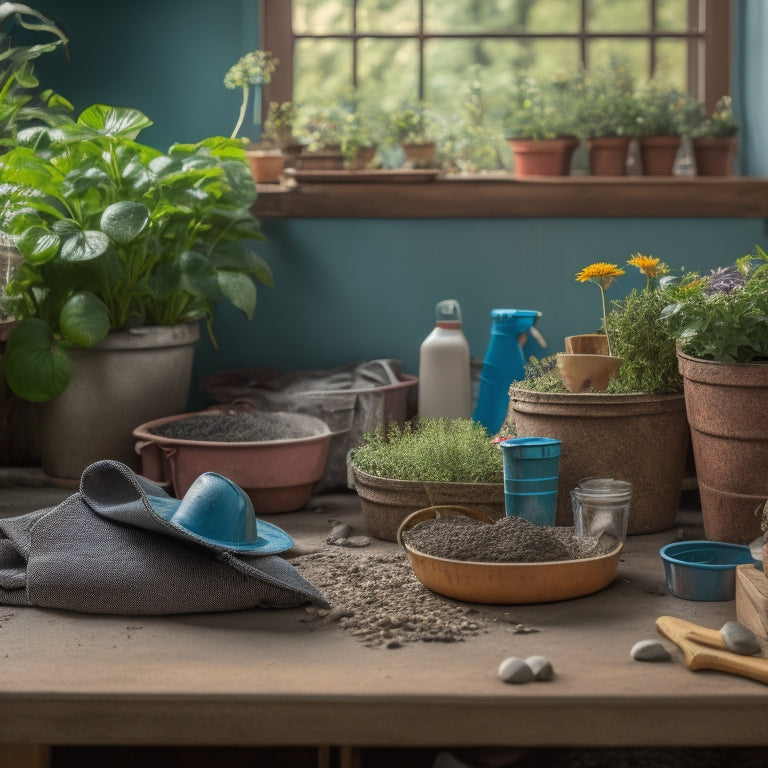
To build a cinder planter, you'll need seven essential materials: cinder blocks, sand, gravel, landscape fabric, decorative rocks, and weather-resistant wood glue. Choose solid or hollow cinder blocks, considering drainage and design. Don't forget pebbles or gravel for drainage, and perlite or vermiculite to improve soil aeration. Clear and level the site, compacting the soil for a stable foundation. Staggered block layers and a well-designed drainage system will keep your plants happy. With these basics covered, you're ready to create a unique and thriving cinder planter - and there's more to explore to make it truly spectacular.
Key Takeaways
• Gather essential materials, including cinder blocks, sand, gravel, landscape fabric, and weather-resistant wood glue.
• Prepare the site by clearing debris, leveling the ground, and compacting the soil to create a stable foundation.
• Lay a foundation row of compacted gravel or crushed stone to ensure proper drainage and prevent erosion.
• Stack cinder blocks in a staggered pattern, using a spirit level to ensure each layer remains horizontal and alternating block orientation for visual interest.
• Drill drainage holes in the bottom of the planter, using a 1/4 inch diameter drill bit and spacing them 1-2 inches apart for efficient water flow.
Gather Essential Building Materials
You'll need to collect seven essential materials to build your cinder planter, including cinder blocks, sand, gravel, landscape fabric, decorative rocks, and weather-resistant wood glue.
When selecting cinder blocks, consider the type that suits your planter design. Solid cinder blocks provide a sturdy base, while hollow blocks allow for better drainage. You can also mix and match different block types to create a unique design. For a modern look, use smooth-faced cinder blocks, or opt for split-faced blocks for a more rustic appearance.
Next, gather sand and gravel to guarantee proper drainage and prevent waterlogged soil. Landscape fabric will help retain moisture and prevent weeds from growing.
Decorative rocks add a visually appealing touch, while weather-resistant wood glue guarantees your planter's structural integrity.
With these materials in hand, you'll be ready to start building your cinder planter. Take your time to carefully select each material, as it will impact the overall look and functionality of your planter.
Prepare the Building Site
Before breaking ground, clear the area of debris, vegetation, and obstructions to create a level, compacted surface that will guarantee a stable foundation for your cinder planter. This vital step ensures your planter remains upright and secure, even in harsh weather conditions.
To achieve a solid base, employ effective site selection strategies and ground preparation techniques. Here are three essential considerations:
-
Assess the terrain: Choose a spot with good drainage to prevent waterlogged soil. Confirm the area is level, or create a slight incline to facilitate water runoff.
-
Remove unwanted growth: Clear the area of weeds, grass, and other vegetation to prevent roots from growing under your planter.
-
Compact the soil: Use a hand tamper or plate compactor to compress the soil, eliminating any air pockets or weaknesses that could compromise your planter's stability.
Lay the Foundation Row
With the site prepared, a solid foundation row is essential to provide a stable base for your cinder planter, and it starts with laying a level course of compacted gravel or crushed stone. This foundation technique guarantees your planter remains stable and level, preventing settling or shifting over time.
To achieve a solid foundation, consider the following cinder considerations:
| Cinder Consideration | Recommended Action | Why It Matters |
|---|---|---|
| Drainage | Use compacted gravel or crushed stone | Prevents water accumulation and erosion |
| Leveling | Check for levelness in multiple directions | Ensures stability and even weight distribution |
| Compaction | Use a hand tamper or plate compactor | Prevents settling and shifting over time |
Add Cinder Block Layers
Stacking cinder blocks in a staggered pattern creates a strong and stable wall structure as you add layers to your planter. This technique guarantees that the weight is evenly distributed, preventing the planter from toppling over.
As you build, consider the cinder block aesthetics – the staggered pattern adds visual interest to your planter.
Here are some tips to keep in mind as you add layers:
-
Level each layer: Use a spirit level to confirm the blocks are perfectly horizontal, ensuring your planter remains stable.
-
Alternate block orientation: Switch the direction of the blocks with each layer to maintain the staggered pattern.
-
Check your planter height: Monitor the height of your planter as you add layers, adjusting as needed to achieve your desired height.
Create a Drainage System
You're now ready to create a drainage system that guarantees your cinder planter doesn't become waterlogged.
To achieve this, you'll need to strategically place drainage holes, select the right materials for your drainage layer, and manage water flow effectively.
Drainage Hole Placement
By carefully positioning drainage holes in the bottom of your cinder planter, you'll create a functional drainage system that prevents waterlogged soil and root rot. This is essential, as water retention can be a major issue in planters, leading to poor plant growth and even death.
To achieve ideal drainage, consider the following techniques:
-
Drill holes at an angle: This allows water to flow out of the planter more efficiently, reducing the risk of waterlogging.
-
Space holes evenly: Confirm that holes are spaced consistently, about 1-2 inches apart, to provide adequate drainage across the entire planter.
-
Use the right drill bit size: Select a drill bit that creates holes with a diameter of about 1/4 inch to allow for proper water flow without letting soil escape.
Materials for Drainage Layer
Now that you've optimized drainage hole placement, it's time to select the right materials for your drainage layer, which will help prevent water from accumulating at the bottom of your cinder planter. You'll need materials that allow excess water to flow out while keeping the soil and roots intact. Here are some popular drainage materials to take into account:
| Material | Description |
|---|---|
| Pebbles or Gravel | Allows water to flow through while preventing soil erosion |
| Broken Pottery or Ceramics | Provides a porous surface for water to drain through |
| Perlite or Vermiculite | Lightweight, porous materials that improve drainage and aeration |
When choosing a drainage material, think about factors like cost, availability, and durability. You may also want to explore drainage alternatives, such as using a layer of landscape fabric or a commercial drainage mat. These options can help prevent clogging and guarantee efficient water flow. Remember to select a material that fits your specific needs and planter design. By selecting the right drainage material, you'll create a healthy environment for your plants to thrive.
Water Flow Management
To create an effective drainage system, start by designing a water flow management strategy that directs excess water away from your cinder planter's roots and into a safe outlet. This will prevent waterlogged soil and root rot, guaranteeing your plants thrive.
When implementing your drainage techniques, consider the following key elements:
-
Layered drainage: Create a layered system with a coarse material, like gravel or broken pottery, at the bottom to allow water to flow freely. This layer should be at least 1-2 inches deep.
-
Water retention zones: Designate areas within your planter where water can collect and slowly release into the drainage layer. This will help prevent rapid water loss and promote healthy water retention.
-
Outlet management: Confirm your drainage system has a clear outlet for excess water to escape. This can be a simple hole in the bottom of the planter or a more complex system of pipes and channels.
Add Soil and Gravel Mix
Now that you've set up your drainage system, it's time to add the soil and gravel mix.
You'll want to get this blend just right, as it'll directly impact your plants' growth and health.
Let's break down the key considerations: soil requirements, gravel ratios, and drainage essentials that'll help you create the perfect mix.
Soil Requirements
You'll need a well-draining mix of soil and gravel to prevent waterlogged roots and guarantee healthy cinder planter growth. This is vital because cinder planters can be prone to waterlogging, which can lead to root rot and other problems.
To achieve the right balance, consider the following key factors:
-
Nutrient balance: Look for a mix that provides a balanced blend of nutrients, including nitrogen, phosphorus, and potassium. This will make certain your plants receive the necessary nutrients for peak growth.
-
Soil pH: Choose a mix with a neutral to slightly acidic soil pH, ranging from 6.0 to 7.0. This will allow your plants to absorb essential nutrients more effectively.
-
Organic matter: Incorporate organic matter like compost or peat moss to improve soil structure and fertility. This will help retain moisture, suppress weeds, and regulate soil temperature.
Gravel Ratios Matter
Mix one part soil with one to two parts gravel to achieve the perfect blend for your cinder planter, allowing for ideal drainage and aeration. This ratio enables the soil to breathe while preventing waterlogged soil conditions.
You can choose from various gravel types, such as pea gravel, crushed stone, or decomposed granite, each with its unique benefits. Pea gravel, for instance, provides excellent drainage and aeration, while crushed stone adds a decorative touch. Decomposed granite, on the other hand, is an eco-friendly option that improves soil structure.
When combining soil and gravel, make sure to mix them well to create a uniform blend. You can also adjust the ratio based on your plant's specific needs.
If you're planting succulents or cacti, you may want to lean towards a higher gravel content to prevent overwatering. With the right gravel ratio, you'll be able to control the moisture levels in your cinder planter, ensuring your plants thrive.
Drainage Essentials
With your ideal soil-to-gravel ratio established, add the mix to your cinder planter, ensuring the soil and gravel blend is evenly distributed to facilitate maximum drainage.
You've got two primary drainage types to take into account: surface drainage and internal drainage. Surface drainage refers to water flowing over the soil's surface, while internal drainage occurs within the soil itself.
To achieve optimal internal drainage, incorporate the following essentials into your mix:
-
Permeable materials: Add materials like perlite or vermiculite to increase the mix's water-holding capacity and aeration, allowing excess water to drain quickly.
-
Organic matter: Incorporate compost or peat moss to improve the soil's structure, enabling better water penetration and reducing waterlogging.
-
Coarse aggregates: Mix in coarse materials like crushed stone or grit to create a stable, porous structure that promotes healthy drainage.
Plant Your Chosen Greenery
Place your chosen greenery into the cinder planter, gently teasing out the roots if necessary to guarantee they spread evenly throughout the container.
Consider the plant selection you made earlier, taking into account the greenery types that thrive in well-draining conditions. Succulents, herbs, and creeping thyme are excellent choices for cinder planters, as they're adapted to dry spells and can tolerate the unique conditions of a cinder planter.
As you plant, visualize the final arrangement, ensuring each plant has enough space to grow and receive adequate sunlight. If you're using multiple plants, stagger their heights and textures to create visual interest.
Pack the soil gently around the roots, making sure not to compact it too much. Leave about an inch of space between the soil surface and the top of the planter for watering.
Check the soil moisture by inserting your finger into the soil up to the first knuckle. Water sparingly, as the cinder planter will drain excess moisture.
Add Decorative Touches
You can now elevate your cinder planter's visual appeal by incorporating decorative elements that complement its industrial aesthetic. This is where you can let your creativity shine and make your planter truly unique.
Here are some ideas to get you started:
-
Add a pop of color: Use decorative paint to add unique patterns or bold stripes to your planter. You can choose a color that complements your outdoor decor or go bold and bright to make a statement.
-
Incorporate textures: Add some interest to your planter by incorporating different textures. You can use a combination of smooth and rough surfaces or add some decorative stones or pebbles for a visually appealing contrast.
-
Add some metallic flair: Give your planter a touch of sophistication by adding some metallic accents. You can use metallic paint, metal rivets, or even add some decorative metal bands around the planter.
Finishing Touches and Sealing
Seal your cinder planter's porous surface with a waterproofing sealant to protect it from the elements and assure your decorative touches last. This vital step guarantees your planter remains durable and visually appealing for years to come. When selecting a sealant, consider silicone or polyurethane-based products, which offer excellent water resistance and UV protection.
Apply the sealant using a high-quality brush or roller, working in small sections to maintain even coverage. Follow the manufacturer's instructions for recommended application thickness and drying times. For added protection, consider applying a second coat after the initial layer has fully dried.
In terms of finishing options, you can choose from a range of sealing techniques to achieve your desired aesthetic. For a natural look, opt for a clear sealant that won't alter the planter's appearance. Alternatively, tinted sealants can enhance the color and texture of the cinder blocks.
Regardless of your chosen finishing option, proper sealing is necessary to preserving your planter's integrity and beauty. By following these steps, you'll enjoy a stunning, long-lasting cinder planter that showcases your creativity and attention to detail.
Maintenance and Upkeep Tips
As you move forward with your cinder planter, it's crucial to prioritize maintenance and upkeep to guarantee your plants thrive.
You'll need to establish a daily watering routine that caters to the specific needs of your plants, taking into account factors like climate, soil type, and sunlight exposure.
Cinder Planter Care
Regular inspections of your cinder planter's drainage holes and bottom surface help prevent waterlogged soil and root rot. This simple routine guarantees your plants thrive in their new home.
To maintain ideal cinder planter aesthetics, follow these essential care tips:
-
Seasonal planting: Update your plant selection according to the changing seasons to keep your cinder planter looking fresh and vibrant.
-
Mulch and compost: Apply a layer of mulch or compost to retain moisture, suppress weeds, and regulate soil temperature.
-
Prune and train: Prune your plants regularly to maintain shape and promote healthy growth, and train vines or climbing plants to grow up the planter's sides.
Daily Watering Routine
You'll want to check the soil moisture daily, especially during hot or dry weather, to determine if your cinder planter needs watering. Stick your finger into the soil up to the first knuckle, and if it feels dry, it's time to water. Establish a consistent water schedule to guarantee your plants receive the right amount of moisture. For moisture monitoring, you can use a moisture meter or a simple DIY method like the 'finger test.'
During the growing season, your cinder planter may require more frequent watering. Check the soil moisture in the morning and evening, and adjust your water schedule accordingly. Avoid overwatering, which can lead to root rot and other problems. If you notice the soil is consistently waterlogged, reduce the frequency of watering.
Visual inspections are also essential. Check for signs of underwatering, such as wilting or yellowing leaves, and adjust your water schedule accordingly.
Frequently Asked Questions
Can I Use Old or Recycled Cinder Blocks for My Planter?
You're wondering if you can use old or recycled cinder blocks for your planter. The answer is yes, but make sure they're in good condition. Inspect them for cracks, crumbling, or excessive wear.
If they're sturdy, clean them thoroughly before using. Consider the planter design you want to achieve - will the weathered look of recycled blocks enhance or detract from it?
Sources like construction sites, Habitat for Humanity ReStores, or online marketplaces can provide affordable, reclaimed cinder blocks for your project.
How Do I Prevent Weeds From Growing up Through the Planter?
To prevent weeds from growing up through your planter, you'll want to focus on weed prevention and regular planter maintenance.
Start by lining the bottom of your planter with a durable landscape fabric or weed barrier.
Then, add a layer of compacted gravel to further block weed growth.
Finally, mulch around your plants to suppress any remaining weeds.
Is It Necessary to Add a Layer of Landscape Fabric?
Did you know that a single weed can produce over 50,000 seeds?
When it comes to adding a layer of landscape fabric, you're not just preventing weeds; you're also enhancing landscape aesthetics.
While it's not necessary, fabric helps with drainage considerations by allowing water to pass through while keeping debris out.
Can I Use a Cinder Planter for Growing Vegetables or Herbs?
You're wondering if you can use a cinder planter for growing vegetables or herbs. The answer is yes, and it's a great idea!
A cinder planter provides excellent drainage, which benefits vegetable growth. The porous nature of cinder allows for healthy root development, and its thermal mass helps regulate soil temperature.
You'll enjoy a bountiful harvest with a cinder planter, as it creates an ideal environment for your veggies and herbs to thrive.
How Often Should I Water My Plants in a Cinder Planter?
You'll want to water your plants in a cinder planter when the top 1-2 inches of the mix feel dry to the touch.
Check daily, especially in hot weather.
Water thoroughly, making sure excess water drains out.
Aim for a plant watering frequency of 2-3 times a week, depending on the plants' needs.
Proper cinder planter maintenance includes monitoring soil moisture and adjusting your watering schedule accordingly.
Conclusion
As you put the finishing touches on your cinder planter, step back and admire your handiwork. The modern ruin you've created is a demonstration of your DIY prowess.
Like a latter-day Pompeii, your planter stands ready to be overtaken by the lush greenery you've chosen. With regular watering and maintenance, it'll thrive, a beacon of industrial chic in your outdoor space.
Now, go forth and tend to your new creation!
Related Posts
-
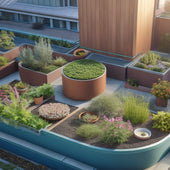
3 Best Roof Garden Drainage Solutions for Planters
When designing your roof garden, you'll want to implement a planter drainage system that guarantees water flows freel...
-
3 Best Roof Garden Drainage Solutions for Planters
When designing your roof garden, you'll want to implement a planter drainage system that guarantees water flows freel...
-
3 Best Roof Garden Drainage Solutions for Planters
When designing your roof garden, you'll want to implement a planter drainage system that guarantees water flows freel...
-
3 Best Roof Garden Drainage Solutions for Planters
When designing your roof garden, you'll want to implement a planter drainage system that guarantees water flows freel...
-
3 Best Roof Garden Drainage Solutions for Planters
When designing your roof garden, you'll want to implement a planter drainage system that guarantees water flows freel...
-
3 Best Roof Garden Drainage Solutions for Planters
When designing your roof garden, you'll want to implement a planter drainage system that guarantees water flows freel...
-
3 Best Roof Garden Drainage Solutions for Planters
When designing your roof garden, you'll want to implement a planter drainage system that guarantees water flows freel...
-
3 Best Roof Garden Drainage Solutions for Planters
When designing your roof garden, you'll want to implement a planter drainage system that guarantees water flows freel...
-
3 Best Roof Garden Drainage Solutions for Planters
When designing your roof garden, you'll want to implement a planter drainage system that guarantees water flows freel...
-
3 Best Roof Garden Drainage Solutions for Planters
When designing your roof garden, you'll want to implement a planter drainage system that guarantees water flows freel...
-
3 Best Roof Garden Drainage Solutions for Planters
When designing your roof garden, you'll want to implement a planter drainage system that guarantees water flows freel...
-
3 Best Roof Garden Drainage Solutions for Planters
When designing your roof garden, you'll want to implement a planter drainage system that guarantees water flows freel...
-
3 Best Roof Garden Drainage Solutions for Planters
When designing your roof garden, you'll want to implement a planter drainage system that guarantees water flows freel...
-

What Makes a Good Used Trowel for Planters
When searching for a good used trowel for planters, you'll want to prioritize corrosion-resistant materials like stai...
-
What Makes a Good Used Trowel for Planters
When searching for a good used trowel for planters, you'll want to prioritize corrosion-resistant materials like stai...
-
What Makes a Good Used Trowel for Planters
When searching for a good used trowel for planters, you'll want to prioritize corrosion-resistant materials like stai...
-
What Makes a Good Used Trowel for Planters
When searching for a good used trowel for planters, you'll want to prioritize corrosion-resistant materials like stai...
-
What Makes a Good Used Trowel for Planters
When searching for a good used trowel for planters, you'll want to prioritize corrosion-resistant materials like stai...
-
What Makes a Good Used Trowel for Planters
When searching for a good used trowel for planters, you'll want to prioritize corrosion-resistant materials like stai...
-
What Makes a Good Used Trowel for Planters
When searching for a good used trowel for planters, you'll want to prioritize corrosion-resistant materials like stai...
-
What Makes a Good Used Trowel for Planters
When searching for a good used trowel for planters, you'll want to prioritize corrosion-resistant materials like stai...
-
What Makes a Good Used Trowel for Planters
When searching for a good used trowel for planters, you'll want to prioritize corrosion-resistant materials like stai...
-
What Makes a Good Used Trowel for Planters
When searching for a good used trowel for planters, you'll want to prioritize corrosion-resistant materials like stai...
-
What Makes a Good Used Trowel for Planters
When searching for a good used trowel for planters, you'll want to prioritize corrosion-resistant materials like stai...
-
What Makes a Good Used Trowel for Planters
When searching for a good used trowel for planters, you'll want to prioritize corrosion-resistant materials like stai...
-
What Makes a Good Used Trowel for Planters
When searching for a good used trowel for planters, you'll want to prioritize corrosion-resistant materials like stai...
-
What Makes a Good Used Trowel for Planters
When searching for a good used trowel for planters, you'll want to prioritize corrosion-resistant materials like stai...
-
What Makes a Good Used Trowel for Planters
When searching for a good used trowel for planters, you'll want to prioritize corrosion-resistant materials like stai...
-
What Makes a Good Used Trowel for Planters
When searching for a good used trowel for planters, you'll want to prioritize corrosion-resistant materials like stai...
-
What Makes a Good Used Trowel for Planters
When searching for a good used trowel for planters, you'll want to prioritize corrosion-resistant materials like stai...
-
What Makes a Good Used Trowel for Planters
When searching for a good used trowel for planters, you'll want to prioritize corrosion-resistant materials like stai...
-
What Makes a Good Used Trowel for Planters
When searching for a good used trowel for planters, you'll want to prioritize corrosion-resistant materials like stai...
-
What Makes a Good Used Trowel for Planters
When searching for a good used trowel for planters, you'll want to prioritize corrosion-resistant materials like stai...
-
What Makes a Good Used Trowel for Planters
When searching for a good used trowel for planters, you'll want to prioritize corrosion-resistant materials like stai...
-
What Makes a Good Used Trowel for Planters
When searching for a good used trowel for planters, you'll want to prioritize corrosion-resistant materials like stai...
-
What Makes a Good Used Trowel for Planters
When searching for a good used trowel for planters, you'll want to prioritize corrosion-resistant materials like stai...
-
What Makes a Good Used Trowel for Planters
When searching for a good used trowel for planters, you'll want to prioritize corrosion-resistant materials like stai...
-

10 Essential Tips to Prevent Disease in Vertical Gardens
You're about to discover the essential strategies to protect your vertical garden from disease, ensuring a thriving a...
-
10 Essential Tips to Prevent Disease in Vertical Gardens
You're about to discover the essential strategies to protect your vertical garden from disease, ensuring a thriving a...
-
10 Essential Tips to Prevent Disease in Vertical Gardens
You're about to discover the essential strategies to protect your vertical garden from disease, ensuring a thriving a...
-
10 Essential Tips to Prevent Disease in Vertical Gardens
You're about to discover the essential strategies to protect your vertical garden from disease, ensuring a thriving a...
-
10 Essential Tips to Prevent Disease in Vertical Gardens
You're about to discover the essential strategies to protect your vertical garden from disease, ensuring a thriving a...
-
10 Essential Tips to Prevent Disease in Vertical Gardens
You're about to discover the essential strategies to protect your vertical garden from disease, ensuring a thriving a...
-
10 Essential Tips to Prevent Disease in Vertical Gardens
You're about to discover the essential strategies to protect your vertical garden from disease, ensuring a thriving a...
-
10 Essential Tips to Prevent Disease in Vertical Gardens
You're about to discover the essential strategies to protect your vertical garden from disease, ensuring a thriving a...
-
10 Essential Tips to Prevent Disease in Vertical Gardens
You're about to discover the essential strategies to protect your vertical garden from disease, ensuring a thriving a...
-
10 Essential Tips to Prevent Disease in Vertical Gardens
You're about to discover the essential strategies to protect your vertical garden from disease, ensuring a thriving a...
-
10 Essential Tips to Prevent Disease in Vertical Gardens
You're about to discover the essential strategies to protect your vertical garden from disease, ensuring a thriving a...
-
10 Essential Tips to Prevent Disease in Vertical Gardens
You're about to discover the essential strategies to protect your vertical garden from disease, ensuring a thriving a...
-
10 Essential Tips to Prevent Disease in Vertical Gardens
You're about to discover the essential strategies to protect your vertical garden from disease, ensuring a thriving a...
-
10 Essential Tips to Prevent Disease in Vertical Gardens
You're about to discover the essential strategies to protect your vertical garden from disease, ensuring a thriving a...
-
10 Essential Tips to Prevent Disease in Vertical Gardens
You're about to discover the essential strategies to protect your vertical garden from disease, ensuring a thriving a...
-
10 Essential Tips to Prevent Disease in Vertical Gardens
You're about to discover the essential strategies to protect your vertical garden from disease, ensuring a thriving a...
-
10 Essential Tips to Prevent Disease in Vertical Gardens
You're about to discover the essential strategies to protect your vertical garden from disease, ensuring a thriving a...
-
10 Essential Tips to Prevent Disease in Vertical Gardens
You're about to discover the essential strategies to protect your vertical garden from disease, ensuring a thriving a...
-
10 Essential Tips to Prevent Disease in Vertical Gardens
You're about to discover the essential strategies to protect your vertical garden from disease, ensuring a thriving a...
-
10 Essential Tips to Prevent Disease in Vertical Gardens
You're about to discover the essential strategies to protect your vertical garden from disease, ensuring a thriving a...
-
10 Essential Tips to Prevent Disease in Vertical Gardens
You're about to discover the essential strategies to protect your vertical garden from disease, ensuring a thriving a...
-
10 Essential Tips to Prevent Disease in Vertical Gardens
You're about to discover the essential strategies to protect your vertical garden from disease, ensuring a thriving a...
-
10 Essential Tips to Prevent Disease in Vertical Gardens
You're about to discover the essential strategies to protect your vertical garden from disease, ensuring a thriving a...
-
10 Essential Tips to Prevent Disease in Vertical Gardens
You're about to discover the essential strategies to protect your vertical garden from disease, ensuring a thriving a...
-
10 Essential Tips to Prevent Disease in Vertical Gardens
You're about to discover the essential strategies to protect your vertical garden from disease, ensuring a thriving a...
-
10 Essential Tips to Prevent Disease in Vertical Gardens
You're about to discover the essential strategies to protect your vertical garden from disease, ensuring a thriving a...
-
10 Essential Tips to Prevent Disease in Vertical Gardens
You're about to discover the essential strategies to protect your vertical garden from disease, ensuring a thriving a...
-
10 Essential Tips to Prevent Disease in Vertical Gardens
You're about to discover the essential strategies to protect your vertical garden from disease, ensuring a thriving a...
-
10 Essential Tips to Prevent Disease in Vertical Gardens
You're about to discover the essential strategies to protect your vertical garden from disease, ensuring a thriving a...


