What You Need for a Concrete Planter Project
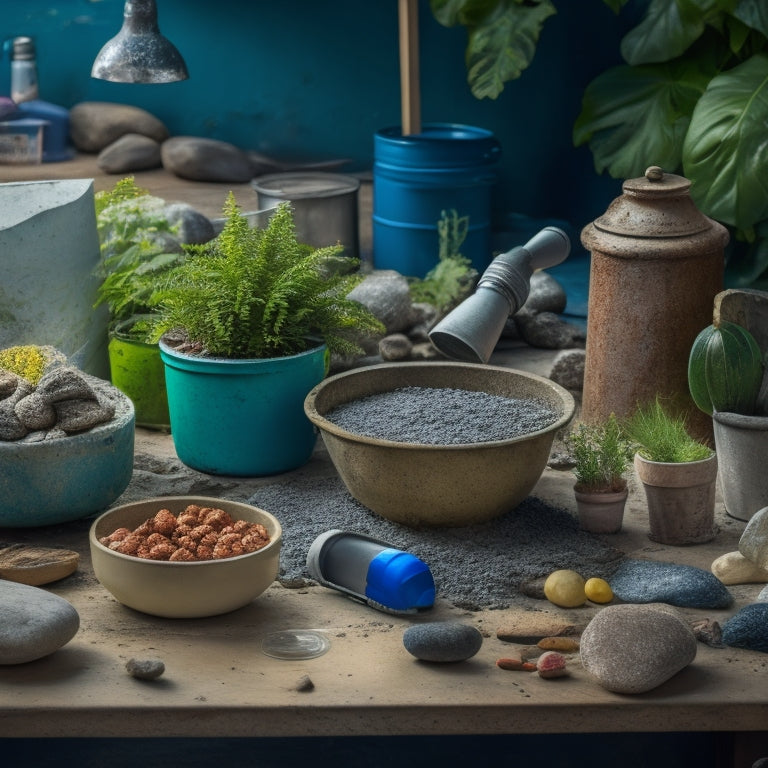
You'll need to gather cinder blocks, foundation materials like sand and gravel, and essential tools such as a level, trowel, and safety gloves to get started on your concrete planter project. A solid plan with milestones and deadlines will help you stay on track, and you'll need to prepare a level surface, mix concrete, and pour it into a form. Don't forget to add drainage features, soil, and finishing touches like paint or stain. With a clear understanding of the materials, tools, and steps involved, you'll be well-equipped to bring your design to life and create a beautiful, functional planter that showcases your skills.
Key Takeaways
- Determine the number of cinder blocks needed based on the desired design and planter size.
- Gather essential tools, including a level, trowel, safety gloves, and a mixing drill with a paddle.
- Prepare the site by clearing debris, leveling the ground, and laying compacted gravel or sand.
- Select the right concrete mix ingredients, including cement, aggregates, water, and optional admixtures.
- Plan for drainage features, such as holes and a waterproof membrane, to prevent water seepage and root rot.
Cinder Block Planter Shopping List
Gather essential materials for your cinder block planter project by ticking off the following items on your shopping list.
You'll need cinder blocks, specifically the half-block or quarter-block types, which offer more versatility in design and structure. Consider the planter aesthetics you want to achieve, as this will influence the type and quantity of blocks you need. For example, a modern, sleek design might require a uniform block size, while a rustic, whimsical planter could incorporate a mix of block sizes and shapes.
Next, add sand, gravel, and Portland cement to your list. These will form the foundation and drainage system for your planter.
Don't forget to include a level, trowel, and safety gloves to guarantee a smooth and safe construction process. If you plan to add a decorative finish, such as paint or sealant, be sure to include those on your list as well.
Timeline for Preparation Work
You'll need a solid plan in place to guarantee your cinder block planter project stays on track. Before you start mixing concrete, it's crucial to create a preparation schedule that outlines project milestones and deadlines. This will help you stay organized, avoid delays, and guarantee a successful outcome.
Begin by allocating time for site preparation, including clearing the area, removing any debris, and leveling the ground. Next, schedule time for cleaning and preparing the cinder blocks, as well as gathering and preparing any additional materials. Consider allocating a few hours for these tasks, depending on the size of your project.
Create a timeline that includes specific dates and deadlines for each task, including preparing the concrete mixture, pouring the mixture into the planter, and allowing it to cure. Be sure to factor in time for any unexpected delays or setbacks.
Gathering Essential Tools
You'll need to assemble the right tools to guarantee a successful concrete planter project.
When selecting tools, consider factors like durability, ease of use, and versatility to tackle various tasks efficiently.
With a focus on essential materials, you'll require a mix of hand tools, power tools, and safety gear to handle concrete, molds, and finishing processes.
Tool Selection Criteria
As you commence on the concrete planter project, selecting the right tools is crucial to guarantee a successful and stress-free experience. You'll need to choose tools that suit the specific tasks and materials involved.
Consider the tool types required for each step, such as mixing, pouring, and finishing. For example, a mixing drill with a paddle attachment will be essential for combining cement, sand, and water. A trowel or float will be necessary for smoothing and finishing the concrete.
When selecting tools, prioritize those that are durable, rust-resistant, and designed for heavy-duty use. Confirm they're in good condition by performing regular tool maintenance.
Clean and store tools properly after each use, and replace worn or damaged parts promptly. This will prevent accidents and confirm peak performance. Additionally, consider the ergonomics and comfort of the tools, as you'll be using them for extended periods.
Essential Materials Needed
Concrete planter projects require a specific set of materials to confirm a sturdy, durable, and visually appealing final product.
You'll need the right components to make sure your planter can withstand the elements and support the weight of your chosen plants.
To get started, gather the following essential materials:
- Portland cement: The primary binding agent that holds your concrete mixture together.
- Aggregates (sand, gravel, or crushed stone): Add strength and texture to your concrete.
- Water: Mix with cement and aggregates to create a workable concrete mixture.
- Mold or form: Shape your planter to the desired design and size.
When selecting your materials, keep in mind the color combinations you want to achieve for your planter.
Consider the aesthetic you're going for and choose materials that will complement your planting tips and design.
Remember to always follow safety guidelines when working with concrete, including wearing protective gear and working in a well-ventilated area.
Concrete Mix and Materials
You'll need to prepare the concrete mix by combining Portland cement, sand, and water in the right proportions.
To guarantee a strong and durable planter, it's crucial to understand the roles of each ingredient and measure them accurately.
With your tools ready, including a mixing bucket, trowel, and gloves, you're set to create a high-quality concrete mix.
Mix Ingredients Explained
Mixing the perfect blend of ingredients is vital to creating a durable and visually appealing concrete planter. The right mix will guarantee your planter can withstand the elements and support the weight of the soil and plants.
When it comes to the mix, you'll need to balance four key ingredients:
-
Cement: Provides strength and binds the mixture together
-
Aggregates (sand, gravel, or crushed stone): Adds bulk and texture
-
Water: Hydrates the cement and makes the mix workable
- Admixtures (optional): Chemical additives that enhance the mix's performance, such as air-entraining agents or retarding agents
Getting the mix ratios right is essential. A general rule of thumb is to use one part cement to two parts aggregates, with just enough water to achieve a workable consistency.
Be careful not to add too much water, as this can lead to a weak and porous final product.
After mixing, you'll need to follow a proper curing process to allow the concrete to set and harden. This may involve keeping the planter moist, protecting it from direct sunlight, and avoiding sudden temperature changes.
Essential Tools Required
With your mix ingredients in check, it's time to gather the vital tools required to bring your concrete planter project to life.
You'll need a few specialized tools to guarantee a successful and safe project. Start by gathering your mixing tools, including a sturdy mixing bucket, a mixing stick or trowel, and a measuring cup. A mixing stick with a flat, wide blade is ideal for scraping the sides of the bucket and folding the mix.
Next, prepare your molding tools, such as a planter mold or form, and a release agent like cooking spray or oil. This will prevent the concrete from sticking to the mold.
You'll also need a level and a rubber mallet for tapping the mold into place. Don't forget to prioritize safety precautions, such as wearing gloves, safety glasses, and a dust mask when working with concrete.
Regular tool maintenance is also essential to guarantee your tools remain in good condition and perform at their best. Clean and store your tools properly after each use to prevent rust and damage.
Planter Design and Layout
The planters' overall aesthetic and functionality hinge on a well-thought-out design and layout. You'll want to take into account the planter's purpose, the type of plants you'll be using, and the space where it will be placed.
-
Planter Aesthetics: Think about the style you're aiming for, from modern and sleek to rustic and distressed. Contemplate the color, texture, and shape of the planter to guarantee it complements its surroundings.
-
Seasonal Plants: Choose plants that thrive in your local climate and take into account the changing seasons. This will help you determine the size and depth of the planter.
-
Drainage: Confirm your planter has proper drainage holes to prevent waterlogged soil and root rot.
- Accessibility: Take into account the height and width of the planter to guarantee it's easy to maintain and access the plants.
Building the Planter Base
Now that you've finalized your planter's design and layout, it's time to bring your vision to life by constructing the base. To guarantee base stability, start by preparing a level surface. Clear the area of debris and lay down a layer of compacted gravel or sand to create a solid foundation.
Next, cut a piece of plywood or oriented strand board (OSB) to the desired size and place it on top of the gravel or sand. This will serve as the base of your planter. Using a level, verify the plywood or OSB is even and secure it with screws or nails.
Now, you're ready to create the form for the concrete base. Cut a piece of 2x6 lumber to the desired height and attach it to the plywood or OSB, creating a border around the perimeter. This will contain the concrete and help achieve the desired planter aesthetics.
Make sure the form is sturdy and secure to prevent it from shifting or collapsing during the concrete pouring process.
Adding Drainage and Soil
Drainage holes punctuate the concrete, allowing excess water to escape, an essential step in preventing waterlogged soil.
Now that your planter base is built, it's time to focus on adding drainage and soil.
When it comes to drainage techniques, you have a few options:
- Drill holes in the bottom of the planter using a masonry bit.
- Create a drainage layer using small rocks or broken pottery.
- Add a waterproof membrane to the inside of the planter to prevent water from seeping into the concrete.
- Incorporate a built-in water reservoir to reduce the need for frequent watering.
With your drainage system in place, it's time to select the perfect soil for your plants.
Look for a well-draining potting mix specifically designed for containers.
Avoid using soil from your garden, as it can compact and prevent proper drainage.
By following these steps, you'll create a healthy environment for your plants to thrive.
Finishing Touches and Sealing
Get set to transform your concrete planter from a rough, unfinished vessel into a sleek, inviting home for your plants. To achieve this, you'll need to add some finishing touches and seal your planter.
Start by sanding the entire surface to remove any imperfections or rough spots. This will guarantee a smooth finish and help your sealant adhere properly.
Next, consider adding a texture enhancement, such as a subtle aggregate or a decorative stamp pattern, to give your planter some visual interest. If desired, apply a coat of paint or stain to explore various color options and match your planter to your outdoor decor.
Once you're satisfied with the appearance, apply a concrete sealer to protect your planter from the elements and extend its lifespan. Choose a sealer that's specifically designed for outdoor use and follow the manufacturer's instructions for application and drying times.
With these finishing touches and a proper seal, your concrete planter will be ready to safely support your plants and thrive in its new environment.
Frequently Asked Questions
Can I Use a Different Type of Block for the Planter Walls?
You can explore alternative block types, considering their weight, texture, and color to achieve desired aesthetic options, but make certain they're durable, weather-resistant, and suitable for outdoor use to guarantee a safe and structurally sound planter.
How Do I Ensure the Planter Won't Crack in Freezing Weather?
To prevent cracking in freezing weather, you'll want to employ effective insulation techniques, such as wrapping the planter with foam board or straw, and apply freeze protection measures like waterproofing and drainage systems to guarantee water doesn't seep in.
Can I Add a Trellis or Other Decorative Elements to the Planter?
As you envision your planter's transformation, imagine a majestic garden trellis rising like a phoenix from the concrete, its delicate tendrils embracing your chosen decorative materials, carefully selected to withstand the elements, ensuring a safe and sturdy haven for your plants to flourish.
Is It Safe to Use a Concrete Planter for Edible Plants?
When using a concrete planter for edible plants, you'll want to guarantee plant safety by minimizing concrete leaching, which can transfer harmful chemicals to your crops; apply a waterproof sealant and maintain good drainage to mitigate this risk.
Can I Make a Self-Watering System for My Concrete Planter?
Building a self-watering system is like crafting a life jacket for your plants; you'll need to design a drainage solution that balances moisture retention, ensuring your concrete planter's soil stays hydrated, not waterlogged, and your edible greens thrive safely.
Conclusion
You've gathered materials, prepared the site, mixed the concrete, and built your planter base. You've added drainage, soil, and plants, and finished with a seal. Now, step back and admire your handiwork. Visualize water flowing through the drainage holes, roots growing deep into the soil, and plants thriving in their new home. Your concrete planter project is complete, a demonstration of your skill and creativity.
Related Posts
-
10 Natural Ways to Clean Your Planters
You can transform your planters from grimy to gleaming with these 10 natural cleaning solutions. Mix baking soda and ...
-
10 Natural Ways to Clean Your Planters
You can transform your planters from grimy to gleaming with these 10 natural cleaning solutions. Mix baking soda and ...
-
10 Natural Ways to Clean Your Planters
You can transform your planters from grimy to gleaming with these 10 natural cleaning solutions. Mix baking soda and ...
-
10 Natural Ways to Clean Your Planters
You can transform your planters from grimy to gleaming with these 10 natural cleaning solutions. Mix baking soda and ...
-
10 Natural Ways to Clean Your Planters
You can transform your planters from grimy to gleaming with these 10 natural cleaning solutions. Mix baking soda and ...
-
10 Natural Ways to Clean Your Planters
You can transform your planters from grimy to gleaming with these 10 natural cleaning solutions. Mix baking soda and ...
-
10 Natural Ways to Clean Your Planters
You can transform your planters from grimy to gleaming with these 10 natural cleaning solutions. Mix baking soda and ...
-
10 Natural Ways to Clean Your Planters
You can transform your planters from grimy to gleaming with these 10 natural cleaning solutions. Mix baking soda and ...
-
10 Natural Ways to Clean Your Planters
You can transform your planters from grimy to gleaming with these 10 natural cleaning solutions. Mix baking soda and ...
-
10 Natural Ways to Clean Your Planters
You can transform your planters from grimy to gleaming with these 10 natural cleaning solutions. Mix baking soda and ...
-
10 Natural Ways to Clean Your Planters
You can transform your planters from grimy to gleaming with these 10 natural cleaning solutions. Mix baking soda and ...
-
10 Natural Ways to Clean Your Planters
You can transform your planters from grimy to gleaming with these 10 natural cleaning solutions. Mix baking soda and ...
-
10 Natural Ways to Clean Your Planters
You can transform your planters from grimy to gleaming with these 10 natural cleaning solutions. Mix baking soda and ...
-
10 Natural Ways to Clean Your Planters
You can transform your planters from grimy to gleaming with these 10 natural cleaning solutions. Mix baking soda and ...
-
10 Natural Ways to Clean Your Planters
You can transform your planters from grimy to gleaming with these 10 natural cleaning solutions. Mix baking soda and ...
-
10 Natural Ways to Clean Your Planters
You can transform your planters from grimy to gleaming with these 10 natural cleaning solutions. Mix baking soda and ...
-
10 Natural Ways to Clean Your Planters
You can transform your planters from grimy to gleaming with these 10 natural cleaning solutions. Mix baking soda and ...
-
10 Natural Ways to Clean Your Planters
You can transform your planters from grimy to gleaming with these 10 natural cleaning solutions. Mix baking soda and ...
-
10 Natural Ways to Clean Your Planters
You can transform your planters from grimy to gleaming with these 10 natural cleaning solutions. Mix baking soda and ...
-
10 Natural Ways to Clean Your Planters
You can transform your planters from grimy to gleaming with these 10 natural cleaning solutions. Mix baking soda and ...
-
10 Natural Ways to Clean Your Planters
You can transform your planters from grimy to gleaming with these 10 natural cleaning solutions. Mix baking soda and ...
-
10 Natural Ways to Clean Your Planters
You can transform your planters from grimy to gleaming with these 10 natural cleaning solutions. Mix baking soda and ...
-
10 Natural Ways to Clean Your Planters
You can transform your planters from grimy to gleaming with these 10 natural cleaning solutions. Mix baking soda and ...
-
10 Natural Ways to Clean Your Planters
You can transform your planters from grimy to gleaming with these 10 natural cleaning solutions. Mix baking soda and ...
-
10 Natural Ways to Clean Your Planters
You can transform your planters from grimy to gleaming with these 10 natural cleaning solutions. Mix baking soda and ...
-
10 Natural Ways to Clean Your Planters
You can transform your planters from grimy to gleaming with these 10 natural cleaning solutions. Mix baking soda and ...
-
10 Natural Ways to Clean Your Planters
You can transform your planters from grimy to gleaming with these 10 natural cleaning solutions. Mix baking soda and ...
-
10 Natural Ways to Clean Your Planters
You can transform your planters from grimy to gleaming with these 10 natural cleaning solutions. Mix baking soda and ...
-
10 Natural Ways to Clean Your Planters
You can transform your planters from grimy to gleaming with these 10 natural cleaning solutions. Mix baking soda and ...
-
10 Natural Ways to Clean Your Planters
You can transform your planters from grimy to gleaming with these 10 natural cleaning solutions. Mix baking soda and ...
-
10 Natural Ways to Clean Your Planters
You can transform your planters from grimy to gleaming with these 10 natural cleaning solutions. Mix baking soda and ...
-
10 Natural Ways to Clean Your Planters
You can transform your planters from grimy to gleaming with these 10 natural cleaning solutions. Mix baking soda and ...
-
10 Natural Ways to Clean Your Planters
You can transform your planters from grimy to gleaming with these 10 natural cleaning solutions. Mix baking soda and ...
-
10 Natural Ways to Clean Your Planters
You can transform your planters from grimy to gleaming with these 10 natural cleaning solutions. Mix baking soda and ...
-
10 Natural Ways to Clean Your Planters
You can transform your planters from grimy to gleaming with these 10 natural cleaning solutions. Mix baking soda and ...
-
What to Know Before Upcycling Concrete Planters
When upcycling concrete planters, you'll want to start by evaluating the planter's size, shape, and condition to guar...
-
What to Know Before Upcycling Concrete Planters
When upcycling concrete planters, you'll want to start by evaluating the planter's size, shape, and condition to guar...
-
What to Know Before Upcycling Concrete Planters
When upcycling concrete planters, you'll want to start by evaluating the planter's size, shape, and condition to guar...
-
What to Know Before Upcycling Concrete Planters
When upcycling concrete planters, you'll want to start by evaluating the planter's size, shape, and condition to guar...
-
What to Know Before Upcycling Concrete Planters
When upcycling concrete planters, you'll want to start by evaluating the planter's size, shape, and condition to guar...
-
What to Know Before Upcycling Concrete Planters
When upcycling concrete planters, you'll want to start by evaluating the planter's size, shape, and condition to guar...
-
What to Know Before Upcycling Concrete Planters
When upcycling concrete planters, you'll want to start by evaluating the planter's size, shape, and condition to guar...
-
What to Know Before Upcycling Concrete Planters
When upcycling concrete planters, you'll want to start by evaluating the planter's size, shape, and condition to guar...
-
What to Know Before Upcycling Concrete Planters
When upcycling concrete planters, you'll want to start by evaluating the planter's size, shape, and condition to guar...
-
What to Know Before Upcycling Concrete Planters
When upcycling concrete planters, you'll want to start by evaluating the planter's size, shape, and condition to guar...
-
What to Know Before Upcycling Concrete Planters
When upcycling concrete planters, you'll want to start by evaluating the planter's size, shape, and condition to guar...
-
What to Know Before Upcycling Concrete Planters
When upcycling concrete planters, you'll want to start by evaluating the planter's size, shape, and condition to guar...
-
What to Know Before Upcycling Concrete Planters
When upcycling concrete planters, you'll want to start by evaluating the planter's size, shape, and condition to guar...
-
What to Know Before Upcycling Concrete Planters
When upcycling concrete planters, you'll want to start by evaluating the planter's size, shape, and condition to guar...
-
What to Know Before Upcycling Concrete Planters
When upcycling concrete planters, you'll want to start by evaluating the planter's size, shape, and condition to guar...
-
What to Know Before Upcycling Concrete Planters
When upcycling concrete planters, you'll want to start by evaluating the planter's size, shape, and condition to guar...
-
What to Know Before Upcycling Concrete Planters
When upcycling concrete planters, you'll want to start by evaluating the planter's size, shape, and condition to guar...
-
What to Know Before Upcycling Concrete Planters
When upcycling concrete planters, you'll want to start by evaluating the planter's size, shape, and condition to guar...
-
What to Know Before Upcycling Concrete Planters
When upcycling concrete planters, you'll want to start by evaluating the planter's size, shape, and condition to guar...
-
What to Know Before Upcycling Concrete Planters
When upcycling concrete planters, you'll want to start by evaluating the planter's size, shape, and condition to guar...
-
What to Know Before Upcycling Concrete Planters
When upcycling concrete planters, you'll want to start by evaluating the planter's size, shape, and condition to guar...
-
What to Know Before Upcycling Concrete Planters
When upcycling concrete planters, you'll want to start by evaluating the planter's size, shape, and condition to guar...
-
What to Know Before Upcycling Concrete Planters
When upcycling concrete planters, you'll want to start by evaluating the planter's size, shape, and condition to guar...
-
Succulent-Friendly Drainage Solutions for Block Planters
You can create a succulent-friendly drainage system in your cinder block planters by drilling holes in the bottom of ...
-
Succulent-Friendly Drainage Solutions for Block Planters
You can create a succulent-friendly drainage system in your cinder block planters by drilling holes in the bottom of ...
-
Succulent-Friendly Drainage Solutions for Block Planters
You can create a succulent-friendly drainage system in your cinder block planters by drilling holes in the bottom of ...
-
Succulent-Friendly Drainage Solutions for Block Planters
You can create a succulent-friendly drainage system in your cinder block planters by drilling holes in the bottom of ...
-
Succulent-Friendly Drainage Solutions for Block Planters
You can create a succulent-friendly drainage system in your cinder block planters by drilling holes in the bottom of ...
-
Succulent-Friendly Drainage Solutions for Block Planters
You can create a succulent-friendly drainage system in your cinder block planters by drilling holes in the bottom of ...
-
Succulent-Friendly Drainage Solutions for Block Planters
You can create a succulent-friendly drainage system in your cinder block planters by drilling holes in the bottom of ...
-
Succulent-Friendly Drainage Solutions for Block Planters
You can create a succulent-friendly drainage system in your cinder block planters by drilling holes in the bottom of ...
-
Succulent-Friendly Drainage Solutions for Block Planters
You can create a succulent-friendly drainage system in your cinder block planters by drilling holes in the bottom of ...
-
Succulent-Friendly Drainage Solutions for Block Planters
You can create a succulent-friendly drainage system in your cinder block planters by drilling holes in the bottom of ...
-
Succulent-Friendly Drainage Solutions for Block Planters
You can create a succulent-friendly drainage system in your cinder block planters by drilling holes in the bottom of ...
-
Succulent-Friendly Drainage Solutions for Block Planters
You can create a succulent-friendly drainage system in your cinder block planters by drilling holes in the bottom of ...
-
Succulent-Friendly Drainage Solutions for Block Planters
You can create a succulent-friendly drainage system in your cinder block planters by drilling holes in the bottom of ...
-
Succulent-Friendly Drainage Solutions for Block Planters
You can create a succulent-friendly drainage system in your cinder block planters by drilling holes in the bottom of ...
-
Succulent-Friendly Drainage Solutions for Block Planters
You can create a succulent-friendly drainage system in your cinder block planters by drilling holes in the bottom of ...


