What Tools Do You Need for Block Planters
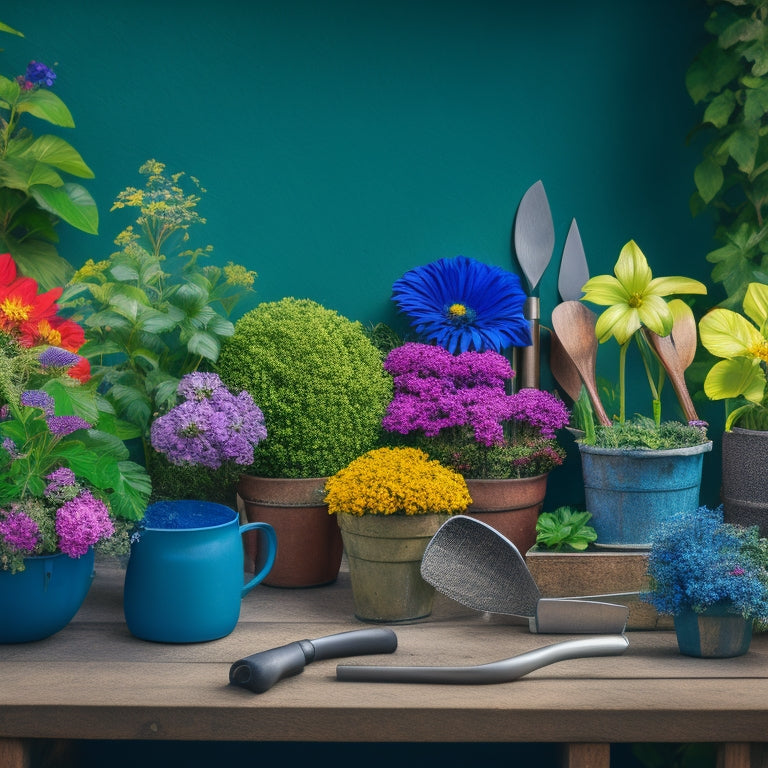
You'll need a range of tools and equipment to build a block planter, including measuring and marking tools like tape measures, marking tools, and combination squares for accurate cuts. Safety gear like goggles, gloves, and a dust mask will protect you from hazards. Laying and leveling tools, such as spirit levels and tamping tools, guarantee a solid foundation. Cutting and shaping equipment, like masonry saws and chisel sets, help you customize blocks. Drilling and fastening tools, mixing and applying materials, and planting and watering essentials are also vital. Now, get ready to explore the specifics to bring your block planter vision to life.
Key Takeaways
• Measuring and marking tools, like tape measures and fine-tip markers, ensure accurate block placement and fit.
• Safety gear, including goggles, gloves, and a dust mask, protects you from hazards during block planter construction.
• Laying and leveling tools, such as spirit levels and tamping tools, help achieve perfect block alignment and a stable base.
• Cutting and shaping equipment, like masonry saws and chisel sets, enable precise block cutting and shaping for a professional finish.
• Drilling and fastening tools, including drill bits and screws, are necessary for securing blocks together and to the planter's base.
Measuring and Marking Cinder Blocks
Measure the cinder blocks accurately to confirm a snug fit for your plants, and mark them clearly with a pencil or marker to guide your drilling and cutting.
You'll want to employ precise measuring techniques to confirm your blocks fit together seamlessly. Use a tape measure or ruler to record the length, width, and height of each block, taking note of any slight variations.
Next, select the right marking tools for the job – a fine-tip marker or a carpenter's pencil will help you create clear, visible marks. When marking, use a straightedge or square to draw straight lines, and apply gentle pressure to avoid scratching the block's surface.
Consider using a combination square to create precise angles and miters. By measuring and marking your cinder blocks with care, you'll set yourself up for success in the next stages of your block planter project.
With accurate measurements and clear marks, you'll be able to drill and cut with confidence, resulting in a sturdy and attractive planter for your plants.
Essential Safety Gear Needed
As you prepare to drill and cut your cinder blocks, don your essential safety gear to shield yourself from flying debris and hazardous dust. Cutting and drilling cinder blocks can be hazardous, but with the right gear, you'll be protected from harm.
| Safety Gear | Purpose |
|---|---|
| Safety Goggles | Protect your eyes from flying debris and dust |
| Work Gloves | Shield your hands from cuts and abrasions |
| Dust Mask | Prevent inhalation of hazardous dust particles |
Laying and Leveling Tools
You'll need a trio of essential tools to accurately lay and level your block planters, guaranteeing a sturdy foundation for your verdant creations.
First, a spirit level will help you achieve perfect horizontal alignment, which is vital for block foundation stability.
Next, a rubber mallet will allow you to tap blocks into place without damaging them.
Finally, a tamping tool will help you compact the soil and gravel base, guaranteeing proper soil drainage considerations.
When laying your blocks, use the spirit level to check the levelness of the surface.
Make adjustments as needed to guarantee a stable base.
Then, use the rubber mallet to gently tap each block into place.
Once the blocks are in position, use the tamping tool to compact the soil and gravel base.
This will prevent settling and guarantee that your block planters remain stable over time.
Cutting and Shaping Equipment
With your block planters' foundation laid and leveled, it's time to focus on refining their shape and size to fit your garden design, which is where cutting and shaping equipment come into play. You'll need to trim excess material, make precise cuts, and shape your blocks to fit together seamlessly. To achieve this, you'll require a range of cutting and shaping tools.
| Tool | Description |
|---|---|
| Masonry saw | Ideal for making precise cuts in concrete blocks |
| Block splitter | Splits blocks into smaller pieces with ease |
| Chisel set | For breaking off excess material and shaping blocks |
| Angle grinder | Perfect for trimming and shaping blocks with precision |
When it comes to cutting techniques, you'll want to use a combination of scoring and breaking to achieve clean cuts. For shaping methods, you can use a combination of chiseling and grinding to refine the shape of your blocks. By mastering these cutting and shaping techniques, you'll be able to create block planters that fit your garden design perfectly.
Drilling and Fastening Tools
As you move forward with your block planter project, you'll need to choose the right drilling and fastening tools to guarantee a sturdy and long-lasting structure.
You'll want to select drill bits that can efficiently penetrate the block's density, and you'll also need to decide on the type of screws that will securely hold everything in place.
Drill Bit Selection
Selecting the right drill bit for your block planter project is crucial, since it directly impacts the quality of the hole and the longevity of the fasteners. You'll want to choose a drill bit that can efficiently penetrate the concrete or masonry blocks without compromising their structural integrity.
When it comes to drill bit materials, you've got options like tungsten carbide, high-speed steel, and diamond-coated bits. Tungsten carbide bits are ideal for drilling through concrete and masonry, while high-speed steel bits are better suited for softer materials. Diamond-coated bits, on the other hand, are perfect for drilling through extremely hard surfaces.
Drill bit sizes are equally important. You'll need to select a bit that matches the size of the fastener you're using. A general rule of thumb is to use a drill bit that's 1/16 inch larger than the fastener's diameter. This guarantees a snug fit and prevents the fastener from becoming loose over time.
With the right drill bit material and size, you'll be able to create clean, precise holes that will hold your block planter together securely.
Screw Type Choices
You'll need to choose the right screw type for your block planter project, as it plays a critical role in ensuring the structural integrity and longevity of your outdoor masterpiece. The wrong screw can lead to a weakened structure, while the right one will provide a solid foundation for your plants to thrive.
When selecting screws, consider the following factors:
-
Screw material types: Stainless steel, galvanized, or coated screws are ideal for outdoor use, as they resist corrosion and withstand harsh weather conditions.
-
Screw size guidelines: Choose screws that are long enough to penetrate through the block and into the underlying surface, ensuring a secure hold. A general rule of thumb is to use screws that are at least 1-2 inches longer than the block's thickness.
-
Head type: Flat head screws are suitable for most block planter projects, but you may need hex head or pan head screws for specific applications.
- Drive type: Decide between Phillips, Torx, or hex drives, depending on your personal preference and the type of screwdriver or drill you're using.
Mixing and Applying Materials
When building a block planter, you'll need to prep the soil, add mulch or gravel, and potentially mix concrete or mortar.
You'll require the right tools to efficiently mix and apply these materials, ensuring a sturdy and visually appealing structure.
Prepare Soil Mixtures
To guarantee ideal growth in your block planters, combine a balanced blend of organic matter, perlite, and vermiculite to create a well-draining and nutrient-rich soil mixture. This will make certain your plants receive the perfect soil nutrient balance, allowing them to thrive.
When preparing your soil mixture, remember to:
-
Add organic amendments like compost or manure to enhance soil fertility and structure.
-
Mix in perlite to improve drainage and prevent waterlogged soil.
-
Incorporate vermiculite to retain moisture and regulate soil temperature.
- Adjust the pH level of your soil mixture according to your plants' specific needs.
Apply Mulch and Gravel
By incorporating a layer of mulch and gravel into your block planters, you create a protective barrier that retains moisture, suppresses weeds, and regulates soil temperature. This vital step guarantees your plants thrive in their new environment.
When selecting mulch types, consider organic options like wood chips, bark, or straw, which break down over time, adding nutrients to the soil. Inorganic mulches like rubber or plastic are also effective, but won't provide the same nutritional benefits.
Gravel benefits include improved drainage, reduced erosion, and a decorative touch. Mix 2-3 inches of mulch with 1-2 inches of gravel for ideal results. Spread the mixture evenly across the planter, taking care not to pile it against the blocks. This will prevent water from seeping behind the blocks and causing damage.
As you apply the mulch and gravel, work from the bottom up, gently raking the materials into place. This guarantees the layer is evenly distributed and your plants receive the maximum benefits.
With this protective barrier in place, you're ready to move on to the next step in creating your block planters.
Mix Concrete or Mortar
You're about to create a strong, durable bond between the blocks by mixing and applying concrete or mortar, an essential step in building your block planters. This process requires attention to detail and the right tools to guarantee a solid foundation for your plants.
To mix concrete or mortar, you'll need:
-
A mixing bucket or wheelbarrow to combine the ingredients
-
A trowel or shovel to mix and apply the mixture
-
A level to guarantee the mixture is evenly distributed
- A hose or water source to achieve the right consistency
When mixing mortar, follow the instructions on the packaging and be careful not to overmix, as this can weaken the bond.
For concrete, make sure to follow the recommended mixing ratio and allow for proper curing time.
Concrete curing is a critical step that requires patience, but it's essential for a strong and durable bond.
Planting and Watering Essentials
As you prepare to fill your block planters, gathering essential tools for planting and watering is crucial to guarantee a successful and thriving garden. You'll need a trowel or small shovel to scoop and spread soil, as well as a cultivator or weeder to loosen and aerate the soil.
Consider the specific soil type you're working with, as some may require more moisture or drainage than others.
When it comes to watering, you'll want to choose a technique that suits your plants' needs. Overhead watering with a hose or watering can is effective for most plants, but you may also consider soaker hoses or drip irrigation for more targeted watering.
A moisture meter can help you determine when your soil is dry enough to water again. Don't forget a watering can or hose with a fine nozzle to reach tight spaces and avoid washing away small plants.
Decorative and Finishing Touches
With your block planters filled and thriving, it's time to add those decorative and finishing touches that'll elevate your garden's visual appeal and create a welcoming ambiance. You've got the foundation laid; now it's time to get creative and make your planters truly shine.
Here are a few essentials to take into account:
-
Decorative paint: Add a pop of color or a subtle texture to your planters with a fresh coat of paint. Choose a style that complements your garden's aesthetic and get creative with patterns and designs.
-
Plant selection: Select plants that not only thrive in your climate but also complement each other regarding texture, color, and growth habits. This will create a visually appealing arrangement that'll draw the eye.
-
Decorative stones: Add a layer of decorative stones or pebbles around your plants to create a polished look and help with drainage.
- Finishing touches: Add a few decorative elements like garden ornaments, wind chimes, or solar lights to create a warm and inviting atmosphere.
Frequently Asked Questions
Can I Use Block Planters for Indoor Gardening Projects?
You're wondering if block planters are suitable for indoor gardening projects? Absolutely!
They're a great choice, offering benefits like improved drainage, aeration, and thermal insulation.
With block planters, you'll have more control over soil quality, moisture levels, and root growth.
Plus, they're space-efficient, allowing you to maximize your indoor gardening space.
How Do I Prevent Weeds From Growing in My Block Planters?
To prevent weeds from taking over your block planters, you'll want to get proactive.
First, line the bottom of each planter with a weed barrier to block unwanted growth.
Next, focus on soil maintenance: use a well-draining mix and avoid overwatering, which can create an ideal environment for weeds.
Are Block Planters Suitable for Growing Vegetables and Herbs?
You're probably thinking, 'Can I grow an entire salad in my block planters?' And the answer is, absolutely!
Block planters are perfect for growing a diverse range of vegetable varieties, from juicy tomatoes to crunchy carrots.
Plus, you can't go wrong with a thoughtful herb selection, like fragrant basil or tangy cilantro.
With proper care, your block planters will yield a bountiful harvest, giving you complete control over your fresh produce.
Can I Paint or Stain My Block Planters for a Decorative Look?
You're looking to add a personal touch to your block planters! Yes, you can definitely paint or stain them for a decorative look.
Get creative with finishes like distressed wood, bold colors, or subtle textures. Just make sure you choose a finish that provides exterior durability, as your planters will be exposed to the elements.
Consider using weather-resistant paints or stains specifically designed for outdoor use to protect your planters from fading or damage.
How Often Should I Replace the Soil in My Block Planters?
'Rake in the benefits' of your block planters by knowing when to refresh the soil.
You'll want to replace the soil every 2-3 years, depending on its quality.
Assess the soil's condition by checking for signs of depletion, like poor drainage or stunted plant growth.
If you notice any of these red flags, it's time to swap it out.
Regular soil replacement guarantees your plants receive the nutrients they need to thrive.
Conclusion
You've made it to the final stage of creating your block planters. Now, take a step back and admire your handiwork.
You've measured and marked, protected yourself, laid and leveled, cut and shaped, drilled and fastened, mixed and applied, planted and watered, and added those finishing touches.
Your block planters are ready to thrive, and you've got the skills to maintain them.
With your tools and expertise, you'll be creating more stunning planters in no time, bringing beauty and life to any outdoor space.
Related Posts
-
Optimal Soil Ph for Planter Boxes Made Easy
You need to optimize your planter box's soil pH to create a thriving environment for your plants, as the ideal pH ran...
-
Optimal Soil Ph for Planter Boxes Made Easy
You need to optimize your planter box's soil pH to create a thriving environment for your plants, as the ideal pH ran...
-
Optimal Soil Ph for Planter Boxes Made Easy
You need to optimize your planter box's soil pH to create a thriving environment for your plants, as the ideal pH ran...
-
Optimal Soil Ph for Planter Boxes Made Easy
You need to optimize your planter box's soil pH to create a thriving environment for your plants, as the ideal pH ran...
-
Optimal Soil Ph for Planter Boxes Made Easy
You need to optimize your planter box's soil pH to create a thriving environment for your plants, as the ideal pH ran...
-
Optimal Soil Ph for Planter Boxes Made Easy
You need to optimize your planter box's soil pH to create a thriving environment for your plants, as the ideal pH ran...
-
Optimal Soil Ph for Planter Boxes Made Easy
You need to optimize your planter box's soil pH to create a thriving environment for your plants, as the ideal pH ran...
-
Optimal Soil Ph for Planter Boxes Made Easy
You need to optimize your planter box's soil pH to create a thriving environment for your plants, as the ideal pH ran...
-
Optimal Soil Ph for Planter Boxes Made Easy
You need to optimize your planter box's soil pH to create a thriving environment for your plants, as the ideal pH ran...
-
Optimal Soil Ph for Planter Boxes Made Easy
You need to optimize your planter box's soil pH to create a thriving environment for your plants, as the ideal pH ran...
-
Optimal Soil Ph for Planter Boxes Made Easy
You need to optimize your planter box's soil pH to create a thriving environment for your plants, as the ideal pH ran...
-
Optimal Soil Ph for Planter Boxes Made Easy
You need to optimize your planter box's soil pH to create a thriving environment for your plants, as the ideal pH ran...
-
Optimal Soil Ph for Planter Boxes Made Easy
You need to optimize your planter box's soil pH to create a thriving environment for your plants, as the ideal pH ran...
-
Optimal Soil Ph for Planter Boxes Made Easy
You need to optimize your planter box's soil pH to create a thriving environment for your plants, as the ideal pH ran...
-
Optimal Soil Ph for Planter Boxes Made Easy
You need to optimize your planter box's soil pH to create a thriving environment for your plants, as the ideal pH ran...
-
Optimal Soil Ph for Planter Boxes Made Easy
You need to optimize your planter box's soil pH to create a thriving environment for your plants, as the ideal pH ran...
-
Optimal Soil Ph for Planter Boxes Made Easy
You need to optimize your planter box's soil pH to create a thriving environment for your plants, as the ideal pH ran...
-
Optimal Soil Ph for Planter Boxes Made Easy
You need to optimize your planter box's soil pH to create a thriving environment for your plants, as the ideal pH ran...
-
Optimal Soil Ph for Planter Boxes Made Easy
You need to optimize your planter box's soil pH to create a thriving environment for your plants, as the ideal pH ran...
-
Optimal Soil Ph for Planter Boxes Made Easy
You need to optimize your planter box's soil pH to create a thriving environment for your plants, as the ideal pH ran...
-
Optimal Soil Ph for Planter Boxes Made Easy
You need to optimize your planter box's soil pH to create a thriving environment for your plants, as the ideal pH ran...
-
Optimal Soil Ph for Planter Boxes Made Easy
You need to optimize your planter box's soil pH to create a thriving environment for your plants, as the ideal pH ran...
-
Optimal Soil Ph for Planter Boxes Made Easy
You need to optimize your planter box's soil pH to create a thriving environment for your plants, as the ideal pH ran...
-
Optimal Soil Ph for Planter Boxes Made Easy
You need to optimize your planter box's soil pH to create a thriving environment for your plants, as the ideal pH ran...
-
Optimal Soil Ph for Planter Boxes Made Easy
You need to optimize your planter box's soil pH to create a thriving environment for your plants, as the ideal pH ran...
-
Optimal Soil Ph for Planter Boxes Made Easy
You need to optimize your planter box's soil pH to create a thriving environment for your plants, as the ideal pH ran...
-
Why Choose Cinder for Your Rooftop Garden Planters
You choose cinder for your rooftop garden planters because they offer a unique combination of durability, versatility...
-
Why Choose Cinder for Your Rooftop Garden Planters
You choose cinder for your rooftop garden planters because they offer a unique combination of durability, versatility...
-
Why Choose Cinder for Your Rooftop Garden Planters
You choose cinder for your rooftop garden planters because they offer a unique combination of durability, versatility...
-
Why Choose Cinder for Your Rooftop Garden Planters
You choose cinder for your rooftop garden planters because they offer a unique combination of durability, versatility...
-
Why Choose Cinder for Your Rooftop Garden Planters
You choose cinder for your rooftop garden planters because they offer a unique combination of durability, versatility...
-
Why Choose Cinder for Your Rooftop Garden Planters
You choose cinder for your rooftop garden planters because they offer a unique combination of durability, versatility...
-
Why Choose Cinder for Your Rooftop Garden Planters
You choose cinder for your rooftop garden planters because they offer a unique combination of durability, versatility...
-
Why Choose Cinder for Your Rooftop Garden Planters
You choose cinder for your rooftop garden planters because they offer a unique combination of durability, versatility...
-
Why Choose Cinder for Your Rooftop Garden Planters
You choose cinder for your rooftop garden planters because they offer a unique combination of durability, versatility...
-
Why Choose Cinder for Your Rooftop Garden Planters
You choose cinder for your rooftop garden planters because they offer a unique combination of durability, versatility...
-
Why Choose Cinder for Your Rooftop Garden Planters
You choose cinder for your rooftop garden planters because they offer a unique combination of durability, versatility...
-
Why Choose Cinder for Your Rooftop Garden Planters
You choose cinder for your rooftop garden planters because they offer a unique combination of durability, versatility...
-
Why Choose Cinder for Your Rooftop Garden Planters
You choose cinder for your rooftop garden planters because they offer a unique combination of durability, versatility...
-
Why Choose Cinder for Your Rooftop Garden Planters
You choose cinder for your rooftop garden planters because they offer a unique combination of durability, versatility...
-
Why Choose Cinder for Your Rooftop Garden Planters
You choose cinder for your rooftop garden planters because they offer a unique combination of durability, versatility...
-
Why Choose Cinder for Your Rooftop Garden Planters
You choose cinder for your rooftop garden planters because they offer a unique combination of durability, versatility...
-
Why Choose Cinder for Your Rooftop Garden Planters
You choose cinder for your rooftop garden planters because they offer a unique combination of durability, versatility...
-
Why Choose Cinder for Your Rooftop Garden Planters
You choose cinder for your rooftop garden planters because they offer a unique combination of durability, versatility...
-
Why Choose Cinder for Your Rooftop Garden Planters
You choose cinder for your rooftop garden planters because they offer a unique combination of durability, versatility...
-
Why Choose Cinder for Your Rooftop Garden Planters
You choose cinder for your rooftop garden planters because they offer a unique combination of durability, versatility...
-
Why Choose Cinder for Your Rooftop Garden Planters
You choose cinder for your rooftop garden planters because they offer a unique combination of durability, versatility...
-
Why Choose Cinder for Your Rooftop Garden Planters
You choose cinder for your rooftop garden planters because they offer a unique combination of durability, versatility...
-
Why Choose Cinder for Your Rooftop Garden Planters
You choose cinder for your rooftop garden planters because they offer a unique combination of durability, versatility...
-
Why Choose Cinder for Your Rooftop Garden Planters
You choose cinder for your rooftop garden planters because they offer a unique combination of durability, versatility...
-
Why Choose Cinder for Your Rooftop Garden Planters
You choose cinder for your rooftop garden planters because they offer a unique combination of durability, versatility...
-
Why Choose Cinder for Your Rooftop Garden Planters
You choose cinder for your rooftop garden planters because they offer a unique combination of durability, versatility...
-
Why Choose Cinder for Your Rooftop Garden Planters
You choose cinder for your rooftop garden planters because they offer a unique combination of durability, versatility...
-
Why Choose Cinder for Your Rooftop Garden Planters
You choose cinder for your rooftop garden planters because they offer a unique combination of durability, versatility...
-
Selecting the Right Planter Dimensions for Your Space
When selecting the right planter dimensions for your space, you'll want to carefully consider the available area, mea...
-
Selecting the Right Planter Dimensions for Your Space
When selecting the right planter dimensions for your space, you'll want to carefully consider the available area, mea...
-
Selecting the Right Planter Dimensions for Your Space
When selecting the right planter dimensions for your space, you'll want to carefully consider the available area, mea...
-
Selecting the Right Planter Dimensions for Your Space
When selecting the right planter dimensions for your space, you'll want to carefully consider the available area, mea...
-
Selecting the Right Planter Dimensions for Your Space
When selecting the right planter dimensions for your space, you'll want to carefully consider the available area, mea...
-
Selecting the Right Planter Dimensions for Your Space
When selecting the right planter dimensions for your space, you'll want to carefully consider the available area, mea...
-
Selecting the Right Planter Dimensions for Your Space
When selecting the right planter dimensions for your space, you'll want to carefully consider the available area, mea...
-
Selecting the Right Planter Dimensions for Your Space
When selecting the right planter dimensions for your space, you'll want to carefully consider the available area, mea...
-
Selecting the Right Planter Dimensions for Your Space
When selecting the right planter dimensions for your space, you'll want to carefully consider the available area, mea...
-
Selecting the Right Planter Dimensions for Your Space
When selecting the right planter dimensions for your space, you'll want to carefully consider the available area, mea...
-
Selecting the Right Planter Dimensions for Your Space
When selecting the right planter dimensions for your space, you'll want to carefully consider the available area, mea...
-
Selecting the Right Planter Dimensions for Your Space
When selecting the right planter dimensions for your space, you'll want to carefully consider the available area, mea...
-
Selecting the Right Planter Dimensions for Your Space
When selecting the right planter dimensions for your space, you'll want to carefully consider the available area, mea...
-
Selecting the Right Planter Dimensions for Your Space
When selecting the right planter dimensions for your space, you'll want to carefully consider the available area, mea...
-
Selecting the Right Planter Dimensions for Your Space
When selecting the right planter dimensions for your space, you'll want to carefully consider the available area, mea...
-
Selecting the Right Planter Dimensions for Your Space
When selecting the right planter dimensions for your space, you'll want to carefully consider the available area, mea...
-
Selecting the Right Planter Dimensions for Your Space
When selecting the right planter dimensions for your space, you'll want to carefully consider the available area, mea...
-
Selecting the Right Planter Dimensions for Your Space
When selecting the right planter dimensions for your space, you'll want to carefully consider the available area, mea...
-
Selecting the Right Planter Dimensions for Your Space
When selecting the right planter dimensions for your space, you'll want to carefully consider the available area, mea...
-
Selecting the Right Planter Dimensions for Your Space
When selecting the right planter dimensions for your space, you'll want to carefully consider the available area, mea...
-
Selecting the Right Planter Dimensions for Your Space
When selecting the right planter dimensions for your space, you'll want to carefully consider the available area, mea...
-
Selecting the Right Planter Dimensions for Your Space
When selecting the right planter dimensions for your space, you'll want to carefully consider the available area, mea...
-
Selecting the Right Planter Dimensions for Your Space
When selecting the right planter dimensions for your space, you'll want to carefully consider the available area, mea...
-
Selecting the Right Planter Dimensions for Your Space
When selecting the right planter dimensions for your space, you'll want to carefully consider the available area, mea...
-
Selecting the Right Planter Dimensions for Your Space
When selecting the right planter dimensions for your space, you'll want to carefully consider the available area, mea...
-
Selecting the Right Planter Dimensions for Your Space
When selecting the right planter dimensions for your space, you'll want to carefully consider the available area, mea...
-
Selecting the Right Planter Dimensions for Your Space
When selecting the right planter dimensions for your space, you'll want to carefully consider the available area, mea...
-
Selecting the Right Planter Dimensions for Your Space
When selecting the right planter dimensions for your space, you'll want to carefully consider the available area, mea...
-
Selecting the Right Planter Dimensions for Your Space
When selecting the right planter dimensions for your space, you'll want to carefully consider the available area, mea...
-
Selecting the Right Planter Dimensions for Your Space
When selecting the right planter dimensions for your space, you'll want to carefully consider the available area, mea...
-
Selecting the Right Planter Dimensions for Your Space
When selecting the right planter dimensions for your space, you'll want to carefully consider the available area, mea...
-
Selecting the Right Planter Dimensions for Your Space
When selecting the right planter dimensions for your space, you'll want to carefully consider the available area, mea...
-
Selecting the Right Planter Dimensions for Your Space
When selecting the right planter dimensions for your space, you'll want to carefully consider the available area, mea...


