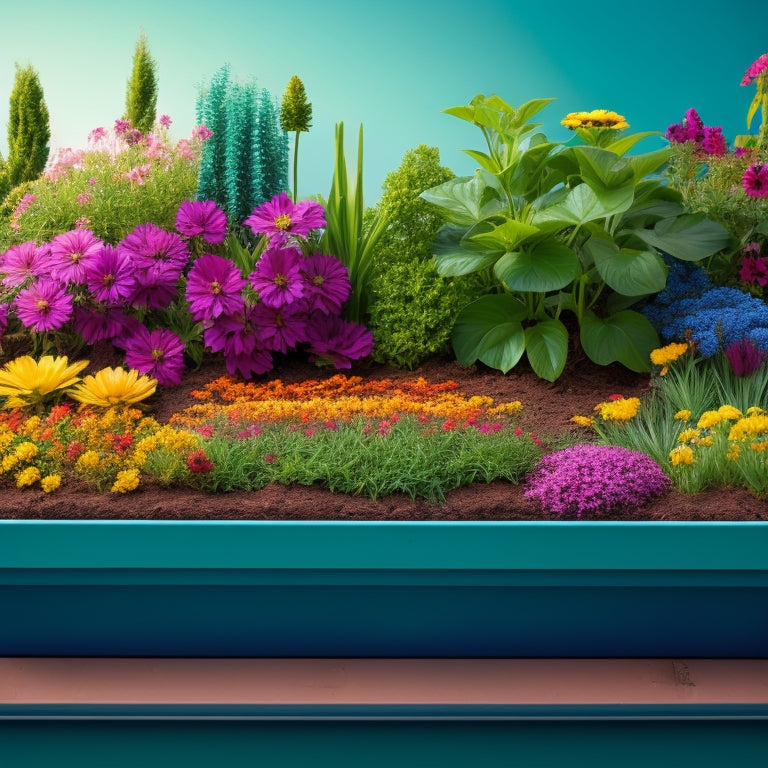
Simple Irrigation System for Planter Boxes Beginners
As a beginner, you'll want to create a simple irrigation system for your planter box that efficiently waters your plants. Start by choosing the right materials, such as dense cinder blocks or a sturdy frame, to provide structural integrity and support for your plants. Next, install a drip or micro-irrigation system that delivers water directly to the roots, conserving water and reducing evaporation. Connect the system to a reliable water source and set up a timer to guarantee consistent watering. Don't forget to implement effective drainage and overflow management to prevent waterlogged soil. With these basics in place, you'll be well on your way to a thriving planter box – and there's more to explore to take your irrigation system to the next level.
Key Takeaways
• Choose dense, heavy cinder blocks for better structural integrity and drainage in planter boxes.
• Select a suitable frame material (wood, plastic, or metal) based on plant size, available space, and maintenance needs.
• Install an efficient irrigation system using drip or micro-irrigation to conserve water and reduce evaporation.
• Ensure proper drainage by drilling holes in the planter box and adding a layer of gravel or small rocks at the bottom.
• Conduct regular checks and maintenance on the irrigation system to prevent clogs, mineral buildup, and damage.
Choosing the Right Cinder Blocks
When building your planter box, select cinder blocks that are dense and heavy, with a smooth, even texture, as they'll provide better structural integrity and drainage. You'll want to choose blocks that can withstand the weight of the soil and plants, as well as the water flow from your irrigation system.
There are various block types to regard, including solid, hollow, and split-face blocks. Solid blocks offer maximum strength, while hollow blocks provide better drainage. Split-face blocks have a textured exterior, adding visual appeal to your planter box.
For block placement, think about a staggered pattern to increase stability and prevent water from seeping between the blocks. This pattern also allows for better weight distribution, making certain your planter box remains sturdy.
When placing the blocks, make sure to align them carefully to create a level surface. You can use a spirit level to guarantee accuracy.
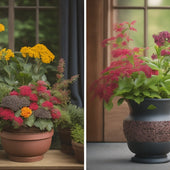
Building the Planter Box Frame
You'll start building your planter box frame by selecting the right materials, considering factors like durability, cost, and aesthetics.
As you decide on the frame's dimensions, think about the space where the planter will sit and the mature size of the plants you'll be growing.
Frame Material Options
Selecting the right frame material is essential, as it affects the durability, weight, and overall aesthetic of your planter box.
You'll want to evaluate the pros and cons of each option to guarantee your frame complements your irrigation system and enhances your outdoor space.
When deciding between wood vs. plastic, think about the look you're going for. Wood frames offer a natural, rustic charm, but they can be prone to rot and require more maintenance.
Plastic frames, on the other hand, are lightweight, low-maintenance, and often more budget-friendly. However, they may lack the visual appeal of wood.
Metal frames are another option to evaluate. They offer superior durability and can support heavier loads, making them ideal for larger planter boxes.
Plus, metal frames can be made to resemble wood or have a sleek, modern look, giving you flexibility in your design.
With metal, you'll also appreciate the added benefit of pest resistance, as it won't attract unwanted critters like wood can.
Box Size Considerations
Determine the ideal box size by considering the mature size of the plants, the space available for the planter, and your personal preference for a compact or sprawling design.
You want to guarantee your plants have enough room to grow and thrive, while also fitting comfortably in the allocated space.
When deciding on box dimensions, keep the following factors in mind:
-
Soil depth: Aim for a minimum of 6-8 inches to provide ample room for roots to develop.
-
Plant spacing: Leave enough space between each plant to prevent overcrowding and promote healthy growth.
-
Accessibility: Consider the height and width of the box to make it easy to water, prune, and harvest.
-
Aesthetics: Choose a size that complements the surrounding decor and creates visual appeal.
-
Mobility: If you plan to move the planter, select a size that's lightweight and easy to transport.
Installing the Irrigation System
With the planter box and irrigation components prepared, attach the irrigation tubing to the water source, ensuring a secure connection to prevent leaks. This is a vital step in installing your simple irrigation system.
You've chosen one of the two primary irrigation types: drip irrigation or micro-irrigation. Both offer system benefits like water conservation and reduced evaporation.
Now, carefully lay out the tubing, making sure it reaches all areas of the planter box. Use tubing clips or stakes to secure it in place. As you work, visualize the water flowing through the system, nourishing your plants. You're creating a self-sustaining environment that will thrive under your care.
Next, connect the irrigation emitters or sprayers to the tubing, spacing them evenly apart. These will deliver water directly to the roots or foliage, depending on the type you've chosen.
Take your time, ensuring each connection is secure and watertight. With the irrigation system in place, you're one step closer to enjoying a lush, vibrant garden that will bring you joy and a sense of belonging.
Connecting Water Source and Timer
You connect the irrigation system to a water source, such as a hose or rain barrel, and then attach a timer to automate watering schedules. This step is essential to guarantee your plants receive the right amount of water at the right time.
When selecting a water source, consider the following:
-
Water source selection: Choose a source that provides consistent water pressure and flow rate to prevent damage to your irrigation system.
-
Distance and accessibility: Select a water source that's easily accessible and close to your planter box to minimize hose length and reduce kinking.
-
Water quality: Consider using a rain barrel or filtered water source to reduce waterborne contaminants and minerals that can clog your irrigation system.
-
Flow rate: Confirm your water source can supply the required flow rate for your irrigation system to function efficiently.
-
Backup plan: Have a backup plan in case your primary water source fails, such as a secondary hose or water storage tank.
Setting Up Drainage and Overflow
Proper drainage and overflow setup is essential to prevent waterlogged soil and guarantee your plants receive the right amount of moisture.
You'll want to implement effective drainage techniques to make certain excess water is removed from the planter box. One solution is to drill holes in the bottom of the box, allowing water to escape. You can also add a layer of small rocks or gravel at the bottom to facilitate drainage.
When it comes to overflow solutions, you have a few options. You can install an overflow valve that releases excess water once the tank reaches a certain level. Alternatively, you can create a simple overflow system using a pipe that directs excess water away from the planter box.
Visualize the water flowing through the system and make adjustments as needed to make certain it's functioning correctly.
Maintaining Your Irrigation System
As you enjoy the benefits of your planter box irrigation system, remember to regularly inspect it to verify it's functioning at its best.
You'll need to perform routine checks, test the water quality, and make seasonal adjustments to prevent clogs, corrosion, and other issues.
Regular System Checks
Regularly inspecting your irrigation system's components, from emitters to valves, helps identify potential issues before they escalate into costly problems. This proactive approach guarantees your plants receive the right amount of water at the right time, maintaining their health and thriving appearance.
Here are some essential checks to perform regularly:
-
Emitter inspection: Check for clogs, mineral buildup, or damage, and clean or replace them as needed.
-
Valve operation: Verify that valves are opening and closing correctly, and adjust or replace them if necessary.
-
Tubing and fittings: Inspect for signs of wear, cracks, or damage, and replace them to prevent leaks.
-
Irrigation frequency: Adjust your irrigation schedule based on weather changes, plant growth, and soil moisture levels.
-
System troubleshooting: Monitor your system's performance, identifying and addressing issues promptly to prevent water waste and plant stress.
Water Quality Testing
One crucial aspect of maintaining your irrigation system is testing the water quality, which involves analyzing its pH levels, nutrient content, and contaminant presence to ascertain it's suitable for your plants' ideal growth. You'll want to make sure your water is free from harmful substances that can harm your plants or affect their growth. Regular water testing will give you peace of mind, knowing your plants are receiving the best possible care.
Here's a breakdown of what to look for in your water testing:
| Parameter | Ideal Range | Effects of Imbalance |
|---|---|---|
| pH | 6.0-7.0 | Too acidic or alkaline can limit nutrient uptake |
| Nitrogen | 5-10 ppm | Deficiency can cause yellowing leaves, excess can burn roots |
| Phosphorus | 1-5 ppm | Deficiency can stunt growth, excess can pollute waterways |
Seasonal Adjustments Needed
Maintaining your irrigation system requires adapting to seasonal changes by adjusting water flow rates, frequency, and duration to accommodate fluctuating plant water requirements.
As the seasons change, so do the water needs of your plants. During hot summer months, plants require more water to stay hydrated, while in cooler winter months, they need less. You'll need to adjust your irrigation schedule to guarantee your plants receive the right amount of water.
Here are some seasonal adjustments to keep in mind:
-
Spring: Increase water frequency as plants start to grow and temperatures rise.
-
Summer: Maximize water flow rates and duration to combat high temperatures and dry weather.
-
Fall: Gradually reduce water frequency and duration as temperatures cool and plants prepare for dormancy.
-
Winter: Minimize water flow rates and frequency to prevent waterlogged soil and root rot.
-
Monitor seasonal weather forecasts: Adjust your irrigation schedule accordingly to guarantee ideal plant hydration and prevent water waste.
Frequently Asked Questions
Can I Use a Simple Irrigation System for Hanging Planters?
You're wondering if a simple irrigation system can work for your hanging planters. Absolutely!
A drip irrigation system is perfect for hanging planters, as it delivers water directly to the roots, reducing evaporation and runoff.
You'll need to attach drippers or micro-sprinklers to the tubing, which will release water at a slow, steady rate.
This efficient system guarantees your plants receive the right amount of water, without wasting a drop.
How Often Should I Inspect My Irrigation System for Leaks?
You'll want to regularly inspect your irrigation system for leaks to avoid water waste and damage.
Set a maintenance schedule to check your system every 2-3 weeks, or after extreme weather.
During inspections, visually examine connections, hoses, and emitters for signs of wear or moisture.
Perform leak detection by running the system and monitoring water flow.
Catching issues early will save you time and resources in the long run.
Are There Any DIY Irrigation Systems for Small Herb Gardens?
You're looking for a DIY irrigation system perfect for your small herb garden. You've got options!
Consider a drip irrigation system, which delivers water directly to the roots, reducing evaporation and runoff.
Alternatively, self-watering planters can store excess water, allowing your herbs to draw it as needed.
Both solutions are easy to set up and require minimal maintenance, giving you more time to tend to your thriving herb garden.
Can I Use Rainwater for My Planter Box Irrigation System?
You're considering harvesting rainwater for your planter box irrigation system - a brilliant move towards sustainable gardening!
First, make certain you've got a proper rainwater filtration system in place to remove debris and contaminants.
Then, connect it to your irrigation setup.
Visualize the water flowing from your roof, through the filter, and into your planters, nourishing your herbs and reducing your water bill.
You'll be proud to be a part of the eco-friendly gardening community!
Are Automatic Irrigation Systems Worth the Extra Cost?
You're wondering if automatic irrigation systems are worth the extra cost, and the answer is, 'when in Rome, do as the Romans do' - invest in what the pros use.
Automatic systems may seem pricey upfront, but they provide cost benefits and long-term savings by reducing water waste, conserving resources, and increasing crop yields.
With precise watering schedules and automated monitoring, you'll reap the rewards of a thriving garden, while also saving time and energy.
Conclusion
You've finally turned your planter box into a thriving oasis!
Now, sit back and let your irrigation system do the heavy lifting. As you bask in the fruits of your labor, remember to check on your system regularly to guarantee it's running like clockwork.
And when you do, imagine you're a medieval lord inspecting your castle's moat - minus the drawbridge and pesky alligators.
With proper maintenance, your irrigation system will be the unsung hero of your garden, keeping your plants happy and healthy for seasons to come.
Related Posts
-
3 Best Tool Essentials for Creative Concrete Planters
To create visually stunning and durable concrete planters, you'll need three essential tool categories. First, you'll...
-
3 Best Tool Essentials for Creative Concrete Planters
To create visually stunning and durable concrete planters, you'll need three essential tool categories. First, you'll...
-
3 Best Tool Essentials for Creative Concrete Planters
To create visually stunning and durable concrete planters, you'll need three essential tool categories. First, you'll...
-
3 Best Tool Essentials for Creative Concrete Planters
To create visually stunning and durable concrete planters, you'll need three essential tool categories. First, you'll...
-
3 Best Tool Essentials for Creative Concrete Planters
To create visually stunning and durable concrete planters, you'll need three essential tool categories. First, you'll...
-
3 Best Tool Essentials for Creative Concrete Planters
To create visually stunning and durable concrete planters, you'll need three essential tool categories. First, you'll...
-
3 Best Tool Essentials for Creative Concrete Planters
To create visually stunning and durable concrete planters, you'll need three essential tool categories. First, you'll...
-
3 Best Tool Essentials for Creative Concrete Planters
To create visually stunning and durable concrete planters, you'll need three essential tool categories. First, you'll...
-
3 Best Tool Essentials for Creative Concrete Planters
To create visually stunning and durable concrete planters, you'll need three essential tool categories. First, you'll...
-
3 Best Tool Essentials for Creative Concrete Planters
To create visually stunning and durable concrete planters, you'll need three essential tool categories. First, you'll...
-
3 Best Tool Essentials for Creative Concrete Planters
To create visually stunning and durable concrete planters, you'll need three essential tool categories. First, you'll...
-
3 Best Tool Essentials for Creative Concrete Planters
To create visually stunning and durable concrete planters, you'll need three essential tool categories. First, you'll...
-
3 Best Tool Essentials for Creative Concrete Planters
To create visually stunning and durable concrete planters, you'll need three essential tool categories. First, you'll...
-
3 Best Tool Essentials for Creative Concrete Planters
To create visually stunning and durable concrete planters, you'll need three essential tool categories. First, you'll...
-
10 Essential Soil Tips for DIY Planters
You can greatly improve your DIY planter's chances of success by understanding and implementing the essential soil ti...
-
10 Essential Soil Tips for DIY Planters
You can greatly improve your DIY planter's chances of success by understanding and implementing the essential soil ti...
-
10 Essential Soil Tips for DIY Planters
You can greatly improve your DIY planter's chances of success by understanding and implementing the essential soil ti...
-
10 Essential Soil Tips for DIY Planters
You can greatly improve your DIY planter's chances of success by understanding and implementing the essential soil ti...
-
10 Essential Soil Tips for DIY Planters
You can greatly improve your DIY planter's chances of success by understanding and implementing the essential soil ti...
-
10 Essential Soil Tips for DIY Planters
You can greatly improve your DIY planter's chances of success by understanding and implementing the essential soil ti...
-
10 Essential Soil Tips for DIY Planters
You can greatly improve your DIY planter's chances of success by understanding and implementing the essential soil ti...
-
10 Essential Soil Tips for DIY Planters
You can greatly improve your DIY planter's chances of success by understanding and implementing the essential soil ti...
-
10 Essential Soil Tips for DIY Planters
You can greatly improve your DIY planter's chances of success by understanding and implementing the essential soil ti...
-
10 Essential Soil Tips for DIY Planters
You can greatly improve your DIY planter's chances of success by understanding and implementing the essential soil ti...
-
10 Essential Soil Tips for DIY Planters
You can greatly improve your DIY planter's chances of success by understanding and implementing the essential soil ti...
-
10 Essential Soil Tips for DIY Planters
You can greatly improve your DIY planter's chances of success by understanding and implementing the essential soil ti...
-
10 Essential Soil Tips for DIY Planters
You can greatly improve your DIY planter's chances of success by understanding and implementing the essential soil ti...
-
10 Essential Soil Tips for DIY Planters
You can greatly improve your DIY planter's chances of success by understanding and implementing the essential soil ti...
-
10 Essential Soil Tips for DIY Planters
You can greatly improve your DIY planter's chances of success by understanding and implementing the essential soil ti...
-
10 Essential Soil Tips for DIY Planters
You can greatly improve your DIY planter's chances of success by understanding and implementing the essential soil ti...
-
10 Essential Soil Tips for DIY Planters
You can greatly improve your DIY planter's chances of success by understanding and implementing the essential soil ti...
-
10 Essential Soil Tips for DIY Planters
You can greatly improve your DIY planter's chances of success by understanding and implementing the essential soil ti...
-
10 Essential Soil Tips for DIY Planters
You can greatly improve your DIY planter's chances of success by understanding and implementing the essential soil ti...
-
10 Essential Soil Tips for DIY Planters
You can greatly improve your DIY planter's chances of success by understanding and implementing the essential soil ti...
-
10 Essential Soil Tips for DIY Planters
You can greatly improve your DIY planter's chances of success by understanding and implementing the essential soil ti...
-
10 Essential Soil Tips for DIY Planters
You can greatly improve your DIY planter's chances of success by understanding and implementing the essential soil ti...
-
10 Essential Soil Tips for DIY Planters
You can greatly improve your DIY planter's chances of success by understanding and implementing the essential soil ti...
-
10 Essential Soil Tips for DIY Planters
You can greatly improve your DIY planter's chances of success by understanding and implementing the essential soil ti...
-
10 Essential Soil Tips for DIY Planters
You can greatly improve your DIY planter's chances of success by understanding and implementing the essential soil ti...
-
10 Essential Soil Tips for DIY Planters
You can greatly improve your DIY planter's chances of success by understanding and implementing the essential soil ti...
-
10 Essential Soil Tips for DIY Planters
You can greatly improve your DIY planter's chances of success by understanding and implementing the essential soil ti...
-
10 Essential Soil Tips for DIY Planters
You can greatly improve your DIY planter's chances of success by understanding and implementing the essential soil ti...
-
10 Essential Soil Tips for DIY Planters
You can greatly improve your DIY planter's chances of success by understanding and implementing the essential soil ti...
-
10 Essential Soil Tips for DIY Planters
You can greatly improve your DIY planter's chances of success by understanding and implementing the essential soil ti...
-
10 Essential Soil Tips for DIY Planters
You can greatly improve your DIY planter's chances of success by understanding and implementing the essential soil ti...
-
10 Essential Soil Tips for DIY Planters
You can greatly improve your DIY planter's chances of success by understanding and implementing the essential soil ti...
-
10 Essential Soil Tips for DIY Planters
You can greatly improve your DIY planter's chances of success by understanding and implementing the essential soil ti...
-
10 Essential Soil Tips for DIY Planters
You can greatly improve your DIY planter's chances of success by understanding and implementing the essential soil ti...
-
10 Essential Soil Tips for DIY Planters
You can greatly improve your DIY planter's chances of success by understanding and implementing the essential soil ti...
-
10 Essential Soil Tips for DIY Planters
You can greatly improve your DIY planter's chances of success by understanding and implementing the essential soil ti...
-
10 Essential Soil Tips for DIY Planters
You can greatly improve your DIY planter's chances of success by understanding and implementing the essential soil ti...
-
Accurate Measuring for DIY Block Planters Made Easy
As you begin building a DIY block planter, precise measurement is essential for a sturdy structure that can support s...
-
Accurate Measuring for DIY Block Planters Made Easy
As you begin building a DIY block planter, precise measurement is essential for a sturdy structure that can support s...
-
Accurate Measuring for DIY Block Planters Made Easy
As you begin building a DIY block planter, precise measurement is essential for a sturdy structure that can support s...
-
Accurate Measuring for DIY Block Planters Made Easy
As you begin building a DIY block planter, precise measurement is essential for a sturdy structure that can support s...
-
Accurate Measuring for DIY Block Planters Made Easy
As you begin building a DIY block planter, precise measurement is essential for a sturdy structure that can support s...
-
Accurate Measuring for DIY Block Planters Made Easy
As you begin building a DIY block planter, precise measurement is essential for a sturdy structure that can support s...
-
Accurate Measuring for DIY Block Planters Made Easy
As you begin building a DIY block planter, precise measurement is essential for a sturdy structure that can support s...
-
Accurate Measuring for DIY Block Planters Made Easy
As you begin building a DIY block planter, precise measurement is essential for a sturdy structure that can support s...
-
Accurate Measuring for DIY Block Planters Made Easy
As you begin building a DIY block planter, precise measurement is essential for a sturdy structure that can support s...
-
Accurate Measuring for DIY Block Planters Made Easy
As you begin building a DIY block planter, precise measurement is essential for a sturdy structure that can support s...
-
Accurate Measuring for DIY Block Planters Made Easy
As you begin building a DIY block planter, precise measurement is essential for a sturdy structure that can support s...
-
Accurate Measuring for DIY Block Planters Made Easy
As you begin building a DIY block planter, precise measurement is essential for a sturdy structure that can support s...
-
Accurate Measuring for DIY Block Planters Made Easy
As you begin building a DIY block planter, precise measurement is essential for a sturdy structure that can support s...
-
Accurate Measuring for DIY Block Planters Made Easy
As you begin building a DIY block planter, precise measurement is essential for a sturdy structure that can support s...
-
Accurate Measuring for DIY Block Planters Made Easy
As you begin building a DIY block planter, precise measurement is essential for a sturdy structure that can support s...
-
Accurate Measuring for DIY Block Planters Made Easy
As you begin building a DIY block planter, precise measurement is essential for a sturdy structure that can support s...
-
Accurate Measuring for DIY Block Planters Made Easy
As you begin building a DIY block planter, precise measurement is essential for a sturdy structure that can support s...
-
Accurate Measuring for DIY Block Planters Made Easy
As you begin building a DIY block planter, precise measurement is essential for a sturdy structure that can support s...
-
Accurate Measuring for DIY Block Planters Made Easy
As you begin building a DIY block planter, precise measurement is essential for a sturdy structure that can support s...
-
Accurate Measuring for DIY Block Planters Made Easy
As you begin building a DIY block planter, precise measurement is essential for a sturdy structure that can support s...
-
Accurate Measuring for DIY Block Planters Made Easy
As you begin building a DIY block planter, precise measurement is essential for a sturdy structure that can support s...
-
Accurate Measuring for DIY Block Planters Made Easy
As you begin building a DIY block planter, precise measurement is essential for a sturdy structure that can support s...
-
Accurate Measuring for DIY Block Planters Made Easy
As you begin building a DIY block planter, precise measurement is essential for a sturdy structure that can support s...
-
Accurate Measuring for DIY Block Planters Made Easy
As you begin building a DIY block planter, precise measurement is essential for a sturdy structure that can support s...
-
Accurate Measuring for DIY Block Planters Made Easy
As you begin building a DIY block planter, precise measurement is essential for a sturdy structure that can support s...
-
Accurate Measuring for DIY Block Planters Made Easy
As you begin building a DIY block planter, precise measurement is essential for a sturdy structure that can support s...
-
Accurate Measuring for DIY Block Planters Made Easy
As you begin building a DIY block planter, precise measurement is essential for a sturdy structure that can support s...


