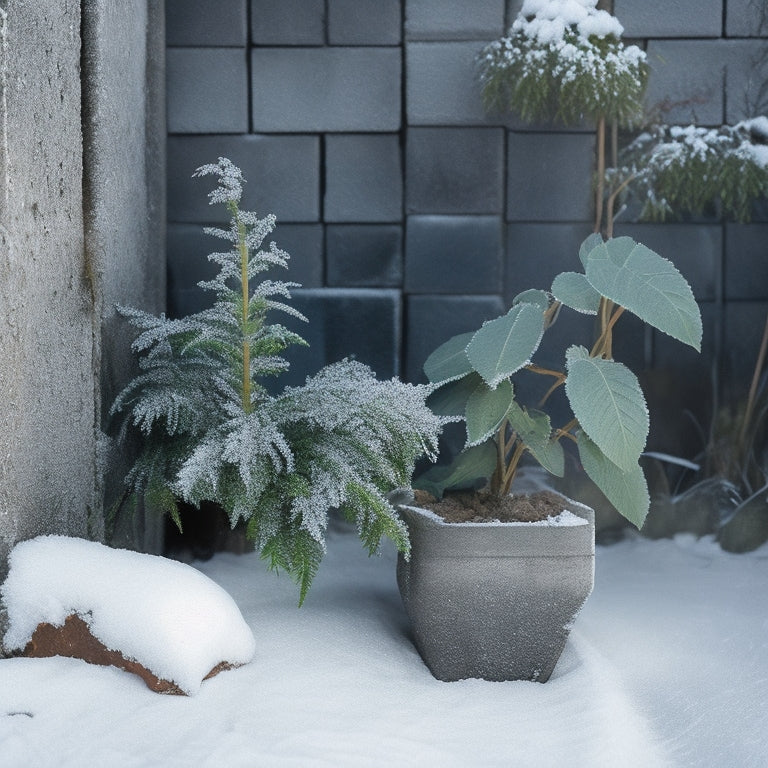
Protect Your Cinder Block Planters From Harsh Winter
To protect your cinder block planters from harsh winter, start by draining and drying them to prevent water seepage and damage. Clean out dead plant material, then disinfect with a bleach solution to remove mold and disease. Dry the planters completely before covering them with burlap or landscape fabric, and add insulating mulch or straw for extra protection. Secure the covers with durable rope or twine, and make sure to check on them periodically to address any issues. By following these steps, you'll be well on your way to safeguarding your planters - and now, it's time to take a closer look at the specifics.
Key Takeaways
• Drain and dry planters to prevent water seepage and damage, ensuring adequate drainage to avoid waterlogged soil and frozen planters.
• Clean planters with a pressure wash or stiff-bristled brush to remove dirt and grime, and inspect for cracks or damage.
• Disinfect planters with a bleach solution to remove mold and bacteria, and rinse thoroughly to remove residue.
• Dry planters completely before covering to prevent mold and mildew growth, and insulate with burlap or landscape fabric.
• Monitor planters regularly to ensure covers remain secure and check for signs of moisture, mold, or pest infestations.
Prepare Your Planters for Winter
Before winter's chill sets in, drain and dry your cinder block planters to prevent water from seeping into the blocks and causing damage.
As part of your winter plant care, it's crucial to verify planter drainage is adequate to prevent waterlogged soil and frozen planters. To do this, you'll need to remove any remaining soil and debris from the planters.
Use a gentle pressure wash or a stiff-bristled brush to remove dirt and grime that may have accumulated. Next, use a clean towel or cloth to dry the planters thoroughly, paying extra attention to the drainage holes.
Make sure to inspect the planters for any cracks or damage and make repairs as needed. By taking these steps, you'll be able to protect your cinder block planters from the harsh winter weather and guarantee they remain in good condition for next year's planting season.
Clean Out Dead Plant Material
Remove any dead or dying plant material from your cinder block planters, taking care to dispose of it properly to prevent the spread of disease. This is an essential step in your seasonal maintenance routine, as it directly impacts plant health. Dead plant material can harbor diseases and pests, which can then infect new plants come springtime.
To guarantee a clean start, follow these steps:
-
Remove all dead or dying plants, taking care not to disturb the soil.
-
Dispose of the material in a sealed bag or by burning it, to prevent the spread of disease.
-
Rake the soil to loosen any debris and aerate it, promoting healthy drainage and air circulation.
Disinfect With Bleach Solution
Now that you've removed dead plant material, it's crucial to disinfect your cinder block planters with a bleach solution to eliminate any lingering mold spores.
You'll need to mix the solution to the right ratio to effectively kill these microorganisms, and then apply it to all surfaces of the planter.
Killing Mold Spores
You'll want to mix a solution of one part bleach to nine parts water to effectively kill mold spores that may have developed on your cinder block planters over the growing season.
This solution is crucial for mold prevention, as it will help prevent the spores from spreading and growing back. When applying the solution, make sure to wear gloves and work in a well-ventilated area to avoid inhaling the bleach fumes.
To guarantee the solution reaches all areas of the planter, use a soft-bristled brush to gently scrub away any visible mold or mildew.
Be sure to:
-
Pay particular attention to crevices and corners where moisture tends to collect
-
Rinse the planter thoroughly with clean water to remove any remaining bleach solution
-
Allow the planter to dry completely before storing or replanting to prevent further moisture buildup
Bleach Solution Ratio
Mix one part bleach with nine parts water to create a disinfecting solution that effectively targets mold and mildew on your cinder block planters. This ratio is essential, as using too much bleach can damage the cinder blocks, while too little may not effectively eliminate the mold and mildew.
| Bleach Solution Ratio | Volume of Bleach | Volume of Water |
|---|---|---|
| 1:9 | 1 cup | 9 cups |
| 1:9 | 1/2 cup | 4.5 cups |
| 1:9 | 1/4 cup | 2.25 cups |
| 1:9 | 1 tablespoon | 9 tablespoons |
| 1:9 | 1 teaspoon | 9 teaspoons |
When working with bleach, remember to exercise bleach safety by wearing gloves, goggles, and working in a well-ventilated area. If you're concerned about using bleach, consider solution alternatives like hydrogen peroxide or white vinegar, which can also be effective against mold and mildew. However, keep in mind that these alternatives may require longer exposure times or repeated applications to achieve the same results.
Preventing Future Growth
Apply the prepared bleach solution to the cinder block planters, thoroughly saturating all surfaces to prevent future mold and mildew growth. This step is essential in guaranteeing your planters remain healthy and thriving come springtime.
As you disinfect your planters, consider implementing practices that promote healthy soil and prevent future issues.
To further prevent future growth of mold and mildew, keep the following tips in mind:
-
Practice crop rotation to avoid depleting the soil of specific nutrients and to reduce the risk of disease buildup.
-
Add organic soil amendments, such as compost or manure, to improve soil structure and fertility, making it less conducive to mold and mildew growth.
-
Maintain good drainage and aeration in your planters by adding materials like perlite or vermiculite to the soil mix.
Dry Completely Before Covering
Before covering your cinder block planters, make certain they're completely dry to prevent moisture from getting trapped and causing damage. You don't want to create an ideal environment for mold and mildew to grow, which can lead to winter damage. Dryness is essential to prevent moisture retention, which can seep into the cinder blocks and cause cracks or disintegration.
Here's a quick checklist to confirm your planters are dry:
| Area | Check for Moisture | Action |
|---|---|---|
| Soil | Check for dampness or wet spots | Remove excess water, let it air dry |
| Cinder Blocks | Inspect for dampness or water spots | Let it air dry, or use a clean towel to dry |
| Planter Walls | Check for condensation or water droplets | Wipe clean with a dry cloth |
Use Burlap or Landscape Fabric
Now that your cinder block planter is dry, you'll want to wrap it in a protective layer to shield it from harsh winter elements.
You can use burlap or landscape fabric, both of which are effective barriers against moisture and extreme temperatures.
Wrap for Protection
How can you shield your cinder block planters from harsh winter elements without dismantling them, and still maintain their structural integrity?
One effective solution is to wrap them with insulation materials that provide protection from freezing temperatures and moisture. Winter wraps are an excellent option to safeguard your planters from winter's fury.
Here are some steps to follow:
-
Wrap your cinder block planters with burlap or landscape fabric, securing it with twine or wire. This will help retain warmth and prevent moisture from seeping into the blocks.
-
Apply a layer of insulation material, such as straw or hay, around the planter to provide extra protection.
-
Consider adding a waterproof coating or sealant to the wrap to guarantee it remains effective throughout the winter season.
Fabric Benefits Explained
Wrap your cinder block planters with burlap or landscape fabric to reap a multitude of benefits, including improved moisture resistance, enhanced insulation, and a natural, aesthetically pleasing appearance.
These fabric types provide a protective barrier against harsh winter conditions, ensuring your planters remain healthy and thriving. Burlap, a breathable fabric, allows for air and water to penetrate while keeping frost and cold air out. Landscape fabric, on the other hand, offers superior insulation properties, trapping warmth and preventing soil from freezing.
Both fabrics are durable and long-lasting, withstanding winter's harshest conditions. They also add a touch of rustic charm to your planters, blending seamlessly with your outdoor decor.
When choosing between burlap and landscape fabric, consider the level of insulation you need. If you live in an extremely cold climate, landscape fabric may be the better option. For milder winters, burlap's breathability may be sufficient.
Regardless of your choice, wrapping your cinder block planters with fabric will provide the protection they need to survive the winter months.
Add Insulating Mulch or Straw
You can add a 2- to 3-inch layer of insulating mulch or straw around your cinder block planters to protect the soil and roots from freezing temperatures. This extra layer provides insulating benefits, keeping the soil warmer and preventing root damage.
When choosing a mulch type, consider the following options:
Organic mulches like straw, bark chips, or pine needles, which break down over time and add nutrients to the soil.
Inorganic mulches like gravel or landscape fabric, which provide better drainage and can help with weed control.
Living mulches like clover or creeping thyme, which can help suppress weeds and add color to your planters.
Remember to spread the mulch evenly and avoid piling it against the cinder blocks to prevent moisture from seeping into the blocks and causing damage.
Secure Cover With Rope or Twine
After adding insulating mulch or straw, take the next step by securing a breathable cover over your cinder block planters with rope or twine to shield them from harsh winter winds and precipitation. This essential step will guarantee your planters remain protected and undamaged throughout the winter season.
When choosing a rope or twine, opt for durable and weather-resistant options like nylon, polypropylene, or jute. You can also consider twine alternatives like burlap strips or landscape fabric ties for added security.
To secure the cover, tie the rope or twine around the planter, making sure it's snug but not too tight, as you want to allow for air circulation. You can use a bowline knot or a square knot to keep the cover in place.
Make sure the rope or twine is tightly secured to prevent it from coming undone in strong winds. By taking this extra step, you'll be confident that your cinder block planters will withstand the harsh winter conditions and be ready for the next growing season.
Check on Planters Periodically
Regularly inspect your cinder block planters throughout the winter season to guarantee the covers remain securely in place and the planters are free from damage or moisture accumulation. This is essential for maintaining planter health and ensuring your planters remain in good condition until the next growing season.
By performing seasonal checks, you can identify and address any potential issues before they become major problems. This includes checking for:
-
Loose or damaged covers that may allow water to seep in and freeze, causing cracks or damage to the cinder blocks
-
Signs of moisture accumulation, such as mold, mildew, or water stains, which can weaken the structure of the planter
-
Any signs of pest or rodent infestation, which can cause damage to the planter or its contents
Frequently Asked Questions
Can I Use Plastic Wrap to Cover My Cinder Block Planters?
You're wondering if plastic wrap can cover your cinder block planters. While it might seem like a good idea, plastic wrap isn't the most effective winter insulation technique.
It can trap moisture, causing more harm than good. Instead, consider using breathable materials like burlap or landscape fabric to protect your planters.
These options allow for airflow while still providing some insulation benefits, making them a better choice for your planters' winter survival.
How Often Should I Water My Planters During the Winter?
As you tend to your planters during the winter, you're probably wondering how often to water them.
Coincidentally, winter watering is all about striking a balance. You want to maintain just enough moisture to keep your plants alive, but not so much that it leads to root rot.
Aim to water your planters every 4-6 weeks, depending on weather conditions and moisture retention.
Check the soil regularly, and adjust your schedule as needed to guarantee your plants thrive during the cold months.
Will Cinder Block Planters Crack From Freezing Temperatures?
You're right to wonder if cinder block planters will crack from freezing temperatures.
The truth is, cinder block durability is put to the test when water inside the blocks freezes, expanding and causing cracks.
However, if you've drained excess water and protected the planters from moisture, the risk of cracking decreases.
In extreme freezing temperatures, it's still possible for cracks to form, but with proper care, your cinder block planters should withstand the cold.
Can I Leave My Planters Uncovered if I Live in a Mild Climate?
If you live in a mild climate, you're probably wondering if you can skip winter preparation for your container gardening.
The truth is, even in warmer regions, temperatures can drop low enough to cause damage.
While it's unlikely your cinder block planters will crack, water inside the blocks can still freeze and expand, causing issues.
To be safe, consider covering your planters or taking other protective measures to guarantee they remain in great condition.
Do I Need to Bring My Planters Into a Garage or Shed for Winter?
You're wondering if you need to bring your planters into a garage or shed for winter.
If you live in an area with freezing temperatures, it's a good idea to provide winter insulation.
Consider moving them to indoor storage to shield them from harsh winds and moisture.
This will help prevent damage and guarantee your planters remain in good condition.
It's better to be safe than sorry, so take the extra step to protect your investment.
Conclusion
By following these simple steps, you've taken the necessary precautions to protect your cinder block planters from harsh winter conditions.
Remember, an ounce of prevention is worth a pound of cure - and in this case, it's worth a thriving garden come spring.
Your planters will thank you for the extra TLC, and you'll be rewarded with a beautiful display of blooms when the weather warms up again.
Related Posts
-

10 Essential Steps to Upcycle Concrete Planters
You've decided to breathe new life into those old concrete planters lying around, and you're ready to transform them ...
-
10 Essential Steps to Upcycle Concrete Planters
You've decided to breathe new life into those old concrete planters lying around, and you're ready to transform them ...
-
10 Essential Steps to Upcycle Concrete Planters
You've decided to breathe new life into those old concrete planters lying around, and you're ready to transform them ...
-
10 Essential Steps to Upcycle Concrete Planters
You've decided to breathe new life into those old concrete planters lying around, and you're ready to transform them ...
-
10 Essential Steps to Upcycle Concrete Planters
You've decided to breathe new life into those old concrete planters lying around, and you're ready to transform them ...
-
10 Essential Steps to Upcycle Concrete Planters
You've decided to breathe new life into those old concrete planters lying around, and you're ready to transform them ...
-
10 Essential Steps to Upcycle Concrete Planters
You've decided to breathe new life into those old concrete planters lying around, and you're ready to transform them ...
-
10 Essential Steps to Upcycle Concrete Planters
You've decided to breathe new life into those old concrete planters lying around, and you're ready to transform them ...
-
10 Essential Steps to Upcycle Concrete Planters
You've decided to breathe new life into those old concrete planters lying around, and you're ready to transform them ...
-
10 Essential Steps to Upcycle Concrete Planters
You've decided to breathe new life into those old concrete planters lying around, and you're ready to transform them ...
-
10 Essential Steps to Upcycle Concrete Planters
You've decided to breathe new life into those old concrete planters lying around, and you're ready to transform them ...
-
10 Essential Steps to Upcycle Concrete Planters
You've decided to breathe new life into those old concrete planters lying around, and you're ready to transform them ...
-
10 Essential Steps to Upcycle Concrete Planters
You've decided to breathe new life into those old concrete planters lying around, and you're ready to transform them ...
-
10 Essential Steps to Upcycle Concrete Planters
You've decided to breathe new life into those old concrete planters lying around, and you're ready to transform them ...
-
10 Essential Steps to Upcycle Concrete Planters
You've decided to breathe new life into those old concrete planters lying around, and you're ready to transform them ...
-
10 Essential Steps to Upcycle Concrete Planters
You've decided to breathe new life into those old concrete planters lying around, and you're ready to transform them ...
-
10 Essential Steps to Upcycle Concrete Planters
You've decided to breathe new life into those old concrete planters lying around, and you're ready to transform them ...
-
10 Essential Steps to Upcycle Concrete Planters
You've decided to breathe new life into those old concrete planters lying around, and you're ready to transform them ...
-
10 Essential Steps to Upcycle Concrete Planters
You've decided to breathe new life into those old concrete planters lying around, and you're ready to transform them ...
-
10 Essential Steps to Upcycle Concrete Planters
You've decided to breathe new life into those old concrete planters lying around, and you're ready to transform them ...
-
10 Essential Steps to Upcycle Concrete Planters
You've decided to breathe new life into those old concrete planters lying around, and you're ready to transform them ...
-
10 Essential Steps to Upcycle Concrete Planters
You've decided to breathe new life into those old concrete planters lying around, and you're ready to transform them ...
-
10 Essential Steps to Upcycle Concrete Planters
You've decided to breathe new life into those old concrete planters lying around, and you're ready to transform them ...
-
10 Essential Steps to Upcycle Concrete Planters
You've decided to breathe new life into those old concrete planters lying around, and you're ready to transform them ...
-
10 Essential Steps to Upcycle Concrete Planters
You've decided to breathe new life into those old concrete planters lying around, and you're ready to transform them ...
-
10 Essential Steps to Upcycle Concrete Planters
You've decided to breathe new life into those old concrete planters lying around, and you're ready to transform them ...
-
10 Essential Steps to Upcycle Concrete Planters
You've decided to breathe new life into those old concrete planters lying around, and you're ready to transform them ...
-
10 Essential Steps to Upcycle Concrete Planters
You've decided to breathe new life into those old concrete planters lying around, and you're ready to transform them ...
-
10 Essential Steps to Upcycle Concrete Planters
You've decided to breathe new life into those old concrete planters lying around, and you're ready to transform them ...
-
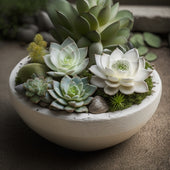
What Makes a Great Planter for Succulents
When selecting a great planter for succulents, you'll want to take into account a combination of factors to guarantee...
-
What Makes a Great Planter for Succulents
When selecting a great planter for succulents, you'll want to take into account a combination of factors to guarantee...
-
What Makes a Great Planter for Succulents
When selecting a great planter for succulents, you'll want to take into account a combination of factors to guarantee...
-
What Makes a Great Planter for Succulents
When selecting a great planter for succulents, you'll want to take into account a combination of factors to guarantee...
-
What Makes a Great Planter for Succulents
When selecting a great planter for succulents, you'll want to take into account a combination of factors to guarantee...
-
What Makes a Great Planter for Succulents
When selecting a great planter for succulents, you'll want to take into account a combination of factors to guarantee...
-
What Makes a Great Planter for Succulents
When selecting a great planter for succulents, you'll want to take into account a combination of factors to guarantee...
-
What Makes a Great Planter for Succulents
When selecting a great planter for succulents, you'll want to take into account a combination of factors to guarantee...
-
What Makes a Great Planter for Succulents
When selecting a great planter for succulents, you'll want to take into account a combination of factors to guarantee...
-
What Makes a Great Planter for Succulents
When selecting a great planter for succulents, you'll want to take into account a combination of factors to guarantee...
-
What Makes a Great Planter for Succulents
When selecting a great planter for succulents, you'll want to take into account a combination of factors to guarantee...
-
What Makes a Great Planter for Succulents
When selecting a great planter for succulents, you'll want to take into account a combination of factors to guarantee...
-
What Makes a Great Planter for Succulents
When selecting a great planter for succulents, you'll want to take into account a combination of factors to guarantee...
-
What Makes a Great Planter for Succulents
When selecting a great planter for succulents, you'll want to take into account a combination of factors to guarantee...
-
What Makes a Great Planter for Succulents
When selecting a great planter for succulents, you'll want to take into account a combination of factors to guarantee...
-
What Makes a Great Planter for Succulents
When selecting a great planter for succulents, you'll want to take into account a combination of factors to guarantee...
-
What Makes a Great Planter for Succulents
When selecting a great planter for succulents, you'll want to take into account a combination of factors to guarantee...
-
What Makes a Great Planter for Succulents
When selecting a great planter for succulents, you'll want to take into account a combination of factors to guarantee...
-
What Makes a Great Planter for Succulents
When selecting a great planter for succulents, you'll want to take into account a combination of factors to guarantee...
-
What Makes a Great Planter for Succulents
When selecting a great planter for succulents, you'll want to take into account a combination of factors to guarantee...
-
What Makes a Great Planter for Succulents
When selecting a great planter for succulents, you'll want to take into account a combination of factors to guarantee...
-
What Makes a Great Planter for Succulents
When selecting a great planter for succulents, you'll want to take into account a combination of factors to guarantee...
-
What Makes a Great Planter for Succulents
When selecting a great planter for succulents, you'll want to take into account a combination of factors to guarantee...
-
What Makes a Great Planter for Succulents
When selecting a great planter for succulents, you'll want to take into account a combination of factors to guarantee...
-
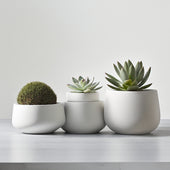
What Makes Concrete Planters Perfect for Succulents
You've found that concrete planters offer the perfect combination of durability, drainage, and design versatility to ...
-
What Makes Concrete Planters Perfect for Succulents
You've found that concrete planters offer the perfect combination of durability, drainage, and design versatility to ...
-
What Makes Concrete Planters Perfect for Succulents
You've found that concrete planters offer the perfect combination of durability, drainage, and design versatility to ...
-
What Makes Concrete Planters Perfect for Succulents
You've found that concrete planters offer the perfect combination of durability, drainage, and design versatility to ...
-
What Makes Concrete Planters Perfect for Succulents
You've found that concrete planters offer the perfect combination of durability, drainage, and design versatility to ...
-
What Makes Concrete Planters Perfect for Succulents
You've found that concrete planters offer the perfect combination of durability, drainage, and design versatility to ...
-
What Makes Concrete Planters Perfect for Succulents
You've found that concrete planters offer the perfect combination of durability, drainage, and design versatility to ...
-
What Makes Concrete Planters Perfect for Succulents
You've found that concrete planters offer the perfect combination of durability, drainage, and design versatility to ...
-
What Makes Concrete Planters Perfect for Succulents
You've found that concrete planters offer the perfect combination of durability, drainage, and design versatility to ...
-
What Makes Concrete Planters Perfect for Succulents
You've found that concrete planters offer the perfect combination of durability, drainage, and design versatility to ...
-
What Makes Concrete Planters Perfect for Succulents
You've found that concrete planters offer the perfect combination of durability, drainage, and design versatility to ...
-
What Makes Concrete Planters Perfect for Succulents
You've found that concrete planters offer the perfect combination of durability, drainage, and design versatility to ...
-
What Makes Concrete Planters Perfect for Succulents
You've found that concrete planters offer the perfect combination of durability, drainage, and design versatility to ...
-
What Makes Concrete Planters Perfect for Succulents
You've found that concrete planters offer the perfect combination of durability, drainage, and design versatility to ...
-
What Makes Concrete Planters Perfect for Succulents
You've found that concrete planters offer the perfect combination of durability, drainage, and design versatility to ...
-
What Makes Concrete Planters Perfect for Succulents
You've found that concrete planters offer the perfect combination of durability, drainage, and design versatility to ...
-
What Makes Concrete Planters Perfect for Succulents
You've found that concrete planters offer the perfect combination of durability, drainage, and design versatility to ...
-
What Makes Concrete Planters Perfect for Succulents
You've found that concrete planters offer the perfect combination of durability, drainage, and design versatility to ...
-
What Makes Concrete Planters Perfect for Succulents
You've found that concrete planters offer the perfect combination of durability, drainage, and design versatility to ...
-
What Makes Concrete Planters Perfect for Succulents
You've found that concrete planters offer the perfect combination of durability, drainage, and design versatility to ...
-
What Makes Concrete Planters Perfect for Succulents
You've found that concrete planters offer the perfect combination of durability, drainage, and design versatility to ...
-
What Makes Concrete Planters Perfect for Succulents
You've found that concrete planters offer the perfect combination of durability, drainage, and design versatility to ...
-
What Makes Concrete Planters Perfect for Succulents
You've found that concrete planters offer the perfect combination of durability, drainage, and design versatility to ...
-
What Makes Concrete Planters Perfect for Succulents
You've found that concrete planters offer the perfect combination of durability, drainage, and design versatility to ...
-
What Makes Concrete Planters Perfect for Succulents
You've found that concrete planters offer the perfect combination of durability, drainage, and design versatility to ...
-
What Makes Concrete Planters Perfect for Succulents
You've found that concrete planters offer the perfect combination of durability, drainage, and design versatility to ...
-
What Makes Concrete Planters Perfect for Succulents
You've found that concrete planters offer the perfect combination of durability, drainage, and design versatility to ...
-
What Makes Concrete Planters Perfect for Succulents
You've found that concrete planters offer the perfect combination of durability, drainage, and design versatility to ...
-
What Makes Concrete Planters Perfect for Succulents
You've found that concrete planters offer the perfect combination of durability, drainage, and design versatility to ...
-
What Makes Concrete Planters Perfect for Succulents
You've found that concrete planters offer the perfect combination of durability, drainage, and design versatility to ...
-
What Makes Concrete Planters Perfect for Succulents
You've found that concrete planters offer the perfect combination of durability, drainage, and design versatility to ...
-
What Makes Concrete Planters Perfect for Succulents
You've found that concrete planters offer the perfect combination of durability, drainage, and design versatility to ...
-
What Makes Concrete Planters Perfect for Succulents
You've found that concrete planters offer the perfect combination of durability, drainage, and design versatility to ...
-
What Makes Concrete Planters Perfect for Succulents
You've found that concrete planters offer the perfect combination of durability, drainage, and design versatility to ...
-
What Makes Concrete Planters Perfect for Succulents
You've found that concrete planters offer the perfect combination of durability, drainage, and design versatility to ...
-
What Makes Concrete Planters Perfect for Succulents
You've found that concrete planters offer the perfect combination of durability, drainage, and design versatility to ...
-
What Makes Concrete Planters Perfect for Succulents
You've found that concrete planters offer the perfect combination of durability, drainage, and design versatility to ...


