
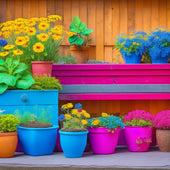
Prepare Perfect Soil for Your Rooftop Garden
When preparing soil for your rooftop garden, you'll need to choose a mix specifically designed for shallow, elevated spaces with sunlight and wind. Look for mixes with high organic matter content, rapid drainage, and a balanced blend of perlite, vermiculite, or sand. Test the soil's pH levels and nutrient content, and adjust them if necessary. Add organic matter like compost to enhance soil structure and fertility. Remove debris and contaminants, and balance water retention and drainage to prevent waterlogging. By following these steps, you'll be well on your way to creating the perfect soil for your rooftop garden, and discovering the full potential of your unique growing space.
Key Takeaways
• Choose a soil mix specifically designed for rooftop gardens with rapid drainage and high organic matter content for optimal plant growth.
• Test soil pH levels and nutrients, adjusting as necessary to achieve a balanced range for healthy plant development.
• Add organic matter like compost, peat moss, or coconut coir to enhance soil structure, fertility, and microbial activity.
• Ensure proper drainage and water retention by combining soil mixes with materials like perlite, vermiculite, or sand, and using containers with drainage holes.
• Mix and aerate soil properly using a garden fork or tiller, and incorporate a layer of organic mulch to retain moisture and suppress weeds.
Choose the Right Soil Mix
Your rooftop garden's success hinges on selecting a soil mix specifically designed to thrive in shallow, elevated spaces with intense sunlight and wind, as well as rapid drainage and aeration.
You'll want to choose a mix that's engineered for container gardening, where soil is confined to a smaller space. Look for a mix that's formulated to retain moisture but drain excess water quickly, preventing waterlogged soil.
When selecting a soil type, consider a mix that's high in organic matter, such as peat moss or coconut coir, which will help retain moisture and regulate soil temperature.
A mix with a balanced blend of perlite, vermiculite, or sand will also provide good drainage and aeration.
Avoid using garden soil from your backyard, as it can be too dense and may compact in containers, leading to poor drainage and root growth.
Test Ph Levels and Nutrients
With your rooftop garden's soil mix selected, it's time to test the pH levels and nutrient content to guarantee they're tailored for your plants' growth. Soil testing is essential to determine the nutrient levels and pH balance, which directly impact your plants' health. You can either purchase a DIY soil testing kit or send a sample to a laboratory for analysis.
Here's a breakdown of the ideal pH and nutrient levels for your rooftop garden:
| Parameter | Ideal Range |
|---|---|
| pH | 6.0-7.0 |
| Nitrogen (N) | 100-200 ppm |
| Phosphorus (P) | 30-60 ppm |
| Potassium (K) | 150-300 ppm |
Based on the soil testing results, you can adjust the pH levels and nutrient content to create a favorable environment for your plants. For instance, if the pH level is too high, you can add elemental sulfur or peat moss to lower it. Similarly, if the nitrogen levels are low, you can add organic fertilizers like compost or manure. By conducting a thorough soil testing and nutrient analysis, you'll be able to create a thriving rooftop garden that will flourish under your care.
Add Organic Matter and Compost
Adding organic matter and compost to your rooftop garden's soil mix is an essential step in creating a nutrient-rich environment that supports healthy plant growth.
You can incorporate organic amendments like peat moss, coconut coir, or well-rotted manure to improve soil structure and fertility.
Compost, in particular, is a valuable addition as it provides beneficial microbes, increases the water-holding capacity of the soil, and supplies essential nutrients.
The compost benefits are numerous, including improved soil aeration, better drainage, and enhanced root development.
When choosing a compost, look for one that's specifically formulated for rooftop gardens or urban agriculture.
You'll want to mix in 2-4 inches of compost into your soil to reap its benefits.
Remember to blend it well with your existing soil to create a uniform mix.
By incorporating organic matter and compost, you'll be creating a thriving environment for your plants to flourish.
With a nutrient-dense soil, you can expect stronger, more resilient plants that will thrive in your rooftop garden.
Remove Debris and Contaminants
Before planting, you must clear your rooftop garden's soil of debris and contaminants that can hinder plant growth and even pose health risks.
Start by removing any visible debris, such as rocks, broken pottery, or construction materials, which can cause physical harm to roots and hinder water penetration.
Next, inspect your soil for signs of contamination, like oil spills, heavy metals, or pesticide residues. These pollutants can leach into the soil, affecting plant health and potentially entering the food chain.
For effective debris removal, sift through your soil using a mesh screen or a garden fork to break up clods and remove unwanted materials.
You can also use a soil test kit to detect contaminants like heavy metals or pesticides. If you find any, consider replacing the affected soil or treating it with contaminant-binding agents.
Contamination prevention is key, so make sure to handle chemicals and fuels carefully, and avoid using them near your rooftop garden.
Balance Water Retention and Drainage
You'll need to optimize your rooftop garden's soil to strike a balance between water retention and drainage, as both excess water and drought can be detrimental to plant growth.
A soil mix with good water holding capacity is essential, but it's equally important to guarantee excess water drains quickly to prevent waterlogged soil.
If you're using a pre-mixed potting soil, check the label for its water holding capacity and drainage capabilities. You can also create your own mix by combining peat moss, vermiculite, or perlite with compost and soil.
These ingredients will improve the soil's water holding capacity while allowing for adequate drainage.
Consider incorporating drainage solutions such as adding a layer of small rocks or broken pottery at the bottom of your containers to facilitate water flow. Additionally, make sure your containers have drainage holes to prevent water from accumulating.
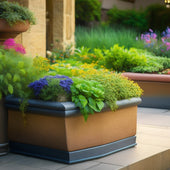
Consider Weight and Structural Needs
As you've optimized your rooftop garden's soil for water retention and drainage, now it's time to contemplate the weight and structural demands of your containers and the roof itself, ensuring they can support the added load of soil, plants, and water.
You must consider the load-bearing capacity of your rooftop to avoid any potential damage or collapse. This includes evaluating the structural integrity of your roof, taking into account factors such as the type of roofing material, its age, and any existing damage.
Your containers, too, must be able to handle the weight of the soil and plants. Choose containers that are specifically designed for rooftop gardens, made from durable materials that can withstand harsh weather conditions and heavy loads.
Be mindful of the size and weight of your containers, ensuring they don't exceed the recommended load capacity of your rooftop.
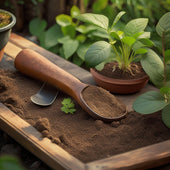
Mix and Aerate the Soil Properly
With your rooftop garden's soil weight and structural needs addressed, now mix and aerate the soil to create an ideal growing environment, where roots can breathe and water can penetrate easily.
This vital step guarantees your plants receive the necessary oxygen and nutrients for healthy growth.
To mix and aerate your soil effectively, follow these expert tips:
-
Use a sturdy mixing tool, such as a garden fork or tiller, to loosen and turn over the soil, breaking up any clods and compacted areas.
-
Incorporate organic matter like compost or peat moss to improve soil structure and fertility.
-
Employ soil aeration techniques like double digging or raised bed construction to increase airflow and drainage.
-
Add a 2- to 3-inch layer of organic mulch to retain moisture and suppress weeds.
-
Use a soil test kit to determine your soil's pH level and nutrient content, adjusting as needed to create a balanced growing environment.
Frequently Asked Questions
Can I Use Soil From My Backyard for My Rooftop Garden?
You might be tempted to use soil from your backyard for your rooftop garden, but beware: backyard soil can compact and hinder drainage, causing waterlogged plants, whereas a mix specifically designed for rooftop gardens will guarantee ideal drainage and benefits.
How Often Should I Replace the Soil in My Rooftop Garden?
As you nurture your rooftop oasis, remember the soil is like a loyal companion, needing regular rejuvenation. You'll know it's time to refresh when soil health starts to decline; typically every 2-3 years, depending on usage and soil amendments, it's time to replace and revitalize.
Will Adding Too Much Compost Harm My Rooftop Garden's Soil?
You're careful not to overdo it, as excessive compost can disrupt the balance, causing nutrient levels to skyrocket, leading to an overload that can harm your rooftop garden's soil and its inhabitants.
Can I Use Potting Soil for My Rooftop Garden Instead of Mix?
You can use potting soil, but be aware it may not provide ideal rooftop garden drainage, whereas a mix allows you to customize benefits like aeration, water retention, and nutrient supply, ensuring a thriving rooftop oasis.
Do I Need to Sterilize the Soil Before Using It in My Rooftop Garden?
"Relax, you're not alone in wondering if sterilizing soil is a hassle. But trust us, it's worth it! Soil sterilization benefits include eradicating pests and diseases, and you can do it easily using methods like solarization or oven heating."
Related Posts
-
10 Essential Steps to Upcycle Concrete Planters
You've decided to breathe new life into those old concrete planters lying around, and you're ready to transform them ...
-
10 Essential Steps to Upcycle Concrete Planters
You've decided to breathe new life into those old concrete planters lying around, and you're ready to transform them ...
-
10 Essential Steps to Upcycle Concrete Planters
You've decided to breathe new life into those old concrete planters lying around, and you're ready to transform them ...
-
10 Essential Steps to Upcycle Concrete Planters
You've decided to breathe new life into those old concrete planters lying around, and you're ready to transform them ...
-
10 Essential Steps to Upcycle Concrete Planters
You've decided to breathe new life into those old concrete planters lying around, and you're ready to transform them ...
-
10 Essential Steps to Upcycle Concrete Planters
You've decided to breathe new life into those old concrete planters lying around, and you're ready to transform them ...
-
10 Essential Steps to Upcycle Concrete Planters
You've decided to breathe new life into those old concrete planters lying around, and you're ready to transform them ...
-
10 Essential Steps to Upcycle Concrete Planters
You've decided to breathe new life into those old concrete planters lying around, and you're ready to transform them ...
-
10 Essential Steps to Upcycle Concrete Planters
You've decided to breathe new life into those old concrete planters lying around, and you're ready to transform them ...
-
10 Essential Steps to Upcycle Concrete Planters
You've decided to breathe new life into those old concrete planters lying around, and you're ready to transform them ...
-
10 Essential Steps to Upcycle Concrete Planters
You've decided to breathe new life into those old concrete planters lying around, and you're ready to transform them ...
-
10 Essential Steps to Upcycle Concrete Planters
You've decided to breathe new life into those old concrete planters lying around, and you're ready to transform them ...
-
10 Essential Steps to Upcycle Concrete Planters
You've decided to breathe new life into those old concrete planters lying around, and you're ready to transform them ...
-
10 Essential Steps to Upcycle Concrete Planters
You've decided to breathe new life into those old concrete planters lying around, and you're ready to transform them ...
-
10 Essential Steps to Upcycle Concrete Planters
You've decided to breathe new life into those old concrete planters lying around, and you're ready to transform them ...
-
10 Essential Steps to Upcycle Concrete Planters
You've decided to breathe new life into those old concrete planters lying around, and you're ready to transform them ...
-
10 Essential Steps to Upcycle Concrete Planters
You've decided to breathe new life into those old concrete planters lying around, and you're ready to transform them ...
-
10 Essential Steps to Upcycle Concrete Planters
You've decided to breathe new life into those old concrete planters lying around, and you're ready to transform them ...
-
10 Essential Steps to Upcycle Concrete Planters
You've decided to breathe new life into those old concrete planters lying around, and you're ready to transform them ...
-
10 Essential Steps to Upcycle Concrete Planters
You've decided to breathe new life into those old concrete planters lying around, and you're ready to transform them ...
-
10 Essential Steps to Upcycle Concrete Planters
You've decided to breathe new life into those old concrete planters lying around, and you're ready to transform them ...
-
10 Essential Steps to Upcycle Concrete Planters
You've decided to breathe new life into those old concrete planters lying around, and you're ready to transform them ...
-
10 Essential Steps to Upcycle Concrete Planters
You've decided to breathe new life into those old concrete planters lying around, and you're ready to transform them ...
-
10 Essential Steps to Upcycle Concrete Planters
You've decided to breathe new life into those old concrete planters lying around, and you're ready to transform them ...
-
10 Essential Steps to Upcycle Concrete Planters
You've decided to breathe new life into those old concrete planters lying around, and you're ready to transform them ...
-
10 Essential Steps to Upcycle Concrete Planters
You've decided to breathe new life into those old concrete planters lying around, and you're ready to transform them ...
-
10 Essential Steps to Upcycle Concrete Planters
You've decided to breathe new life into those old concrete planters lying around, and you're ready to transform them ...
-
10 Essential Steps to Upcycle Concrete Planters
You've decided to breathe new life into those old concrete planters lying around, and you're ready to transform them ...
-
10 Essential Steps to Upcycle Concrete Planters
You've decided to breathe new life into those old concrete planters lying around, and you're ready to transform them ...
-
5 Essential Drainage Tips for Block Planters
When using block planters, you'll want to guarantee effective drainage to prevent waterlogging and root rot. Start by...
-
5 Essential Drainage Tips for Block Planters
When using block planters, you'll want to guarantee effective drainage to prevent waterlogging and root rot. Start by...
-
5 Essential Drainage Tips for Block Planters
When using block planters, you'll want to guarantee effective drainage to prevent waterlogging and root rot. Start by...
-
5 Essential Drainage Tips for Block Planters
When using block planters, you'll want to guarantee effective drainage to prevent waterlogging and root rot. Start by...
-
5 Essential Drainage Tips for Block Planters
When using block planters, you'll want to guarantee effective drainage to prevent waterlogging and root rot. Start by...
-
5 Essential Drainage Tips for Block Planters
When using block planters, you'll want to guarantee effective drainage to prevent waterlogging and root rot. Start by...
-
5 Essential Drainage Tips for Block Planters
When using block planters, you'll want to guarantee effective drainage to prevent waterlogging and root rot. Start by...
-
5 Essential Drainage Tips for Block Planters
When using block planters, you'll want to guarantee effective drainage to prevent waterlogging and root rot. Start by...
-
5 Essential Drainage Tips for Block Planters
When using block planters, you'll want to guarantee effective drainage to prevent waterlogging and root rot. Start by...
-
5 Essential Drainage Tips for Block Planters
When using block planters, you'll want to guarantee effective drainage to prevent waterlogging and root rot. Start by...
-
5 Essential Drainage Tips for Block Planters
When using block planters, you'll want to guarantee effective drainage to prevent waterlogging and root rot. Start by...
-
5 Essential Drainage Tips for Block Planters
When using block planters, you'll want to guarantee effective drainage to prevent waterlogging and root rot. Start by...
-
5 Essential Drainage Tips for Block Planters
When using block planters, you'll want to guarantee effective drainage to prevent waterlogging and root rot. Start by...
-
5 Essential Drainage Tips for Block Planters
When using block planters, you'll want to guarantee effective drainage to prevent waterlogging and root rot. Start by...
-
5 Essential Drainage Tips for Block Planters
When using block planters, you'll want to guarantee effective drainage to prevent waterlogging and root rot. Start by...
-
5 Essential Drainage Tips for Block Planters
When using block planters, you'll want to guarantee effective drainage to prevent waterlogging and root rot. Start by...
-
5 Essential Drainage Tips for Block Planters
When using block planters, you'll want to guarantee effective drainage to prevent waterlogging and root rot. Start by...
-
5 Essential Drainage Tips for Block Planters
When using block planters, you'll want to guarantee effective drainage to prevent waterlogging and root rot. Start by...
-
What Makes a Good Used Trowel for Planters
When searching for a good used trowel for planters, you'll want to prioritize corrosion-resistant materials like stai...
-
What Makes a Good Used Trowel for Planters
When searching for a good used trowel for planters, you'll want to prioritize corrosion-resistant materials like stai...
-
What Makes a Good Used Trowel for Planters
When searching for a good used trowel for planters, you'll want to prioritize corrosion-resistant materials like stai...
-
What Makes a Good Used Trowel for Planters
When searching for a good used trowel for planters, you'll want to prioritize corrosion-resistant materials like stai...
-
What Makes a Good Used Trowel for Planters
When searching for a good used trowel for planters, you'll want to prioritize corrosion-resistant materials like stai...
-
What Makes a Good Used Trowel for Planters
When searching for a good used trowel for planters, you'll want to prioritize corrosion-resistant materials like stai...
-
What Makes a Good Used Trowel for Planters
When searching for a good used trowel for planters, you'll want to prioritize corrosion-resistant materials like stai...
-
What Makes a Good Used Trowel for Planters
When searching for a good used trowel for planters, you'll want to prioritize corrosion-resistant materials like stai...
-
What Makes a Good Used Trowel for Planters
When searching for a good used trowel for planters, you'll want to prioritize corrosion-resistant materials like stai...
-
What Makes a Good Used Trowel for Planters
When searching for a good used trowel for planters, you'll want to prioritize corrosion-resistant materials like stai...
-
What Makes a Good Used Trowel for Planters
When searching for a good used trowel for planters, you'll want to prioritize corrosion-resistant materials like stai...
-
What Makes a Good Used Trowel for Planters
When searching for a good used trowel for planters, you'll want to prioritize corrosion-resistant materials like stai...
-
What Makes a Good Used Trowel for Planters
When searching for a good used trowel for planters, you'll want to prioritize corrosion-resistant materials like stai...
-
What Makes a Good Used Trowel for Planters
When searching for a good used trowel for planters, you'll want to prioritize corrosion-resistant materials like stai...
-
What Makes a Good Used Trowel for Planters
When searching for a good used trowel for planters, you'll want to prioritize corrosion-resistant materials like stai...
-
What Makes a Good Used Trowel for Planters
When searching for a good used trowel for planters, you'll want to prioritize corrosion-resistant materials like stai...
-
What Makes a Good Used Trowel for Planters
When searching for a good used trowel for planters, you'll want to prioritize corrosion-resistant materials like stai...
-
What Makes a Good Used Trowel for Planters
When searching for a good used trowel for planters, you'll want to prioritize corrosion-resistant materials like stai...
-
What Makes a Good Used Trowel for Planters
When searching for a good used trowel for planters, you'll want to prioritize corrosion-resistant materials like stai...
-
What Makes a Good Used Trowel for Planters
When searching for a good used trowel for planters, you'll want to prioritize corrosion-resistant materials like stai...
-
What Makes a Good Used Trowel for Planters
When searching for a good used trowel for planters, you'll want to prioritize corrosion-resistant materials like stai...
-
What Makes a Good Used Trowel for Planters
When searching for a good used trowel for planters, you'll want to prioritize corrosion-resistant materials like stai...
-
What Makes a Good Used Trowel for Planters
When searching for a good used trowel for planters, you'll want to prioritize corrosion-resistant materials like stai...
-
What Makes a Good Used Trowel for Planters
When searching for a good used trowel for planters, you'll want to prioritize corrosion-resistant materials like stai...


