Irrigation System Installation Tips for DIY Planters
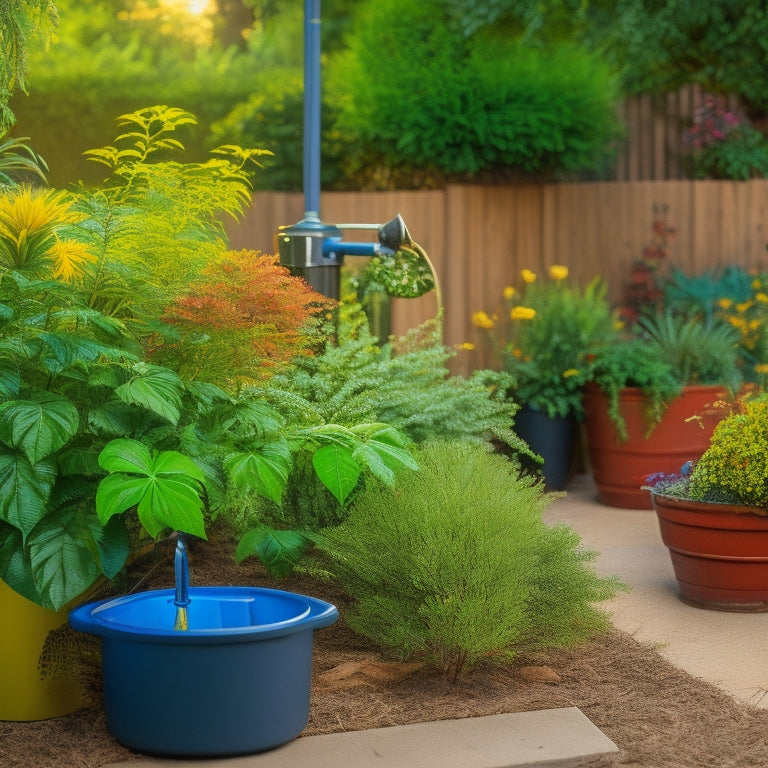
As you prepare to install a DIY irrigation system for your planters, it's crucial to choose the right kit based on lawn size, soil type, and water pressure. Verify piping materials are compatible with your water source and system design. Properly prepare cinder blocks by cleaning and leveling them, and lay out the irrigation system considering plant location, soil type, and sun exposure. Connect the water source using durable pipes and fittings, and install drip irrigation tubing for efficient water delivery. With a well-designed system, you'll be one step closer to providing your plants with the perfect amount of water and nutrients, and as you continue, you'll discover the finer details that make all the difference.
Key Takeaways
• Select the right irrigation kit based on lawn size, soil type, and water pressure to ensure efficient water distribution and resource savings.
• Prepare cinder blocks by cleaning, inspecting, and leveling them to create a reliable base for the irrigation system.
• Design the irrigation system layout based on specific watering needs, yard terrain, and mature plant size to guarantee adequate water supply to all plants.
• Connect the water source to the system using durable, weather-resistant pipes and fittings, and install a backflow preventer to protect against water source contamination.
• Test and adjust the system post-installation to confirm functionality, inspect for leaks or damage, and ensure even water distribution.
Choosing the Right Irrigation Kit
You'll need to select an irrigation kit that matches your lawn's specific needs, considering factors like lawn size, soil type, and water pressure. A well-chosen kit will guarantee efficient water distribution, saving you time and resources.
For smaller areas, drip irrigation kits are ideal, delivering water directly to the roots, minimizing evaporation and runoff. Soaker hoses, on the other hand, are perfect for larger lawns, providing a gentle, soaking action that encourages deep root growth.
When choosing a kit, consider the type of plants you're growing, as some require more water than others. Additionally, think about the layout of your lawn, taking into account obstacles like trees, slopes, and gardens.
Preparing Cinder Blocks for Installation
By the time you're ready to start installing your irrigation system, it's vital to have your cinder blocks properly prepared to serve as a stable base for the entire setup. Cinder block preparation is key to ensuring a successful installation.
Begin by cleaning the blocks thoroughly with a wire brush to remove any debris or dirt. This will help create a solid bond between the block and the irrigation system components. Next, inspect each block for any cracks or damage, and replace any that are compromised.
Drainage considerations are also essential during cinder block preparation. Make sure the blocks are level and slightly sloped to allow water to flow freely. You can achieve this by placing a spirit level on top of each block and adjusting it accordingly.
Additionally, consider applying a drainage material, such as gravel or sand, between the blocks to facilitate water flow. By taking the time to properly prepare your cinder blocks, you'll be able to create a reliable and efficient irrigation system that will keep your plants thriving.
Laying Out the Irrigation System
With your cinder blocks properly prepared, you can now focus on designing the layout of your irrigation system, taking into account the specific watering needs of your plants and the terrain of your yard. This vital step will guarantee your plants receive the right amount of water, exactly where they need it.
To achieve ideal plant spacing, consider the mature size of your plants and leave enough room for growth.
Employ effective irrigation layout techniques, such as dividing your yard into separate zones, each serving a specific group of plants. This approach allows you to tailor the water flow to the unique requirements of each zone.
Identify areas with full sun, shade, or varying soil types, and adjust your irrigation layout accordingly. For instance, plants in full sun may require more frequent watering, while those in shade may need less.
Connecting Water Source to System
Your irrigation system's water source, whether it's a municipal supply or a private well, must be connected to the system using durable, weather-resistant pipes and fittings that can withstand outdoor conditions.
You'll need to determine the best connection method for your specific water source type. For municipal supplies, you'll typically connect to an outdoor hose bib or a dedicated irrigation meter. Private wells, on the other hand, may require a submersible pump and pressure tank.
When connecting your water source, verify the pipes and fittings are rated for outdoor use and can handle the system's operating pressure. Use corrosion-resistant materials, such as copper or PVC, to minimize the risk of damage from exposure to the elements.
Additionally, consider installing a backflow preventer to protect your water source from contamination. Properly connecting your water source is essential for a functional and efficient irrigation system.
Drilling Holes for Tubing and Fittings
Six holes of precise diameter must be drilled into the fittings to accommodate the tubing, guaranteeing a snug, watertight connection that resists damage from weather and pressure fluctuations. To achieve this, you'll need to choose the right drill bits and hole saws options. Here's a breakdown of the fitting types and corresponding drill bit sizes:
| Fitting Type | Drill Bit Size |
|---|---|
| 1/2' Barb Fitting | 1/2' |
| 1/4' Barb Fitting | 1/4' |
| 1/2' Compression Fitting | 5/8' |
| 1/4' Compression Fitting | 3/8' |
When drilling, guarantee the fittings are securely held in place to prevent damage or misalignment. Use a slow and steady drilling motion to avoid overheating the drill bit or deforming the fitting. The type of tubing materials you're working with will also influence the drilling process. For instance, PEX tubing requires a slightly larger hole diameter than PVC tubing. By following these guidelines, you'll be able to create precise holes that guarantee a secure and watertight connection for your irrigation system.
Installing Drip Irrigation Tubing
By carefully planning the route of your drip irrigation tubing, you'll ensure that water and nutrients are delivered directly to the roots of your plants, maximizing their growth and health.
When installing the tubing, make certain it's laid out in a way that allows for easy access and maintenance. Choose tubing materials that are resistant to UV degradation, cracks, and kinking, such as polyethylene or PVC.
You'll also need to select the appropriate drip emitter types, which can be categorized into three main groups: inline, online, and subsurface. Inline emitters are built into the tubing, while online emitters are attached separately. Subsurface emitters, on the other hand, are designed for below-ground use.
Consider the specific needs of your plants and the layout of your planter when deciding on the best emitter type. As you lay out the tubing, make sure to secure it with stakes or clips to prevent movement and kinking.
With proper installation, your drip irrigation system will provide efficient and targeted watering, giving your plants the best chance to thrive.
Setting Up Water Distribution Points
Now that you've installed the drip irrigation tubing, it's time to set up the water distribution points.
You'll need to connect to a reliable water source and design a piping network layout that guarantees efficient water distribution to all areas of your landscape.
Water Source Connection
Connect the irrigation system to a reliable water source by identifying and setting up strategic water distribution points that guarantee consistent pressure and flow rate throughout the network.
You'll need to determine the best water source type for your system, whether it's a municipal water supply, rainwater harvesting, or a well or borehole. Each water source type has its unique connection methods, so it's crucial to understand the requirements for your specific setup.
For instance, if you're using a municipal water supply, you'll need to connect to a hose bib or a dedicated irrigation meter. Rainwater harvesting systems require a connection to a storage tank, while wells or boreholes need a submersible pump and a pressure tank.
Confirm you follow the manufacturer's instructions for connection methods, taking into account factors like pipe size, material, and pressure ratings. Proper connection will prevent leaks, water waste, and damage to your irrigation system.
Piping Network Layout
To guarantee efficient water distribution, you'll need to strategically design the piping network layout, taking into account factors such as pipe size, material, and elevation changes to maintain consistent pressure and flow rates throughout the irrigation system.
When selecting piping materials, consider durability, resistance to corrosion, and UV stability. PVC, polyethylene, and polypropylene are popular choices for irrigation systems due to their flexibility, ease of installation, and affordability. Ascertain the piping materials you choose are compatible with the water source and system design.
In your system design, consider the layout of your planter, including the location of plants, soil type, and sun exposure. This will help you determine the best placement of water distribution points, such as sprinkler heads or drip irrigation emitters.
Take into account any obstacles, like rocks or slopes, that may affect pipe installation or water flow. By carefully designing your piping network layout, you'll create an efficient and effective irrigation system that delivers the right amount of water to your plants, exactly where they need it.
Testing and Adjusting the System
You'll typically perform a series of initial tests on the irrigation system after installation to confirm it's functioning as designed. This step is vital to guarantee system efficiency and prevent water waste.
Start by checking the flow rate of each zone, making sure it matches the manufacturer's specifications. Inspect the pipes and fittings for any signs of leakage or damage.
Next, activate each zone individually to verify that the water is being distributed evenly and reaching all plants. Observe the system's performance during different weather conditions, such as high winds or intense sunlight, to identify any areas that require adjustment.
Make note of any issues you encounter and adjust the system accordingly. This might involve tweaking the valve settings, replacing faulty components, or repositioning sprinkler heads.
Maintaining the Irrigation System
As you move forward with your newly installed irrigation system, you'll want to prioritize regular maintenance to guarantee it continues to function efficiently.
You'll need to stay on top of inspections, monitoring water pressure levels, and removing debris to prevent clogs and damage.
Inspect the System Regularly
Regular inspections are essential to identifying potential issues before they escalate into costly problems. It's important to set a schedule to guarantee your irrigation system doesn't slip through the cracks. By doing so, you'll make certain your plants receive the right amount of water, and you'll avoid wasting resources.
Here are some key aspects to focus on during your inspections:
-
Check for leaks and blockages: Inspect the pipes, fittings, and emitters for any signs of damage or clogging.
-
Verify system upgrades: After making any system upgrades, double-check that they're functioning as intended and not disrupting the overall system.
-
Make seasonal adjustments: Adjust your irrigation schedule according to the changing seasons to make sure your plants receive the right amount of water.
Check Water Pressure Levels
While inspecting your irrigation system, checking water pressure levels should be a top priority, as it directly affects the system's overall performance and efficiency. You want to make certain that your plants receive the right amount of water at the right time.
Low water pressure can lead to inadequate water distribution, resulting in parched plants and wasted resources. On the other hand, high water pressure can cause pipe damage, leaks, and erosion.
To check water pressure levels, you'll need a pressure gauge. Attach it to the irrigation system's main line, and take a reading. Compare it to the recommended pressure range specified by the manufacturer.
If the pressure is too high or too low, adjust the system accordingly. You may need to install a pressure regulator or adjust the pump's settings.
Flush Out Debris Often
You must flush out debris from your irrigation system regularly to prevent clogs and assure that water flows freely to your plants. Debris accumulation can lead to reduced water pressure, uneven water distribution, and even system failure. Regular flushing assures your plants receive the water they need to thrive.
Here are some common debris sources to watch out for:
-
Dirt and sediment: These can enter your system through the water source or during installation.
-
Mineral buildup: Minerals in the water can precipitate out and form deposits that clog your system.
-
Plant material: Leaves, twigs, and other plant debris can enter your system through the emitters or pipes.
To flush out debris, you can use various methods, including:
-
Running the system at high pressure to dislodge debris.
-
Using a filter or screen to catch debris before it enters the system.
-
Disassembling and cleaning individual components, such as emitters and pipes.
Frequently Asked Questions
Can I Use an Irrigation System With a Rainwater Harvesting Setup?
You're wondering if you can integrate an irrigation system with your rainwater harvesting setup.
The answer is yes, and it's a great way to boost rainwater compatibility!
By combining the two, you'll not only reduce your water bill but also increase irrigation efficiency.
You'll be using a free, renewable resource to nourish your plants, and that's a win-win.
How Often Should I Clean the Irrigation System's Filter?
Imagine your plants thriving under a gentle, consistent rain - that's what a well-maintained irrigation system can provide.
You're wise to wonder how often to clean the filter. Aim to inspect and clean it every 1-2 weeks, depending on water quality and usage.
Regular filter maintenance guarantees irrigation efficiency, preventing clogs and nutrient deficiencies.
Will the Drip Irrigation Tubing Be Damaged by UV Sunlight?
When you're working with drip irrigation tubing, you're right to wonder if UV sunlight will damage it.
The good news is that most modern tubing is designed with UV resistance in mind. Look for tubing with a high UV resistance rating to guarantee its longevity.
You'll typically find this information on the manufacturer's label or website. By choosing the right tubing, you'll be protecting your investment and guaranteeing your plants receive the water they need without interruptions.
Are There Any Specific Tools Required for DIY Irrigation Installation?
When setting up your irrigation system, you'll need specific installation tools to guarantee a seamless process.
You'll require a tubing cutter or pruning shears to cut the drip irrigation tubing, a hole punch or drill for creating holes in the tubing, and a filter or pressure regulator to connect system components.
Additionally, you may need wire strippers, pliers, or wrenches depending on the specific system design.
Having these tools handy will make your DIY irrigation installation a breeze.
Can I Install an Irrigation System on a Slope or Uneven Ground?
When working with uneven terrain, you'll need to get creative.
Installing an irrigation system on a slope requires thoughtful slope adjustments to guarantee water flows evenly and doesn't pool.
Don't forget drainage considerations, like swales or French drains, to prevent waterlogged areas.
Conclusion
You've successfully installed your DIY irrigation system, and your plants are now thriving.
According to the EPA, a properly installed irrigation system can reduce water waste by up to 50%.
With regular maintenance, your system will continue to provide efficient watering for your plants.
Take pride in knowing you've not only saved time but also contributed to a more sustainable future.
Related Posts
-
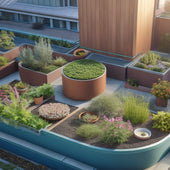
3 Best Roof Garden Drainage Solutions for Planters
When designing your roof garden, you'll want to implement a planter drainage system that guarantees water flows freel...
-
3 Best Roof Garden Drainage Solutions for Planters
When designing your roof garden, you'll want to implement a planter drainage system that guarantees water flows freel...
-
3 Best Roof Garden Drainage Solutions for Planters
When designing your roof garden, you'll want to implement a planter drainage system that guarantees water flows freel...
-
3 Best Roof Garden Drainage Solutions for Planters
When designing your roof garden, you'll want to implement a planter drainage system that guarantees water flows freel...
-
3 Best Roof Garden Drainage Solutions for Planters
When designing your roof garden, you'll want to implement a planter drainage system that guarantees water flows freel...
-
3 Best Roof Garden Drainage Solutions for Planters
When designing your roof garden, you'll want to implement a planter drainage system that guarantees water flows freel...
-
3 Best Roof Garden Drainage Solutions for Planters
When designing your roof garden, you'll want to implement a planter drainage system that guarantees water flows freel...
-
3 Best Roof Garden Drainage Solutions for Planters
When designing your roof garden, you'll want to implement a planter drainage system that guarantees water flows freel...
-
3 Best Roof Garden Drainage Solutions for Planters
When designing your roof garden, you'll want to implement a planter drainage system that guarantees water flows freel...
-
3 Best Roof Garden Drainage Solutions for Planters
When designing your roof garden, you'll want to implement a planter drainage system that guarantees water flows freel...
-
3 Best Roof Garden Drainage Solutions for Planters
When designing your roof garden, you'll want to implement a planter drainage system that guarantees water flows freel...
-
3 Best Roof Garden Drainage Solutions for Planters
When designing your roof garden, you'll want to implement a planter drainage system that guarantees water flows freel...
-
3 Best Roof Garden Drainage Solutions for Planters
When designing your roof garden, you'll want to implement a planter drainage system that guarantees water flows freel...
-
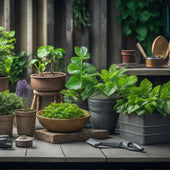
Why Do Cinder Block Planter Tools Cost So Much
You'll likely spend at least $200 to $500 on essential tools for a DIY cinder block planter project, with high-end op...
-
Why Do Cinder Block Planter Tools Cost So Much
You'll likely spend at least $200 to $500 on essential tools for a DIY cinder block planter project, with high-end op...
-
Why Do Cinder Block Planter Tools Cost So Much
You'll likely spend at least $200 to $500 on essential tools for a DIY cinder block planter project, with high-end op...
-
Why Do Cinder Block Planter Tools Cost So Much
You'll likely spend at least $200 to $500 on essential tools for a DIY cinder block planter project, with high-end op...
-
Why Do Cinder Block Planter Tools Cost So Much
You'll likely spend at least $200 to $500 on essential tools for a DIY cinder block planter project, with high-end op...
-
Why Do Cinder Block Planter Tools Cost So Much
You'll likely spend at least $200 to $500 on essential tools for a DIY cinder block planter project, with high-end op...
-
Why Do Cinder Block Planter Tools Cost So Much
You'll likely spend at least $200 to $500 on essential tools for a DIY cinder block planter project, with high-end op...
-
Why Do Cinder Block Planter Tools Cost So Much
You'll likely spend at least $200 to $500 on essential tools for a DIY cinder block planter project, with high-end op...
-
Why Do Cinder Block Planter Tools Cost So Much
You'll likely spend at least $200 to $500 on essential tools for a DIY cinder block planter project, with high-end op...
-
Why Do Cinder Block Planter Tools Cost So Much
You'll likely spend at least $200 to $500 on essential tools for a DIY cinder block planter project, with high-end op...
-
Why Do Cinder Block Planter Tools Cost So Much
You'll likely spend at least $200 to $500 on essential tools for a DIY cinder block planter project, with high-end op...
-
Why Do Cinder Block Planter Tools Cost So Much
You'll likely spend at least $200 to $500 on essential tools for a DIY cinder block planter project, with high-end op...
-
Why Do Cinder Block Planter Tools Cost So Much
You'll likely spend at least $200 to $500 on essential tools for a DIY cinder block planter project, with high-end op...
-
Why Do Cinder Block Planter Tools Cost So Much
You'll likely spend at least $200 to $500 on essential tools for a DIY cinder block planter project, with high-end op...
-
Why Do Cinder Block Planter Tools Cost So Much
You'll likely spend at least $200 to $500 on essential tools for a DIY cinder block planter project, with high-end op...
-
Why Do Cinder Block Planter Tools Cost So Much
You'll likely spend at least $200 to $500 on essential tools for a DIY cinder block planter project, with high-end op...
-
Why Do Cinder Block Planter Tools Cost So Much
You'll likely spend at least $200 to $500 on essential tools for a DIY cinder block planter project, with high-end op...
-
Why Do Cinder Block Planter Tools Cost So Much
You'll likely spend at least $200 to $500 on essential tools for a DIY cinder block planter project, with high-end op...
-
Why Do Cinder Block Planter Tools Cost So Much
You'll likely spend at least $200 to $500 on essential tools for a DIY cinder block planter project, with high-end op...
-
Why Do Cinder Block Planter Tools Cost So Much
You'll likely spend at least $200 to $500 on essential tools for a DIY cinder block planter project, with high-end op...
-
Why Do Cinder Block Planter Tools Cost So Much
You'll likely spend at least $200 to $500 on essential tools for a DIY cinder block planter project, with high-end op...
-
Why Do Cinder Block Planter Tools Cost So Much
You'll likely spend at least $200 to $500 on essential tools for a DIY cinder block planter project, with high-end op...
-
Why Do Cinder Block Planter Tools Cost So Much
You'll likely spend at least $200 to $500 on essential tools for a DIY cinder block planter project, with high-end op...
-
Why Do Cinder Block Planter Tools Cost So Much
You'll likely spend at least $200 to $500 on essential tools for a DIY cinder block planter project, with high-end op...
-
Why Do Cinder Block Planter Tools Cost So Much
You'll likely spend at least $200 to $500 on essential tools for a DIY cinder block planter project, with high-end op...
-
Why Do Cinder Block Planter Tools Cost So Much
You'll likely spend at least $200 to $500 on essential tools for a DIY cinder block planter project, with high-end op...
-
Why Do Cinder Block Planter Tools Cost So Much
You'll likely spend at least $200 to $500 on essential tools for a DIY cinder block planter project, with high-end op...
-
Why Do Cinder Block Planter Tools Cost So Much
You'll likely spend at least $200 to $500 on essential tools for a DIY cinder block planter project, with high-end op...
-
Why Do Cinder Block Planter Tools Cost So Much
You'll likely spend at least $200 to $500 on essential tools for a DIY cinder block planter project, with high-end op...
-
Why Do Cinder Block Planter Tools Cost So Much
You'll likely spend at least $200 to $500 on essential tools for a DIY cinder block planter project, with high-end op...
-
Why Do Cinder Block Planter Tools Cost So Much
You'll likely spend at least $200 to $500 on essential tools for a DIY cinder block planter project, with high-end op...
-
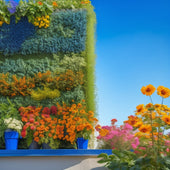
5 Tips for Thriving Vertical Vegetable Gardens
To thrive in vertical vegetable gardening, you'll want to choose a planter that meets the unique needs of your veggie...
-
5 Tips for Thriving Vertical Vegetable Gardens
To thrive in vertical vegetable gardening, you'll want to choose a planter that meets the unique needs of your veggie...
-
5 Tips for Thriving Vertical Vegetable Gardens
To thrive in vertical vegetable gardening, you'll want to choose a planter that meets the unique needs of your veggie...
-
5 Tips for Thriving Vertical Vegetable Gardens
To thrive in vertical vegetable gardening, you'll want to choose a planter that meets the unique needs of your veggie...
-
5 Tips for Thriving Vertical Vegetable Gardens
To thrive in vertical vegetable gardening, you'll want to choose a planter that meets the unique needs of your veggie...
-
5 Tips for Thriving Vertical Vegetable Gardens
To thrive in vertical vegetable gardening, you'll want to choose a planter that meets the unique needs of your veggie...
-
5 Tips for Thriving Vertical Vegetable Gardens
To thrive in vertical vegetable gardening, you'll want to choose a planter that meets the unique needs of your veggie...
-
5 Tips for Thriving Vertical Vegetable Gardens
To thrive in vertical vegetable gardening, you'll want to choose a planter that meets the unique needs of your veggie...
-
5 Tips for Thriving Vertical Vegetable Gardens
To thrive in vertical vegetable gardening, you'll want to choose a planter that meets the unique needs of your veggie...
-
5 Tips for Thriving Vertical Vegetable Gardens
To thrive in vertical vegetable gardening, you'll want to choose a planter that meets the unique needs of your veggie...
-
5 Tips for Thriving Vertical Vegetable Gardens
To thrive in vertical vegetable gardening, you'll want to choose a planter that meets the unique needs of your veggie...
-
5 Tips for Thriving Vertical Vegetable Gardens
To thrive in vertical vegetable gardening, you'll want to choose a planter that meets the unique needs of your veggie...
-
5 Tips for Thriving Vertical Vegetable Gardens
To thrive in vertical vegetable gardening, you'll want to choose a planter that meets the unique needs of your veggie...
-
5 Tips for Thriving Vertical Vegetable Gardens
To thrive in vertical vegetable gardening, you'll want to choose a planter that meets the unique needs of your veggie...
-
5 Tips for Thriving Vertical Vegetable Gardens
To thrive in vertical vegetable gardening, you'll want to choose a planter that meets the unique needs of your veggie...
-
5 Tips for Thriving Vertical Vegetable Gardens
To thrive in vertical vegetable gardening, you'll want to choose a planter that meets the unique needs of your veggie...
-
5 Tips for Thriving Vertical Vegetable Gardens
To thrive in vertical vegetable gardening, you'll want to choose a planter that meets the unique needs of your veggie...


