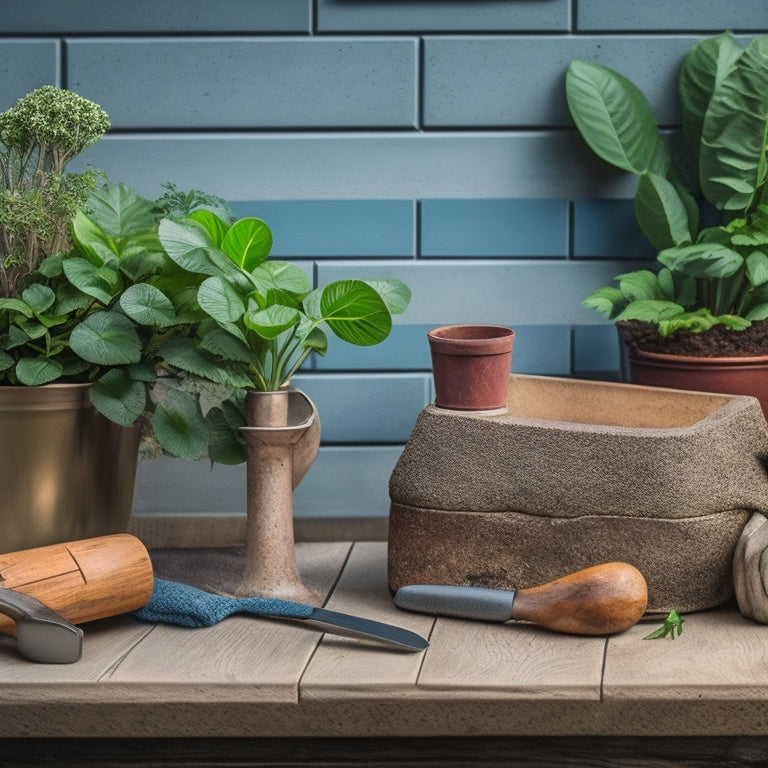
Essential Tools for Block Garden Planters
When building block garden planters, you'll need a solid toolkit to guarantee stability, functionality, and visual appeal. Start with essential measuring and marking tools like a 25-foot tape measure, level, and combination square to get accurate measurements. Next, gather leveling and aligning tools such as a laser level, spirit level, and tamping tool to create a solid foundation. You'll also need trowels and mortar application tools, drilling and fastening tools, safety gear, and cleaning and debris removal tools. With these essentials, you'll be well on your way to creating stunning block garden planters - and that's just the beginning of what you can learn to take your project to the next level.
Key Takeaways
• A 25-foot tape measure, level, and combination square are essential for accurate measurements and alignment in block garden planters.
• A laser level, spirit level, and tamping tool ensure a stable foundation and proper block alignment.
• A mix of the right consistency, a suitable trowel, and proper application technique are crucial for strong mortar bonding.
• A variety of drill bits, masonry bits, and screws with corrosion resistance are necessary for drilling and fastening tasks.
• Safety gear, including safety goggles, gloves, and a dust mask, is vital for protecting yourself during planter construction.
Measuring and Marking Tools Needed
You'll need a set of vital measuring and marking tools to accurately plan and execute your block garden planter project. These tools will help you take precise measurements, mark cut lines, and guarantee a snug fit for your blocks.
Start with a 25-foot tape measure, which will allow you to take measurements around your planter area. A level is also essential for confirming your blocks are properly aligned and your planter is level.
For marking methods, you'll need a pencil and a marker. The pencil will come in handy for marking cut lines on your blocks, while the marker will help you label each block with its corresponding layout number.
A combination square will also aid in marking precise 90-degree angles and guaranteeing your blocks are properly aligned. When it comes to measuring techniques, use your tape measure to take precise measurements of your planter area and blocks. Double-check your measurements to avoid errors and guarantee a successful project.
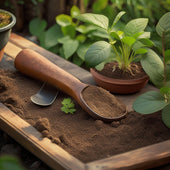
Trowels for Mortar Application
When it comes to applying mortar to your block garden planters, you'll want to master the right techniques to guarantee a strong and durable bond.
You'll need to learn how to mix mortar to the perfect consistency and then smoothly apply it to the blocks, making certain to fill all gaps and joints.
Mortar Mixing Techniques
Mixing mortar to the ideal consistency is crucial, as it directly affects the structural integrity of your block garden planters. Mastering the technique requires a deep understanding of the ratio of cement to sand and water. You want to achieve a workable consistency that's not too runny or too dry. Aim for a mix that's similar to thick cream or toothpaste. This will guarantee proper bonding between the blocks and prevent excessive water loss during the curing process.
To get it right, start by following the manufacturer's instructions for the recommended ratio of cement to sand. Then, gradually add water while mixing the ingredients with a shovel or trowel until you reach the desired consistency. It's better to err on the side of caution and add water slowly, as you can always add more but can't remove excess water.
Smooth Application Tips
With a well-mixed mortar in hand, it's time to focus on applying it smoothly and evenly, and the right trowel is essential for achieving a professional-looking finish.
When it comes to trowels, you'll want to choose one that feels comfortable in your hand and has the right amount of flexibility. A stiff trowel can apply too much pressure, causing the mortar to ooze out between the blocks, while a too-flexible trowel can lead to an uneven application.
Hold the trowel at a 20- to 30-degree angle and press it firmly into the mortar, using long, smooth strokes to spread it evenly. Apply gentle pressure to fill the gaps between the blocks, and use a level to verify the blocks are straight and level.
Safety Gear for Protection
You'll need three essential pieces of safety gear to protect yourself from potential hazards while working on your block garden planters. These must-haves will guarantee you stay safe and healthy throughout the process.
| Safety Gear | Purpose |
|---|---|
| Safety Goggles | Protect your eyes from debris, dust, and other particles that may fly around during mixing, cutting, or handling materials. |
| Gloves | Provide protection for your hands from rough or sharp edges, and also offer grip and traction when handling blocks or tools. |
| Steel-Toed Boots | Safeguard your feet from heavy blocks, tools, or other objects that may fall or be dropped during construction. |
Cleaning and Debris Removal
Frequently, cleaning and debris removal are overlooked but essential steps in the block garden planter construction process, requiring your attention to guarantee a safe and successful project.
You'll need to prioritize debris management to avoid accidents and ascertain a smooth workflow. Start by clearing the area of any loose materials, such as rocks, twigs, or broken blocks. Use a broom or a leaf blower to remove dirt, dust, and other debris from the surface.
Next, focus on cleaning the blocks themselves. Use a gentle cleaning technique, such as a soft-bristled brush or a damp cloth, to remove dirt and grime without damaging the material. For tougher stains or stubborn dirt, you can use a mild detergent and water solution. Make sure to rinse the blocks thoroughly to prevent any soap residue from affecting the plants.
Effective debris management and cleaning techniques will save you time and effort in the long run. By keeping your workspace clean and organized, you'll be able to work more efficiently and accurately, resulting in a beautiful and thriving block garden planter.
Leveling and Aligning Tools
To guarantee your block garden planter turns out level and even, you'll need to invest in a few essential tools that'll help you achieve professional-looking results.
Leveling and aligning tools are critical in making certain your planter's foundation is solid and stable. A laser level is a must-have for accurate alignment techniques. This tool projects a precise level line, allowing you to adjust your blocks accordingly. A spirit level is another essential tool for checking the planter's levelness. It's particularly useful for smaller planters or when working with uneven surfaces.
When it comes to leveling methods, a tamping tool is significant for compacting soil or gravel beneath your blocks. This guarantees a stable base that won't shift over time.
A string and stakes can also be used to create a straight line, guiding your block placement for perfect alignment. By incorporating these leveling and aligning tools into your process, you'll be able to achieve a sturdy and visually appealing block garden planter that will thrive for years to come.
Drilling and Fastening Tools
When building your block garden planters, you'll need to make precise holes and secure the blocks together, which is where drilling and fastening tools come in.
You'll want to choose the right drill bits for the job, select the appropriate screws, and strategically place clamps to hold everything in place.
Drill Bit Selection
You'll need a variety of drill bits in your toolkit to tackle the diverse tasks involved in building and maintaining your block garden planters. Different drill bit types are designed for specific tasks, and using the right one can make a huge difference in the quality of your work.
For example, twist drill bits are great for drilling through wood and metal, while masonry bits are perfect for drilling into concrete blocks. You'll also need to take into account drill speed when selecting a drill bit. A slower drill speed is usually better for drilling through tough materials, while a faster speed is better suited for softer materials.
When it comes to drill bit selection, it's crucial to choose the right type for the job. Using a drill bit that's not designed for the task at hand can lead to poor results, damage to the material, or even breakage of the drill bit itself.
Screw Type Options
With your drill bits in place, now it's time to contemplate the screw type options that will securely fasten your block garden planters together. You'll want to choose screws that provide a strong hold, are resistant to corrosion, and can withstand outdoor elements.
When selecting screw types, consider the following options:
| Screw Type | Screw Advantages |
|---|---|
| Galvanized | Resistant to corrosion, ideal for outdoor use |
| Stainless Steel | High strength, resistant to rust and corrosion |
| Coated | Weather-resistant coating, reduces rust and corrosion |
Galvanized screws are a popular choice for outdoor projects, as they provide a durable barrier against corrosion. Stainless steel screws offer superior strength and resistance to rust and corrosion, making them ideal for heavy-duty applications. Coated screws provide an additional layer of protection against the elements, reducing the risk of rust and corrosion.
Clamp Placement Tips
Proper clamp placement is essential to guaranteeing your drilling and fastening tools work efficiently and effectively, allowing you to secure your block garden planters together seamlessly. You'll want to choose the right clamp type for the job, considering factors like the size and shape of your blocks, as well as the material they're made of.
Here are some key clamp placement tips to keep in mind:
-
Position clamps on a flat surface: This guarantees even pressure and prevents the clamp from slipping or shifting during use.
-
Avoid clamping on corners or edges: This can cause the block to crack or break, especially if it's made of a fragile material.
-
Use multiple clamps for larger blocks: This provides extra stability and prevents the block from shifting or toppling over.
Additionally, remember to perform regular clamp maintenance to keep your tools in top condition. This includes cleaning and lubricating moving parts, as well as storing clamps in a dry, secure location when not in use.
Mixing and Applying Mortar
Mixing mortar to the right consistency is essential, as it directly affects the structural integrity of your block garden planters. You'll need to choose the right type of mortar for your project, whether it's a general-purpose mix, a high-strength mix, or a specialized mix for specific applications.
When mixing mortar, you'll need to achieve the right consistency. The ideal mix should be stiff enough to hold its shape, but still flow easily off a trowel. If the mix is too wet, it can lead to a weak bond between the blocks. If it's too dry, it won't spread evenly.
Here's a quick guide to help you get the right consistency:
| Mortar Consistency | Description |
|---|---|
| Stiff | Holds its shape, but doesn't flow easily off a trowel |
| Ideal | Stiff enough to hold its shape, but flows easily off a trowel |
| Wet | Too runny, difficult to hold its shape |
Finishing and Smoothing Tools
You'll need to equip yourself with the right finishing and smoothing tools to achieve a professional-looking finish on your block garden planters, now that you've mixed and applied the mortar to the correct consistency.
These tools will help you achieve a smooth, even surface finish that's free of imperfections.
Here are the essential finishing and smoothing tools you'll need:
-
Sanding blocks: These are used to smooth out rough spots and bumps on the surface of your planters. They come in various grits, so you can start with a coarse grit to remove major imperfections and progress to finer grits for a high-gloss finish.
-
Trowels: A trowel is used to apply and smooth out mortar, ensuring a uniform surface finish.
-
Rubber float: This tool is used to remove excess mortar and smooth out the surface of your planters, creating a smooth, even finish.
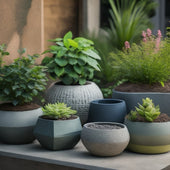
Planting and Arrangement Essentials
With your block garden planters now complete, it's time to focus on the fun part - planting and arranging your chosen flowers, herbs, or vegetables in a way that showcases their beauty and maximizes their growth.
To guarantee a thriving garden, you'll need to take into account two essential factors: soil selection and plant spacing. Here's a quick guide to get you started:
| Soil Selection | Plant Spacing |
|---|---|
| Choose a well-draining potting mix specifically designed for containers | Plant flowers and herbs 6-8 inches apart for ideal air circulation |
| Think about adding organic matter like compost to improve soil fertility | Leave 12-18 inches between vegetable plants for proper growth |
| Select a soil with a pH level suitable for your chosen plants | Group plants with similar watering needs together |
| Avoid using soil from your backyard, as it may compact and prevent drainage | Contemplate a staggered planting arrangement to create visual interest |
| Don't forget to add a layer of mulch to retain moisture and suppress weeds | Experiment with different planting patterns to find what works best for you |
Frequently Asked Questions
Can I Use a Drill With a Hammer Function for Block Gardening?
When using a drill with a hammer function for block gardening, you'll want to prioritize drill safety.
Make sure you're wearing protective gear, like gloves and safety glasses, to prevent injuries.
Next, master the hammer technique by applying gentle to moderate pressure, depending on the block's density.
Keep your footing stable and maintain control of the drill to avoid accidents.
With practice, you'll be able to efficiently break up blocks and create a thriving garden.
How Often Should I Clean My Block Garden Planter Tools?
Did you know that 80% of gardening issues arise from poor tool maintenance?
You're on the right track by thinking about cleaning your block garden planter tools!
As a rule of thumb, you should clean your tools after every use to prevent dirt and debris buildup.
For more thorough cleaning, set aside time each week to scrub and sanitize your tools.
This frequency will guarantee your tools remain in top condition, allowing you to maintain control over your garden's health and growth.
Are There Any Block Gardening Tools Suitable for Left-Handed People?
As a left-handed gardener, you'll be relieved to know that there are tools designed specifically for you.
Look for left-handed trowels with reversed blade angles, making it easier to scoop and plant.
Additionally, ergonomic gardening tools with contoured handles and balanced weight distribution can reduce strain and discomfort.
You'll find that these tools are designed to fit comfortably in your hand, allowing you to focus on your gardening tasks with precision and control.
Can I Use a Pressure Washer for Cleaning Block Garden Planters?
Blast away dirt and grime like a pro!
You're wondering if a pressure washer is the secret to sparkling clean block garden planters. The answer is yes!
A pressure washer's powerful jets can effortlessly remove stubborn dirt, algae, and mildew, making block planter maintenance a breeze.
Just be sure to use a wide fan tip and keep the nozzle at least 12 inches away to avoid damaging the blocks.
With a pressure washer, you'll be enjoying a pristine garden oasis in no time!
Are Block Gardening Tools Suitable for Use With Other Types of Gardens?
You're wondering if the tools you've invested in for block gardening can be used elsewhere.
The good news is that most block gardening tools are designed with versatility in mind. They're often compatible with other types of gardens, such as raised beds or container gardens.
You'll find that trowels, cultivators, and pruning shears can be used across different gardening styles.
Just remember to choose tools that fit your specific gardening needs, and you'll be all set to tackle any garden project that comes your way.
Conclusion
As you put the finishing touches on your block garden planters, remember that a well-stocked toolkit is like a master chef's kitchen - it's crucial to have the right ingredients and tools to create a culinary masterpiece.
Without them, you're left with a recipe for disaster.
By having the essential tools outlined in this article, you'll be whipping up beautiful block gardens in no time, and your outdoor space will be the envy of the neighborhood.
Related Posts
-
5 Best DIY Planter Ideas to Upcycle Concrete
You're about to breathe new life into discarded concrete blocks by transforming them into functional and visually app...
-
5 Best DIY Planter Ideas to Upcycle Concrete
You're about to breathe new life into discarded concrete blocks by transforming them into functional and visually app...
-
5 Best DIY Planter Ideas to Upcycle Concrete
You're about to breathe new life into discarded concrete blocks by transforming them into functional and visually app...
-
5 Best DIY Planter Ideas to Upcycle Concrete
You're about to breathe new life into discarded concrete blocks by transforming them into functional and visually app...
-
5 Best DIY Planter Ideas to Upcycle Concrete
You're about to breathe new life into discarded concrete blocks by transforming them into functional and visually app...
-
5 Best DIY Planter Ideas to Upcycle Concrete
You're about to breathe new life into discarded concrete blocks by transforming them into functional and visually app...
-
5 Best DIY Planter Ideas to Upcycle Concrete
You're about to breathe new life into discarded concrete blocks by transforming them into functional and visually app...
-
5 Best DIY Planter Ideas to Upcycle Concrete
You're about to breathe new life into discarded concrete blocks by transforming them into functional and visually app...
-
5 Best DIY Planter Ideas to Upcycle Concrete
You're about to breathe new life into discarded concrete blocks by transforming them into functional and visually app...
-
5 Best DIY Planter Ideas to Upcycle Concrete
You're about to breathe new life into discarded concrete blocks by transforming them into functional and visually app...
-
5 Best DIY Planter Ideas to Upcycle Concrete
You're about to breathe new life into discarded concrete blocks by transforming them into functional and visually app...
-
5 Best DIY Planter Ideas to Upcycle Concrete
You're about to breathe new life into discarded concrete blocks by transforming them into functional and visually app...
-
5 Best DIY Planter Ideas to Upcycle Concrete
You're about to breathe new life into discarded concrete blocks by transforming them into functional and visually app...
-
5 Best DIY Planter Ideas to Upcycle Concrete
You're about to breathe new life into discarded concrete blocks by transforming them into functional and visually app...
-
5 Best DIY Planter Ideas to Upcycle Concrete
You're about to breathe new life into discarded concrete blocks by transforming them into functional and visually app...
-
5 Best DIY Planter Ideas to Upcycle Concrete
You're about to breathe new life into discarded concrete blocks by transforming them into functional and visually app...
-
5 Best DIY Planter Ideas to Upcycle Concrete
You're about to breathe new life into discarded concrete blocks by transforming them into functional and visually app...
-
5 Best DIY Planter Ideas to Upcycle Concrete
You're about to breathe new life into discarded concrete blocks by transforming them into functional and visually app...
-
7 Creative Upcycled Planter Tutorials to Try Now
Get ready to transform your outdoor space with these 7 creative upcycled planter tutorials! Start by turning cinder b...
-
7 Creative Upcycled Planter Tutorials to Try Now
Get ready to transform your outdoor space with these 7 creative upcycled planter tutorials! Start by turning cinder b...
-
7 Creative Upcycled Planter Tutorials to Try Now
Get ready to transform your outdoor space with these 7 creative upcycled planter tutorials! Start by turning cinder b...
-
7 Creative Upcycled Planter Tutorials to Try Now
Get ready to transform your outdoor space with these 7 creative upcycled planter tutorials! Start by turning cinder b...
-
7 Creative Upcycled Planter Tutorials to Try Now
Get ready to transform your outdoor space with these 7 creative upcycled planter tutorials! Start by turning cinder b...
-
7 Creative Upcycled Planter Tutorials to Try Now
Get ready to transform your outdoor space with these 7 creative upcycled planter tutorials! Start by turning cinder b...
-
7 Creative Upcycled Planter Tutorials to Try Now
Get ready to transform your outdoor space with these 7 creative upcycled planter tutorials! Start by turning cinder b...
-
7 Creative Upcycled Planter Tutorials to Try Now
Get ready to transform your outdoor space with these 7 creative upcycled planter tutorials! Start by turning cinder b...
-
7 Creative Upcycled Planter Tutorials to Try Now
Get ready to transform your outdoor space with these 7 creative upcycled planter tutorials! Start by turning cinder b...
-
7 Creative Upcycled Planter Tutorials to Try Now
Get ready to transform your outdoor space with these 7 creative upcycled planter tutorials! Start by turning cinder b...
-
7 Creative Upcycled Planter Tutorials to Try Now
Get ready to transform your outdoor space with these 7 creative upcycled planter tutorials! Start by turning cinder b...
-
7 Creative Upcycled Planter Tutorials to Try Now
Get ready to transform your outdoor space with these 7 creative upcycled planter tutorials! Start by turning cinder b...
-
7 Creative Upcycled Planter Tutorials to Try Now
Get ready to transform your outdoor space with these 7 creative upcycled planter tutorials! Start by turning cinder b...
-
7 Creative Upcycled Planter Tutorials to Try Now
Get ready to transform your outdoor space with these 7 creative upcycled planter tutorials! Start by turning cinder b...
-
7 Creative Upcycled Planter Tutorials to Try Now
Get ready to transform your outdoor space with these 7 creative upcycled planter tutorials! Start by turning cinder b...
-
7 Creative Upcycled Planter Tutorials to Try Now
Get ready to transform your outdoor space with these 7 creative upcycled planter tutorials! Start by turning cinder b...
-
7 Creative Upcycled Planter Tutorials to Try Now
Get ready to transform your outdoor space with these 7 creative upcycled planter tutorials! Start by turning cinder b...
-
7 Creative Upcycled Planter Tutorials to Try Now
Get ready to transform your outdoor space with these 7 creative upcycled planter tutorials! Start by turning cinder b...
-
7 Creative Upcycled Planter Tutorials to Try Now
Get ready to transform your outdoor space with these 7 creative upcycled planter tutorials! Start by turning cinder b...
-
7 Creative Upcycled Planter Tutorials to Try Now
Get ready to transform your outdoor space with these 7 creative upcycled planter tutorials! Start by turning cinder b...
-
7 Creative Upcycled Planter Tutorials to Try Now
Get ready to transform your outdoor space with these 7 creative upcycled planter tutorials! Start by turning cinder b...
-
7 Creative Upcycled Planter Tutorials to Try Now
Get ready to transform your outdoor space with these 7 creative upcycled planter tutorials! Start by turning cinder b...
-
7 Creative Upcycled Planter Tutorials to Try Now
Get ready to transform your outdoor space with these 7 creative upcycled planter tutorials! Start by turning cinder b...
-
7 Creative Upcycled Planter Tutorials to Try Now
Get ready to transform your outdoor space with these 7 creative upcycled planter tutorials! Start by turning cinder b...
-
What Makes a Good Used Trowel for Planters
When searching for a good used trowel for planters, you'll want to prioritize corrosion-resistant materials like stai...
-
What Makes a Good Used Trowel for Planters
When searching for a good used trowel for planters, you'll want to prioritize corrosion-resistant materials like stai...
-
What Makes a Good Used Trowel for Planters
When searching for a good used trowel for planters, you'll want to prioritize corrosion-resistant materials like stai...
-
What Makes a Good Used Trowel for Planters
When searching for a good used trowel for planters, you'll want to prioritize corrosion-resistant materials like stai...
-
What Makes a Good Used Trowel for Planters
When searching for a good used trowel for planters, you'll want to prioritize corrosion-resistant materials like stai...
-
What Makes a Good Used Trowel for Planters
When searching for a good used trowel for planters, you'll want to prioritize corrosion-resistant materials like stai...
-
What Makes a Good Used Trowel for Planters
When searching for a good used trowel for planters, you'll want to prioritize corrosion-resistant materials like stai...
-
What Makes a Good Used Trowel for Planters
When searching for a good used trowel for planters, you'll want to prioritize corrosion-resistant materials like stai...
-
What Makes a Good Used Trowel for Planters
When searching for a good used trowel for planters, you'll want to prioritize corrosion-resistant materials like stai...
-
What Makes a Good Used Trowel for Planters
When searching for a good used trowel for planters, you'll want to prioritize corrosion-resistant materials like stai...
-
What Makes a Good Used Trowel for Planters
When searching for a good used trowel for planters, you'll want to prioritize corrosion-resistant materials like stai...
-
What Makes a Good Used Trowel for Planters
When searching for a good used trowel for planters, you'll want to prioritize corrosion-resistant materials like stai...
-
What Makes a Good Used Trowel for Planters
When searching for a good used trowel for planters, you'll want to prioritize corrosion-resistant materials like stai...
-
What Makes a Good Used Trowel for Planters
When searching for a good used trowel for planters, you'll want to prioritize corrosion-resistant materials like stai...
-
What Makes a Good Used Trowel for Planters
When searching for a good used trowel for planters, you'll want to prioritize corrosion-resistant materials like stai...
-
What Makes a Good Used Trowel for Planters
When searching for a good used trowel for planters, you'll want to prioritize corrosion-resistant materials like stai...
-
What Makes a Good Used Trowel for Planters
When searching for a good used trowel for planters, you'll want to prioritize corrosion-resistant materials like stai...
-
What Makes a Good Used Trowel for Planters
When searching for a good used trowel for planters, you'll want to prioritize corrosion-resistant materials like stai...
-
What Makes a Good Used Trowel for Planters
When searching for a good used trowel for planters, you'll want to prioritize corrosion-resistant materials like stai...
-
What Makes a Good Used Trowel for Planters
When searching for a good used trowel for planters, you'll want to prioritize corrosion-resistant materials like stai...
-
What Makes a Good Used Trowel for Planters
When searching for a good used trowel for planters, you'll want to prioritize corrosion-resistant materials like stai...
-
What Makes a Good Used Trowel for Planters
When searching for a good used trowel for planters, you'll want to prioritize corrosion-resistant materials like stai...
-
What Makes a Good Used Trowel for Planters
When searching for a good used trowel for planters, you'll want to prioritize corrosion-resistant materials like stai...
-
What Makes a Good Used Trowel for Planters
When searching for a good used trowel for planters, you'll want to prioritize corrosion-resistant materials like stai...


