Concrete Patch Repair for Damaged Planters
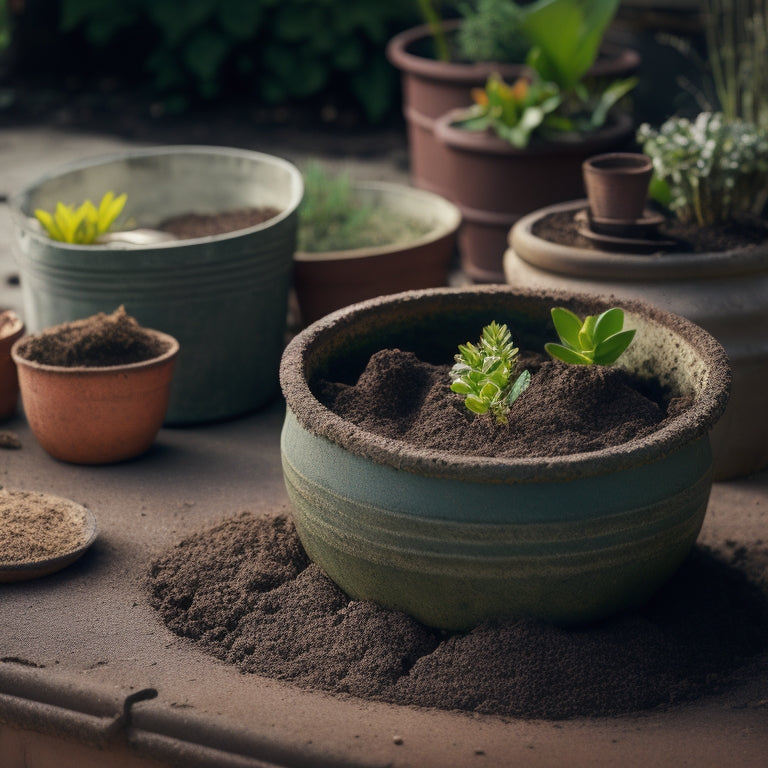
When repairing damaged planters, you'll need to inspect the cinder blocks for cracks, crumbling, and water damage to assess the structural integrity. Clean the surface thoroughly to guarantee a strong bond, then mix a concrete patch using Portland cement, sand, and water to create a workable paste. Apply the patching compound in thin layers, allowing each to dry before adding more, and smooth the surface using a putty knife or trowel. After curing, sand the area to achieve a uniform finish, and apply a clear sealant to protect against the elements. By following these steps, you'll be well on your way to restoring your planters - and there's more to learn to guarantee a successful repair.
Key Takeaways
• Assess cinder block damage by inspecting for cracks, crumbling, and water damage to evaluate structural integrity and identify areas needing attention.
• Clean the planter surface thoroughly with a wire brush, pressure washing, and degreaser to ensure a strong bond between old and new concrete.
• Mix a workable paste of Portland cement, sand, and water, avoiding excessive water, to create a strong and durable patching compound.
• Apply thin layers of patching compound, allowing each to dry before adding more, and smooth the surface with sandpaper and a sanding block.
• Allow the repaired area to cure for at least 24 hours, keeping it away from direct sunlight and moisture, and apply a breathable concrete sealer for protection.
Assessing Cinder Block Damage
When evaluating your cinder block planter for repair, inspect each block carefully to identify cracks, crumbling, or signs of water damage, as these defects can compromise the structural integrity of the entire planter. You'll want to examine the blocks closely, looking for any signs of deterioration or weakness. Different cinder block types may exhibit unique characteristics, so it's important to understand the specific properties of your planter's blocks.
Regular planter maintenance can help prevent damage, but even with proper care, defects can still occur. As you inspect each block, take note of any areas that need attention. Check for cracks, which can allow water to seep in and cause further damage. Look for signs of crumbling or erosion, which can weaken the block's structure.
Also, inspect the blocks for signs of water damage, such as discoloration or efflorescence. By carefully evaluating the damage, you'll be able to determine the best course of action for repair.
Preparing for Concrete Patching
As you prepare for concrete patching, you'll need to start by cleaning the planter surface thoroughly to remove any dirt, debris, or loose particles.
Next, assess the depth of the damage to determine the extent of the repair needed.
Clean the Planter Surface
How thoroughly you clean the planter surface will greatly impact the success of your concrete patch repair. A clean surface guarantees a strong bond between the old concrete and the new patch, which is vital for a durable repair.
Start by removing any debris, dirt, or loose concrete from the planter surface using a wire brush or a scraper. Next, use a pressure washer to blast away any remaining dirt or grime. Be cautious not to use excessive pressure, which can damage the surrounding concrete.
For more thorough cleaning, employ specialized cleaning techniques such as acid etching or mechanical scarification. These methods help to open up the pores of the concrete, allowing for better surface preparation.
After cleaning, use a degreaser to remove any oil or grease that may be present on the surface. Finally, rinse the surface thoroughly with water to remove any cleaning residue.
Assess the Damage Depth
You'll need to evaluate the depth of the damage to determine the appropriate repair strategy and materials required for a successful concrete patch repair. This step is essential in identifying the extent of the damage and selecting the most suitable repair techniques.
Look for damage indicators such as cracks, spalls, or broken edges to gauge the depth of the damage. Measure the depth of the damage using a ruler or caliper to determine if it's shallow, moderate, or deep.
Shallow damage may only require a thin layer of patching compound, while deeper damage may need more extensive repair techniques, such as layering or replacing the entire concrete section.
Take note of any underlying structural issues that may have contributed to the damage, such as water infiltration or soil settlement.
Mixing the Concrete Patch
Mix one part Portland cement, two parts sand, and a small amount of water in a bucket to create a thick, workable paste. This mixture is vital for a successful concrete patch repair.
When mixing, use a shovel or trowel to combine the ingredients, starting with the dry components and gradually adding water. Be cautious not to add too much water, as this can lead to a weak and crumbling patch.
Proper mixing techniques are important to achieve the right consistency. You're aiming for a thick, yet pliable, paste that can be easily molded into the damaged area. If the mixture is too runny, add a bit more sand or cement. If it's too stiff, add a small amount of water.
Consistency is key, as it will directly impact the patch's strength and durability. Take your time, and mix thoroughly to guarantee a strong bond between the old and new concrete.
Applying the Patching Compound
Before applying the patching compound, scrape away any loose debris from the damaged area using a wire brush or old screwdriver to guarantee a clean surface for bonding. This step is essential to make sure the compound adheres properly and forms a strong bond with the surrounding concrete.
Now, you're ready to apply the patching compound. Use a putty knife or trowel to spread a thin, even layer of the compound into the damaged area. Make sure to press the compound firmly into the area, feathering it out towards the edges to create a seamless shift.
Here are some key tips to keep in mind when applying the patching compound:
-
Follow the manufacturer's instructions for application and drying times.
-
Use the correct mixing ratio to achieve ideal compound properties.
-
Apply the compound in thin layers, allowing each layer to dry before adding the next.
-
Use a level or straightedge to make sure the patch is even with the surrounding surface.
-
Avoid overworking the compound, as this can lead to air pockets and weakened bond strength.
Smoothening the Patches
Now that you've applied the patching compound, it's time to focus on smoothening the patches.
You'll need to sand the surface to achieve a uniform finish, and then remove any excess material that's protruding from the planter's edges.
Sanding the Surface
You'll need to sand the freshly applied concrete patch to smoothen out the surface and guarantee a uniform finish. This step is vital in achieving a professional-looking repair. As you begin sanding, focus on using the right sanding techniques to avoid scratching the surface. Start with a coarse grit sandpaper (around 80-100) and work your way up to finer grits (220-240) for a smoother finish.
Here are some essential tips to keep in mind:
-
Use a sanding block to maintain even pressure and prevent uneven scratches.
-
Sand in circular motions to avoid creating scratches that can be difficult to remove.
-
Apply gentle to moderate pressure, depending on the surface texture.
-
Use a dust mask to avoid inhaling concrete dust.
-
Clean the surface regularly to remove dust and debris, ensuring a better bond between the patch and the surrounding concrete.
Removing Excess Material
After achieving a smooth finish through sanding, turn your attention to removing excess material from the patch, ensuring it's flush with the surrounding concrete. This step is vital in creating a seamless repair.
You'll need to employ effective removal techniques to avoid damaging the surrounding area. Start by using a putty knife or a scraper to carefully remove any excess material that's protruding above the surface. Be gentle, as you don't want to scratch the surrounding concrete.
Once you've removed the bulk of the excess material, switch to a finer tool, such as a steel wool pad or a wire brush, to smooth out the area. This will help create a uniform surface.
When selecting a removal tool, consider the type of material you're working with. For example, if you're working with an epoxy-based patching compound, you may need to use a specialized solvent to break down the material before removal.
Final Touches Applied
With the excess material removed, turn your attention to fine-tuning the patch by applying a series of gentle, sweeping motions with a soft-bristled brush or a clean cloth to eliminate any remaining imperfections. This step is essential in ensuring a seamless repair that blends in with the rest of the planter.
As you work, keep an eye out for any areas that may require additional attention. Perform a final inspection to guarantee that the patch is smooth, even, and free of defects. If necessary, apply additional coats of patching compound or make minor adjustments to achieve the desired finish.
To complete the repair, think about adding decorative finishes such as sealers, stains, or paint to match the original color and texture of the planter.
Here are some final touches to keep in mind:
-
Apply a clear sealant to protect the repair from the elements.
-
Add a coat of paint or stain to match the original color.
-
Use a texture additive to match the surrounding concrete.
-
Install new drainage holes if necessary.
-
Add decorative elements, such as mosaic tiles or stencils, to give the planter a unique touch.
Allowing the Patch to Cure
This patch needs at least 24 hours of uninterrupted drying time to fully cure and reach its maximum strength.
During this curing time, it's vital to keep the repaired area away from direct sunlight, moisture, and extreme temperatures. Environmental factors like humidity, wind, and temperature can greatly impact the curing process, so it's important to provide a stable environment.
You should also avoid applying any additional coatings or sealants during this time, as they can interfere with the curing process. Keep the area clean and free of debris, but avoid using any cleaning products or chemicals that might compromise the patch.
If you're working in an area with high humidity or extreme temperatures, you may need to adjust the curing time accordingly. It's better to err on the side of caution and wait a bit longer for the patch to fully cure than to risk compromising its strength.
Sanding the Repaired Area
Once the patch has fully cured, you can move on to sanding the repaired area to smooth out any bumps or ridges. This step is essential in achieving a seamless finish and guaranteeing the planter looks like new.
When sanding, use a combination of sanding techniques and tools to achieve the best results. Start with a coarse-grit sandpaper (about 80-100 grit) to remove any excess material and gradually move to finer grits (120-150) for a smoother finish.
Here are some important tips to keep in mind when sanding the repaired area:
-
Always sand in a circular motion to avoid scratching the surface.
-
Use a dust mask to avoid inhaling concrete dust.
-
Work in small sections to maintain even pressure and avoid creating uneven surfaces.
-
Use a sanding block to help keep the sandpaper flat and prevent uneven wear.
-
Regularly clean the sandpaper to prevent clogging and guarantee peak performance.
Sealing the Cinder Block
You'll need to apply a high-quality concrete sealer to the cinder block to protect it from the elements and enhance its appearance. This step is essential in cinder block maintenance, as it prevents water from seeping into the block and causing further damage.
When selecting a sealer, look for one that's specifically designed for concrete and offers excellent waterproofing techniques. You'll want to choose a sealer that's breathable, allowing moisture to escape while keeping water out.
Before applying the sealer, make sure the cinder block is clean and dry. Remove any dirt, dust, or debris that may interfere with the sealer's adhesion.
Follow the manufacturer's instructions for application, usually involving a roller or brush. Apply a thin, even coat to the entire surface, making sure to cover all areas thoroughly. Allow the sealer to dry according to the instructions, usually between 24 hours to several days, depending on the type of sealer.
Once dry, your cinder block planter will be protected from the elements, extending its lifespan and maintaining its appearance.
Preventing Future Damage
How can you guarantee your planter remains damage-free and functional for years to come, given the harsh outdoor conditions it's exposed to? To prevent future damage, you'll need to take proactive measures to protect your planter from the elements.
Here are some essential steps to take:
-
Apply a waterproof coating to the planter's surface to prevent water seepage and damage.
-
Install drainage solutions, such as drainage holes or a French drain, to ascertain excess water is redirected away from the planter.
-
Use planter insulation to regulate soil temperature and prevent thermal shock.
-
Regularly inspect your planter for signs of damage or wear, addressing any issues promptly to prevent them from escalating.
-
Consider applying a sealant to the planter's joints and seams to prevent water and debris from entering and causing damage.
Frequently Asked Questions
Can I Use Paint to Cover Concrete Patch Repair?
When it comes to covering repairs, you're wondering if paint will do the trick.
While paint can be a viable option, it's essential to choose the right type for the job. Acrylic or epoxy-based paints are ideal for concrete surfaces.
Before applying paint, make certain the surface is properly prepared by cleaning and roughening the area to create a strong bond.
Will Concrete Patches Affect Planter Drainage?
When you're dealing with planters, you know that proper drainage is essential. You're right to wonder if concrete patches will affect it.
The truth is, they can, if not done correctly. However, with the right drainage solutions in place, you can minimize the impact.
As part of your planter maintenance, make sure the patch is sloped to allow water to flow, and consider adding a drainage layer to keep your plants happy and healthy.
Can I Repair Cracks in Old, Weathered Cinder Blocks?
Did you know that over 50% of cinder block walls require repair within the first 20 years of construction?
When it comes to repairing cracks in old, weathered cinder blocks, you'll want to focus on cinder block maintenance and weatherproofing techniques.
You can start by cleaning the affected area and applying a bonding agent to guarantee a strong repair.
Then, use a patching compound specifically designed for masonry to fill in the cracks, making sure to follow the manufacturer's instructions for best results.
How Long Does Concrete Patching Compound Last?
When you apply a concrete patching compound, its lifespan depends on various durability factors. You'll want to take into account the type of compound, environmental conditions, and the quality of the application.
On average, a well-maintained patch can last up to 10 years.
To extend its life, follow maintenance tips like sealing the area, avoiding heavy loads, and keeping it clean.
Can I Use Epoxy to Repair Cinder Block Cracks?
'Fasten your seatbelts, time-traveler, as we plunge into the world of repair materials!
Can you use epoxy to repair cinder block cracks? Absolutely! Epoxy offers benefits like high bonding strength, resistance to chemicals, and low shrinkage.
For peak results, confirm you're working with the right type of cinder block - either solid, hollow, or split-faced. Prepare the surface, mix the epoxy, and apply it according to the manufacturer's instructions.
With proper preparation and application, epoxy can provide a durable, long-lasting fix for your cinder block cracks.'
Conclusion
By following these steps, you've successfully repaired your damaged planter.
For instance, a homeowner in California repaired a cracked cinder block planter using this method, and after a year, the repair still looked like new.
The planter, which held a 500-pound statue, withstood heavy rainfall and extreme temperatures.
With proper care and maintenance, your repair can last just as long.
Now, you can enjoy your beautifully restored planter, knowing it's strong and durable enough to withstand the elements.
Related Posts
-
What Makes a Great Planter for Succulents
When selecting a great planter for succulents, you'll want to take into account a combination of factors to guarantee...
-
What Makes a Great Planter for Succulents
When selecting a great planter for succulents, you'll want to take into account a combination of factors to guarantee...
-
What Makes a Great Planter for Succulents
When selecting a great planter for succulents, you'll want to take into account a combination of factors to guarantee...
-
What Makes a Great Planter for Succulents
When selecting a great planter for succulents, you'll want to take into account a combination of factors to guarantee...
-
What Makes a Great Planter for Succulents
When selecting a great planter for succulents, you'll want to take into account a combination of factors to guarantee...
-
What Makes a Great Planter for Succulents
When selecting a great planter for succulents, you'll want to take into account a combination of factors to guarantee...
-
What Makes a Great Planter for Succulents
When selecting a great planter for succulents, you'll want to take into account a combination of factors to guarantee...
-
What Makes a Great Planter for Succulents
When selecting a great planter for succulents, you'll want to take into account a combination of factors to guarantee...
-
What Makes a Great Planter for Succulents
When selecting a great planter for succulents, you'll want to take into account a combination of factors to guarantee...
-
What Makes a Great Planter for Succulents
When selecting a great planter for succulents, you'll want to take into account a combination of factors to guarantee...
-
What Makes a Great Planter for Succulents
When selecting a great planter for succulents, you'll want to take into account a combination of factors to guarantee...
-
What Makes a Great Planter for Succulents
When selecting a great planter for succulents, you'll want to take into account a combination of factors to guarantee...
-
What Makes a Great Planter for Succulents
When selecting a great planter for succulents, you'll want to take into account a combination of factors to guarantee...
-
What Makes a Great Planter for Succulents
When selecting a great planter for succulents, you'll want to take into account a combination of factors to guarantee...
-
What Makes a Great Planter for Succulents
When selecting a great planter for succulents, you'll want to take into account a combination of factors to guarantee...
-
What Makes a Great Planter for Succulents
When selecting a great planter for succulents, you'll want to take into account a combination of factors to guarantee...
-
What Makes a Great Planter for Succulents
When selecting a great planter for succulents, you'll want to take into account a combination of factors to guarantee...
-
What Makes a Great Planter for Succulents
When selecting a great planter for succulents, you'll want to take into account a combination of factors to guarantee...
-
What Makes a Great Planter for Succulents
When selecting a great planter for succulents, you'll want to take into account a combination of factors to guarantee...
-
What Makes a Great Planter for Succulents
When selecting a great planter for succulents, you'll want to take into account a combination of factors to guarantee...
-
What Makes a Great Planter for Succulents
When selecting a great planter for succulents, you'll want to take into account a combination of factors to guarantee...
-
What Makes a Great Planter for Succulents
When selecting a great planter for succulents, you'll want to take into account a combination of factors to guarantee...
-
What Makes a Great Planter for Succulents
When selecting a great planter for succulents, you'll want to take into account a combination of factors to guarantee...
-
What Makes a Great Planter for Succulents
When selecting a great planter for succulents, you'll want to take into account a combination of factors to guarantee...
-
Why Urban Gardens Need Better Planter Drainage Systems
When you neglect to install a well-designed drainage system in your urban garden, you're fundamentally sentencing you...
-
Why Urban Gardens Need Better Planter Drainage Systems
When you neglect to install a well-designed drainage system in your urban garden, you're fundamentally sentencing you...
-
Why Urban Gardens Need Better Planter Drainage Systems
When you neglect to install a well-designed drainage system in your urban garden, you're fundamentally sentencing you...
-
Why Urban Gardens Need Better Planter Drainage Systems
When you neglect to install a well-designed drainage system in your urban garden, you're fundamentally sentencing you...
-
Why Urban Gardens Need Better Planter Drainage Systems
When you neglect to install a well-designed drainage system in your urban garden, you're fundamentally sentencing you...
-
Why Urban Gardens Need Better Planter Drainage Systems
When you neglect to install a well-designed drainage system in your urban garden, you're fundamentally sentencing you...
-
Why Urban Gardens Need Better Planter Drainage Systems
When you neglect to install a well-designed drainage system in your urban garden, you're fundamentally sentencing you...
-
Why Urban Gardens Need Better Planter Drainage Systems
When you neglect to install a well-designed drainage system in your urban garden, you're fundamentally sentencing you...
-
Why Urban Gardens Need Better Planter Drainage Systems
When you neglect to install a well-designed drainage system in your urban garden, you're fundamentally sentencing you...
-
Why Urban Gardens Need Better Planter Drainage Systems
When you neglect to install a well-designed drainage system in your urban garden, you're fundamentally sentencing you...
-
Why Urban Gardens Need Better Planter Drainage Systems
When you neglect to install a well-designed drainage system in your urban garden, you're fundamentally sentencing you...
-
Why Urban Gardens Need Better Planter Drainage Systems
When you neglect to install a well-designed drainage system in your urban garden, you're fundamentally sentencing you...
-
Why Urban Gardens Need Better Planter Drainage Systems
When you neglect to install a well-designed drainage system in your urban garden, you're fundamentally sentencing you...
-
Why Urban Gardens Need Better Planter Drainage Systems
When you neglect to install a well-designed drainage system in your urban garden, you're fundamentally sentencing you...
-
Why Urban Gardens Need Better Planter Drainage Systems
When you neglect to install a well-designed drainage system in your urban garden, you're fundamentally sentencing you...
-
Why Urban Gardens Need Better Planter Drainage Systems
When you neglect to install a well-designed drainage system in your urban garden, you're fundamentally sentencing you...
-
Why Urban Gardens Need Better Planter Drainage Systems
When you neglect to install a well-designed drainage system in your urban garden, you're fundamentally sentencing you...
-
Why Urban Gardens Need Better Planter Drainage Systems
When you neglect to install a well-designed drainage system in your urban garden, you're fundamentally sentencing you...
-
Why Urban Gardens Need Better Planter Drainage Systems
When you neglect to install a well-designed drainage system in your urban garden, you're fundamentally sentencing you...
-
Why Urban Gardens Need Better Planter Drainage Systems
When you neglect to install a well-designed drainage system in your urban garden, you're fundamentally sentencing you...
-
Why Urban Gardens Need Better Planter Drainage Systems
When you neglect to install a well-designed drainage system in your urban garden, you're fundamentally sentencing you...
-
Why Urban Gardens Need Better Planter Drainage Systems
When you neglect to install a well-designed drainage system in your urban garden, you're fundamentally sentencing you...
-
Why Urban Gardens Need Better Planter Drainage Systems
When you neglect to install a well-designed drainage system in your urban garden, you're fundamentally sentencing you...
-
Why Urban Gardens Need Better Planter Drainage Systems
When you neglect to install a well-designed drainage system in your urban garden, you're fundamentally sentencing you...
-
Why Urban Gardens Need Better Planter Drainage Systems
When you neglect to install a well-designed drainage system in your urban garden, you're fundamentally sentencing you...
-
Why Urban Gardens Need Better Planter Drainage Systems
When you neglect to install a well-designed drainage system in your urban garden, you're fundamentally sentencing you...
-
Why Urban Gardens Need Better Planter Drainage Systems
When you neglect to install a well-designed drainage system in your urban garden, you're fundamentally sentencing you...
-
Why Urban Gardens Need Better Planter Drainage Systems
When you neglect to install a well-designed drainage system in your urban garden, you're fundamentally sentencing you...
-

Why Do Cinder Block Planter Tools Cost So Much
You'll likely spend at least $200 to $500 on essential tools for a DIY cinder block planter project, with high-end op...
-
Why Do Cinder Block Planter Tools Cost So Much
You'll likely spend at least $200 to $500 on essential tools for a DIY cinder block planter project, with high-end op...
-
Why Do Cinder Block Planter Tools Cost So Much
You'll likely spend at least $200 to $500 on essential tools for a DIY cinder block planter project, with high-end op...
-
Why Do Cinder Block Planter Tools Cost So Much
You'll likely spend at least $200 to $500 on essential tools for a DIY cinder block planter project, with high-end op...
-
Why Do Cinder Block Planter Tools Cost So Much
You'll likely spend at least $200 to $500 on essential tools for a DIY cinder block planter project, with high-end op...
-
Why Do Cinder Block Planter Tools Cost So Much
You'll likely spend at least $200 to $500 on essential tools for a DIY cinder block planter project, with high-end op...
-
Why Do Cinder Block Planter Tools Cost So Much
You'll likely spend at least $200 to $500 on essential tools for a DIY cinder block planter project, with high-end op...
-
Why Do Cinder Block Planter Tools Cost So Much
You'll likely spend at least $200 to $500 on essential tools for a DIY cinder block planter project, with high-end op...
-
Why Do Cinder Block Planter Tools Cost So Much
You'll likely spend at least $200 to $500 on essential tools for a DIY cinder block planter project, with high-end op...
-
Why Do Cinder Block Planter Tools Cost So Much
You'll likely spend at least $200 to $500 on essential tools for a DIY cinder block planter project, with high-end op...
-
Why Do Cinder Block Planter Tools Cost So Much
You'll likely spend at least $200 to $500 on essential tools for a DIY cinder block planter project, with high-end op...
-
Why Do Cinder Block Planter Tools Cost So Much
You'll likely spend at least $200 to $500 on essential tools for a DIY cinder block planter project, with high-end op...
-
Why Do Cinder Block Planter Tools Cost So Much
You'll likely spend at least $200 to $500 on essential tools for a DIY cinder block planter project, with high-end op...
-
Why Do Cinder Block Planter Tools Cost So Much
You'll likely spend at least $200 to $500 on essential tools for a DIY cinder block planter project, with high-end op...
-
Why Do Cinder Block Planter Tools Cost So Much
You'll likely spend at least $200 to $500 on essential tools for a DIY cinder block planter project, with high-end op...
-
Why Do Cinder Block Planter Tools Cost So Much
You'll likely spend at least $200 to $500 on essential tools for a DIY cinder block planter project, with high-end op...
-
Why Do Cinder Block Planter Tools Cost So Much
You'll likely spend at least $200 to $500 on essential tools for a DIY cinder block planter project, with high-end op...
-
Why Do Cinder Block Planter Tools Cost So Much
You'll likely spend at least $200 to $500 on essential tools for a DIY cinder block planter project, with high-end op...
-
Why Do Cinder Block Planter Tools Cost So Much
You'll likely spend at least $200 to $500 on essential tools for a DIY cinder block planter project, with high-end op...
-
Why Do Cinder Block Planter Tools Cost So Much
You'll likely spend at least $200 to $500 on essential tools for a DIY cinder block planter project, with high-end op...
-
Why Do Cinder Block Planter Tools Cost So Much
You'll likely spend at least $200 to $500 on essential tools for a DIY cinder block planter project, with high-end op...
-
Why Do Cinder Block Planter Tools Cost So Much
You'll likely spend at least $200 to $500 on essential tools for a DIY cinder block planter project, with high-end op...
-
Why Do Cinder Block Planter Tools Cost So Much
You'll likely spend at least $200 to $500 on essential tools for a DIY cinder block planter project, with high-end op...
-
Why Do Cinder Block Planter Tools Cost So Much
You'll likely spend at least $200 to $500 on essential tools for a DIY cinder block planter project, with high-end op...
-
Why Do Cinder Block Planter Tools Cost So Much
You'll likely spend at least $200 to $500 on essential tools for a DIY cinder block planter project, with high-end op...
-
Why Do Cinder Block Planter Tools Cost So Much
You'll likely spend at least $200 to $500 on essential tools for a DIY cinder block planter project, with high-end op...
-
Why Do Cinder Block Planter Tools Cost So Much
You'll likely spend at least $200 to $500 on essential tools for a DIY cinder block planter project, with high-end op...
-
Why Do Cinder Block Planter Tools Cost So Much
You'll likely spend at least $200 to $500 on essential tools for a DIY cinder block planter project, with high-end op...
-
Why Do Cinder Block Planter Tools Cost So Much
You'll likely spend at least $200 to $500 on essential tools for a DIY cinder block planter project, with high-end op...
-
Why Do Cinder Block Planter Tools Cost So Much
You'll likely spend at least $200 to $500 on essential tools for a DIY cinder block planter project, with high-end op...
-
Why Do Cinder Block Planter Tools Cost So Much
You'll likely spend at least $200 to $500 on essential tools for a DIY cinder block planter project, with high-end op...


