Build a DIY Planter With the Right Tools
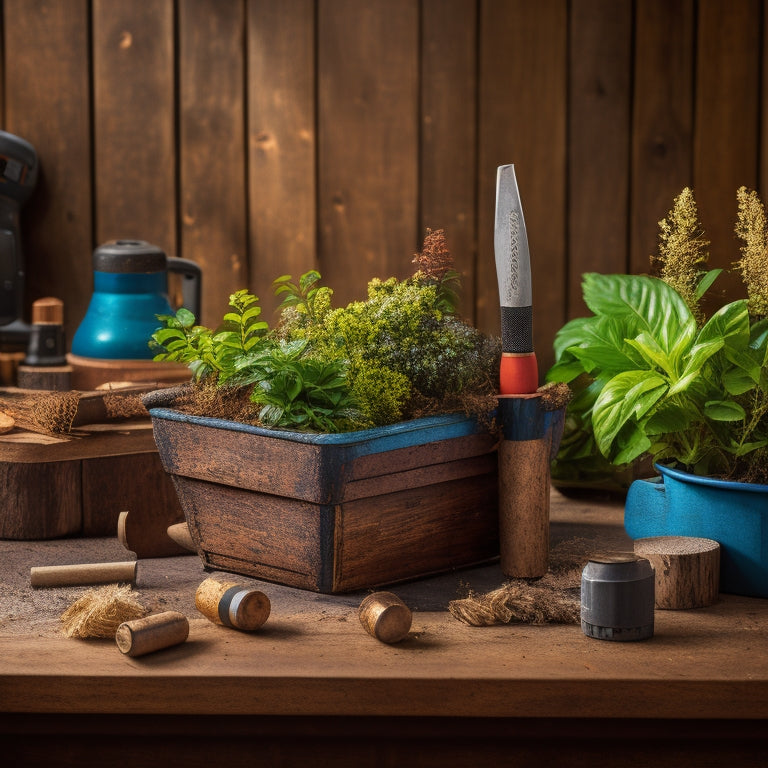
You're about to create a stunning DIY planter that showcases your personal style and gardening skills! To get started, choose the right cinder blocks, considering aesthetics, color schemes, and size. Select the essential tools, including a masonry saw, block chisel, trowel, and safety gear. Measure and mark the blocks carefully, then cut them efficiently using the right techniques. Assemble the planter structure, adding a drainage layer and high-quality potting mix. With the right tools and a solid plan, you'll be well on your way to crafting a beautiful DIY planter that's both functional and visually appealing - and that's just the beginning of your creative journey!
Key Takeaways
• Choose the right tools, such as a masonry saw, block chisel, trowel, and measuring tools, to ensure accurate cuts and assembly.
• Wear safety gear, including gloves, safety glasses, and dust masks, to protect yourself from debris and accidents.
• Select high-quality materials, such as heavy cinder blocks and durable potting mix, to ensure the planter's structure and plant health.
• Measure and mark cinder blocks carefully to ensure proper fit and structural integrity, and inspect for imperfections that may affect measurements.
• Follow tool instructions and safety precautions to avoid accidents and ensure a successful DIY planter construction project.
Choosing the Right Cinder Blocks
When building a DIY planter, select cinder blocks that are heavy enough to provide stability and have a smooth, even surface to guarantee proper drainage and prevent water from seeping into the block's pores. You want blocks that can hold their own against the weight of the soil and plants, while also allowing excess water to escape.
Cinder block aesthetics play a significant role in the overall look of your planter, so choose blocks that fit your desired style. Do you prefer a modern, sleek look or a more rustic, textured appearance? Cinder block varieties can range from standard gray blocks to colored or patterned ones, offering endless design possibilities.
Consider the color scheme and theme of your outdoor space when selecting your blocks. Additionally, think about the size and shape of the blocks, as they can affect the overall structure and layout of your planter.
Tool Selection for Cinder Block Cutting
To efficiently cut cinder blocks, you'll need to select the right tools for the job, as using the wrong ones can lead to uneven cuts, wasted blocks, and frustration.
This is where cutter selection comes in - choosing the right tool can make all the difference in the quality of your cuts and the overall success of your DIY planter project.
Here are the top tools you'll need to get the job done:
-
Masonry saw: A masonry saw is a must-have for cutting cinder blocks. Its diamond-coated blade can handle the tough, abrasive material with ease.
-
Block chisel: A block chisel is perfect for removing excess material and creating clean edges. Its heavy-duty design makes it durable and long-lasting.
-
Trowel: A trowel is essential for applying mortar and ensuring a strong bond between blocks. Its curved blade makes it easy to scoop and spread mortar evenly.
Safety Precautions for DIY Projects
Before diving into your DIY planter project, make certain you're equipped with the right mindset and gear to protect yourself from potential hazards. Safety should always be your top priority when working with power tools and building with heavy materials like cinder blocks.
Here are some essential safety precautions to keep in mind:
| Safety Gear | Workspace Organization | Best Practices |
|---|---|---|
| Safety glasses | Clear workspace of debris | Read tool instructions carefully |
| Gloves | Designate a specific work area | Keep loose clothing tied back |
| Ear protection | Keep tools organized and within reach | Take regular breaks to avoid fatigue |
| Steel-toed boots | Guarantee good lighting in the workspace | Never use power tools near water |
| Dust mask | Maintain a clean and tidy workspace | Always unplug tools when not in use |
Measuring and Marking Cinder Blocks
When working with cinder blocks, you'll need to take into account the size of each block to guarantee your planter turns out as envisioned.
You'll want to measure carefully to avoid errors, using techniques like measuring multiple times and double-checking your calculations.
Block Size Considerations
You'll need to measure and mark your cinder blocks accurately to guarantee a sturdy and well-proportioned planter, so grab your tape measure and pencil to get started.
When it comes to block size considerations, it's crucial to think about the overall dimensions of your planter and how you can optimize the space.
Here are three things to keep in mind when selecting your block size:
-
Block dimensions: Make sure to choose blocks that fit comfortably within your planter's footprint, leaving enough space for soil and plants to thrive.
-
Space optimization: Consider using blocks of varying sizes to create a visually appealing and functional design that maximizes space.
-
Structural integrity: Confirm your blocks are sturdy enough to support the weight of the soil, plants, and any additional decorative elements.
Accurate Measurement Techniques
To guarantee accurate measurements, take a few minutes to inspect each cinder block for any imperfections or irregularities that could affect your planter's design. You'll want to check for chips, cracks, or uneven surfaces that might throw off your calculations. Once you've identified any issues, you can decide whether to use the block as is or swap it out for a better one.
Next, gather your measurement tools, including a tape measure, level, and square. These precision techniques will make sure your planter's dimensions are spot on. Measure the length, width, and height of each block, taking note of any variations. Don't assume all blocks are identical – you'd be surprised how often they can differ slightly.
As you measure, pay attention to the block's texture and any markings that might indicate the manufacturer's specifications. You might need to account for these when building your planter.
Marking Cinder BlockFaces
Now that you've taken precise measurements, grab a pencil and mark the block faces with the calculated dimensions, guaranteeing each face is clearly labeled with its corresponding length, width, or height. This step is essential in achieving accurate cuts and a sturdy planter structure.
When marking the block faces, use a ruler or straightedge to draw straight lines and make sure the marks are bold and visible.
Here are three vital tips to keep in mind when marking cinder block faces:
-
Consistency is key: Use the same marking technique throughout the project to maintain consistency and avoid confusion.
-
Consider block orientations: Think about how the blocks will be arranged in your planter design and mark the faces accordingly. This will help you visualize the final product and make adjustments as needed.
-
Double-check your marks: Before moving on to the next step, double-check your marks to verify they're accurate and match your measurements.
Cutting Cinder Blocks Efficiently
Using a diamond-blade saw or a masonry blade on a circular saw, efficiently cutting cinder blocks requires a combination of the right tools and a few essential techniques. When it comes to cutting cinder blocks, you'll want to choose the right block type for your project. Some common block types include solid, hollow, and split-face blocks. Each type has its own unique characteristics that affect how they're cut.
Here's a breakdown of the cutting techniques for each block type:
| Block Type | Cutting Technique |
|---|---|
| Solid Blocks | Use a slow, steady motion to prevent breaking |
| Hollow Blocks | Apply gentle pressure to avoid crushing |
| Split-Face Blocks | Cut along the scored line for a clean edge |
When cutting, make sure to wear protective gear, including gloves, safety glasses, and a dust mask. Keep the saw blade clean and well-lubricated to prevent overheating. By following these tips and techniques, you'll be able to efficiently cut your cinder blocks and move on to the next step in building your DIY planter.
Assembling the Planter Structure
Now that you've cut your cinder blocks efficiently, it's time to assemble the planter structure.
You'll start by building the frame, which will provide the base for your planter.
You'll need to cut the frame pieces to the right size and then assemble them to create a sturdy structure.
Planter Frame Assembly
You'll begin constructing the planter's skeleton by attaching the legs to the frame's corners, guaranteeing a sturdy foundation for your DIY project. This vital step will determine the overall stability and structural integrity of your planter. Take your time and make certain the legs are securely attached, using screws or nails that fit your planter design.
As you assemble the frame, consider the aesthetic enhancements that will elevate your planter's appeal. Think about the style and theme you want to achieve, and how the frame's design will complement your chosen plants.
Here are 3 essential tips to keep in mind:
-
Measure twice, assemble once: Double-check your measurements to avoid errors and guarantee a smooth assembly process.
-
Choose the right materials: Select materials that fit your planter design and can withstand outdoor conditions.
-
Add a personal touch: Incorporate unique features or decorations that reflect your personal style and make your planter truly special.
Cutting the Frame Pieces
Cut out the frame pieces according to your planter design specifications, guaranteeing accurate measurements to build a sturdy structure that will support your chosen plants. Double-check your frame dimensions to verify everything fits together seamlessly.
To achieve precise cuts, use a miter saw or a circular saw, depending on the type of wood and the complexity of the cuts. For straight cuts, a circular saw is a great option. However, for angled or mitered cuts, a miter saw is the way to go.
When cutting, maintain a steady hand and follow the cutting techniques you've chosen. If you're new to cutting wood, consider practicing on scrap wood before tackling your actual frame pieces.
Remember to wear protective gear, including safety glasses and a dust mask, to avoid any potential hazards. By cutting your frame pieces accurately, you'll set yourself up for success in the assembly process.
Take your time, and don't rush through this essential step. With precise cuts, you'll be able to build a beautiful and sturdy planter that will showcase your plants perfectly.
Assembling the Frame
With your precisely cut frame pieces in hand, it's time to bring your planter structure to life by assembling the individual components into a sturdy, cohesive unit. You've got this! Now, let's plunge into the assembly process.
First, gather all your frame materials and lay them out according to your design plan. Take a deep breath, and let's get started.
Begin by attaching the side panels to the bottom plate using your preferred assembly techniques, such as screws or nails. Make certain they're evenly spaced and securely fastened.
Here's what you can expect to feel during this process:
-
Pride: As you see your planter take shape, you'll feel an overwhelming sense of pride and accomplishment.
-
Excitement: You'll be thrilled to see your design come to life, and you'll be enthusiastic to add the finishing touches.
-
Confidence: With each step, you'll become more confident in your DIY skills, and you'll be motivated to take on more projects.
Remember to work methodically, following your design plan and taking your time to guarantee each piece fits snugly together.
You're one step closer to creating a beautiful, functional planter that showcases your unique style!
Adding Drainage and Soil Layers
Add a layer of small rocks or broken pottery at the bottom of your planter to create a drainage system that prevents waterlogged soil. This is one of the most important drainage solutions you can implement, as it allows excess water to escape and prevents root rot.
Next, add a layer of landscape fabric or mesh to separate the drainage layer from the soil. This will prevent the soil from washing away and clogging the drainage system.
Now it's time to add the soil. Choose a high-quality potting mix that's specifically designed for planters. Consider the type of plants you'll be using and select a soil type that's suitable for them.
For example, if you're planting succulents, you'll want a well-draining soil that's designed for cacti and succulents. Fill the planter to about 2-3 inches from the top, leaving enough room for the plants' roots to grow.
Take your time and make sure the soil is evenly distributed and smooth. You're one step closer to creating a beautiful and thriving DIY planter!
Planting and Decorating the Planter
You're ready to bring your planter to life by selecting and planting the perfect combination of flowers, herbs, or greens that will thrive in their new home. This is the fun part – where you get to release your creativity and make your planter truly unique.
When it comes to plant selection, consider the amount of sunlight your planter will receive, as well as the soil type and moisture levels. You can choose a single statement piece or a mix of complementary plants for a visually appealing display.
Here are a few tips to get you started:
-
Choose plants with similar growing conditions to guarantee they thrive together.
-
Consider the mature size of each plant to avoid overcrowding.
-
Don't be afraid to add some decorative elements, like small ornaments or moss, to enhance the visual appeal of your planter.
As you plant and arrange your selection, think about the overall aesthetic you want to achieve. Do you prefer a modern and sleek look, or a more rustic and whimsical feel? The possibilities are endless, and it's up to you to bring your vision to life.
Finishing Touches and Maintenance
Finishing your planter's design and ensuring its long-term health requires attention to a few essential details, from sealing and protecting the planter to regular watering and pruning schedules.
You've invested time and effort into creating a beautiful DIY planter, and now it's vital to focus on plant care to keep it thriving. Apply a waterproof sealant to the planter's interior and exterior to prevent water damage and extend its lifespan. Next, establish a regular watering schedule, taking into account the specific needs of your plants and the climate you're in.
As you move forward with seasonal maintenance, adjust your care routine accordingly. During hotter months, increase watering frequency and provide shade when necessary. In cooler months, reduce watering and add a layer of mulch to retain moisture.
Regular pruning will also help maintain your plants' shape and promote healthy growth. By staying on top of these finishing touches and maintenance tasks, you'll be able to enjoy your DIY planter for years to come, and it will continue to be a beautiful addition to your outdoor space.
Frequently Asked Questions
Can I Use Old or Damaged Cinder Blocks for My Planter?
You're wondering if you can repurpose old or damaged cinder blocks for your planter. While it's tempting to reuse them, consider the safety and aesthetic implications.
Damaged cinder blocks can crumble, compromising the structure's integrity and potentially harming you or others. Furthermore, their weathered appearance might detract from your planter's overall look.
It's better to opt for new, sturdy cinder blocks to guarantee cinder block safety and a visually appealing planter aesthetics that'll make you proud to show off your DIY creation.
How Often Should I Water Plants in a Cinder Block Planter?
You're wondering how often to water your plants in that cinder block planter.
Well, it depends on the watering frequency and moisture retention of the soil. Since cinder blocks drain excess water, you'll want to check the soil daily.
Water when the top inch of soil feels dry to the touch. In hot weather, you might need to water every other day, but in cooler weather, every 3-4 days should do.
Keep an eye on your plants, and adjust as needed!
Can I Use a Cinder Block Planter for Indoor Plants?
Did you know that 67% of households in the US have at least one indoor plant? You're not alone in wanting to bring some greenery inside!
When it comes to using a cinder block planter for indoor plants, you'll love the advantages it offers. Cinder blocks provide excellent drainage and aeration, making them perfect for plants that prefer dry soil. Plus, they're incredibly versatile, allowing you to create a unique planter that complements your indoor decor.
With the right indoor plant options, like low-maintenance succulents or air-purifying peace lilies, you'll be enjoying your new planter in no time!
Are Cinder Blocks Suitable for Plants With Deep Root Systems?
You're wondering if cinder blocks are suitable for plants with deep root systems?
Well, here's the scoop: cinder blocks can work, but you'll need to guarantee proper drainage.
Since cinder blocks are porous, they can retain moisture, which mightn't be ideal for plants with deep roots.
Consider adding a layer of gravel or broken pottery to improve drainage.
If you're willing to put in the extra effort, cinder blocks can support plants with deep root systems, but it's essential to prioritize drainage to avoid waterlogged soil.
Can I Paint or Stain Cinder Blocks for a Decorative Look?
You're wondering if you can give your cinder blocks a personalized touch? Absolutely!
You can enhance their rugged aesthetics with a fresh coat of paint or stain. When it comes to painting techniques, make certain to clean the blocks thoroughly and apply a primer for better adhesion.
Choose a weather-resistant paint or stain to guarantee your design withstands the elements.
With a little creativity, you can transform plain cinder blocks into a unique, eye-catching planter that reflects your personal style.
Conclusion
You've made it! With your DIY planter now complete, you've got a masterpiece that's a million times better than anything you'd find at a store.
Be proud of yourself - you've earned it! Remember to keep your planter well-maintained, and it'll thrive for years to come.
Pat yourself on the back, take a step back, and admire your handiwork - you've truly earned the right to call yourself a DIY rockstar!
Related Posts
-
5 Must-Knows for Buying Used Tools for Planters
When buying used tools for planters, you're investing in the reliability and performance of your operations, so it's ...
-
5 Must-Knows for Buying Used Tools for Planters
When buying used tools for planters, you're investing in the reliability and performance of your operations, so it's ...
-
5 Must-Knows for Buying Used Tools for Planters
When buying used tools for planters, you're investing in the reliability and performance of your operations, so it's ...
-
5 Must-Knows for Buying Used Tools for Planters
When buying used tools for planters, you're investing in the reliability and performance of your operations, so it's ...
-
5 Must-Knows for Buying Used Tools for Planters
When buying used tools for planters, you're investing in the reliability and performance of your operations, so it's ...
-
5 Must-Knows for Buying Used Tools for Planters
When buying used tools for planters, you're investing in the reliability and performance of your operations, so it's ...
-
5 Must-Knows for Buying Used Tools for Planters
When buying used tools for planters, you're investing in the reliability and performance of your operations, so it's ...
-
5 Must-Knows for Buying Used Tools for Planters
When buying used tools for planters, you're investing in the reliability and performance of your operations, so it's ...
-
5 Must-Knows for Buying Used Tools for Planters
When buying used tools for planters, you're investing in the reliability and performance of your operations, so it's ...
-
5 Must-Knows for Buying Used Tools for Planters
When buying used tools for planters, you're investing in the reliability and performance of your operations, so it's ...
-
5 Must-Knows for Buying Used Tools for Planters
When buying used tools for planters, you're investing in the reliability and performance of your operations, so it's ...
-
5 Must-Knows for Buying Used Tools for Planters
When buying used tools for planters, you're investing in the reliability and performance of your operations, so it's ...
-
5 Must-Knows for Buying Used Tools for Planters
When buying used tools for planters, you're investing in the reliability and performance of your operations, so it's ...
-
5 Must-Knows for Buying Used Tools for Planters
When buying used tools for planters, you're investing in the reliability and performance of your operations, so it's ...
-
5 Must-Knows for Buying Used Tools for Planters
When buying used tools for planters, you're investing in the reliability and performance of your operations, so it's ...
-
5 Must-Knows for Buying Used Tools for Planters
When buying used tools for planters, you're investing in the reliability and performance of your operations, so it's ...
-
5 Must-Knows for Buying Used Tools for Planters
When buying used tools for planters, you're investing in the reliability and performance of your operations, so it's ...
-
5 Must-Knows for Buying Used Tools for Planters
When buying used tools for planters, you're investing in the reliability and performance of your operations, so it's ...
-
5 Must-Knows for Buying Used Tools for Planters
When buying used tools for planters, you're investing in the reliability and performance of your operations, so it's ...
-
5 Must-Knows for Buying Used Tools for Planters
When buying used tools for planters, you're investing in the reliability and performance of your operations, so it's ...
-
10 Tips for Training Vines in a Vertical Garden
When training vines in a vertical garden, you'll want to choose the right species for your climate, prepare your wall...
-
10 Tips for Training Vines in a Vertical Garden
When training vines in a vertical garden, you'll want to choose the right species for your climate, prepare your wall...
-
10 Tips for Training Vines in a Vertical Garden
When training vines in a vertical garden, you'll want to choose the right species for your climate, prepare your wall...
-
10 Tips for Training Vines in a Vertical Garden
When training vines in a vertical garden, you'll want to choose the right species for your climate, prepare your wall...
-
10 Tips for Training Vines in a Vertical Garden
When training vines in a vertical garden, you'll want to choose the right species for your climate, prepare your wall...
-
10 Tips for Training Vines in a Vertical Garden
When training vines in a vertical garden, you'll want to choose the right species for your climate, prepare your wall...
-
10 Tips for Training Vines in a Vertical Garden
When training vines in a vertical garden, you'll want to choose the right species for your climate, prepare your wall...
-
10 Tips for Training Vines in a Vertical Garden
When training vines in a vertical garden, you'll want to choose the right species for your climate, prepare your wall...
-
10 Tips for Training Vines in a Vertical Garden
When training vines in a vertical garden, you'll want to choose the right species for your climate, prepare your wall...
-
10 Tips for Training Vines in a Vertical Garden
When training vines in a vertical garden, you'll want to choose the right species for your climate, prepare your wall...
-
10 Tips for Training Vines in a Vertical Garden
When training vines in a vertical garden, you'll want to choose the right species for your climate, prepare your wall...
-
10 Tips for Training Vines in a Vertical Garden
When training vines in a vertical garden, you'll want to choose the right species for your climate, prepare your wall...
-
10 Tips for Training Vines in a Vertical Garden
When training vines in a vertical garden, you'll want to choose the right species for your climate, prepare your wall...
-
10 Tips for Training Vines in a Vertical Garden
When training vines in a vertical garden, you'll want to choose the right species for your climate, prepare your wall...
-
10 Tips for Training Vines in a Vertical Garden
When training vines in a vertical garden, you'll want to choose the right species for your climate, prepare your wall...
-
10 Tips for Training Vines in a Vertical Garden
When training vines in a vertical garden, you'll want to choose the right species for your climate, prepare your wall...
-
10 Tips for Training Vines in a Vertical Garden
When training vines in a vertical garden, you'll want to choose the right species for your climate, prepare your wall...
-
10 Tips for Training Vines in a Vertical Garden
When training vines in a vertical garden, you'll want to choose the right species for your climate, prepare your wall...
-
10 Tips for Training Vines in a Vertical Garden
When training vines in a vertical garden, you'll want to choose the right species for your climate, prepare your wall...
-
10 Tips for Training Vines in a Vertical Garden
When training vines in a vertical garden, you'll want to choose the right species for your climate, prepare your wall...
-
10 Tips for Training Vines in a Vertical Garden
When training vines in a vertical garden, you'll want to choose the right species for your climate, prepare your wall...
-
10 Tips for Training Vines in a Vertical Garden
When training vines in a vertical garden, you'll want to choose the right species for your climate, prepare your wall...
-
10 Tips for Training Vines in a Vertical Garden
When training vines in a vertical garden, you'll want to choose the right species for your climate, prepare your wall...
-
10 Tips for Training Vines in a Vertical Garden
When training vines in a vertical garden, you'll want to choose the right species for your climate, prepare your wall...
-
10 Tips for Training Vines in a Vertical Garden
When training vines in a vertical garden, you'll want to choose the right species for your climate, prepare your wall...
-
10 Tips for Training Vines in a Vertical Garden
When training vines in a vertical garden, you'll want to choose the right species for your climate, prepare your wall...
-
10 Tips for Training Vines in a Vertical Garden
When training vines in a vertical garden, you'll want to choose the right species for your climate, prepare your wall...
-
10 Tips for Training Vines in a Vertical Garden
When training vines in a vertical garden, you'll want to choose the right species for your climate, prepare your wall...
-
10 Tips for Training Vines in a Vertical Garden
When training vines in a vertical garden, you'll want to choose the right species for your climate, prepare your wall...
-
10 Tips for Training Vines in a Vertical Garden
When training vines in a vertical garden, you'll want to choose the right species for your climate, prepare your wall...
-
10 Tips for Training Vines in a Vertical Garden
When training vines in a vertical garden, you'll want to choose the right species for your climate, prepare your wall...
-
10 Tips for Training Vines in a Vertical Garden
When training vines in a vertical garden, you'll want to choose the right species for your climate, prepare your wall...
-

What Depth Is Best for My Planter
When selecting a planter, consider the root depth requirements of your chosen plant species, as this dictates the min...
-
What Depth Is Best for My Planter
When selecting a planter, consider the root depth requirements of your chosen plant species, as this dictates the min...
-
What Depth Is Best for My Planter
When selecting a planter, consider the root depth requirements of your chosen plant species, as this dictates the min...
-
What Depth Is Best for My Planter
When selecting a planter, consider the root depth requirements of your chosen plant species, as this dictates the min...
-
What Depth Is Best for My Planter
When selecting a planter, consider the root depth requirements of your chosen plant species, as this dictates the min...
-
What Depth Is Best for My Planter
When selecting a planter, consider the root depth requirements of your chosen plant species, as this dictates the min...
-
What Depth Is Best for My Planter
When selecting a planter, consider the root depth requirements of your chosen plant species, as this dictates the min...
-
What Depth Is Best for My Planter
When selecting a planter, consider the root depth requirements of your chosen plant species, as this dictates the min...
-
What Depth Is Best for My Planter
When selecting a planter, consider the root depth requirements of your chosen plant species, as this dictates the min...
-
What Depth Is Best for My Planter
When selecting a planter, consider the root depth requirements of your chosen plant species, as this dictates the min...
-
What Depth Is Best for My Planter
When selecting a planter, consider the root depth requirements of your chosen plant species, as this dictates the min...
-
What Depth Is Best for My Planter
When selecting a planter, consider the root depth requirements of your chosen plant species, as this dictates the min...
-
What Depth Is Best for My Planter
When selecting a planter, consider the root depth requirements of your chosen plant species, as this dictates the min...
-
What Depth Is Best for My Planter
When selecting a planter, consider the root depth requirements of your chosen plant species, as this dictates the min...
-
What Depth Is Best for My Planter
When selecting a planter, consider the root depth requirements of your chosen plant species, as this dictates the min...
-
What Depth Is Best for My Planter
When selecting a planter, consider the root depth requirements of your chosen plant species, as this dictates the min...
-
What Depth Is Best for My Planter
When selecting a planter, consider the root depth requirements of your chosen plant species, as this dictates the min...
-
What Depth Is Best for My Planter
When selecting a planter, consider the root depth requirements of your chosen plant species, as this dictates the min...
-
What Depth Is Best for My Planter
When selecting a planter, consider the root depth requirements of your chosen plant species, as this dictates the min...
-
What Depth Is Best for My Planter
When selecting a planter, consider the root depth requirements of your chosen plant species, as this dictates the min...
-
What Depth Is Best for My Planter
When selecting a planter, consider the root depth requirements of your chosen plant species, as this dictates the min...


