7-Step Irrigation System Installation Tutorial for Rooftop Gardens
You're about to install a rooftop garden irrigation system, and you need a step-by-step guide. Start by gathering materials like water sources, piping, fittings, valves, controllers, sensors, and tubing, considering durability, corrosion resistance, and budget. Assess your rooftop layout for efficient water distribution and enhance water flow. Connect to a reliable water source, lay out pipes strategically, and attach sprinkler heads for uniform coverage. Test your system, troubleshoot common issues, and maintain your system regularly. Finally, establish an irrigation schedule and implement water conservation measures. Now, get ready to fine-tune your system for peak performance.
Key Takeaways
• Assess rooftop garden layout for efficient water distribution, optimize water flow, and divide space based on plant needs.
• Connect to a reliable water source, considering water pressure impact, and use quality fittings and manufacturer's instructions.
• Lay out pipes strategically for easy maintenance, selecting durable pipes, routing to reduce pressure loss, and preventing over/under-watering.
• Attach sprinkler heads for uniform water coverage, aligning properly, checking for blockages, and adjusting water pressure.
• Inspect and test the system regularly to prevent issues, address water distribution problems, and implement water conservation measures.
Gathering Essential Materials
Gather the following necessary materials for your rooftop garden irrigation system installation: a water source, piping, fittings, valves, irrigation controllers, sensors, and tubing. When it comes to material selection, consider factors like durability, resistance to corrosion, and UV stability to make sure your system withstands the outdoor environment. Budget planning is important to avoid overspending, so set a realistic budget and stick to it.
You have two options for acquiring these materials: supplier options or DIY alternatives. Research local suppliers to find the best deals on high-quality materials. Compare prices, read reviews, and ask for recommendations to make an informed decision. If you're on a tight budget, consider DIY alternatives like repurposing old piping or valves. However, be cautious not to compromise on quality, as this may lead to system failures and maintenance issues down the line.
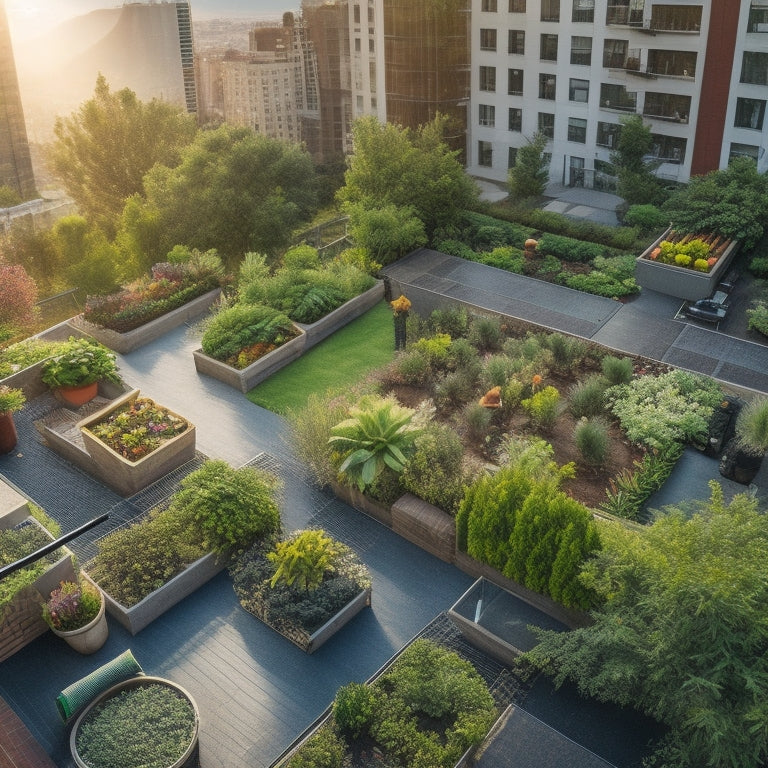
Preparing Rooftop Garden Layout
With your materials in hand, now it's time to assess your rooftop garden's layout to guarantee efficient water distribution and best plant growth. You'll want to create a rooftop garden design that optimizes water flow and minimizes waste.
Start by dividing your rooftop space into sections, considering the mature size of each plant, their watering needs, and sunlight exposure. This will help you determine the most effective planting arrangements for your space.
Next, identify any obstacles, such as vents, skylights, or slope changes, that may impact your irrigation system's performance. Take note of the direction of water flow and how it will interact with your plants.
Consider using a grid system to organize your plants, making it easier to install and maintain your irrigation system. By carefully planning your rooftop garden layout, you'll be able to create a thriving oasis that not only looks great but also conserves water and reduces maintenance.
With a well-designed layout, you'll be free to enjoy your rooftop garden, knowing that your plants are receiving the right amount of water at the right time.
Installing Water Source Connection
Connect the irrigation system to a dependable water source, like a hose bib or a dedicated irrigation water meter, to secure a steady supply of water to your rooftop garden. This link is critical, as it guarantees your plants receive the appropriate amount of water, whenever they require it.
You'll want to take into account the water pressure in your area, as it impacts the performance of your irrigation system. Typically, a minimum of 30 psi is necessary, but this may vary depending on your specific setup.
Next, focus on creating safe piping connections. Utilize high-quality fittings and adapters that can endure the water pressure and flow rate. Ensure all connections are leak-proof to avoid leaks and water wastage. It's vital to follow the manufacturer's instructions for linking the piping to the water source and irrigation system.
Take your time, and double-check each connection to establish a safe and dependable setup. With a strong water source connection, you'll be confident that your rooftop garden is receiving the water it requires to flourish.
Laying Out Irrigation Pipes
You'll need to carefully plan and lay out the irrigation pipes to guarantee every plant in your rooftop garden receives the right amount of water. This is an essential step in maintaining watering efficiency and preventing overwatering or underwatering.
Here are three key considerations to keep in mind when laying out your irrigation pipes:
-
Pipe placement: Position pipes in a way that allows for easy access and maintenance. This will save you time and trouble in the long term.
-
Pipe size and material: Select pipes that are durable, UV-resistant, and suitable for outdoor use. Make sure the pipe size is adequate for the water pressure and flow rate required by your rooftop garden.
-
Pipe routing: Strategize the pipe route to minimize bends, kinks, and obstacles. This will decrease water pressure loss and guarantee consistent water distribution throughout your garden.
Connecting Sprinkler Heads
Next, attach sprinkler heads to the irrigation pipes, making sure each head is securely fastened and aligned to provide uniform water coverage throughout your rooftop garden. Make sure to follow the manufacturer's instructions for specific installation requirements.
As you connect the sprinkler heads, keep in mind that proper alignment is essential to achieve ideal water distribution. You'll want to adjust the sprinkler heads to ensure they're spraying water in the desired pattern.
When connecting the sprinkler heads, remember to check for any blockages or debris that might affect water flow. Regular sprayer head maintenance is vital to prevent clogging and guarantee consistent performance.
You should also consider adjusting the water pressure to accommodate the specific needs of your rooftop garden. This might require tweaking the pressure regulator or adjusting the valve settings.
Programming Irrigation Timers
Now that your rooftop garden's irrigation system is physically installed, you'll need to program the timers to guarantee your plants receive the right amount of water at the right times.
You'll set timer parameters, such as the duration and frequency of each watering cycle, to match your garden's specific needs.
Next, you'll explore the various watering schedule options to determine the best approach for your rooftop oasis.
Setting Timer Parameters
Program the irrigation timer to specify the duration and frequency of water delivery to your rooftop garden, taking into account factors such as soil type, climate, and plant water requirements. This step is essential in achieving best watering efficiency and ensuring your plants receive the right amount of water at the right time.
When setting timer parameters, consider the following key aspects:
-
Soil type: Adjust the watering frequency based on soil absorption rates. For example, sandy soils may require more frequent watering, while clay soils may need less frequent but longer watering sessions.
-
Climate: Take into account local weather patterns, such as rainfall and temperature fluctuations, to adjust the irrigation schedule accordingly.
-
Plant water requirements: Different plants have unique watering needs. Research the specific requirements of your rooftop garden's plants to customize the timer settings.
Watering Schedule Options
Configuring your irrigation timer's watering schedule options allows you to tailor the frequency and duration of water delivery to your rooftop garden's specific needs, ensuring best plant health and water efficiency.
You can choose from various scheduling options, including daily, weekly, or interval-based watering. For drip irrigation systems, you may want to ponder shorter, more frequent watering sessions to prevent overwatering.
When programming your irrigation timer, contemplate factors like soil type, plant species, and climate. You can also take advantage of smart controllers that can automatically adjust watering schedules based on real-time weather data and soil moisture levels.
These advanced controllers can optimize water usage, reducing waste and saving you money on your water bill.
Testing Irrigation System
You'll need to confirm that your irrigation system is operating correctly by conducting a series of tests to identify any leaks, blockages, or other issues. This is essential to make sure your rooftop garden receives the right amount of water, saving you time, money, and resources.
To test your irrigation system, follow these necessary steps:
-
Water flow testing: Check the flow rate of your irrigation system to ensure it's meeting the designed specifications. This will help you identify any blockages or restrictions in the pipes.
-
System pressure analysis: Measure the pressure at different points in the system to detect any variations that could affect irrigation system efficiency.
-
Drip line evaluation: Inspect the drip lines for any signs of damage, clogging, or blockages that could prevent water from reaching your plants.
Troubleshooting Common Issues
Once you've confirmed your irrigation system is working as intended, it's time to anticipate and address common issues that may arise. You'll want to stay vigilant for signs of trouble, such as uneven water distribution or unexpected water usage spikes.
For leak detection, inspect your system regularly, checking for signs of moisture around connections and valves. Make pressure adjustments as needed to ensure optimal system performance.
You'll also need to calibrate your sensors periodically to make certain they're providing accurate readings. This is especially important for soil moisture sensors, which can become desensitized over time.
If you notice your timer isn't functioning correctly, troubleshoot the issue by checking the power source, programming, and sensor inputs. Make sure all connections are secure and that the timer is properly configured.
Maintaining Irrigation System
As you move forward with your rooftop garden, it's important that you prioritize maintaining your irrigation system to guarantee peak performance and water efficiency.
You'll need to stay on top of regular system checks, manage your irrigation schedule effectively, and implement water conservation measures to prevent waste and reduce your environmental impact.
Regular System Checks
Your rooftop garden's irrigation system requires regular checks to guarantee efficient water distribution, prevent clogs, and detect potential issues before they escalate into costly problems. Regular maintenance is key to securing your system runs smoothly and efficiently. By doing so, you'll save water, reduce energy consumption, and enjoy a thriving rooftop garden.
Here are 3 essential checks to perform regularly:
-
Inspect for leaks: Check the entire system for signs of leaks, including the pipes, fittings, and emitters. Even small leaks can lead to significant water loss and damage to your garden.
-
Monitor water pressure: Secure the water pressure is within the recommended range for your system. Low pressure can lead to poor water distribution, while high pressure can cause damage to the pipes and fittings.
-
Check for clogs: Inspect the emitters and filters for clogs or blockages. Clean or replace them as needed to secure proper water flow.
Irrigation Schedule Management
To optimize your rooftop garden's irrigation system, you'll need to establish a tailored irrigation schedule that considers factors such as plant type, climate, and soil moisture levels. This schedule will guarantee your plants receive the appropriate amount of water at the correct time, without wasting a single drop.
To create an effective schedule, you'll need to monitor weather patterns and soil moisture levels. You can do this by installing moisture sensors and utilizing smart technology that integrates with weather monitoring systems. This will offer you real-time data on soil moisture levels, temperature, and humidity, enabling you to adjust your irrigation schedule accordingly.
Water Conservation Measures
Regular inspections and maintenance of your irrigation system are crucial to prevent leaks, clogs, and other issues that can lead to water waste and negatively impact your rooftop garden's health. By staying on top of maintenance, you'll make sure your system is running efficiently and effectively, giving your plants the right amount of water they need to thrive.
To take your water conservation efforts to the next level, consider implementing the following measures:
-
Rainwater harvesting: Collect and store rainwater in a tank or barrel to use for irrigation, reducing your dependence on potable water.
-
Drought-resistant plants: Choose plants that are adapted to thrive in dry conditions, reducing the need for frequent watering.
-
Greywater recycling: Repurpose greywater (wastewater generated from sinks, showers, and washing machines) for irrigation, further decreasing your water footprint.
Final System Check
With the entire irrigation system installed, you're now ready to perform a thorough final system check to verify that all components are functioning as intended. This pivotal step guarantees your rooftop garden receives the right amount of water, promoting healthy plant growth while minimizing waste.
| Component | Functionality | Status |
|---|---|---|
| Pumps | Providing consistent water pressure | |
| Sensors | Monitoring soil moisture and temperature | |
| Sprinklers | Distributing water evenly throughout the garden | |
| Timers | Regulating irrigation schedules |
During the final system check, pay close attention to system efficiency and water distribution patterns. Verify that the pumps are providing consistent water pressure, sensors are accurately monitoring soil conditions, and sprinklers are distributing water evenly throughout the garden. Also, ascertain timers are regulating irrigation schedules as programmed. A well-functioning irrigation system will not only conserve water but also give you the freedom to focus on nurturing your rooftop garden. By following this tutorial, you'll be enjoying a thriving and sustainable garden in no time.
Frequently Asked Questions
Can I Install a Step Irrigation System on a Sloping Rooftop?
As you envision a lush green oasis on your sloping rooftop, you wonder if it's possible. Yes, you can install a step irrigation system, but first, make sure your waterproofing is solid, and consider the sloped surface's drainage implications.
How Do I Prevent Irrigation Pipes From Freezing in Winter?
To prevent irrigation pipes from freezing in winter, you'll want to wrap them with winter insulation and consider installing heat cables, ensuring a warm and continuous water flow that won't leave your rooftop garden high and dry.
Are There Any Specific Regulations for Rooftop Irrigation Systems?
'As you scale new heights, remember that rooftop irrigation systems come with unique regulations, requiring you to guarantee roof access safety and adhere to water usage conservation guidelines to avoid a deluge of fines.'
Can I Use a Step Irrigation System for Indoor Plants Too?
You can adapt a step irrigation system for indoor plants, but you'll need to adjust the watering schedule based on factors like humidity, pot size, and plant species to ensure best growth and freedom from overwatering.
Do I Need to Hire a Professional for Step Irrigation System Installation?
You can opt for DIY installation to save on costs, but consider hiring a pro for their expertise, ensuring a time-efficient setup and avoiding potential mistakes that might waste resources.
Related Posts
-
3 Best DIY Planter Ideas for Backyard Decor
You can elevate your backyard's style and functionality by choosing the right DIY planter ideas. Start with a mix of ...
-
3 Best DIY Planter Ideas for Backyard Decor
You can elevate your backyard's style and functionality by choosing the right DIY planter ideas. Start with a mix of ...
-
3 Best DIY Planter Ideas for Backyard Decor
You can elevate your backyard's style and functionality by choosing the right DIY planter ideas. Start with a mix of ...
-
3 Best DIY Planter Ideas for Backyard Decor
You can elevate your backyard's style and functionality by choosing the right DIY planter ideas. Start with a mix of ...
-
3 Best DIY Planter Ideas for Backyard Decor
You can elevate your backyard's style and functionality by choosing the right DIY planter ideas. Start with a mix of ...
-
3 Best DIY Planter Ideas for Backyard Decor
You can elevate your backyard's style and functionality by choosing the right DIY planter ideas. Start with a mix of ...
-
3 Best DIY Planter Ideas for Backyard Decor
You can elevate your backyard's style and functionality by choosing the right DIY planter ideas. Start with a mix of ...
-
3 Best DIY Planter Ideas for Backyard Decor
You can elevate your backyard's style and functionality by choosing the right DIY planter ideas. Start with a mix of ...
-
3 Best DIY Planter Ideas for Backyard Decor
You can elevate your backyard's style and functionality by choosing the right DIY planter ideas. Start with a mix of ...
-
3 Best DIY Planter Ideas for Backyard Decor
You can elevate your backyard's style and functionality by choosing the right DIY planter ideas. Start with a mix of ...
-
3 Best DIY Planter Ideas for Backyard Decor
You can elevate your backyard's style and functionality by choosing the right DIY planter ideas. Start with a mix of ...
-
3 Best DIY Planter Ideas for Backyard Decor
You can elevate your backyard's style and functionality by choosing the right DIY planter ideas. Start with a mix of ...
-
3 Best DIY Planter Ideas for Backyard Decor
You can elevate your backyard's style and functionality by choosing the right DIY planter ideas. Start with a mix of ...
-
3 Best DIY Planter Ideas for Backyard Decor
You can elevate your backyard's style and functionality by choosing the right DIY planter ideas. Start with a mix of ...
-
What Makes a Beautiful Border Planter Design
When crafting a beautiful border planter design, you balance fundamental elements like durable cinder block structure...
-
What Makes a Beautiful Border Planter Design
When crafting a beautiful border planter design, you balance fundamental elements like durable cinder block structure...
-
What Makes a Beautiful Border Planter Design
When crafting a beautiful border planter design, you balance fundamental elements like durable cinder block structure...
-
What Makes a Beautiful Border Planter Design
When crafting a beautiful border planter design, you balance fundamental elements like durable cinder block structure...
-
What Makes a Beautiful Border Planter Design
When crafting a beautiful border planter design, you balance fundamental elements like durable cinder block structure...
-
What Makes a Beautiful Border Planter Design
When crafting a beautiful border planter design, you balance fundamental elements like durable cinder block structure...
-
What Makes a Beautiful Border Planter Design
When crafting a beautiful border planter design, you balance fundamental elements like durable cinder block structure...
-
What Makes a Beautiful Border Planter Design
When crafting a beautiful border planter design, you balance fundamental elements like durable cinder block structure...
-
What Makes a Beautiful Border Planter Design
When crafting a beautiful border planter design, you balance fundamental elements like durable cinder block structure...
-
What Makes a Beautiful Border Planter Design
When crafting a beautiful border planter design, you balance fundamental elements like durable cinder block structure...
-
What Makes a Beautiful Border Planter Design
When crafting a beautiful border planter design, you balance fundamental elements like durable cinder block structure...
-
What Makes a Beautiful Border Planter Design
When crafting a beautiful border planter design, you balance fundamental elements like durable cinder block structure...
-
What Makes a Beautiful Border Planter Design
When crafting a beautiful border planter design, you balance fundamental elements like durable cinder block structure...
-
What Makes a Beautiful Border Planter Design
When crafting a beautiful border planter design, you balance fundamental elements like durable cinder block structure...
-
What Makes a Beautiful Border Planter Design
When crafting a beautiful border planter design, you balance fundamental elements like durable cinder block structure...
-
What Makes a Beautiful Border Planter Design
When crafting a beautiful border planter design, you balance fundamental elements like durable cinder block structure...
-
What Makes a Beautiful Border Planter Design
When crafting a beautiful border planter design, you balance fundamental elements like durable cinder block structure...
-
What Makes a Beautiful Border Planter Design
When crafting a beautiful border planter design, you balance fundamental elements like durable cinder block structure...
-
What Makes a Beautiful Border Planter Design
When crafting a beautiful border planter design, you balance fundamental elements like durable cinder block structure...
-
What Makes a Beautiful Border Planter Design
When crafting a beautiful border planter design, you balance fundamental elements like durable cinder block structure...
-
What Makes a Beautiful Border Planter Design
When crafting a beautiful border planter design, you balance fundamental elements like durable cinder block structure...
-
What Makes a Beautiful Border Planter Design
When crafting a beautiful border planter design, you balance fundamental elements like durable cinder block structure...
-
What Makes a Beautiful Border Planter Design
When crafting a beautiful border planter design, you balance fundamental elements like durable cinder block structure...
-
What Makes a Beautiful Border Planter Design
When crafting a beautiful border planter design, you balance fundamental elements like durable cinder block structure...
-
What Makes a Beautiful Border Planter Design
When crafting a beautiful border planter design, you balance fundamental elements like durable cinder block structure...
-
What Makes a Beautiful Border Planter Design
When crafting a beautiful border planter design, you balance fundamental elements like durable cinder block structure...
-
What Makes a Beautiful Border Planter Design
When crafting a beautiful border planter design, you balance fundamental elements like durable cinder block structure...
-
What Makes a Beautiful Border Planter Design
When crafting a beautiful border planter design, you balance fundamental elements like durable cinder block structure...
-
What Makes a Beautiful Border Planter Design
When crafting a beautiful border planter design, you balance fundamental elements like durable cinder block structure...
-
What Makes a Beautiful Border Planter Design
When crafting a beautiful border planter design, you balance fundamental elements like durable cinder block structure...
-
What Makes a Beautiful Border Planter Design
When crafting a beautiful border planter design, you balance fundamental elements like durable cinder block structure...
-

Accurate Measurements for Self-Watering Planters Made Easy
You're about to reveal the secrets of self-watering planters, and it all starts with precise measurements. Begin by a...
-
Accurate Measurements for Self-Watering Planters Made Easy
You're about to reveal the secrets of self-watering planters, and it all starts with precise measurements. Begin by a...
-
Accurate Measurements for Self-Watering Planters Made Easy
You're about to reveal the secrets of self-watering planters, and it all starts with precise measurements. Begin by a...
-
Accurate Measurements for Self-Watering Planters Made Easy
You're about to reveal the secrets of self-watering planters, and it all starts with precise measurements. Begin by a...
-
Accurate Measurements for Self-Watering Planters Made Easy
You're about to reveal the secrets of self-watering planters, and it all starts with precise measurements. Begin by a...
-
Accurate Measurements for Self-Watering Planters Made Easy
You're about to reveal the secrets of self-watering planters, and it all starts with precise measurements. Begin by a...
-
Accurate Measurements for Self-Watering Planters Made Easy
You're about to reveal the secrets of self-watering planters, and it all starts with precise measurements. Begin by a...
-
Accurate Measurements for Self-Watering Planters Made Easy
You're about to reveal the secrets of self-watering planters, and it all starts with precise measurements. Begin by a...
-
Accurate Measurements for Self-Watering Planters Made Easy
You're about to reveal the secrets of self-watering planters, and it all starts with precise measurements. Begin by a...
-
Accurate Measurements for Self-Watering Planters Made Easy
You're about to reveal the secrets of self-watering planters, and it all starts with precise measurements. Begin by a...
-
Accurate Measurements for Self-Watering Planters Made Easy
You're about to reveal the secrets of self-watering planters, and it all starts with precise measurements. Begin by a...
-
Accurate Measurements for Self-Watering Planters Made Easy
You're about to reveal the secrets of self-watering planters, and it all starts with precise measurements. Begin by a...
-
Accurate Measurements for Self-Watering Planters Made Easy
You're about to reveal the secrets of self-watering planters, and it all starts with precise measurements. Begin by a...
-
Accurate Measurements for Self-Watering Planters Made Easy
You're about to reveal the secrets of self-watering planters, and it all starts with precise measurements. Begin by a...
-
Accurate Measurements for Self-Watering Planters Made Easy
You're about to reveal the secrets of self-watering planters, and it all starts with precise measurements. Begin by a...
-
Accurate Measurements for Self-Watering Planters Made Easy
You're about to reveal the secrets of self-watering planters, and it all starts with precise measurements. Begin by a...
-
Accurate Measurements for Self-Watering Planters Made Easy
You're about to reveal the secrets of self-watering planters, and it all starts with precise measurements. Begin by a...
-
Accurate Measurements for Self-Watering Planters Made Easy
You're about to reveal the secrets of self-watering planters, and it all starts with precise measurements. Begin by a...
-
Accurate Measurements for Self-Watering Planters Made Easy
You're about to reveal the secrets of self-watering planters, and it all starts with precise measurements. Begin by a...
-
Accurate Measurements for Self-Watering Planters Made Easy
You're about to reveal the secrets of self-watering planters, and it all starts with precise measurements. Begin by a...
-
Accurate Measurements for Self-Watering Planters Made Easy
You're about to reveal the secrets of self-watering planters, and it all starts with precise measurements. Begin by a...
-
Accurate Measurements for Self-Watering Planters Made Easy
You're about to reveal the secrets of self-watering planters, and it all starts with precise measurements. Begin by a...
-
Accurate Measurements for Self-Watering Planters Made Easy
You're about to reveal the secrets of self-watering planters, and it all starts with precise measurements. Begin by a...
-
Accurate Measurements for Self-Watering Planters Made Easy
You're about to reveal the secrets of self-watering planters, and it all starts with precise measurements. Begin by a...
-
Accurate Measurements for Self-Watering Planters Made Easy
You're about to reveal the secrets of self-watering planters, and it all starts with precise measurements. Begin by a...
-
Accurate Measurements for Self-Watering Planters Made Easy
You're about to reveal the secrets of self-watering planters, and it all starts with precise measurements. Begin by a...
-
Accurate Measurements for Self-Watering Planters Made Easy
You're about to reveal the secrets of self-watering planters, and it all starts with precise measurements. Begin by a...
-
Accurate Measurements for Self-Watering Planters Made Easy
You're about to reveal the secrets of self-watering planters, and it all starts with precise measurements. Begin by a...
-
Accurate Measurements for Self-Watering Planters Made Easy
You're about to reveal the secrets of self-watering planters, and it all starts with precise measurements. Begin by a...
-
Accurate Measurements for Self-Watering Planters Made Easy
You're about to reveal the secrets of self-watering planters, and it all starts with precise measurements. Begin by a...
-
Accurate Measurements for Self-Watering Planters Made Easy
You're about to reveal the secrets of self-watering planters, and it all starts with precise measurements. Begin by a...


