7 Best Weed Barrier Tips for Planter Success
To guarantee planter success, you're about to learn the 7 essential weed barrier tips. First, choose the right weed barrier for your plant type, soil, and climate. Then, measure twice and cut once to avoid waste. Overlap the barrier rows by at least 6-12 inches for maximum coverage, and secure it with landscape pins 6-8 inches apart. Next, add a layer of mulch to retain moisture and suppress weeds. Trim excess material neatly to maintain a clean appearance. Finally, inspect and adjust the barrier regularly to guarantee it remains effective. Now, get ready to dig deeper into the details that will take your planter to the next level.
Key Takeaways
• Choose the right weed barrier for your plants, considering factors like biodegradability, UV protection, and soil type for optimal growth.
• Measure your planter accurately to ensure a precise fit, accounting for overlaps, obstructions, and recommended seam allowances.
• Overlap weed barrier rows by 6-12 inches for maximum coverage, and secure with landscape pins 6-8 inches apart for stability.
• Add a 2-3 inch layer of mulch around plants, maintaining consistent depth and avoiding mulch volcanoes to prevent waterlogging.
• Regularly inspect and adjust your weed barrier, monitoring for damage, weeds, and soil moisture levels to ensure planter success.
Choose the Right Weed Barrier
When selecting a weed barrier for your planter, take into account the specific needs of your plants, soil, and climate to guarantee you choose the right one for ideal growth and minimal maintenance.
You'll want to reflect on the type of plants you're growing, as some may require more water or nutrients than others. Your soil type and climate will also play a role in determining the best weed barrier for your planter.
Biodegradable options are a great choice if you're looking for an eco-friendly solution. These barriers break down naturally over time, reducing waste and minimizing environmental impact. However, they may not be as effective at preventing weeds as non-biodegradable options.
Proper installation techniques are also essential for success. Make sure to lay the barrier down evenly and securely, overlapping seams to prevent weeds from growing through.
You may also want to think about using a weed barrier with built-in UV protection to prevent degradation from sunlight. By choosing the right weed barrier and installing it correctly, you'll be well on your way to a thriving, low-maintenance planter.
Measure Twice, Cut Once
Now that you've chosen the right weed barrier, it's time to ascertain a precise fit by measuring your planter accurately to avoid wasting material and prevent weeds from growing through gaps.
A precise fit guarantees that your weed barrier lies flat, allowing for ideal plant health and soil moisture control. Take your time to measure the length, width, and any obstructions, such as irrigation systems or plant supports.
Here are some measuring tips to keep in mind:
-
Measure in multiple spots to account for any variations in planter shape or size.
-
Record your measurements carefully to avoid mistakes.
-
Consider the weed barrier's recommended overlap (we'll cover this in the next section).
-
Measure around any obstructions, such as irrigation systems or plant supports.
-
Double-check your measurements before cutting your weed barrier to avoid costly mistakes.
Overlap for Maximum Coverage
By overlapping your weed barrier, you guarantee that your planter is fully protected from weeds, even when the material shifts slightly over time. This vital step guarantees that your planting techniques aren't compromised by pesky weeds.
When laying down the barrier, make sure to overlap each row by at least 6-12 inches. This will create a seamless barrier that prevents weeds from growing up through the seams.
As you prepare the soil for planting, remember to overlap the barrier around any obstructions like rocks or roots. This will prevent weeds from finding a way to grow through the barrier.
When cutting the barrier to fit around obstructions, use a utility knife or scissors to make clean cuts. Avoid tearing the material, as this can create weak points that allow weeds to grow.
Secure With Landscape Pins
Your weed barrier is only as good as its anchorage, so use landscape pins to secure it tightly to the ground. You've taken the time to lay out your barrier; now make certain it stays in place. Landscape pins are the key to maintaining your landscape aesthetics and keeping weeds at bay.
Here are some tips to keep in mind when securing your weed barrier with landscape pins:
-
Place pins 6-8 inches apart to guarantee a tight hold.
-
Use pins that are at least 6 inches long to secure the barrier to the ground.
-
Pin placement is essential - place pins in the center of the barrier, not at the edges.
-
Use a hammer or mallet to drive pins into the ground, making sure they're flush with the surface.
-
Check and adjust pin placement regularly to guarantee the barrier remains secure.
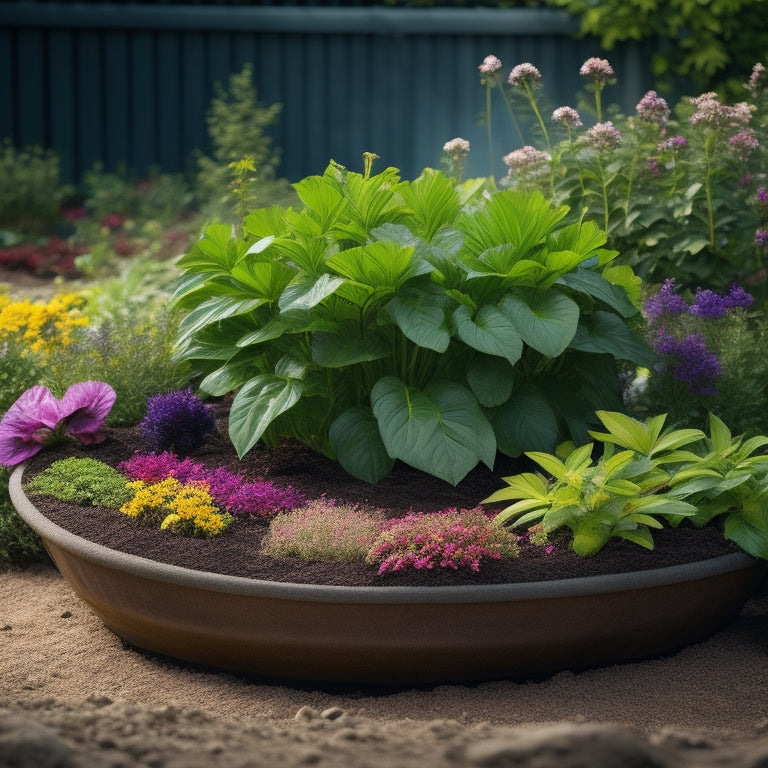
Add a Layer of Mulch
You've secured your weed barrier with landscape pins; now it's time to add a layer of mulch to complete your planter.
This essential step not only adds a decorative touch, but also helps retain moisture, suppress weeds, and regulate soil temperature.
As you prepare to mulch, remember that the depth, type, and coverage area of your mulch can make all the difference in your planter's success.
Mulch Depth Matters
Adding a layer of mulch to your planter is crucial, as it helps retain moisture, suppress weeds, and regulate soil temperature. However, the depth of this layer is equally important. You want to guarantee you're providing the right environment for your plants to thrive.
Here's why mulch depth matters:
-
Too little mulch: Weeds will still grow, and soil temperature will fluctuate, affecting plant growth.
-
Just right: Moisture retention is ideal, and soil temperature is regulated, creating a perfect environment for your plants.
-
Too much mulch: Water can't penetrate, causing root rot, and plants may suffocate from lack of oxygen.
-
Mulch volcanoes: Water flows away from plants, reducing moisture retention and increasing erosion.
-
Inconsistent mulch depth: Some areas may receive too much or too little moisture, leading to uneven plant growth.
Mulch Type Importance
When it comes to choosing a mulch type, select one that complements your plant's specific needs and the climate you're in, as different materials have varying levels of water retention, weed suppression, and temperature regulation.
You'll want to evaluate the pros and cons of organic mulches versus synthetic mulches. Organic mulches, such as wood chips or bark, are biodegradable and can add nutrients to the soil as they break down. They're ideal for plants that require frequent watering, as they help retain moisture. However, they may need to be replenished regularly.
Synthetic mulches, like landscape fabric or plastic sheets, provide longer-lasting weed suppression and can be more durable. They're suitable for plants that prefer drier conditions, as they can help prevent overwatering. However, they may not allow for air and water penetration, which can be detrimental to some plants.
Mulch Coverage Area
Now that you've selected the ideal mulch type for your plants, it's time to determine how much mulch to apply and where to place it. The mulch coverage area is essential for maximizing mulch benefits and achieving effective weed suppression.
To get it right, remember:
-
Apply a 2-3 inch layer of mulch around your plants, keeping it a few inches away from the base to prevent rot and disease.
-
Extend the mulch coverage area 12-18 inches beyond the plant's drip line to prevent weeds from growing and competing with your plants for water and nutrients.
-
Mulch around trees and shrubs should be 3-4 inches thick and cover the entire root zone for maximum benefits.
-
Replenish mulch as needed to maintain the desired thickness and prevent weeds from breaking through.
-
Keep the mulch layer thin and evenly distributed to prevent waterlogging and root rot.
Trim Excess Material Neatly
Now that you've laid down your weed barrier, it's time to tidy up the edges.
You'll want to trim the excess material neatly to maintain a clean appearance and prevent the barrier from showing above the mulch.
Precise Cutting Techniques
Cut the weed barrier material to size using a utility knife or pruning shears, taking care to trim excess material neatly around the edges of your planter. This precision is essential to guarantee a professional-looking finish and prevent weeds from growing through the barrier.
When cutting, maintain a consistent angle to prevent uneven edges. Hold your cutting tool at a 45-degree angle to create a clean cut. For thicker materials, use long, smooth strokes to cut through the barrier. For thinner materials, use short, gentle cuts to avoid tearing.
Here are some additional tips to keep in mind:
-
Use sharp cutting tools to prevent tearing or ripping the material.
-
Cut on a flat surface to maintain control and precision.
-
Use a ruler or straightedge to guide your cuts for straight lines.
-
Cut slowly and deliberately to avoid mistakes.
-
Consider using a cutting mat or other protective surface to prevent damage to your work surface.
Edge Control Methods
Edge Control Methods
To achieve a clean, professional finish, trim excess weed barrier material neatly around the planter's edges using a utility knife or pruning shears. This step is essential in preventing weeds from growing up through the barrier and competing with your beneficial plants for water and nutrients.
Here are some tips to help you master edge control:
| Tool | Cutting Technique | Benefits |
|---|---|---|
| Utility Knife | Slice in a gentle, sawing motion | More precise cuts, less material waste |
| Pruning Shears | Cut in small, clean snips | Quicker cutting, ideal for thicker material |
| Scissors | Cut in a slow, deliberate motion | Good for thin materials, more control |
| Razor Blade | Slice in a smooth, continuous motion | Very precise cuts, but be cautious |
| Garden Knife | Cut in a gentle, rocking motion | Good for curved edges, more control |
Material Conservation Tips
By trimming excess weed barrier material neatly, you'll not only maintain a clean appearance but also reduce waste and save resources for your next project. This simple step is essential in adopting sustainable materials and eco-friendly options, ensuring your gardening practices align with your values.
Here are some additional material conservation tips to keep in mind:
-
Measure twice, cut once: Avoid overestimating the amount of material you need, and make precise cuts to minimize waste.
-
Use a sharp utility knife: A dull knife can lead to sloppy cuts and excess material waste.
-
Store leftover material: Keep leftover weed barrier material in a dry, protected area for future use.
-
Opt for reusable materials: Consider using reusable weed barriers or biodegradable alternatives to reduce waste.
-
Plan your project carefully: Take the time to plan your project carefully, and you'll be less likely to generate unnecessary waste.
Inspect and Adjust Regularly
Regular monitoring of your planter's weed barrier guarantees its continued effectiveness and prevents setbacks in your garden's growth.
You'll want to inspect your barrier regularly to ascertain it's doing its job - preventing weed growth and promoting healthy moisture retention. Check for any signs of damage, such as tears or holes, and repair them promptly. Make sure the barrier is still securely in place and hasn't shifted or bunched up.
As you inspect, take note of any areas where weeds might be pushing through. Adjust the barrier as needed to prevent further weed growth. You may need to add additional layers of barrier material or reposition existing ones to guarantee complete coverage.
Don't forget to check the soil moisture levels, too. If the barrier is doing its job, the soil should be retaining moisture well. If you notice dry spots, you may need to adjust your watering schedule.
Frequently Asked Questions
Can I Use Weed Barrier in My Vegetable Garden?
When it comes to vegetable gardening techniques, you're probably wondering if using a weed barrier is a good idea. The answer is yes!
You can definitely use a weed barrier in your vegetable garden. In fact, it's a great way to reduce weeding time and increase crop yields.
The weed barrier benefits include preventing weeds from competing with your veggies for water and nutrients, and retaining soil moisture.
Give it a try and see the difference for yourself!
How Long Does Weed Barrier Material Last Underground?
'An ounce of prevention is worth a pound of cure' when it comes to keeping weeds at bay.
You're wise to wonder how long your weed barrier material will last underground. The good news is that most high-quality weed barriers can last up to 10-15 years, depending on the material and soil conditions.
Look for durable, UV-resistant materials that can withstand underground moisture and temperature fluctuations. With the right choice, you'll be enjoying a weed-free garden for years to come.
Will Weed Barrier Affect Soil Ph or Nutrient Levels?
You're wondering if the weed barrier will affect your soil's pH or nutrient levels.
The good news is that most modern weed barriers are designed to be neutral, so they won't alter your soil's pH.
However, you should choose a breathable barrier to guarantee oxygen and water can reach your soil, maintaining healthy nutrient retention and overall soil health.
This way, you can control the environment and keep your soil thriving.
Can I Install Weed Barrier on a Slope or Hill?
When installing a weed barrier on a slope or hill, you'll need to take extra precautions to guarantee it stays in place.
You'll want to secure the barrier with rocks or pins to prevent it from sliding down the hill.
Make sure to overlap the edges by at least 6 inches to prevent weeds from growing through the seams.
With proper slope installation and hillside gardening techniques, you can enjoy a weed-free garden even on challenging terrain.
Is Weed Barrier Safe for Pets and Children to Play On?
When you're planning an outdoor space where pets and kids will play, you'll want to verify the weed barrier you choose is safe for them.
You're right to take into account safety concerns, and the good news is that most weed barrier materials are non-toxic and won't harm your loved ones.
Look for permeable materials like landscape fabric or polypropylene, which allow water and air to pass through while keeping weeds at bay.
These materials are generally safe for pets and kids to play on, giving you peace of mind.
Conclusion
You've made it! With these 7 best weed barrier tips, you're on your way to planter success.
According to the National Gardening Association, 67% of gardeners consider weeds their biggest nuisance. By following these tips, you'll be part of the 33% who've got it under control.
Remember, a weed barrier is an investment in your garden's future. With a little effort upfront, you'll reap the rewards of a thriving, low-maintenance planter for years to come.
Happy gardening!
Related Posts
-
5 Essential Drainage Tips for Block Planters
When using block planters, you'll want to guarantee effective drainage to prevent waterlogging and root rot. Start by...
-
5 Essential Drainage Tips for Block Planters
When using block planters, you'll want to guarantee effective drainage to prevent waterlogging and root rot. Start by...
-
5 Essential Drainage Tips for Block Planters
When using block planters, you'll want to guarantee effective drainage to prevent waterlogging and root rot. Start by...
-
5 Essential Drainage Tips for Block Planters
When using block planters, you'll want to guarantee effective drainage to prevent waterlogging and root rot. Start by...
-
5 Essential Drainage Tips for Block Planters
When using block planters, you'll want to guarantee effective drainage to prevent waterlogging and root rot. Start by...
-
5 Essential Drainage Tips for Block Planters
When using block planters, you'll want to guarantee effective drainage to prevent waterlogging and root rot. Start by...
-
5 Essential Drainage Tips for Block Planters
When using block planters, you'll want to guarantee effective drainage to prevent waterlogging and root rot. Start by...
-
5 Essential Drainage Tips for Block Planters
When using block planters, you'll want to guarantee effective drainage to prevent waterlogging and root rot. Start by...
-
5 Essential Drainage Tips for Block Planters
When using block planters, you'll want to guarantee effective drainage to prevent waterlogging and root rot. Start by...
-
5 Essential Drainage Tips for Block Planters
When using block planters, you'll want to guarantee effective drainage to prevent waterlogging and root rot. Start by...
-
5 Essential Drainage Tips for Block Planters
When using block planters, you'll want to guarantee effective drainage to prevent waterlogging and root rot. Start by...
-
5 Essential Drainage Tips for Block Planters
When using block planters, you'll want to guarantee effective drainage to prevent waterlogging and root rot. Start by...
-
5 Essential Drainage Tips for Block Planters
When using block planters, you'll want to guarantee effective drainage to prevent waterlogging and root rot. Start by...
-
5 Essential Drainage Tips for Block Planters
When using block planters, you'll want to guarantee effective drainage to prevent waterlogging and root rot. Start by...
-
5 Essential Drainage Tips for Block Planters
When using block planters, you'll want to guarantee effective drainage to prevent waterlogging and root rot. Start by...
-
5 Essential Drainage Tips for Block Planters
When using block planters, you'll want to guarantee effective drainage to prevent waterlogging and root rot. Start by...
-
5 Essential Drainage Tips for Block Planters
When using block planters, you'll want to guarantee effective drainage to prevent waterlogging and root rot. Start by...
-
5 Essential Drainage Tips for Block Planters
When using block planters, you'll want to guarantee effective drainage to prevent waterlogging and root rot. Start by...
-
Preventing Soil Settlement in DIY Planters
To prevent soil settlement in your DIY planters, you'll want to focus on selecting a well-balanced soil mix with good...
-
Preventing Soil Settlement in DIY Planters
To prevent soil settlement in your DIY planters, you'll want to focus on selecting a well-balanced soil mix with good...
-
Preventing Soil Settlement in DIY Planters
To prevent soil settlement in your DIY planters, you'll want to focus on selecting a well-balanced soil mix with good...
-
Preventing Soil Settlement in DIY Planters
To prevent soil settlement in your DIY planters, you'll want to focus on selecting a well-balanced soil mix with good...
-
Preventing Soil Settlement in DIY Planters
To prevent soil settlement in your DIY planters, you'll want to focus on selecting a well-balanced soil mix with good...
-
Preventing Soil Settlement in DIY Planters
To prevent soil settlement in your DIY planters, you'll want to focus on selecting a well-balanced soil mix with good...
-
Preventing Soil Settlement in DIY Planters
To prevent soil settlement in your DIY planters, you'll want to focus on selecting a well-balanced soil mix with good...
-
Preventing Soil Settlement in DIY Planters
To prevent soil settlement in your DIY planters, you'll want to focus on selecting a well-balanced soil mix with good...
-
Preventing Soil Settlement in DIY Planters
To prevent soil settlement in your DIY planters, you'll want to focus on selecting a well-balanced soil mix with good...
-
Preventing Soil Settlement in DIY Planters
To prevent soil settlement in your DIY planters, you'll want to focus on selecting a well-balanced soil mix with good...
-
Preventing Soil Settlement in DIY Planters
To prevent soil settlement in your DIY planters, you'll want to focus on selecting a well-balanced soil mix with good...
-
Preventing Soil Settlement in DIY Planters
To prevent soil settlement in your DIY planters, you'll want to focus on selecting a well-balanced soil mix with good...
-
Preventing Soil Settlement in DIY Planters
To prevent soil settlement in your DIY planters, you'll want to focus on selecting a well-balanced soil mix with good...
-
Preventing Soil Settlement in DIY Planters
To prevent soil settlement in your DIY planters, you'll want to focus on selecting a well-balanced soil mix with good...
-
Preventing Soil Settlement in DIY Planters
To prevent soil settlement in your DIY planters, you'll want to focus on selecting a well-balanced soil mix with good...
-
Preventing Soil Settlement in DIY Planters
To prevent soil settlement in your DIY planters, you'll want to focus on selecting a well-balanced soil mix with good...
-
Preventing Soil Settlement in DIY Planters
To prevent soil settlement in your DIY planters, you'll want to focus on selecting a well-balanced soil mix with good...
-
Preventing Soil Settlement in DIY Planters
To prevent soil settlement in your DIY planters, you'll want to focus on selecting a well-balanced soil mix with good...
-
Preventing Soil Settlement in DIY Planters
To prevent soil settlement in your DIY planters, you'll want to focus on selecting a well-balanced soil mix with good...
-
Preventing Soil Settlement in DIY Planters
To prevent soil settlement in your DIY planters, you'll want to focus on selecting a well-balanced soil mix with good...
-
Preventing Soil Settlement in DIY Planters
To prevent soil settlement in your DIY planters, you'll want to focus on selecting a well-balanced soil mix with good...
-
Preventing Soil Settlement in DIY Planters
To prevent soil settlement in your DIY planters, you'll want to focus on selecting a well-balanced soil mix with good...
-
Preventing Soil Settlement in DIY Planters
To prevent soil settlement in your DIY planters, you'll want to focus on selecting a well-balanced soil mix with good...
-
Preventing Soil Settlement in DIY Planters
To prevent soil settlement in your DIY planters, you'll want to focus on selecting a well-balanced soil mix with good...
-
Succulent-Friendly Drainage Solutions for Block Planters
You can create a succulent-friendly drainage system in your cinder block planters by drilling holes in the bottom of ...
-
Succulent-Friendly Drainage Solutions for Block Planters
You can create a succulent-friendly drainage system in your cinder block planters by drilling holes in the bottom of ...
-
Succulent-Friendly Drainage Solutions for Block Planters
You can create a succulent-friendly drainage system in your cinder block planters by drilling holes in the bottom of ...
-
Succulent-Friendly Drainage Solutions for Block Planters
You can create a succulent-friendly drainage system in your cinder block planters by drilling holes in the bottom of ...
-
Succulent-Friendly Drainage Solutions for Block Planters
You can create a succulent-friendly drainage system in your cinder block planters by drilling holes in the bottom of ...
-
Succulent-Friendly Drainage Solutions for Block Planters
You can create a succulent-friendly drainage system in your cinder block planters by drilling holes in the bottom of ...
-
Succulent-Friendly Drainage Solutions for Block Planters
You can create a succulent-friendly drainage system in your cinder block planters by drilling holes in the bottom of ...
-
Succulent-Friendly Drainage Solutions for Block Planters
You can create a succulent-friendly drainage system in your cinder block planters by drilling holes in the bottom of ...
-
Succulent-Friendly Drainage Solutions for Block Planters
You can create a succulent-friendly drainage system in your cinder block planters by drilling holes in the bottom of ...
-
Succulent-Friendly Drainage Solutions for Block Planters
You can create a succulent-friendly drainage system in your cinder block planters by drilling holes in the bottom of ...
-
Succulent-Friendly Drainage Solutions for Block Planters
You can create a succulent-friendly drainage system in your cinder block planters by drilling holes in the bottom of ...
-
Succulent-Friendly Drainage Solutions for Block Planters
You can create a succulent-friendly drainage system in your cinder block planters by drilling holes in the bottom of ...
-
Succulent-Friendly Drainage Solutions for Block Planters
You can create a succulent-friendly drainage system in your cinder block planters by drilling holes in the bottom of ...
-
Succulent-Friendly Drainage Solutions for Block Planters
You can create a succulent-friendly drainage system in your cinder block planters by drilling holes in the bottom of ...
-
Succulent-Friendly Drainage Solutions for Block Planters
You can create a succulent-friendly drainage system in your cinder block planters by drilling holes in the bottom of ...


