
7 Best Ways to Harvest Microgreens on Rooftops
When harvesting microgreens on your rooftop, you'll want to choose the right location with 4-6 hours of direct sunlight, wind protection, and a level surface. Select climate-tolerant varieties like pea shoots or radish greens, and prepare your soil with a well-draining mix and organic fertilizers. Create an ideal microclimate by regulating temperature and monitoring for pests. Water consistently, and harvest your microgreens at 1-3 inches height, using scissors or pinching off gently. By following these guidelines, you'll be able to reap the benefits of your rooftop microgreens, and with a few more tricks up your sleeve, you'll be enjoying fresh, nutritious greens all season long.
Key Takeaways
• Harvest microgreens in the morning, after dew dries, to minimize moisture on leaves and reduce spoilage risk.
• Snip microgreens just above the soil line using scissors or pinch off gently to avoid damaging roots.
• Harvest microgreens at 1-3 inches height, typically 7-21 days post-germination, for optimal flavor and texture.
• Use a staggered harvesting strategy to prolong microgreen availability and ensure a continuous supply.
• Handle microgreens gently during harvesting to prevent bruising and damage, ensuring peak freshness and quality.
Choosing the Right Rooftop Location
When selecting a rooftop location for your microgreen harvest, consider the amount of direct sunlight it receives, as most microgreens require at least 4-6 hours of direct sunlight per day.
You'll want to choose a spot that gets plenty of sunlight exposure, especially during the peak sun hours of 9 am to 3 pm. However, be mindful of extreme sunlight, which can cause overheating and drying out.
In addition to sunlight, think about wind protection. Microgreens are delicate, and strong gusts can damage or dislodge them. Look for areas with natural windbreaks, such as nearby buildings or structures, or consider using windbreaks like trellises or screens.
You should also guarantee your rooftop location is level and even, as uneven surfaces can lead to waterlogging and poor drainage.
Lastly, consider the accessibility and maintenance of your rooftop location. You'll need to tend to your microgreens regularly, so choose a spot that's easy to reach and has a reliable water source.
Selecting Microgreen Varieties for Rooftops
When selecting microgreen varieties for your rooftop harvest, you'll want to contemplate options that thrive in your local climate.
Since rooftop spaces often have limited square footage, you'll also benefit from choosing varieties that don't require a lot of space to grow.
Climate Tolerant Varieties
Select microgreen varieties that thrive in extreme temperatures, intense sunlight, and windier conditions, as these climate-tolerant crops will give you a head start on a successful rooftop harvest.
When choosing heat-resistant varieties, look for ones that have developed climate adaptation strategies to cope with high temperatures. Pea shoots, for instance, are an excellent choice as they can tolerate temperatures up to 90°F (32°C). Another option is radish greens, which can handle intense sunlight and dry spells.
Consider the specific climate conditions on your rooftop and choose varieties that match those conditions. If you have a rooftop that receives full sun, opt for varieties like sorrel or purslane that thrive in direct sunlight. For shadier rooftops, choose varieties like kale or mustard greens that prefer partial shade.
Space Saving Options
You'll want to choose microgreen varieties that make the most of your rooftop's limited space, such as compact or upright growers like lettuce, arugula, or cilantro, which can be harvested in as little as 7-10 days. These varieties are perfect for vertical gardening, allowing you to maximize your rooftop's space without sacrificing yield.
Consider varieties with smaller leaf sizes, like pea shoots or radish greens, which can be grown in tighter spaces and harvested in as little as 5-7 days. Hydroponic systems are also a great option for rooftop microgreen production, as they can be designed to optimize space while providing precise control over nutrients and watering.
Preparing Rooftop Soil and Containers
As you prepare to grow microgreens on your rooftop, you'll need to create a suitable environment for them to thrive.
This starts with the soil, where you'll want to guarantee it's well-draining, has the right pH balance, and is rich in nutrients.
Next, you'll select containers that can hold the soil and microgreens securely, while also allowing for good air circulation and access to sunlight.
Soil Preparation Essentials
Prepare your rooftop soil by blending a mix of peat moss, vermiculite, and perlite to create a well-draining and nutrient-rich growing medium for your microgreens. This mix will provide the perfect conditions for your microgreens to flourish.
Next, test your soil pH to verify it falls within the ideal range of 6.0 to 7.0. If your soil pH is too high or too low, adjust it accordingly to promote healthy growth.
Additionally, aim for a balanced nutrient profile by incorporating organic fertilizers like compost or worm castings. Seek a nutrient balance that's rich in nitrogen, phosphorus, and potassium (NPK) to support leafy growth.
Don't forget to sterilize your soil to prevent any potential diseases or pests from affecting your microgreens.
Container Selection Criteria
Selecting the right container is essential to guarantee your microgreens receive the necessary air circulation, water drainage, and room for growth. Consider factors such as material, size, and depth when choosing the perfect vessel for your rooftop garden.
When it comes to container materials, you'll want to choose something that's durable, lightweight, and resistant to extreme weather conditions. Consider using plastic or fiberglass containers, which are ideal for rooftop gardens due to their weight and ability to withstand high winds. You can also opt for wooden or ceramic containers, but make sure they're treated with a waterproof sealant to prevent water damage.
Container size is also vital, as it will affect the growth and yield of your microgreens. A good rule of thumb is to choose containers that are at least 1-2 inches deep and have a surface area of around 4-6 square feet. This will give your microgreens enough room to grow and allow for proper air circulation.
Additionally, consider containers with built-in drainage holes or a trellis system to promote healthy growth and prevent waterlogged soil. By selecting the right container, you'll be well on your way to growing thriving microgreens on your rooftop.
Creating Optimal Rooftop Growing Conditions
You'll need to carefully assess your rooftop's microclimate to create ideal growing conditions for your microgreens, considering factors like wind direction, sunlight exposure, and temperature fluctuations.
Light exposure is essential, so make sure your microgreens receive the right amount of direct sunlight. Most microgreens require 4-6 hours of direct sunlight per day, but some varieties can tolerate partial shade. Take note of the time of day the sun hits your rooftop and adjust your setup accordingly.
Temperature regulation is also important. Microgreens prefer daytime temperatures between 65-75°F (18-24°C) and nighttime temperatures around 55-65°F (13-18°C). Be mindful of extreme temperatures, as they can stunt growth or even kill your microgreens.
Consider using shade cloth or row covers to regulate temperature and protect your crops from harsh winds. By understanding and controlling these factors, you'll be able to create a rooftop haven for your microgreens to thrive.
With the best growing conditions, you'll be harvesting fresh, nutritious microgreens in no time.
Watering and Maintaining Microgreens
As your microgreens grow, they'll require consistent moisture, so it is essential to establish a watering schedule that suits their unique needs. You'll want to water them when the soil feels dry to the touch, usually every 1-3 days depending on the climate and humidity. Be careful not to overwater, as this can lead to root rot and other issues.
Here are some watering tips to keep in mind:
| Watering Tips | Why It Matters |
|---|---|
| Water in the morning | Allows plants to absorb water throughout the day |
| Use a gentle spray | Prevents washing away tiny seeds or roots |
| Monitor soil moisture | guarantees consistent watering schedule |
In addition to watering, you'll also need to maintain your microgreens by keeping an eye out for pests and providing them with the necessary nutrients. For pest management, keep an eye out for common pests like aphids, whiteflies, and spider mites, and use organic pest control methods whenever possible. You can also use nutrient solutions specifically formulated for microgreens to give them an extra boost. By following these tips, you'll be well on your way to growing healthy, thriving microgreens on your rooftop.
Harvesting Microgreens at Peak Freshness
By the time your microgreens reach 1-3 inches in height, typically within 7-21 days of germination, they're ready to be harvested at their peak freshness and nutritional value.
Now's the time to use the right harvesting techniques to get the most out of your crop. You'll want to harvest your microgreens when they're at their peak flavor, which usually occurs in the morning, after the dew has dried but before the heat of the day sets in.
Simply snip the greens just above the soil line using scissors or pinch them off with your fingers. Be gentle, as you want to avoid damaging the stems or leaves. Harvesting in the morning will also help prevent moisture from accumulating on the leaves, reducing the risk of spoilage.
You can harvest your microgreens all at once or stagger the harvest to extend the season. Either way, you'll be enjoying a fresh, nutrient-dense addition to your meals in no time.
Preserving Microgreens for Future Use
How do you plan to enjoy your microgreens beyond their short shelf life, considering they're typically consumed within a week of harvesting? To extend their freshness and availability, you'll need to explore preservation methods and storage techniques. Here are some ways to preserve your microgreens for future use:
Freezing: Blanch microgreens in boiling water for 10-15 seconds, then immediately submerge them in an ice bath. Pat dry and store in airtight containers or freezer bags.
Dehydrating: Use a food dehydrator or your oven on the lowest temperature setting to dry microgreens. Store in airtight containers to preserve flavor and nutrition.
Refrigeration: Store microgreens in a sealed container in the refrigerator to keep them fresh for up to 5 days.
Pickle or ferment: Soak microgreens in vinegar or brine to create a tangy, crunchy snack. Fermenting microgreens in a saltwater brine can create a nutrient-dense condiment.
Make microgreen powder: Dry microgreens and blend them into a powder that can be used as a nutritional supplement or added to recipes.
Frequently Asked Questions
Can Rooftop Microgreens Be Grown in Extreme Weather Conditions?
When growing rooftop microgreens, you'll need to adapt to extreme weather conditions using specialized growing techniques, such as windbreaks, shading, and insulation, to guarantee a healthy and thriving harvest.
Do Rooftop Microgreens Attract Pests or Insects?
You think rooftop microgreens are a pest magnet, but surprise! With proper pest management and insect prevention strategies, you'll be the one calling the shots, not those unwanted critters.
Can Rooftop Microgreens Be Insured Against Damage or Loss?
You can protect your rooftop microgreens from damage or loss by investing in specialized insurance policies that offer crop protection, ensuring you're financially covered in case of unexpected events or natural disasters.
Are Rooftop Microgreens More Expensive Than Store-Bought Greens?
You're wondering if rooftop microgreens are more expensive than store-bought greens. Consider this: a local NYC farm sells rooftop-grown kale for $4.50 per ounce, while a high-end grocery store offers organic kale for $2.50 per ounce - the price comparison highlights the trade-off between quality and cost.
Can Rooftop Microgreens Be Certified as Organic?
You can pursue organic certification for your rooftop microgreens through organizations like the USDA, ensuring transparency and credibility for your urban farming venture, which may even increase its appeal to environmentally-conscious customers.
Related Posts
-
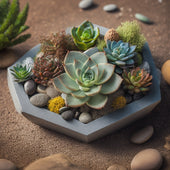
Why Succulents Thrive in DIY Concrete Planters
You've likely noticed that succulents seem to flourish in DIY concrete planters, and it's not just a coincidence - th...
-
Why Succulents Thrive in DIY Concrete Planters
You've likely noticed that succulents seem to flourish in DIY concrete planters, and it's not just a coincidence - th...
-
Why Succulents Thrive in DIY Concrete Planters
You've likely noticed that succulents seem to flourish in DIY concrete planters, and it's not just a coincidence - th...
-
Why Succulents Thrive in DIY Concrete Planters
You've likely noticed that succulents seem to flourish in DIY concrete planters, and it's not just a coincidence - th...
-
Why Succulents Thrive in DIY Concrete Planters
You've likely noticed that succulents seem to flourish in DIY concrete planters, and it's not just a coincidence - th...
-
Why Succulents Thrive in DIY Concrete Planters
You've likely noticed that succulents seem to flourish in DIY concrete planters, and it's not just a coincidence - th...
-
Why Succulents Thrive in DIY Concrete Planters
You've likely noticed that succulents seem to flourish in DIY concrete planters, and it's not just a coincidence - th...
-
Why Succulents Thrive in DIY Concrete Planters
You've likely noticed that succulents seem to flourish in DIY concrete planters, and it's not just a coincidence - th...
-
Why Succulents Thrive in DIY Concrete Planters
You've likely noticed that succulents seem to flourish in DIY concrete planters, and it's not just a coincidence - th...
-
Why Succulents Thrive in DIY Concrete Planters
You've likely noticed that succulents seem to flourish in DIY concrete planters, and it's not just a coincidence - th...
-
Why Succulents Thrive in DIY Concrete Planters
You've likely noticed that succulents seem to flourish in DIY concrete planters, and it's not just a coincidence - th...
-
Why Succulents Thrive in DIY Concrete Planters
You've likely noticed that succulents seem to flourish in DIY concrete planters, and it's not just a coincidence - th...
-
Why Succulents Thrive in DIY Concrete Planters
You've likely noticed that succulents seem to flourish in DIY concrete planters, and it's not just a coincidence - th...
-
Why Succulents Thrive in DIY Concrete Planters
You've likely noticed that succulents seem to flourish in DIY concrete planters, and it's not just a coincidence - th...
-
Why Succulents Thrive in DIY Concrete Planters
You've likely noticed that succulents seem to flourish in DIY concrete planters, and it's not just a coincidence - th...
-
Why Succulents Thrive in DIY Concrete Planters
You've likely noticed that succulents seem to flourish in DIY concrete planters, and it's not just a coincidence - th...
-
Why Succulents Thrive in DIY Concrete Planters
You've likely noticed that succulents seem to flourish in DIY concrete planters, and it's not just a coincidence - th...
-
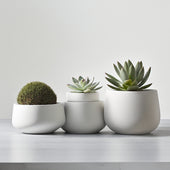
What Makes Concrete Planters Perfect for Succulents
You've found that concrete planters offer the perfect combination of durability, drainage, and design versatility to ...
-
What Makes Concrete Planters Perfect for Succulents
You've found that concrete planters offer the perfect combination of durability, drainage, and design versatility to ...
-
What Makes Concrete Planters Perfect for Succulents
You've found that concrete planters offer the perfect combination of durability, drainage, and design versatility to ...
-
What Makes Concrete Planters Perfect for Succulents
You've found that concrete planters offer the perfect combination of durability, drainage, and design versatility to ...
-
What Makes Concrete Planters Perfect for Succulents
You've found that concrete planters offer the perfect combination of durability, drainage, and design versatility to ...
-
What Makes Concrete Planters Perfect for Succulents
You've found that concrete planters offer the perfect combination of durability, drainage, and design versatility to ...
-
What Makes Concrete Planters Perfect for Succulents
You've found that concrete planters offer the perfect combination of durability, drainage, and design versatility to ...
-
What Makes Concrete Planters Perfect for Succulents
You've found that concrete planters offer the perfect combination of durability, drainage, and design versatility to ...
-
What Makes Concrete Planters Perfect for Succulents
You've found that concrete planters offer the perfect combination of durability, drainage, and design versatility to ...
-
What Makes Concrete Planters Perfect for Succulents
You've found that concrete planters offer the perfect combination of durability, drainage, and design versatility to ...
-
What Makes Concrete Planters Perfect for Succulents
You've found that concrete planters offer the perfect combination of durability, drainage, and design versatility to ...
-
What Makes Concrete Planters Perfect for Succulents
You've found that concrete planters offer the perfect combination of durability, drainage, and design versatility to ...
-
What Makes Concrete Planters Perfect for Succulents
You've found that concrete planters offer the perfect combination of durability, drainage, and design versatility to ...
-
What Makes Concrete Planters Perfect for Succulents
You've found that concrete planters offer the perfect combination of durability, drainage, and design versatility to ...
-
What Makes Concrete Planters Perfect for Succulents
You've found that concrete planters offer the perfect combination of durability, drainage, and design versatility to ...
-
What Makes Concrete Planters Perfect for Succulents
You've found that concrete planters offer the perfect combination of durability, drainage, and design versatility to ...
-
What Makes Concrete Planters Perfect for Succulents
You've found that concrete planters offer the perfect combination of durability, drainage, and design versatility to ...
-
What Makes Concrete Planters Perfect for Succulents
You've found that concrete planters offer the perfect combination of durability, drainage, and design versatility to ...
-
What Makes Concrete Planters Perfect for Succulents
You've found that concrete planters offer the perfect combination of durability, drainage, and design versatility to ...
-
What Makes Concrete Planters Perfect for Succulents
You've found that concrete planters offer the perfect combination of durability, drainage, and design versatility to ...
-
What Makes Concrete Planters Perfect for Succulents
You've found that concrete planters offer the perfect combination of durability, drainage, and design versatility to ...
-
What Makes Concrete Planters Perfect for Succulents
You've found that concrete planters offer the perfect combination of durability, drainage, and design versatility to ...
-
What Makes Concrete Planters Perfect for Succulents
You've found that concrete planters offer the perfect combination of durability, drainage, and design versatility to ...
-
What Makes Concrete Planters Perfect for Succulents
You've found that concrete planters offer the perfect combination of durability, drainage, and design versatility to ...
-
What Makes Concrete Planters Perfect for Succulents
You've found that concrete planters offer the perfect combination of durability, drainage, and design versatility to ...
-
What Makes Concrete Planters Perfect for Succulents
You've found that concrete planters offer the perfect combination of durability, drainage, and design versatility to ...
-
What Makes Concrete Planters Perfect for Succulents
You've found that concrete planters offer the perfect combination of durability, drainage, and design versatility to ...
-
What Makes Concrete Planters Perfect for Succulents
You've found that concrete planters offer the perfect combination of durability, drainage, and design versatility to ...
-
What Makes Concrete Planters Perfect for Succulents
You've found that concrete planters offer the perfect combination of durability, drainage, and design versatility to ...
-
What Makes Concrete Planters Perfect for Succulents
You've found that concrete planters offer the perfect combination of durability, drainage, and design versatility to ...
-
What Makes Concrete Planters Perfect for Succulents
You've found that concrete planters offer the perfect combination of durability, drainage, and design versatility to ...
-
What Makes Concrete Planters Perfect for Succulents
You've found that concrete planters offer the perfect combination of durability, drainage, and design versatility to ...
-
What Makes Concrete Planters Perfect for Succulents
You've found that concrete planters offer the perfect combination of durability, drainage, and design versatility to ...
-
What Makes Concrete Planters Perfect for Succulents
You've found that concrete planters offer the perfect combination of durability, drainage, and design versatility to ...
-
What Makes Concrete Planters Perfect for Succulents
You've found that concrete planters offer the perfect combination of durability, drainage, and design versatility to ...
-
What Makes Concrete Planters Perfect for Succulents
You've found that concrete planters offer the perfect combination of durability, drainage, and design versatility to ...
-
What Makes Concrete Planters Perfect for Succulents
You've found that concrete planters offer the perfect combination of durability, drainage, and design versatility to ...
-

Soil Selection for Successful Planter Garden Boxes
When selecting soil for your planter garden box, it's important to balance drainage, moisture retention, and nutrient...
-
Soil Selection for Successful Planter Garden Boxes
When selecting soil for your planter garden box, it's important to balance drainage, moisture retention, and nutrient...
-
Soil Selection for Successful Planter Garden Boxes
When selecting soil for your planter garden box, it's important to balance drainage, moisture retention, and nutrient...
-
Soil Selection for Successful Planter Garden Boxes
When selecting soil for your planter garden box, it's important to balance drainage, moisture retention, and nutrient...
-
Soil Selection for Successful Planter Garden Boxes
When selecting soil for your planter garden box, it's important to balance drainage, moisture retention, and nutrient...
-
Soil Selection for Successful Planter Garden Boxes
When selecting soil for your planter garden box, it's important to balance drainage, moisture retention, and nutrient...
-
Soil Selection for Successful Planter Garden Boxes
When selecting soil for your planter garden box, it's important to balance drainage, moisture retention, and nutrient...
-
Soil Selection for Successful Planter Garden Boxes
When selecting soil for your planter garden box, it's important to balance drainage, moisture retention, and nutrient...
-
Soil Selection for Successful Planter Garden Boxes
When selecting soil for your planter garden box, it's important to balance drainage, moisture retention, and nutrient...
-
Soil Selection for Successful Planter Garden Boxes
When selecting soil for your planter garden box, it's important to balance drainage, moisture retention, and nutrient...
-
Soil Selection for Successful Planter Garden Boxes
When selecting soil for your planter garden box, it's important to balance drainage, moisture retention, and nutrient...
-
Soil Selection for Successful Planter Garden Boxes
When selecting soil for your planter garden box, it's important to balance drainage, moisture retention, and nutrient...
-
Soil Selection for Successful Planter Garden Boxes
When selecting soil for your planter garden box, it's important to balance drainage, moisture retention, and nutrient...
-
Soil Selection for Successful Planter Garden Boxes
When selecting soil for your planter garden box, it's important to balance drainage, moisture retention, and nutrient...
-
Soil Selection for Successful Planter Garden Boxes
When selecting soil for your planter garden box, it's important to balance drainage, moisture retention, and nutrient...
-
Soil Selection for Successful Planter Garden Boxes
When selecting soil for your planter garden box, it's important to balance drainage, moisture retention, and nutrient...
-
Soil Selection for Successful Planter Garden Boxes
When selecting soil for your planter garden box, it's important to balance drainage, moisture retention, and nutrient...
-
Soil Selection for Successful Planter Garden Boxes
When selecting soil for your planter garden box, it's important to balance drainage, moisture retention, and nutrient...
-
Soil Selection for Successful Planter Garden Boxes
When selecting soil for your planter garden box, it's important to balance drainage, moisture retention, and nutrient...
-
Soil Selection for Successful Planter Garden Boxes
When selecting soil for your planter garden box, it's important to balance drainage, moisture retention, and nutrient...
-
Soil Selection for Successful Planter Garden Boxes
When selecting soil for your planter garden box, it's important to balance drainage, moisture retention, and nutrient...
-
Soil Selection for Successful Planter Garden Boxes
When selecting soil for your planter garden box, it's important to balance drainage, moisture retention, and nutrient...
-
Soil Selection for Successful Planter Garden Boxes
When selecting soil for your planter garden box, it's important to balance drainage, moisture retention, and nutrient...
-
Soil Selection for Successful Planter Garden Boxes
When selecting soil for your planter garden box, it's important to balance drainage, moisture retention, and nutrient...
-
Soil Selection for Successful Planter Garden Boxes
When selecting soil for your planter garden box, it's important to balance drainage, moisture retention, and nutrient...
-
Soil Selection for Successful Planter Garden Boxes
When selecting soil for your planter garden box, it's important to balance drainage, moisture retention, and nutrient...
-
Soil Selection for Successful Planter Garden Boxes
When selecting soil for your planter garden box, it's important to balance drainage, moisture retention, and nutrient...
-
Soil Selection for Successful Planter Garden Boxes
When selecting soil for your planter garden box, it's important to balance drainage, moisture retention, and nutrient...
-
Soil Selection for Successful Planter Garden Boxes
When selecting soil for your planter garden box, it's important to balance drainage, moisture retention, and nutrient...
-
Soil Selection for Successful Planter Garden Boxes
When selecting soil for your planter garden box, it's important to balance drainage, moisture retention, and nutrient...
-
Soil Selection for Successful Planter Garden Boxes
When selecting soil for your planter garden box, it's important to balance drainage, moisture retention, and nutrient...
-
Soil Selection for Successful Planter Garden Boxes
When selecting soil for your planter garden box, it's important to balance drainage, moisture retention, and nutrient...


