7 Best Steps to Upcycle Concrete Planters Successfully
You'll transform discarded concrete planters into stunning garden features by following these 7 best steps. First, prepare and clean the cinder blocks, guaranteeing they're free from cracks and damage, then arrange them to create a stable base. Next, sand the surface to achieve a smooth finish and prime it for painting. Apply a protective coating that offers weather resistance, and add drainage and aeration to guarantee proper water flow and air circulation. Paint and decorate the planters using outdoor-friendly materials, then select and plant greenery that thrives in the planter's conditions. Finally, enhance your outdoor space with visually appealing layouts and regular maintenance, and discover the full potential of your upcycled concrete planters.
Key Takeaways
• Gather materials, including cinder blocks, and arrange them to create a stable base, ensuring evenness and a consistent stacking pattern.
• Clean and disinfect the blocks with a vinegar solution, and sand the surface to achieve a smooth finish and create micro-scratches for better paint adhesion.
• Apply a concrete-specific primer and a protective coating that offers weather resistance and longevity, considering eco-friendly options like water-based sealers.
• Drill drainage holes and add a layer of small rocks or pebbles to ensure proper drainage, and mix aeration materials into the soil for healthy plant growth.
• Paint and decorate the planter using outdoor-friendly paint and techniques like ombre, stripes, and polka dots, and seal with a clear coat of varnish for added protection.
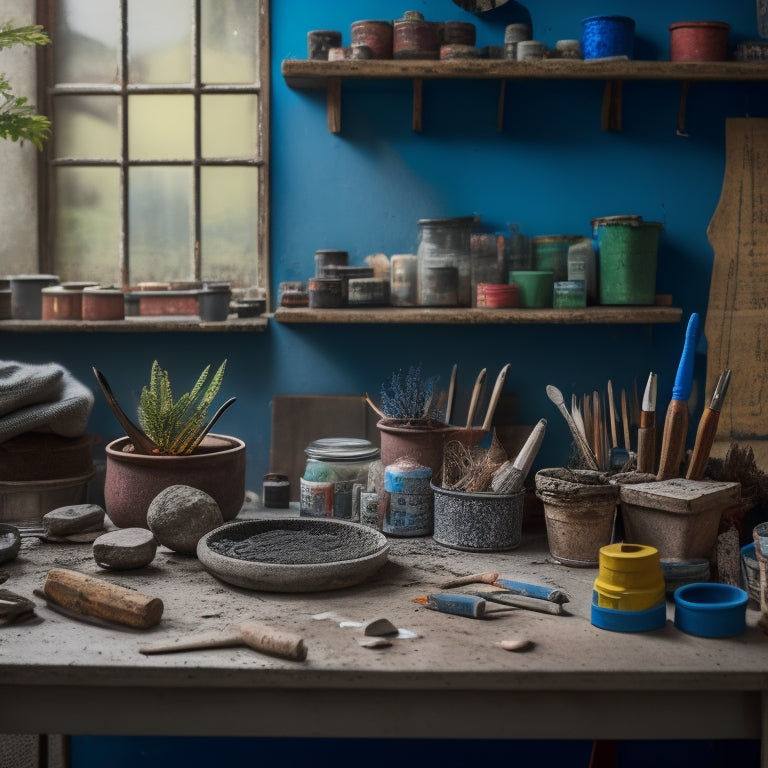
Prepare Cinder Block Planters
Gather a minimum of four cinder blocks, depending on the size of your planter, and inspect them for any cracks or damage that could compromise their structural integrity.
You want to make certain the blocks can withstand the weight of the soil and plants. Examine the cinder block textures, noting any rough or porous areas that may affect the planter's overall appearance.
Consider the planter design you envision and how the blocks' textures will contribute to its aesthetic.
Next, arrange the blocks to form the base of your planter. You may need to trim or cut some blocks to fit snugly together.
Use a level to make certain the base is even and sturdy. As you stack the blocks, maintain a consistent pattern to achieve a visually appealing design.
Take your time, and don't hesitate to adjust the blocks as needed to achieve a solid foundation for your upcycled planter.
Clean and Disinfect Surfaces
Before adding any decorative elements or soil, thoroughly clean and disinfect all surfaces of the cinder blocks to remove any dirt, debris, or bacteria that may be present. This essential step in concrete care guarantees a clean slate for your upcycling project.
Start by sweeping away any loose dirt or debris from the blocks using a soft-bristled brush or a gentle broom.
Next, mix 1 part white vinegar with 2 parts water in a spray bottle and spray the solution onto the blocks. Let it sit for 10-15 minutes to allow the solution to penetrate and break down any tough stains or grime.
Use a soft cloth or sponge to wipe down the blocks, paying particular attention to any crevices or grooves where dirt may accumulate.
Rinse the blocks thoroughly with clean water to remove any remaining dirt or vinegar solution.
Finally, allow the blocks to air dry completely before moving on to the next step in your upcycling project.
Sand and Prime for Painting
Now that your concrete planter is clean and disinfected, it's time to prep the surface for painting.
You'll need to sand the concrete to create a smooth, even finish, and then prime it to guarantee a strong bond between the concrete and paint.
Prepare the Surface
Sand the entire surface of your concrete planter using a wire brush or an orbital sander with a 120-grit sandpaper to roughen the surface, removing any dirt, grime, or release agents that might interfere with paint adhesion.
This vital step in surface preparation guarantees a strong bond between the concrete and the paint.
When sanding, focus on areas with visible imperfections, such as bumps or cracks.
As you sand, you'll notice the texture of the concrete becoming more even and porous, allowing for better paint absorption.
Here's what you should achieve after sanding:
-
A roughened surface: The sandpaper will create micro-scratches, enabling the paint to grip the concrete better.
-
Improved texture: Sanding enhances the natural texture of the concrete, adding depth and character to your planter.
-
Clean surface: Dirt, grime, and release agents are removed, guaranteeing a contaminant-free surface for painting.
Choose the Right Primer
You'll need to select a high-quality, concrete-specific primer that's designed to create a strong bond between the porous concrete surface and your chosen paint. This is essential to guarantee a durable and long-lasting finish. When selecting a primer, consider the following factors:
| Primer Type | Surface Compatibility |
|---|---|
| Epoxy-based | Ideal for porous concrete surfaces, provides strong adhesion and chemical resistance |
| Acrylic-based | Suitable for smooth concrete surfaces, offers good flexibility and UV resistance |
| Silane-based | Best for concrete surfaces with high moisture levels, provides excellent waterproofing |
Make certain to choose a primer that's compatible with your concrete planter's surface condition. Epoxy-based primers are ideal for porous surfaces, while acrylic-based primers work well on smooth surfaces. If your planter is exposed to high moisture levels, consider a silane-based primer. Always read the product label and follow the manufacturer's instructions for application and drying times. By selecting the right primer, you'll guarantee a strong bond between the concrete and paint, resulting in a beautiful and durable finish.
Sanding Techniques Matter
With your primer chosen, it's time to prepare your concrete planter's surface by employing the right sanding techniques to confirm a strong bond between the primer and paint. This vital step will guarantee a smooth, even finish and prevent peeling or flaking.
When it comes to sanding, you'll want to focus on achieving a surface finish that's suitable for painting. Here are some essential tips to keep in mind:
-
Start with coarse grit: Begin with a coarse grit sandpaper (around 80-100) to remove any imperfections, rough patches, or debris from the surface.
-
Gradually move to finer grits: Progress to finer grits (120-150) for a smoother finish, and finally, use a high-grit sandpaper (220-240) for a silky, paint-ready surface.
-
Wipe away dust and debris: Use a tack cloth or a damp cloth to remove any dust, dirt, or debris from the sanded surface to confirm a strong bond between the primer and paint.
Apply Protective Coatings
Applying a protective coating to your upcycled concrete planter is essential to shield it from the elements and extend its lifespan. You'll want to choose a coating that provides excellent weather resistance, ensuring your planter can withstand harsh outdoor conditions. Look for eco-friendly options, such as water-based sealers or natural wax coatings, which are gentler on the environment.
When selecting a coating, consider the finish you want to achieve. Matte, satin, or gloss – the choice is yours. Some coatings offer additional benefits, like UV protection or mold and mildew resistance. Make sure to read the product instructions carefully, as application methods may vary. Typically, you'll need to clean the planter thoroughly before applying a thin, even layer of coating. Allow it to dry according to the manufacturer's instructions, then apply additional coats as needed.
Remember to choose a coating compatible with your planter's material and intended use. With the right protective coating, your upcycled concrete planter will remain vibrant and durable, providing a beautiful home for your plants for years to come.
Add Drainage and Aeration
As you've protected your planter from the elements, now it's time to confirm your plants' roots receive the right amount of water and air by incorporating a drainage and aeration system. This vital step guarantees healthy root growth and prevents waterlogged soil.
To achieve ideal drainage and aeration, consider the following techniques:
-
Drill drainage holes: Create 1-2 inch holes in the bottom of the planter, spaced 2-3 inches apart, to allow excess water to escape.
-
Add a layer of aggregate: Place a 1-2 inch layer of small rocks, pebbles, or broken pottery at the bottom of the planter to facilitate drainage and aeration.
-
Incorporate aeration materials: Mix in materials like perlite, vermiculite, or coconut coir into your potting soil to improve aeration and prevent waterlogging.
Paint and Decorate Planters
Now that your planter is fully functional, you can release your creativity and transform it into a unique decorative piece by painting and decorating it with a personal touch.
To begin, prepare your planter by cleaning it thoroughly with soap and water, and letting it dry completely.
Next, choose a primer specifically designed for concrete and apply it according to the manufacturer's instructions.
Once the primer is dry, you can start painting using a variety of color techniques, such as ombre, stripes, or polka dots.
Consider adding artistic patterns like chevrons or florals to give your planter a unique flair. Use high-quality, outdoor-friendly paint to guarantee your design lasts through the elements.
Don't be afraid to experiment and mix-and-match different colors and patterns to create a look that's all your own.
Finally, seal your design with a clear coat of varnish to protect it from the elements and add a glossy finish.
With a little creativity, your upcycled planter will become a stunning focal point in your garden or outdoor space.
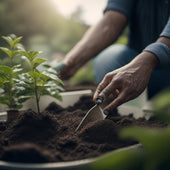
Plant and Maintain Greenery
Selecting the right plants for your upcycled concrete planter is essential, considering factors like sunlight, temperature, and moisture levels to guarantee thriving greenery. You want to choose plants that will complement the planter's texture and color, while also thriving in the environment you've created.
Here are three key considerations for plant selection:
-
Lighting: If your planter will be in direct sunlight, choose plants that can tolerate high temperatures and intense light, such as succulents or cacti. For shaded areas, opt for plants like ferns or peace lilies.
-
Moisture: Plants that prefer well-draining soil, like herbs or lavender, are ideal for concrete planters. If you want to create a lush, tropical look, choose plants that thrive in moist conditions, like ferns or impatiens.
-
Temperature: If your planter will be exposed to frost, select plants that can tolerate cold temperatures, like winter flowering heathers or cyclamen.
When it comes to watering, use techniques that prevent waterlogged soil, such as watering in the morning to allow excess water to evaporate, or using a well-draining potting mix. By considering these factors, you'll be able to create a thriving oasis in your upcycled concrete planter.
Frequently Asked Questions
Can I Upcycle Concrete Planters With Cracks or Broken Edges?
You're wondering if you can upcycle concrete planters with cracks or broken edges. The answer is yes, with the right repair techniques!
Start by evaluating the damage and deciding if you can salvage the planter. If the cracks are minor, you can use a concrete patching compound to fill them in.
For broken edges, try rebuilding with new concrete or using a decorative trim to conceal the damage.
Then, get creative with decorative options like paint, stencils, or mosaic tiles to give your planter a fresh new look.
How Long Does It Take for Protective Coatings to Fully Dry?
When applying protective coatings to your upcycled concrete planters, you'll want to know how long they take to fully dry.
Drying times vary depending on the coating type and environmental conditions.
For example, acrylic-based coatings typically take 1-2 hours to touch-dry, while epoxy-based coatings can take 24-48 hours to fully cure.
Make sure to follow the manufacturer's instructions and wait for the recommended time before handling or exposing your planters to the elements.
Are There Any Non-Toxic Paint Options for Concrete Planters?
When searching for non-toxic paint options, you'll find eco-friendly paints specifically designed for concrete.
Look for water-based, low-VOC (volatile organic compound) formulas that guarantee a safe, chemical-free finish.
For a smooth paint application, make certain the planter is clean and dry.
Apply a primer if necessary, then use a roller or brush to achieve a uniform coat.
Follow the manufacturer's instructions for drying times, usually ranging from 30 minutes to an hour, depending on the brand and environmental conditions.
Can I Use Concrete Planters for Plants That Need Full Sun?
When choosing concrete planters for sun-loving plants, you'll want to guarantee they can handle intense heat.
Look for planters with good planter drainage to prevent waterlogged soil, as this can be detrimental to plants in full sun.
Consider adding a layer of small rocks or broken pottery at the bottom of the planter to enhance drainage.
This simple step will help your plants thrive in their new concrete home.
How Often Should I Water Plants in Upcycled Concrete Planters?
You're like a master chef, carefully crafting the perfect blend of water and soil for your plants.
When it comes to watering frequency, you'll want to check the soil moisture daily, especially in upcycled concrete planters where drainage can be tricky.
Stick your finger into the soil up to the first knuckle; if it feels dry, it's time to water.
Aim for about 1-2 inches of water per week, either from rain or irrigation.
Conclusion
You've transformed those dull concrete planters into vibrant works of art, much like a master chef elevates a simple recipe into a culinary masterpiece.
With these 7 steps, you've not only given new life to discarded cinder blocks but also created a thriving oasis for your green friends.
Now, sit back, admire your handiwork, and watch your plants flourish, bursting with color and life, like a symphony of nature.
Related Posts
-
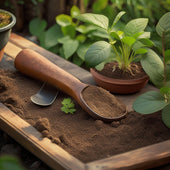
5 Best Trowels for Planting in Concrete Planters
When planting in concrete planters, you need a trowel that can handle the harsh conditions and reduce fatigue on your...
-
5 Best Trowels for Planting in Concrete Planters
When planting in concrete planters, you need a trowel that can handle the harsh conditions and reduce fatigue on your...
-
5 Best Trowels for Planting in Concrete Planters
When planting in concrete planters, you need a trowel that can handle the harsh conditions and reduce fatigue on your...
-
5 Best Trowels for Planting in Concrete Planters
When planting in concrete planters, you need a trowel that can handle the harsh conditions and reduce fatigue on your...
-
5 Best Trowels for Planting in Concrete Planters
When planting in concrete planters, you need a trowel that can handle the harsh conditions and reduce fatigue on your...
-
5 Best Trowels for Planting in Concrete Planters
When planting in concrete planters, you need a trowel that can handle the harsh conditions and reduce fatigue on your...
-
5 Best Trowels for Planting in Concrete Planters
When planting in concrete planters, you need a trowel that can handle the harsh conditions and reduce fatigue on your...
-
5 Best Trowels for Planting in Concrete Planters
When planting in concrete planters, you need a trowel that can handle the harsh conditions and reduce fatigue on your...
-
5 Best Trowels for Planting in Concrete Planters
When planting in concrete planters, you need a trowel that can handle the harsh conditions and reduce fatigue on your...
-
5 Best Trowels for Planting in Concrete Planters
When planting in concrete planters, you need a trowel that can handle the harsh conditions and reduce fatigue on your...
-
5 Best Trowels for Planting in Concrete Planters
When planting in concrete planters, you need a trowel that can handle the harsh conditions and reduce fatigue on your...
-
5 Best Trowels for Planting in Concrete Planters
When planting in concrete planters, you need a trowel that can handle the harsh conditions and reduce fatigue on your...
-
5 Best Trowels for Planting in Concrete Planters
When planting in concrete planters, you need a trowel that can handle the harsh conditions and reduce fatigue on your...
-
5 Best Trowels for Planting in Concrete Planters
When planting in concrete planters, you need a trowel that can handle the harsh conditions and reduce fatigue on your...
-
5 Best Trowels for Planting in Concrete Planters
When planting in concrete planters, you need a trowel that can handle the harsh conditions and reduce fatigue on your...
-
5 Best Trowels for Planting in Concrete Planters
When planting in concrete planters, you need a trowel that can handle the harsh conditions and reduce fatigue on your...
-
5 Best Trowels for Planting in Concrete Planters
When planting in concrete planters, you need a trowel that can handle the harsh conditions and reduce fatigue on your...
-
5 Best Trowels for Planting in Concrete Planters
When planting in concrete planters, you need a trowel that can handle the harsh conditions and reduce fatigue on your...
-
What Makes a Good Used Trowel for Planters
When searching for a good used trowel for planters, you'll want to prioritize corrosion-resistant materials like stai...
-
What Makes a Good Used Trowel for Planters
When searching for a good used trowel for planters, you'll want to prioritize corrosion-resistant materials like stai...
-
What Makes a Good Used Trowel for Planters
When searching for a good used trowel for planters, you'll want to prioritize corrosion-resistant materials like stai...
-
What Makes a Good Used Trowel for Planters
When searching for a good used trowel for planters, you'll want to prioritize corrosion-resistant materials like stai...
-
What Makes a Good Used Trowel for Planters
When searching for a good used trowel for planters, you'll want to prioritize corrosion-resistant materials like stai...
-
What Makes a Good Used Trowel for Planters
When searching for a good used trowel for planters, you'll want to prioritize corrosion-resistant materials like stai...
-
What Makes a Good Used Trowel for Planters
When searching for a good used trowel for planters, you'll want to prioritize corrosion-resistant materials like stai...
-
What Makes a Good Used Trowel for Planters
When searching for a good used trowel for planters, you'll want to prioritize corrosion-resistant materials like stai...
-
What Makes a Good Used Trowel for Planters
When searching for a good used trowel for planters, you'll want to prioritize corrosion-resistant materials like stai...
-
What Makes a Good Used Trowel for Planters
When searching for a good used trowel for planters, you'll want to prioritize corrosion-resistant materials like stai...
-
What Makes a Good Used Trowel for Planters
When searching for a good used trowel for planters, you'll want to prioritize corrosion-resistant materials like stai...
-
What Makes a Good Used Trowel for Planters
When searching for a good used trowel for planters, you'll want to prioritize corrosion-resistant materials like stai...
-
What Makes a Good Used Trowel for Planters
When searching for a good used trowel for planters, you'll want to prioritize corrosion-resistant materials like stai...
-
What Makes a Good Used Trowel for Planters
When searching for a good used trowel for planters, you'll want to prioritize corrosion-resistant materials like stai...
-
What Makes a Good Used Trowel for Planters
When searching for a good used trowel for planters, you'll want to prioritize corrosion-resistant materials like stai...
-
What Makes a Good Used Trowel for Planters
When searching for a good used trowel for planters, you'll want to prioritize corrosion-resistant materials like stai...
-
What Makes a Good Used Trowel for Planters
When searching for a good used trowel for planters, you'll want to prioritize corrosion-resistant materials like stai...
-
What Makes a Good Used Trowel for Planters
When searching for a good used trowel for planters, you'll want to prioritize corrosion-resistant materials like stai...
-
What Makes a Good Used Trowel for Planters
When searching for a good used trowel for planters, you'll want to prioritize corrosion-resistant materials like stai...
-
What Makes a Good Used Trowel for Planters
When searching for a good used trowel for planters, you'll want to prioritize corrosion-resistant materials like stai...
-
What Makes a Good Used Trowel for Planters
When searching for a good used trowel for planters, you'll want to prioritize corrosion-resistant materials like stai...
-
What Makes a Good Used Trowel for Planters
When searching for a good used trowel for planters, you'll want to prioritize corrosion-resistant materials like stai...
-
What Makes a Good Used Trowel for Planters
When searching for a good used trowel for planters, you'll want to prioritize corrosion-resistant materials like stai...
-
What Makes a Good Used Trowel for Planters
When searching for a good used trowel for planters, you'll want to prioritize corrosion-resistant materials like stai...
-
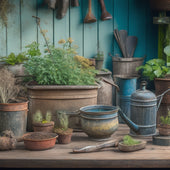
Inspect and Revive Second-Hand Tools for Planters
When inspecting and reviving second-hand tools for planters, prioritize tools with sturdy builds and functional parts...
-
Inspect and Revive Second-Hand Tools for Planters
When inspecting and reviving second-hand tools for planters, prioritize tools with sturdy builds and functional parts...
-
Inspect and Revive Second-Hand Tools for Planters
When inspecting and reviving second-hand tools for planters, prioritize tools with sturdy builds and functional parts...
-
Inspect and Revive Second-Hand Tools for Planters
When inspecting and reviving second-hand tools for planters, prioritize tools with sturdy builds and functional parts...
-
Inspect and Revive Second-Hand Tools for Planters
When inspecting and reviving second-hand tools for planters, prioritize tools with sturdy builds and functional parts...
-
Inspect and Revive Second-Hand Tools for Planters
When inspecting and reviving second-hand tools for planters, prioritize tools with sturdy builds and functional parts...
-
Inspect and Revive Second-Hand Tools for Planters
When inspecting and reviving second-hand tools for planters, prioritize tools with sturdy builds and functional parts...
-
Inspect and Revive Second-Hand Tools for Planters
When inspecting and reviving second-hand tools for planters, prioritize tools with sturdy builds and functional parts...
-
Inspect and Revive Second-Hand Tools for Planters
When inspecting and reviving second-hand tools for planters, prioritize tools with sturdy builds and functional parts...
-
Inspect and Revive Second-Hand Tools for Planters
When inspecting and reviving second-hand tools for planters, prioritize tools with sturdy builds and functional parts...
-
Inspect and Revive Second-Hand Tools for Planters
When inspecting and reviving second-hand tools for planters, prioritize tools with sturdy builds and functional parts...
-
Inspect and Revive Second-Hand Tools for Planters
When inspecting and reviving second-hand tools for planters, prioritize tools with sturdy builds and functional parts...
-
Inspect and Revive Second-Hand Tools for Planters
When inspecting and reviving second-hand tools for planters, prioritize tools with sturdy builds and functional parts...
-
Inspect and Revive Second-Hand Tools for Planters
When inspecting and reviving second-hand tools for planters, prioritize tools with sturdy builds and functional parts...
-
Inspect and Revive Second-Hand Tools for Planters
When inspecting and reviving second-hand tools for planters, prioritize tools with sturdy builds and functional parts...
-
Inspect and Revive Second-Hand Tools for Planters
When inspecting and reviving second-hand tools for planters, prioritize tools with sturdy builds and functional parts...
-
Inspect and Revive Second-Hand Tools for Planters
When inspecting and reviving second-hand tools for planters, prioritize tools with sturdy builds and functional parts...
-
Inspect and Revive Second-Hand Tools for Planters
When inspecting and reviving second-hand tools for planters, prioritize tools with sturdy builds and functional parts...
-
Inspect and Revive Second-Hand Tools for Planters
When inspecting and reviving second-hand tools for planters, prioritize tools with sturdy builds and functional parts...
-
Inspect and Revive Second-Hand Tools for Planters
When inspecting and reviving second-hand tools for planters, prioritize tools with sturdy builds and functional parts...
-
Inspect and Revive Second-Hand Tools for Planters
When inspecting and reviving second-hand tools for planters, prioritize tools with sturdy builds and functional parts...
-
Inspect and Revive Second-Hand Tools for Planters
When inspecting and reviving second-hand tools for planters, prioritize tools with sturdy builds and functional parts...
-
Inspect and Revive Second-Hand Tools for Planters
When inspecting and reviving second-hand tools for planters, prioritize tools with sturdy builds and functional parts...
-
Inspect and Revive Second-Hand Tools for Planters
When inspecting and reviving second-hand tools for planters, prioritize tools with sturdy builds and functional parts...
-
Inspect and Revive Second-Hand Tools for Planters
When inspecting and reviving second-hand tools for planters, prioritize tools with sturdy builds and functional parts...
-
Inspect and Revive Second-Hand Tools for Planters
When inspecting and reviving second-hand tools for planters, prioritize tools with sturdy builds and functional parts...


