5 Best Steps to Upcycle Concrete Planters
You'll transform your concrete planter into a garden showstopper by following these 5 key steps. First, prepare the cinder block surface by cleaning and deciding on a texture. Next, add a drainage system with holes and a layer of small rocks or broken pottery to prevent root rot. Then, apply a coat of bonding primer to guarantee a smooth finish. After that, add a decorative touch with paint, texture, or embellishments like seashells or moss. Finally, plant with care, selecting soil and plants that fit your planter's conditions, and don't be afraid to experiment with unique designs and elements to reveal your planter's full potential.
Key Takeaways
• Prepare the cinder block surface by cleaning and scrubbing it with a wire brush and vinegar solution to remove dirt and debris.
• Add a drainage system by drilling holes and adding small rocks or broken pottery to prevent waterlogged soil and root rot.
• Apply a coat of primer paint to ensure a strong bond and even adhesion of the topcoat, and allow it to dry completely.
• Add a decorative finishing touch with paint, textures, or stenciling, and seal with a clear coat to protect the design.
• Plant and embellish with care by selecting suitable plants, soil, and decorative elements, and adding trellises or rocks for structural interest.
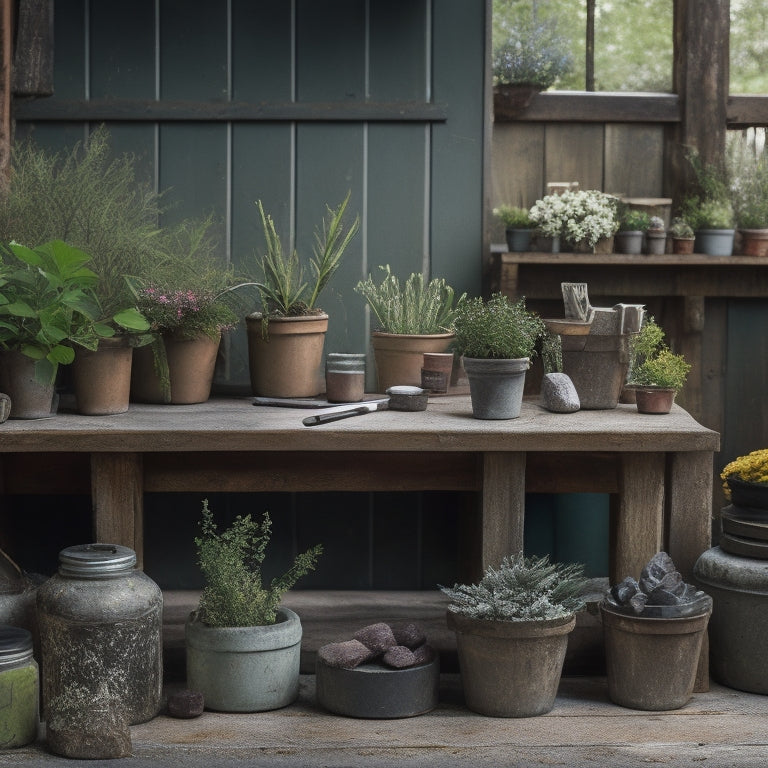
Prepare the Cinder Block Surface
Before transforming your cinder block into a planter, you'll need to prepare its surface by thoroughly cleaning it to remove any dirt, grime, or loose particles that may interfere with the upcycling process.
Use a wire brush or a scrubber to remove stubborn dirt and debris, paying attention to the block's crevices and corners.
Next, mix a solution of one part white vinegar to two parts water, and use it to scrub the surface. This will help remove any remaining dirt and grime, as well as etch the surface to create a better bond between the block and any subsequent coatings.
After cleaning, use a hose to rinse the block thoroughly, and let it dry completely before proceeding.
As you clean, consider the texture enhancement you want to achieve. Do you want a smooth surface or a more rustic, textured look?
Your surface cleaning process will lay the foundation for the final aesthetic of your planter, so take your time and get it right.
Add a Drainage System Effectively
To prevent waterlogged soil and guarantee healthy plant growth, you'll need to create a functional drainage system by drilling holes in the bottom of the cinder block planter.
Use a drill with a masonry bit to create 3-5 holes, depending on the size of your planter, about 1-2 inches from the bottom. This will allow excess water to escape, preventing root rot and ensuring your plants receive the right amount of moisture.
Next, add a layer of drainage materials, such as small rocks or broken pottery, to the bottom of the planter. This will help filter out excess water and prevent clogging.
When selecting soil, choose a well-draining mix specifically designed for containers. Avoid using regular garden soil, as it can compact and prevent proper drainage.
Apply a Coat of Primer Paint
With your planter's drainage system in place, you can now focus on preparing its surface for a fresh coat of paint by applying a primer. This will help the topcoat adhere evenly and bring out the vibrant colors you've chosen for your upcycled concrete planter.
When selecting a primer, consider the type of paint you'll be using and the surface condition of your planter. For a concrete surface, a bonding primer or a concrete-specific primer is ideal. These primer types create a strong bond between the concrete and paint, guaranteeing a durable finish.
Apply the primer according to the manufacturer's instructions, usually with a high-quality roller or brush. Make sure to cover the entire surface, but avoid over-application, which can lead to a rough texture.
Allow the primer to dry completely before moving on to the next step. A well-applied primer will guarantee a smooth, even paint application and a professional-looking finish for your upcycled concrete planter.
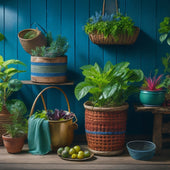
Add a Decorative Finishing Touch
You can now elevate your upcycled concrete planter's visual appeal by incorporating decorative elements that reflect your personal style. To achieve this, consider applying decorative paint to add pops of color or create intricate designs. Choose a paint specifically designed for concrete and follow the manufacturer's instructions for application and drying times.
For a more subtle look, try adding a textured finish using materials like sand, small rocks, or even seashells. These elements won't only add visual interest but also create a unique tactile experience.
When selecting a decorative paint, make certain to choose a color that complements the planter's original tone and the surroundings where it will be placed. You can also experiment with different techniques, such as ombre or stenciling, to create a one-of-a-kind design.
Remember to seal your planter with a clear coat to protect the decorative elements and guarantee they last for a long time. With these finishing touches, your upcycled concrete planter is now ready to showcase your personal style and add a touch of elegance to any room or outdoor space.
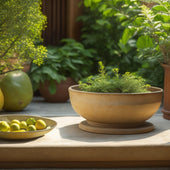
Plant and Embellish With Care
Carefully selecting the perfect plants and embellishments for your upcycled concrete planter is crucial to bringing your unique design vision to life. You've invested time and effort into transforming a mundane planter into a work of art, and now it's time to add the finishing touches.
When it comes to plant selection, consider the planter's size, material, and exposure to sunlight. Choose plants that thrive in similar conditions to guarantee they'll flourish in their new home. Don't forget to select soil types that complement your plant's needs, as this will greatly impact their growth and health.
To take your planter to the next level, consider the following embellishments:
-
Add a decorative top dressing, such as pebbles or moss, to conceal the soil and add visual interest.
-
Incorporate small decorative elements, like seashells or marbles, to create a unique focal point.
-
Use a trellis or obelisk to provide support for climbing plants or add structural interest.
- Add a few carefully placed decorative rocks or pebbles to create a visually appealing contrast with the concrete.
Frequently Asked Questions
Can I Use Concrete Planters for Herbs or Edible Plants?
When it comes to herb gardening, you're probably wondering if concrete planters are a good fit. The short answer is yes, but with caution.
Since concrete can be porous, it's essential to guarantee your planter has proper drainage to prevent waterlogged soil. You'll want to drill holes in the bottom and add a layer of gravel or broken pottery for ideal drainage.
With the right prep, your herbs will thrive in their new concrete home.
How Long Does It Take for the Primer Paint to Fully Dry?
As you wait for the primer paint to dry, imagine a calm lake on a windless day - its surface smooth, unrippled.
Now, focus on the task at hand.
The drying time for primer paint varies depending on the type you're using.
Acrylic-based primers typically take 30 minutes to an hour to dry, while epoxy-based ones can take up to 24 hours.
Always check the instructions for your specific paint type to verify you're giving it the right amount of time.
Are There Alternative Materials to Cinder Blocks for Upcycling?
You're wondering if cinder blocks are the only option for upcycling. Fortunately, there are alternative materials you can use.
Consider sustainable options like reclaimed wood, bamboo, or repurposed pallets for a more eco-friendly approach. These materials can add unique textures and visual interest to your upcycled project.
You can also explore alternative upcycling techniques, such as using ceramic tiles or stone to create a mosaic design.
Get creative and experiment with different materials to achieve the look you want!
Can I Add a Trellis or Obelisk to My Upcycled Planter?
As you envision your upcycled masterpiece, a trellis or obelisk can elevate it to new heights - literally!
You'll want to plan carefully for trellis installation, ensuring it's securely attached to your planter.
Consider an obelisk design that complements your planter's shape and style.
With a sturdy base and gentle curves, your obelisk will provide a beautiful support system for climbing plants.
How Often Should I Water Plants in Upcycled Concrete Planters?
When determining the ideal watering frequency for your plants, consider the moisture retention of your upcycled concrete planter.
Since concrete can absorb water, you'll want to water when the top 1-2 inches of soil feel dry to the touch.
Check daily, especially during hot or dry weather, and water every 2-3 days in temperate conditions.
Adjust based on your plant's specific needs and the planter's drainage.
Conclusion
You've transformed your drab concrete planters into stunning works of art, akin to a caterpillar emerging from a cocoon as a vibrant butterfly.
With these 5 steps, you've not only given new life to discarded materials but also created a unique conversation piece for your garden or indoor space.
Your upcycled planters now exude charm and character, ready to be filled with lush greens and vibrant blooms, adding a touch of elegance to any setting.
Related Posts
-
10 Natural Ways to Clean Your Planters
You can transform your planters from grimy to gleaming with these 10 natural cleaning solutions. Mix baking soda and ...
-
10 Natural Ways to Clean Your Planters
You can transform your planters from grimy to gleaming with these 10 natural cleaning solutions. Mix baking soda and ...
-
10 Natural Ways to Clean Your Planters
You can transform your planters from grimy to gleaming with these 10 natural cleaning solutions. Mix baking soda and ...
-
10 Natural Ways to Clean Your Planters
You can transform your planters from grimy to gleaming with these 10 natural cleaning solutions. Mix baking soda and ...
-
10 Natural Ways to Clean Your Planters
You can transform your planters from grimy to gleaming with these 10 natural cleaning solutions. Mix baking soda and ...
-
10 Natural Ways to Clean Your Planters
You can transform your planters from grimy to gleaming with these 10 natural cleaning solutions. Mix baking soda and ...
-
10 Natural Ways to Clean Your Planters
You can transform your planters from grimy to gleaming with these 10 natural cleaning solutions. Mix baking soda and ...
-
10 Natural Ways to Clean Your Planters
You can transform your planters from grimy to gleaming with these 10 natural cleaning solutions. Mix baking soda and ...
-
10 Natural Ways to Clean Your Planters
You can transform your planters from grimy to gleaming with these 10 natural cleaning solutions. Mix baking soda and ...
-
10 Natural Ways to Clean Your Planters
You can transform your planters from grimy to gleaming with these 10 natural cleaning solutions. Mix baking soda and ...
-
10 Natural Ways to Clean Your Planters
You can transform your planters from grimy to gleaming with these 10 natural cleaning solutions. Mix baking soda and ...
-
10 Natural Ways to Clean Your Planters
You can transform your planters from grimy to gleaming with these 10 natural cleaning solutions. Mix baking soda and ...
-
10 Natural Ways to Clean Your Planters
You can transform your planters from grimy to gleaming with these 10 natural cleaning solutions. Mix baking soda and ...
-
10 Natural Ways to Clean Your Planters
You can transform your planters from grimy to gleaming with these 10 natural cleaning solutions. Mix baking soda and ...
-
10 Natural Ways to Clean Your Planters
You can transform your planters from grimy to gleaming with these 10 natural cleaning solutions. Mix baking soda and ...
-
10 Natural Ways to Clean Your Planters
You can transform your planters from grimy to gleaming with these 10 natural cleaning solutions. Mix baking soda and ...
-
10 Natural Ways to Clean Your Planters
You can transform your planters from grimy to gleaming with these 10 natural cleaning solutions. Mix baking soda and ...
-
10 Natural Ways to Clean Your Planters
You can transform your planters from grimy to gleaming with these 10 natural cleaning solutions. Mix baking soda and ...
-
10 Natural Ways to Clean Your Planters
You can transform your planters from grimy to gleaming with these 10 natural cleaning solutions. Mix baking soda and ...
-
10 Natural Ways to Clean Your Planters
You can transform your planters from grimy to gleaming with these 10 natural cleaning solutions. Mix baking soda and ...
-
10 Natural Ways to Clean Your Planters
You can transform your planters from grimy to gleaming with these 10 natural cleaning solutions. Mix baking soda and ...
-
10 Natural Ways to Clean Your Planters
You can transform your planters from grimy to gleaming with these 10 natural cleaning solutions. Mix baking soda and ...
-
10 Natural Ways to Clean Your Planters
You can transform your planters from grimy to gleaming with these 10 natural cleaning solutions. Mix baking soda and ...
-
10 Natural Ways to Clean Your Planters
You can transform your planters from grimy to gleaming with these 10 natural cleaning solutions. Mix baking soda and ...
-
10 Natural Ways to Clean Your Planters
You can transform your planters from grimy to gleaming with these 10 natural cleaning solutions. Mix baking soda and ...
-
10 Natural Ways to Clean Your Planters
You can transform your planters from grimy to gleaming with these 10 natural cleaning solutions. Mix baking soda and ...
-
10 Natural Ways to Clean Your Planters
You can transform your planters from grimy to gleaming with these 10 natural cleaning solutions. Mix baking soda and ...
-
10 Natural Ways to Clean Your Planters
You can transform your planters from grimy to gleaming with these 10 natural cleaning solutions. Mix baking soda and ...
-
10 Natural Ways to Clean Your Planters
You can transform your planters from grimy to gleaming with these 10 natural cleaning solutions. Mix baking soda and ...
-
10 Natural Ways to Clean Your Planters
You can transform your planters from grimy to gleaming with these 10 natural cleaning solutions. Mix baking soda and ...
-
10 Natural Ways to Clean Your Planters
You can transform your planters from grimy to gleaming with these 10 natural cleaning solutions. Mix baking soda and ...
-
10 Natural Ways to Clean Your Planters
You can transform your planters from grimy to gleaming with these 10 natural cleaning solutions. Mix baking soda and ...
-
10 Natural Ways to Clean Your Planters
You can transform your planters from grimy to gleaming with these 10 natural cleaning solutions. Mix baking soda and ...
-
10 Natural Ways to Clean Your Planters
You can transform your planters from grimy to gleaming with these 10 natural cleaning solutions. Mix baking soda and ...
-
10 Natural Ways to Clean Your Planters
You can transform your planters from grimy to gleaming with these 10 natural cleaning solutions. Mix baking soda and ...
-
7 Creative Upcycled Planter Tutorials to Try Now
Get ready to transform your outdoor space with these 7 creative upcycled planter tutorials! Start by turning cinder b...
-
7 Creative Upcycled Planter Tutorials to Try Now
Get ready to transform your outdoor space with these 7 creative upcycled planter tutorials! Start by turning cinder b...
-
7 Creative Upcycled Planter Tutorials to Try Now
Get ready to transform your outdoor space with these 7 creative upcycled planter tutorials! Start by turning cinder b...
-
7 Creative Upcycled Planter Tutorials to Try Now
Get ready to transform your outdoor space with these 7 creative upcycled planter tutorials! Start by turning cinder b...
-
7 Creative Upcycled Planter Tutorials to Try Now
Get ready to transform your outdoor space with these 7 creative upcycled planter tutorials! Start by turning cinder b...
-
7 Creative Upcycled Planter Tutorials to Try Now
Get ready to transform your outdoor space with these 7 creative upcycled planter tutorials! Start by turning cinder b...
-
7 Creative Upcycled Planter Tutorials to Try Now
Get ready to transform your outdoor space with these 7 creative upcycled planter tutorials! Start by turning cinder b...
-
7 Creative Upcycled Planter Tutorials to Try Now
Get ready to transform your outdoor space with these 7 creative upcycled planter tutorials! Start by turning cinder b...
-
7 Creative Upcycled Planter Tutorials to Try Now
Get ready to transform your outdoor space with these 7 creative upcycled planter tutorials! Start by turning cinder b...
-
7 Creative Upcycled Planter Tutorials to Try Now
Get ready to transform your outdoor space with these 7 creative upcycled planter tutorials! Start by turning cinder b...
-
7 Creative Upcycled Planter Tutorials to Try Now
Get ready to transform your outdoor space with these 7 creative upcycled planter tutorials! Start by turning cinder b...
-
7 Creative Upcycled Planter Tutorials to Try Now
Get ready to transform your outdoor space with these 7 creative upcycled planter tutorials! Start by turning cinder b...
-
7 Creative Upcycled Planter Tutorials to Try Now
Get ready to transform your outdoor space with these 7 creative upcycled planter tutorials! Start by turning cinder b...
-
7 Creative Upcycled Planter Tutorials to Try Now
Get ready to transform your outdoor space with these 7 creative upcycled planter tutorials! Start by turning cinder b...
-
7 Creative Upcycled Planter Tutorials to Try Now
Get ready to transform your outdoor space with these 7 creative upcycled planter tutorials! Start by turning cinder b...
-
7 Creative Upcycled Planter Tutorials to Try Now
Get ready to transform your outdoor space with these 7 creative upcycled planter tutorials! Start by turning cinder b...
-
7 Creative Upcycled Planter Tutorials to Try Now
Get ready to transform your outdoor space with these 7 creative upcycled planter tutorials! Start by turning cinder b...
-
7 Creative Upcycled Planter Tutorials to Try Now
Get ready to transform your outdoor space with these 7 creative upcycled planter tutorials! Start by turning cinder b...
-
7 Creative Upcycled Planter Tutorials to Try Now
Get ready to transform your outdoor space with these 7 creative upcycled planter tutorials! Start by turning cinder b...
-
7 Creative Upcycled Planter Tutorials to Try Now
Get ready to transform your outdoor space with these 7 creative upcycled planter tutorials! Start by turning cinder b...
-
7 Creative Upcycled Planter Tutorials to Try Now
Get ready to transform your outdoor space with these 7 creative upcycled planter tutorials! Start by turning cinder b...
-
7 Creative Upcycled Planter Tutorials to Try Now
Get ready to transform your outdoor space with these 7 creative upcycled planter tutorials! Start by turning cinder b...
-
7 Creative Upcycled Planter Tutorials to Try Now
Get ready to transform your outdoor space with these 7 creative upcycled planter tutorials! Start by turning cinder b...
-
7 Creative Upcycled Planter Tutorials to Try Now
Get ready to transform your outdoor space with these 7 creative upcycled planter tutorials! Start by turning cinder b...
-
Selecting the Right Planter Dimensions for Your Space
When selecting the right planter dimensions for your space, you'll want to carefully consider the available area, mea...
-
Selecting the Right Planter Dimensions for Your Space
When selecting the right planter dimensions for your space, you'll want to carefully consider the available area, mea...
-
Selecting the Right Planter Dimensions for Your Space
When selecting the right planter dimensions for your space, you'll want to carefully consider the available area, mea...
-
Selecting the Right Planter Dimensions for Your Space
When selecting the right planter dimensions for your space, you'll want to carefully consider the available area, mea...
-
Selecting the Right Planter Dimensions for Your Space
When selecting the right planter dimensions for your space, you'll want to carefully consider the available area, mea...
-
Selecting the Right Planter Dimensions for Your Space
When selecting the right planter dimensions for your space, you'll want to carefully consider the available area, mea...
-
Selecting the Right Planter Dimensions for Your Space
When selecting the right planter dimensions for your space, you'll want to carefully consider the available area, mea...
-
Selecting the Right Planter Dimensions for Your Space
When selecting the right planter dimensions for your space, you'll want to carefully consider the available area, mea...
-
Selecting the Right Planter Dimensions for Your Space
When selecting the right planter dimensions for your space, you'll want to carefully consider the available area, mea...
-
Selecting the Right Planter Dimensions for Your Space
When selecting the right planter dimensions for your space, you'll want to carefully consider the available area, mea...
-
Selecting the Right Planter Dimensions for Your Space
When selecting the right planter dimensions for your space, you'll want to carefully consider the available area, mea...
-
Selecting the Right Planter Dimensions for Your Space
When selecting the right planter dimensions for your space, you'll want to carefully consider the available area, mea...
-
Selecting the Right Planter Dimensions for Your Space
When selecting the right planter dimensions for your space, you'll want to carefully consider the available area, mea...
-
Selecting the Right Planter Dimensions for Your Space
When selecting the right planter dimensions for your space, you'll want to carefully consider the available area, mea...
-
Selecting the Right Planter Dimensions for Your Space
When selecting the right planter dimensions for your space, you'll want to carefully consider the available area, mea...
-
Selecting the Right Planter Dimensions for Your Space
When selecting the right planter dimensions for your space, you'll want to carefully consider the available area, mea...
-
Selecting the Right Planter Dimensions for Your Space
When selecting the right planter dimensions for your space, you'll want to carefully consider the available area, mea...
-
Selecting the Right Planter Dimensions for Your Space
When selecting the right planter dimensions for your space, you'll want to carefully consider the available area, mea...
-
Selecting the Right Planter Dimensions for Your Space
When selecting the right planter dimensions for your space, you'll want to carefully consider the available area, mea...
-
Selecting the Right Planter Dimensions for Your Space
When selecting the right planter dimensions for your space, you'll want to carefully consider the available area, mea...
-
Selecting the Right Planter Dimensions for Your Space
When selecting the right planter dimensions for your space, you'll want to carefully consider the available area, mea...
-
Selecting the Right Planter Dimensions for Your Space
When selecting the right planter dimensions for your space, you'll want to carefully consider the available area, mea...
-
Selecting the Right Planter Dimensions for Your Space
When selecting the right planter dimensions for your space, you'll want to carefully consider the available area, mea...
-
Selecting the Right Planter Dimensions for Your Space
When selecting the right planter dimensions for your space, you'll want to carefully consider the available area, mea...
-
Selecting the Right Planter Dimensions for Your Space
When selecting the right planter dimensions for your space, you'll want to carefully consider the available area, mea...
-
Selecting the Right Planter Dimensions for Your Space
When selecting the right planter dimensions for your space, you'll want to carefully consider the available area, mea...
-
Selecting the Right Planter Dimensions for Your Space
When selecting the right planter dimensions for your space, you'll want to carefully consider the available area, mea...
-
Selecting the Right Planter Dimensions for Your Space
When selecting the right planter dimensions for your space, you'll want to carefully consider the available area, mea...
-
Selecting the Right Planter Dimensions for Your Space
When selecting the right planter dimensions for your space, you'll want to carefully consider the available area, mea...
-
Selecting the Right Planter Dimensions for Your Space
When selecting the right planter dimensions for your space, you'll want to carefully consider the available area, mea...
-
Selecting the Right Planter Dimensions for Your Space
When selecting the right planter dimensions for your space, you'll want to carefully consider the available area, mea...
-
Selecting the Right Planter Dimensions for Your Space
When selecting the right planter dimensions for your space, you'll want to carefully consider the available area, mea...
-
Selecting the Right Planter Dimensions for Your Space
When selecting the right planter dimensions for your space, you'll want to carefully consider the available area, mea...


