3 Easy Steps to Concrete Planters From Scratch
Share
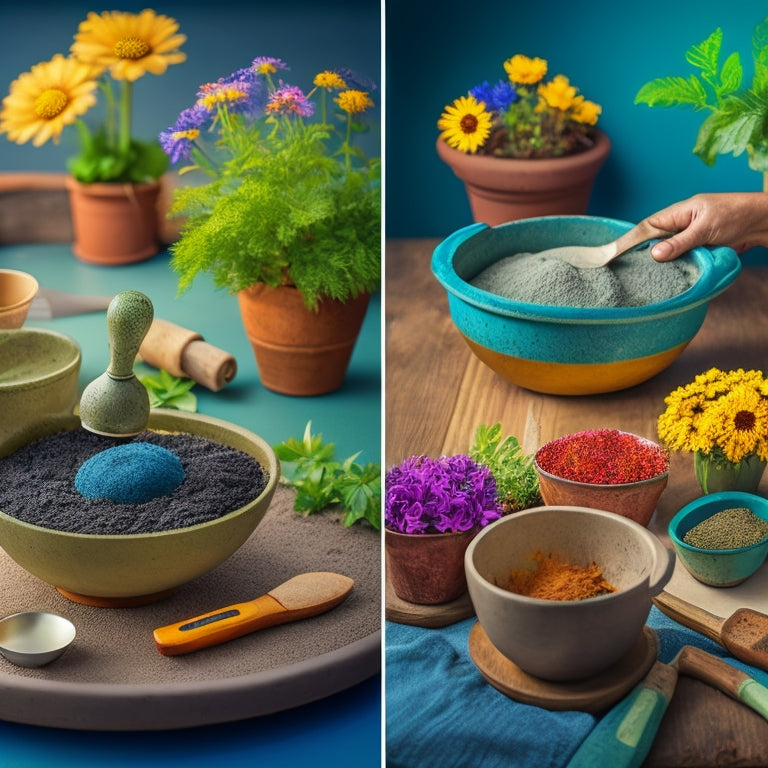
You'll start by preparing your cinder blocks, choosing the right type and layout to achieve your desired planter shape and dimensions, and considering factors like texture, color, weight capacity, and stability. Next, you'll mix and pour the concrete, combining cement, sand, and aggregate with water to achieve a workable consistency, and then allowing it to rest for 10 minutes. Finally, you'll add your personal touch with paint and decorative accents, exploring different designs and styles to make your planter truly unique - and as you get creative, you'll discover even more ways to make your planter truly one-of-a-kind.
Key Takeaways
• Gather and inspect cinder blocks for cracks or damage, choosing the right type for your desired aesthetic.
• Mix concrete with a 1:2:3 ratio of cement, sand, and aggregate, adding water for a workable consistency.
• Allow the mix to rest for 10 minutes for cement hydration and strength before pouring into the cinder block mold.
• Add a personal touch with paint, primer, and decorative accents like trim, tiles, or handles to create a unique planter.
• Be patient and creative during the process, as it leads to a one-of-a-kind concrete planter that reflects your style.
Prepare the Cinder Blocks
Gather 6-8 cinder blocks, depending on the size of your planter, and inspect them for any cracks or damage, setting aside any defective blocks.
You'll want to choose from the various cinder block types, such as solid, hollow, or split-face, depending on the aesthetic you're aiming for. For a more rustic look, consider using recycled or reclaimed blocks.
Once you've selected your blocks, lay them out on a flat surface to visualize your planter's shape. Experiment with different block placements to achieve the desired dimensions. You may want to create a simple rectangular shape or get creative with a curved or circular design.
Take note of the block's texture and color, as these will influence the overall appearance of your planter. Consider the weight capacity and stability of your blocks, especially if you're planning to add a heavy concrete layer or large plants.
With your blocks carefully selected and arranged, you're ready to move on to the next step in creating your concrete planter from scratch.
Mix and Pour the Concrete
With your cinder block foundation laid out, you're ready to mix and pour the concrete that will bind everything together, so grab your mixing tools and let's get started! To guarantee a strong and durable planter, it's crucial to follow the right mixing techniques. Start by combining 1 part cement with 2 parts sand and 3 parts aggregate (such as gravel or crushed stone) in a large mixing bucket. Gradually add water while mixing until you achieve a workable consistency.
| Concrete Mixing Tips | Why It Matters |
|---|---|
| Use a mixing stick or trowel | Prevents lumps and guarantees uniform mix |
| Mix in a well-ventilated area | Reduces risk of inhaling cement dust |
| Avoid overmixing | Prevents weakening of concrete structure |
| Let the mix rest for 10 minutes | Allows cement to hydrate and strengthen |
Once your mix is ready, pour it into the cinder block foundation, making sure to fill it to the top. Use a level to guarantee the surface is even and smooth out any excess concrete. Now, let the concrete set and cure for the recommended curing time, usually 24-48 hours, depending on the type of concrete you're using.
Add Finishing Touches
Now that your concrete has fully cured, you can start adding the finishing touches to transform your planter into a beautiful and functional piece of outdoor decor. This is where you get to express your creativity and add personality to your planter.
First, consider your paint options. You can choose a bold, bright color to make a statement or a more muted tone to blend with your outdoor surroundings. Apply a coat of primer if necessary, and then get creative with your paintbrush.
Next, think about adding decorative accents to give your planter some extra flair. You could add a decorative trim around the edges, embed small tiles or pebbles into the concrete, or even attach a small decorative handle to the side.
The possibilities are endless, and it's up to you to decide what look you're going for. Take your time, have fun, and don't be afraid to experiment.
With a little patience and creativity, you'll be left with a stunning planter that's uniquely yours.
Frequently Asked Questions
Can I Use Any Type of Cement for Making Planters?
When it comes to making planters, you're not limited to just any type of cement. You've got options!
You can choose from various types of cement, like Portland, masonry, or hydraulic cement. Or, if you're feeling adventurous, you can explore cement alternatives like lime-based or geopolymer cements.
Just remember to take into account factors like durability, strength, and moisture resistance to guarantee your planters thrive.
Research and choose the best fit for your project, and you'll be on your way to creating stunning planters that'll make a statement!
How Long Does It Take for Concrete to Fully Cure?
You're probably wondering how long you'll need to wait for your concrete to fully cure. The answer depends on the curing process and your ability to control moisture.
Ideally, you'll want to maintain a consistent level of moisture for 24-48 hours. After that, you can gradually reduce moisture over the next 28 days.
With proper moisture control, your concrete will reach its full strength, and you'll be left with a durable, long-lasting planter.
Are Concrete Planters Suitable for Indoor Use?
Are you wondering if concrete planters are suitable for indoor use? Absolutely!
You can bring the outdoors in by choosing the right indoor plant selection and pairing it with a planter that incorporates clever drainage solutions.
Look for planters with built-in saucers or add a layer of small rocks at the bottom to prevent waterlogged soil.
With a little planning, you'll be enjoying your lush greenery in the comfort of your own home in no time!
Can I Paint or Stain My Concrete Planters?
You're wondering if you can paint or stain your concrete planters? Absolutely! You'll love the creative freedom to customize their look.
Choose from a wide range of color choices to match your interior style. Select the right paint type, like acrylic or epoxy, to guarantee a durable finish.
Get creative with bold strokes, subtle textures, or ombre effects. With a little prep and patience, you'll transform your planters into one-of-a-kind masterpieces that reflect your unique taste.
How Do I Prevent Water From Seeping Out of the Planter?
To keep water from seeping out of your planter, you'll need to focus on drainage solutions and waterproofing techniques.
Start by applying a waterproofing coating to the inside of the planter, making sure to cover every inch.
Next, add a drainage hole at the bottom to allow excess water to escape.
You can also line the planter with a waterproof membrane or add a layer of small rocks for extra protection.
With these steps, you'll be able to keep your plants happy and your planter dry.
Conclusion
You've just created concrete planters from scratch that are so stunning, they'll stop traffic!
Your friends will beg you to make them one, and your neighbors will be green with envy (pun intended).
Your cinder block foundation is solid, your concrete is smooth, and your finishing touches are on point.
You've single-handedly elevated your outdoor space to a work of art that'll be the talk of the town for years to come.
Bravo, DIY rockstar!
Related Posts
-

3 Best DIY Planter Ideas for Backyard Decor
You can elevate your backyard's style and functionality by choosing the right DIY planter ideas. Start with a mix of ...
-

3 Best DIY Planter Ideas for Backyard Decor
You can elevate your backyard's style and functionality by choosing the right DIY planter ideas. Start with a mix of ...
-

3 Best DIY Planter Ideas for Backyard Decor
You can elevate your backyard's style and functionality by choosing the right DIY planter ideas. Start with a mix of ...
-

3 Best DIY Planter Ideas for Backyard Decor
You can elevate your backyard's style and functionality by choosing the right DIY planter ideas. Start with a mix of ...
-

3 Best DIY Planter Ideas for Backyard Decor
You can elevate your backyard's style and functionality by choosing the right DIY planter ideas. Start with a mix of ...
-

3 Best DIY Planter Ideas for Backyard Decor
You can elevate your backyard's style and functionality by choosing the right DIY planter ideas. Start with a mix of ...
-

3 Best DIY Planter Ideas for Backyard Decor
You can elevate your backyard's style and functionality by choosing the right DIY planter ideas. Start with a mix of ...
-

3 Best DIY Planter Ideas for Backyard Decor
You can elevate your backyard's style and functionality by choosing the right DIY planter ideas. Start with a mix of ...
-

3 Best DIY Planter Ideas for Backyard Decor
You can elevate your backyard's style and functionality by choosing the right DIY planter ideas. Start with a mix of ...
-

3 Best DIY Planter Ideas for Backyard Decor
You can elevate your backyard's style and functionality by choosing the right DIY planter ideas. Start with a mix of ...
-

3 Best DIY Planter Ideas for Backyard Decor
You can elevate your backyard's style and functionality by choosing the right DIY planter ideas. Start with a mix of ...
-

3 Best DIY Planter Ideas for Backyard Decor
You can elevate your backyard's style and functionality by choosing the right DIY planter ideas. Start with a mix of ...
-

3 Best DIY Planter Ideas for Backyard Decor
You can elevate your backyard's style and functionality by choosing the right DIY planter ideas. Start with a mix of ...
-

3 Best DIY Planter Ideas for Backyard Decor
You can elevate your backyard's style and functionality by choosing the right DIY planter ideas. Start with a mix of ...
-

10 Tips for Training Vines in a Vertical Garden
When training vines in a vertical garden, you'll want to choose the right species for your climate, prepare your wall...
-

10 Tips for Training Vines in a Vertical Garden
When training vines in a vertical garden, you'll want to choose the right species for your climate, prepare your wall...
-

10 Tips for Training Vines in a Vertical Garden
When training vines in a vertical garden, you'll want to choose the right species for your climate, prepare your wall...
-

10 Tips for Training Vines in a Vertical Garden
When training vines in a vertical garden, you'll want to choose the right species for your climate, prepare your wall...
-

10 Tips for Training Vines in a Vertical Garden
When training vines in a vertical garden, you'll want to choose the right species for your climate, prepare your wall...
-

10 Tips for Training Vines in a Vertical Garden
When training vines in a vertical garden, you'll want to choose the right species for your climate, prepare your wall...
-

10 Tips for Training Vines in a Vertical Garden
When training vines in a vertical garden, you'll want to choose the right species for your climate, prepare your wall...
-

10 Tips for Training Vines in a Vertical Garden
When training vines in a vertical garden, you'll want to choose the right species for your climate, prepare your wall...
-

10 Tips for Training Vines in a Vertical Garden
When training vines in a vertical garden, you'll want to choose the right species for your climate, prepare your wall...
-

10 Tips for Training Vines in a Vertical Garden
When training vines in a vertical garden, you'll want to choose the right species for your climate, prepare your wall...
-

10 Tips for Training Vines in a Vertical Garden
When training vines in a vertical garden, you'll want to choose the right species for your climate, prepare your wall...
-

10 Tips for Training Vines in a Vertical Garden
When training vines in a vertical garden, you'll want to choose the right species for your climate, prepare your wall...
-

10 Tips for Training Vines in a Vertical Garden
When training vines in a vertical garden, you'll want to choose the right species for your climate, prepare your wall...
-

10 Tips for Training Vines in a Vertical Garden
When training vines in a vertical garden, you'll want to choose the right species for your climate, prepare your wall...
-

10 Tips for Training Vines in a Vertical Garden
When training vines in a vertical garden, you'll want to choose the right species for your climate, prepare your wall...
-

10 Tips for Training Vines in a Vertical Garden
When training vines in a vertical garden, you'll want to choose the right species for your climate, prepare your wall...
-

10 Tips for Training Vines in a Vertical Garden
When training vines in a vertical garden, you'll want to choose the right species for your climate, prepare your wall...
-

10 Tips for Training Vines in a Vertical Garden
When training vines in a vertical garden, you'll want to choose the right species for your climate, prepare your wall...
-

10 Tips for Training Vines in a Vertical Garden
When training vines in a vertical garden, you'll want to choose the right species for your climate, prepare your wall...
-

10 Tips for Training Vines in a Vertical Garden
When training vines in a vertical garden, you'll want to choose the right species for your climate, prepare your wall...
-

10 Tips for Training Vines in a Vertical Garden
When training vines in a vertical garden, you'll want to choose the right species for your climate, prepare your wall...
-

10 Tips for Training Vines in a Vertical Garden
When training vines in a vertical garden, you'll want to choose the right species for your climate, prepare your wall...
-

10 Tips for Training Vines in a Vertical Garden
When training vines in a vertical garden, you'll want to choose the right species for your climate, prepare your wall...
-

10 Tips for Training Vines in a Vertical Garden
When training vines in a vertical garden, you'll want to choose the right species for your climate, prepare your wall...
-

10 Tips for Training Vines in a Vertical Garden
When training vines in a vertical garden, you'll want to choose the right species for your climate, prepare your wall...
-

10 Tips for Training Vines in a Vertical Garden
When training vines in a vertical garden, you'll want to choose the right species for your climate, prepare your wall...
-

10 Tips for Training Vines in a Vertical Garden
When training vines in a vertical garden, you'll want to choose the right species for your climate, prepare your wall...
-

10 Tips for Training Vines in a Vertical Garden
When training vines in a vertical garden, you'll want to choose the right species for your climate, prepare your wall...
-

10 Tips for Training Vines in a Vertical Garden
When training vines in a vertical garden, you'll want to choose the right species for your climate, prepare your wall...
-

10 Tips for Training Vines in a Vertical Garden
When training vines in a vertical garden, you'll want to choose the right species for your climate, prepare your wall...
-

10 Tips for Training Vines in a Vertical Garden
When training vines in a vertical garden, you'll want to choose the right species for your climate, prepare your wall...
-

10 Tips for Training Vines in a Vertical Garden
When training vines in a vertical garden, you'll want to choose the right species for your climate, prepare your wall...
-

What Materials Do You Need for a DIY Planter
You'll need a combination of structural components, soil and compost, drainage materials, and decorative elements to ...
-

What Materials Do You Need for a DIY Planter
You'll need a combination of structural components, soil and compost, drainage materials, and decorative elements to ...
-

What Materials Do You Need for a DIY Planter
You'll need a combination of structural components, soil and compost, drainage materials, and decorative elements to ...
-

What Materials Do You Need for a DIY Planter
You'll need a combination of structural components, soil and compost, drainage materials, and decorative elements to ...
-

What Materials Do You Need for a DIY Planter
You'll need a combination of structural components, soil and compost, drainage materials, and decorative elements to ...
-

What Materials Do You Need for a DIY Planter
You'll need a combination of structural components, soil and compost, drainage materials, and decorative elements to ...
-

What Materials Do You Need for a DIY Planter
You'll need a combination of structural components, soil and compost, drainage materials, and decorative elements to ...
-

What Materials Do You Need for a DIY Planter
You'll need a combination of structural components, soil and compost, drainage materials, and decorative elements to ...
-

What Materials Do You Need for a DIY Planter
You'll need a combination of structural components, soil and compost, drainage materials, and decorative elements to ...
-

What Materials Do You Need for a DIY Planter
You'll need a combination of structural components, soil and compost, drainage materials, and decorative elements to ...
-

What Materials Do You Need for a DIY Planter
You'll need a combination of structural components, soil and compost, drainage materials, and decorative elements to ...
-

What Materials Do You Need for a DIY Planter
You'll need a combination of structural components, soil and compost, drainage materials, and decorative elements to ...
-

What Materials Do You Need for a DIY Planter
You'll need a combination of structural components, soil and compost, drainage materials, and decorative elements to ...
-

What Materials Do You Need for a DIY Planter
You'll need a combination of structural components, soil and compost, drainage materials, and decorative elements to ...
-

What Materials Do You Need for a DIY Planter
You'll need a combination of structural components, soil and compost, drainage materials, and decorative elements to ...
-

What Materials Do You Need for a DIY Planter
You'll need a combination of structural components, soil and compost, drainage materials, and decorative elements to ...
-

What Materials Do You Need for a DIY Planter
You'll need a combination of structural components, soil and compost, drainage materials, and decorative elements to ...
-

What Materials Do You Need for a DIY Planter
You'll need a combination of structural components, soil and compost, drainage materials, and decorative elements to ...
-

What Materials Do You Need for a DIY Planter
You'll need a combination of structural components, soil and compost, drainage materials, and decorative elements to ...
-

What Materials Do You Need for a DIY Planter
You'll need a combination of structural components, soil and compost, drainage materials, and decorative elements to ...
-

What Materials Do You Need for a DIY Planter
You'll need a combination of structural components, soil and compost, drainage materials, and decorative elements to ...
-

What Materials Do You Need for a DIY Planter
You'll need a combination of structural components, soil and compost, drainage materials, and decorative elements to ...
-

What Materials Do You Need for a DIY Planter
You'll need a combination of structural components, soil and compost, drainage materials, and decorative elements to ...
-

What Materials Do You Need for a DIY Planter
You'll need a combination of structural components, soil and compost, drainage materials, and decorative elements to ...
-

What Materials Do You Need for a DIY Planter
You'll need a combination of structural components, soil and compost, drainage materials, and decorative elements to ...
-

What Materials Do You Need for a DIY Planter
You'll need a combination of structural components, soil and compost, drainage materials, and decorative elements to ...
-

What Materials Do You Need for a DIY Planter
You'll need a combination of structural components, soil and compost, drainage materials, and decorative elements to ...
-

What Materials Do You Need for a DIY Planter
You'll need a combination of structural components, soil and compost, drainage materials, and decorative elements to ...
-

What Materials Do You Need for a DIY Planter
You'll need a combination of structural components, soil and compost, drainage materials, and decorative elements to ...
-

What Materials Do You Need for a DIY Planter
You'll need a combination of structural components, soil and compost, drainage materials, and decorative elements to ...


