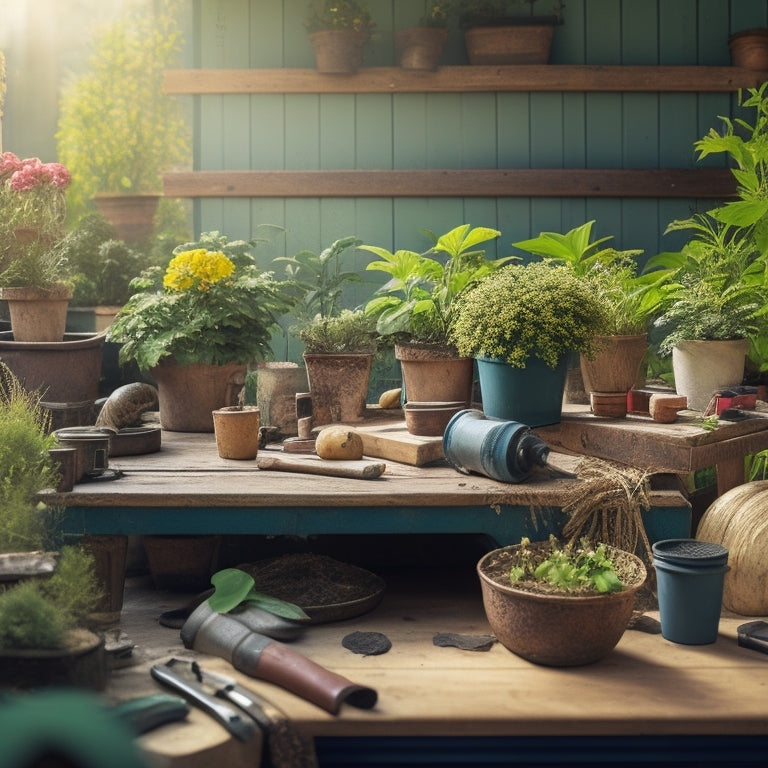
3 Best Tools for a DIY Block Planter Project
You'll need three essential tools to get started on your DIY block planter project: a reliable measuring tool to guarantee accurate block dimensions, a dust mask to protect yourself from harmful particles, and a masonry drill bit to create holes for drainage and assembly. With these tools, you'll be able to tackle the foundation of your project, from measuring and preparing your blocks to creating a safe and secure structure. As you progress, you'll discover the importance of other critical elements that will bring your planter to life - and a beautiful, thriving creation will start to take shape.
Key Takeaways
• Invest in a tape measure to ensure accurate block dimensions and space measurements.
• Wear safety glasses or goggles to protect your eyes from debris and dust.
• Use masonry drill bits to create holes in blocks for drainage or assembly.
• Don't forget gloves for hand safety and grip when handling blocks and tools.
• A dust mask is essential for preventing inhalation of harmful particles during drilling or sawing.
Essential Tools for the Job
You'll need a solid set of essential tools to tackle your DIY block planter project, including a tape measure, level, and masonry drill bits.
These measuring tools will help you guarantee accuracy and precision in your project. A tape measure will come in handy when measuring the blocks, the space where you'll be placing the planter, and the materials you'll be using. A level will ensure that your planter is even and straight, preventing it from leaning or toppling over.
In addition to measuring tools, you'll also need safety equipment to protect yourself from potential hazards. Safety glasses or goggles will shield your eyes from debris and dust, while gloves will provide grip and protection for your hands. A dust mask will prevent you from inhaling harmful particles when drilling or sawing.
Don't forget a first-aid kit, just in case. Having these essential tools and safety equipment will give you the confidence and control you need to successfully complete your DIY block planter project.
Concrete Mixing and Laying
With your blocks and safety gear at the ready, it's time to mix and lay the concrete that will bring your planter to life.
For a strong and durable foundation, you'll need to master the art of concrete mixing. Start by following the instructions on your cement bag to get the right ratio of cement to water. Use a mixing bucket and a shovel or trowel to combine the ingredients, working in small batches to avoid lumps. As you mix, focus on achieving a smooth, consistent texture.
Once you've reached the perfect consistency, it's time to lay the concrete. Use a level to verify your planter base is even, then pour the concrete into the blocks, filling them about 2/3 full. Use a tamping tool or a screed to compact the concrete and remove any air pockets.
Finally, let the concrete set and cure according to the manufacturer's instructions, using curing methods like misting or covering with plastic sheeting to prevent cracking.
With the concrete in place, you're one step closer to completing your DIY block planter project.
Finishing Touches and Assembly
Now that the concrete has set, it's time to add the final flourishes to your planter, starting with a thorough cleaning of the blocks to remove any excess concrete or debris.
Use a stiff-bristled brush or a wire scrubber to remove stubborn bits, and then hose down the blocks to rinse away any remaining dust or dirt.
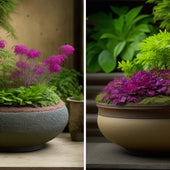
Next, consider your plant selection. Choose plants that thrive in containers and complement the style of your planter.
You may want to opt for a single statement piece or a mix of textures and colors to add visual interest.
Make sure to leave enough space between plants for proper growth and air circulation.
Frequently Asked Questions
Can I Use Regular Cement Instead of Concrete Mix?
You're wondering if regular cement will cut it for your project instead of concrete mix. Here's the deal: cement isn't a suitable substitute.
While both are binding agents, cement lacks the aggregate (sand, gravel, or crushed stone) that concrete mix provides. This omission affects the final product's strength and durability.
To achieve a sturdy planter, stick with concrete mix and master the right mixing techniques.
If you're looking for cement alternatives, consider masonry cement or epoxy-based mixtures for specific applications.
How Do I Ensure Drainage in My Block Planters?
'When in doubt, pour it out!' Don't let waterlogged soil ruin your masterpiece.
To guarantee drainage in your block planters, you'll want to implement smart drainage solutions. Start by adding a layer of coarse gravel or broken pottery at the bottom of each planter. This allows excess water to escape while maintaining moisture retention.
Next, drill holes in the bottom of each block to prevent water from accumulating. Finally, use a well-draining potting mix to complete the setup.
With these steps, you'll be well on your way to a thriving, water-managed garden.
Can I Paint or Stain the Blocks for Added Color?
You're wondering if you can add some personality to your block planters with a fresh coat of paint or stain. Absolutely! You can release your creativity with various color choices to match your outdoor decor.
Consider using a waterproof sealant to protect the blocks from the elements. When it comes to painting techniques, try using a semi-gloss or high-gloss finish to make the colors pop.
Just remember to follow the manufacturer's instructions for preparation and application to guarantee a durable, long-lasting finish.
What Types of Plants Are Best Suited for Block Planters?
'Oh, you thought you were done with the hard part, didn't you? Think again!
Now it's time to fill those block planters with the perfect plants. You'll want to choose sun-loving plants that can handle the heat, like vibrant succulents or bold zinnias.
Opt for drought-tolerant varieties like sedum or yarrow to guarantee your plants thrive with minimal maintenance.
Imagine the Instagram-worthy display you'll create with these stunning, low-fuss plants!'
Are Block Planters Suitable for Indoor or Outdoor Use Only?
You're wondering if block planters are limited to indoor gardening or outdoor aesthetics.
The good news is, they can thrive in both settings!
For indoor use, choose plants that tolerate low light and moisture levels.
Outdoor block planters can add a decorative touch to your patio or garden, with plants that require more sunlight and drainage.
You can even move them between indoor and outdoor spaces as the seasons change, giving you ultimate control over their environment.
Conclusion
As you step back to admire your handiwork, the DIY block planter takes shape, a sturdy oasis amidst the urban jungle.
The concrete's cool gray tone provides a sleek backdrop for the lush greens to come, while the carefully laid blocks form a sturdy foundation.
Your creation stands ready to bloom, a demonstration of your creativity and perseverance.
Related Posts
-
7 Best Concrete Planter Ideas for Indoor Gardens
You're looking for a stylish and low-maintenance way to bring some greenery into your home, and concrete planters off...
-
7 Best Concrete Planter Ideas for Indoor Gardens
You're looking for a stylish and low-maintenance way to bring some greenery into your home, and concrete planters off...
-
7 Best Concrete Planter Ideas for Indoor Gardens
You're looking for a stylish and low-maintenance way to bring some greenery into your home, and concrete planters off...
-
7 Best Concrete Planter Ideas for Indoor Gardens
You're looking for a stylish and low-maintenance way to bring some greenery into your home, and concrete planters off...
-
7 Best Concrete Planter Ideas for Indoor Gardens
You're looking for a stylish and low-maintenance way to bring some greenery into your home, and concrete planters off...
-
7 Best Concrete Planter Ideas for Indoor Gardens
You're looking for a stylish and low-maintenance way to bring some greenery into your home, and concrete planters off...
-
7 Best Concrete Planter Ideas for Indoor Gardens
You're looking for a stylish and low-maintenance way to bring some greenery into your home, and concrete planters off...
-
7 Best Concrete Planter Ideas for Indoor Gardens
You're looking for a stylish and low-maintenance way to bring some greenery into your home, and concrete planters off...
-
7 Best Concrete Planter Ideas for Indoor Gardens
You're looking for a stylish and low-maintenance way to bring some greenery into your home, and concrete planters off...
-
7 Best Concrete Planter Ideas for Indoor Gardens
You're looking for a stylish and low-maintenance way to bring some greenery into your home, and concrete planters off...
-
7 Best Concrete Planter Ideas for Indoor Gardens
You're looking for a stylish and low-maintenance way to bring some greenery into your home, and concrete planters off...
-
7 Best Concrete Planter Ideas for Indoor Gardens
You're looking for a stylish and low-maintenance way to bring some greenery into your home, and concrete planters off...
-
7 Best Concrete Planter Ideas for Indoor Gardens
You're looking for a stylish and low-maintenance way to bring some greenery into your home, and concrete planters off...
-
7 Best Concrete Planter Ideas for Indoor Gardens
You're looking for a stylish and low-maintenance way to bring some greenery into your home, and concrete planters off...
-
7 Best Concrete Planter Ideas for Indoor Gardens
You're looking for a stylish and low-maintenance way to bring some greenery into your home, and concrete planters off...
-
7 Best Concrete Planter Ideas for Indoor Gardens
You're looking for a stylish and low-maintenance way to bring some greenery into your home, and concrete planters off...
-
7 Best Concrete Planter Ideas for Indoor Gardens
You're looking for a stylish and low-maintenance way to bring some greenery into your home, and concrete planters off...
-
7 Best Concrete Planter Ideas for Indoor Gardens
You're looking for a stylish and low-maintenance way to bring some greenery into your home, and concrete planters off...
-
7 Best Concrete Planter Ideas for Indoor Gardens
You're looking for a stylish and low-maintenance way to bring some greenery into your home, and concrete planters off...
-
7 Best Concrete Planter Ideas for Indoor Gardens
You're looking for a stylish and low-maintenance way to bring some greenery into your home, and concrete planters off...
-
7 Best Concrete Planter Ideas for Indoor Gardens
You're looking for a stylish and low-maintenance way to bring some greenery into your home, and concrete planters off...
-
7 Best Concrete Planter Ideas for Indoor Gardens
You're looking for a stylish and low-maintenance way to bring some greenery into your home, and concrete planters off...
-
7 Best Concrete Planter Ideas for Indoor Gardens
You're looking for a stylish and low-maintenance way to bring some greenery into your home, and concrete planters off...
-
What to Seal Your Planters With for Longevity
When sealing your planters for longevity, it's vital to choose a sealant compatible with your planter material - whet...
-
What to Seal Your Planters With for Longevity
When sealing your planters for longevity, it's vital to choose a sealant compatible with your planter material - whet...
-
What to Seal Your Planters With for Longevity
When sealing your planters for longevity, it's vital to choose a sealant compatible with your planter material - whet...
-
What to Seal Your Planters With for Longevity
When sealing your planters for longevity, it's vital to choose a sealant compatible with your planter material - whet...
-
What to Seal Your Planters With for Longevity
When sealing your planters for longevity, it's vital to choose a sealant compatible with your planter material - whet...
-
What to Seal Your Planters With for Longevity
When sealing your planters for longevity, it's vital to choose a sealant compatible with your planter material - whet...
-
What to Seal Your Planters With for Longevity
When sealing your planters for longevity, it's vital to choose a sealant compatible with your planter material - whet...
-
What to Seal Your Planters With for Longevity
When sealing your planters for longevity, it's vital to choose a sealant compatible with your planter material - whet...
-
What to Seal Your Planters With for Longevity
When sealing your planters for longevity, it's vital to choose a sealant compatible with your planter material - whet...
-
What to Seal Your Planters With for Longevity
When sealing your planters for longevity, it's vital to choose a sealant compatible with your planter material - whet...
-
What to Seal Your Planters With for Longevity
When sealing your planters for longevity, it's vital to choose a sealant compatible with your planter material - whet...
-
What to Seal Your Planters With for Longevity
When sealing your planters for longevity, it's vital to choose a sealant compatible with your planter material - whet...
-
What to Seal Your Planters With for Longevity
When sealing your planters for longevity, it's vital to choose a sealant compatible with your planter material - whet...
-
What to Seal Your Planters With for Longevity
When sealing your planters for longevity, it's vital to choose a sealant compatible with your planter material - whet...
-
What to Seal Your Planters With for Longevity
When sealing your planters for longevity, it's vital to choose a sealant compatible with your planter material - whet...
-
What to Seal Your Planters With for Longevity
When sealing your planters for longevity, it's vital to choose a sealant compatible with your planter material - whet...
-
What to Seal Your Planters With for Longevity
When sealing your planters for longevity, it's vital to choose a sealant compatible with your planter material - whet...
-
What to Seal Your Planters With for Longevity
When sealing your planters for longevity, it's vital to choose a sealant compatible with your planter material - whet...
-
What to Seal Your Planters With for Longevity
When sealing your planters for longevity, it's vital to choose a sealant compatible with your planter material - whet...
-
What to Seal Your Planters With for Longevity
When sealing your planters for longevity, it's vital to choose a sealant compatible with your planter material - whet...
-
What to Seal Your Planters With for Longevity
When sealing your planters for longevity, it's vital to choose a sealant compatible with your planter material - whet...
-
What to Seal Your Planters With for Longevity
When sealing your planters for longevity, it's vital to choose a sealant compatible with your planter material - whet...
-
What to Seal Your Planters With for Longevity
When sealing your planters for longevity, it's vital to choose a sealant compatible with your planter material - whet...
-
What to Seal Your Planters With for Longevity
When sealing your planters for longevity, it's vital to choose a sealant compatible with your planter material - whet...
-
What to Seal Your Planters With for Longevity
When sealing your planters for longevity, it's vital to choose a sealant compatible with your planter material - whet...
-
What to Seal Your Planters With for Longevity
When sealing your planters for longevity, it's vital to choose a sealant compatible with your planter material - whet...
-
What to Seal Your Planters With for Longevity
When sealing your planters for longevity, it's vital to choose a sealant compatible with your planter material - whet...
-
What to Seal Your Planters With for Longevity
When sealing your planters for longevity, it's vital to choose a sealant compatible with your planter material - whet...
-
What to Seal Your Planters With for Longevity
When sealing your planters for longevity, it's vital to choose a sealant compatible with your planter material - whet...
-
What to Seal Your Planters With for Longevity
When sealing your planters for longevity, it's vital to choose a sealant compatible with your planter material - whet...
-
What to Seal Your Planters With for Longevity
When sealing your planters for longevity, it's vital to choose a sealant compatible with your planter material - whet...
-
What to Seal Your Planters With for Longevity
When sealing your planters for longevity, it's vital to choose a sealant compatible with your planter material - whet...
-

10 Essential Tips to Prevent Disease in Vertical Gardens
You're about to discover the essential strategies to protect your vertical garden from disease, ensuring a thriving a...
-
10 Essential Tips to Prevent Disease in Vertical Gardens
You're about to discover the essential strategies to protect your vertical garden from disease, ensuring a thriving a...
-
10 Essential Tips to Prevent Disease in Vertical Gardens
You're about to discover the essential strategies to protect your vertical garden from disease, ensuring a thriving a...
-
10 Essential Tips to Prevent Disease in Vertical Gardens
You're about to discover the essential strategies to protect your vertical garden from disease, ensuring a thriving a...
-
10 Essential Tips to Prevent Disease in Vertical Gardens
You're about to discover the essential strategies to protect your vertical garden from disease, ensuring a thriving a...
-
10 Essential Tips to Prevent Disease in Vertical Gardens
You're about to discover the essential strategies to protect your vertical garden from disease, ensuring a thriving a...
-
10 Essential Tips to Prevent Disease in Vertical Gardens
You're about to discover the essential strategies to protect your vertical garden from disease, ensuring a thriving a...
-
10 Essential Tips to Prevent Disease in Vertical Gardens
You're about to discover the essential strategies to protect your vertical garden from disease, ensuring a thriving a...
-
10 Essential Tips to Prevent Disease in Vertical Gardens
You're about to discover the essential strategies to protect your vertical garden from disease, ensuring a thriving a...
-
10 Essential Tips to Prevent Disease in Vertical Gardens
You're about to discover the essential strategies to protect your vertical garden from disease, ensuring a thriving a...
-
10 Essential Tips to Prevent Disease in Vertical Gardens
You're about to discover the essential strategies to protect your vertical garden from disease, ensuring a thriving a...
-
10 Essential Tips to Prevent Disease in Vertical Gardens
You're about to discover the essential strategies to protect your vertical garden from disease, ensuring a thriving a...
-
10 Essential Tips to Prevent Disease in Vertical Gardens
You're about to discover the essential strategies to protect your vertical garden from disease, ensuring a thriving a...
-
10 Essential Tips to Prevent Disease in Vertical Gardens
You're about to discover the essential strategies to protect your vertical garden from disease, ensuring a thriving a...
-
10 Essential Tips to Prevent Disease in Vertical Gardens
You're about to discover the essential strategies to protect your vertical garden from disease, ensuring a thriving a...
-
10 Essential Tips to Prevent Disease in Vertical Gardens
You're about to discover the essential strategies to protect your vertical garden from disease, ensuring a thriving a...
-
10 Essential Tips to Prevent Disease in Vertical Gardens
You're about to discover the essential strategies to protect your vertical garden from disease, ensuring a thriving a...
-
10 Essential Tips to Prevent Disease in Vertical Gardens
You're about to discover the essential strategies to protect your vertical garden from disease, ensuring a thriving a...
-
10 Essential Tips to Prevent Disease in Vertical Gardens
You're about to discover the essential strategies to protect your vertical garden from disease, ensuring a thriving a...
-
10 Essential Tips to Prevent Disease in Vertical Gardens
You're about to discover the essential strategies to protect your vertical garden from disease, ensuring a thriving a...
-
10 Essential Tips to Prevent Disease in Vertical Gardens
You're about to discover the essential strategies to protect your vertical garden from disease, ensuring a thriving a...
-
10 Essential Tips to Prevent Disease in Vertical Gardens
You're about to discover the essential strategies to protect your vertical garden from disease, ensuring a thriving a...
-
10 Essential Tips to Prevent Disease in Vertical Gardens
You're about to discover the essential strategies to protect your vertical garden from disease, ensuring a thriving a...
-
10 Essential Tips to Prevent Disease in Vertical Gardens
You're about to discover the essential strategies to protect your vertical garden from disease, ensuring a thriving a...
-
10 Essential Tips to Prevent Disease in Vertical Gardens
You're about to discover the essential strategies to protect your vertical garden from disease, ensuring a thriving a...
-
10 Essential Tips to Prevent Disease in Vertical Gardens
You're about to discover the essential strategies to protect your vertical garden from disease, ensuring a thriving a...
-
10 Essential Tips to Prevent Disease in Vertical Gardens
You're about to discover the essential strategies to protect your vertical garden from disease, ensuring a thriving a...
-
10 Essential Tips to Prevent Disease in Vertical Gardens
You're about to discover the essential strategies to protect your vertical garden from disease, ensuring a thriving a...
-
10 Essential Tips to Prevent Disease in Vertical Gardens
You're about to discover the essential strategies to protect your vertical garden from disease, ensuring a thriving a...


