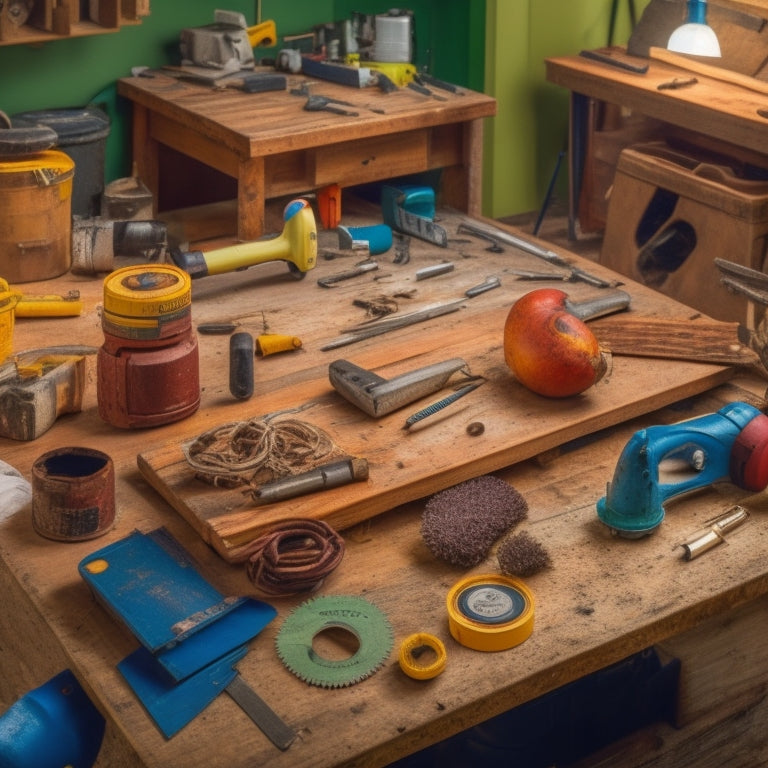
10 Must-Have Tools for Fast Planter Construction
When building planters, you'll need the right tools to get the job done efficiently and effectively. First, invest in a reliable tamping tool for proper soil compaction, a high-torque drill for setting anchors, and a precise level for accurate alignment. Don't forget heavy-duty gloves for protection, a measuring tape for accurate cuts, and a wheelbarrow for transporting materials. A block lifter will make handling heavy blocks a breeze, while a weather-resistant mortar mixer will guarantee a strong bond. Finally, a spirit level will assure perfect plumb. With these must-have tools, you'll be well on your way to constructing planters like a pro, and mastering the techniques that will take your skills to the next level.
Key Takeaways
• A reliable tamping tool and high-torque drill are essential for proper soil compaction and anchor setting in planter construction.
• Accurate torque control and anchoring techniques ensure secure and efficient anchor setting in varying soil conditions.
• Precise alignment and measurement tools, such as levels and angle finders, guarantee structural integrity and prevent errors.
• Safety and protection gear, including heavy-duty gloves and safety goggles, safeguard against injuries during construction.
• Weather-resistant equipment and tools, like mortar mixers and wheelbarrows, enhance longevity and facilitate fast planter construction.
Essential Tamping Tool for Compaction
When building a planter, you'll need a reliable tamping tool to secure proper compaction of the soil or aggregate base, as uneven settlement can lead to structural issues down the line.
A good tamping tool guarantees that the base material is evenly compacted, providing a solid foundation for your planter. This is vital, as poor compaction can lead to settling or shifting of the planter over time, compromising its integrity.
To achieve ideal compaction, it's important to master various tamping techniques. Start by dividing the base material into smaller sections, and then use your tamping tool to apply even pressure, working from one end to the other.
Use a gentle, consistent motion to avoid creating air pockets or voids. It's also significant to choose the right compaction method for your specific project. For example, hand tamping is suitable for smaller planters, while mechanical compactors are better suited for larger projects.
High-Torque Drill for Anchor Setting
When it comes to anchor setting, you need a high-torque drill that can handle the demands of the job.
To get the best results, you'll want to focus on selecting the right drill bit, mastering anchoring techniques, and controlling torque levels.
Drill Bit Selection
You'll need a high-torque drill bit that can handle the demands of anchor setting, which typically requires a robust bit capable of drilling through dense materials like concrete or thick metal.
When selecting a drill bit, consider the type and material that'll work best for your project. There are two primary drill bit types: twist bits and masonry bits. Twist bits are ideal for drilling through wood and metal, while masonry bits are designed for concrete, brick, and block.
Drill bit materials also play a vital role. Carbide-tipped bits are durable and can withstand the rigors of anchor setting, especially when working with hard materials. Cobalt steel bits, on the other hand, offer high heat resistance and are suitable for drilling through thick metal.
Additionally, consider the drill bit's shank size, which should match your drill's chuck size to guarantee a secure fit. By choosing the right drill bit type and material, you'll be able to efficiently and effectively drill anchors, saving you time and effort in your planter construction project.
Anchoring Technique Matters
To achieve a secure anchor setting, master the proper anchoring technique, which involves using a high-torque drill that can efficiently handle the demands of drilling through dense materials.
You'll be able to drill through tough soil with ease, guaranteeing your planter's stability and longevity. A high-torque drill provides the necessary power to reach the desired anchor depth, which is critical for soil stability.
When drilling, maintain a steady pace and apply consistent pressure to avoid damaging the surrounding soil. This will help prevent soil instability and guarantee your anchor sets properly.
As you drill, pay attention to the soil's density and adjust your technique accordingly. For instance, if you're working with loose soil, you may need to use a slower drill speed to avoid creating cavities.
Torque Control Essentials
Mastering torque control is essential for achieving ideal anchor setting results, as it allows you to adjust the drill's power output to suit the specific soil conditions and anchor type you're working with.
When you have precise control over torque, you can guarantee that your anchors are set securely and efficiently. This is especially important when working with different soil types, as excessive torque can damage the surrounding soil or even break the anchor.
To get the most out of your high-torque drill, make certain you:
-
Measure torque accurately: Invest in a reliable torque measurement tool to guarantee you're applying the right amount of force.
-
Apply torque consistently: Develop a consistent torque application technique to avoid over- or under-tightening your anchors.
-
Adjust torque for soil conditions: Be prepared to adjust your torque setting based on the soil type and density you're working with.
Precise Level for Accurate Alignment
When building planters, you need to make certain that your structure is perfectly aligned, and that's where a precise level comes in.
You'll want to check your level's bubble vials to guarantee it's accurately calibrated, and then use it in conjunction with an angle measurement tool to get your corners just right.
Additionally, a plumb line indicator will help you achieve a perfectly vertical alignment, giving your planter a sturdy and professional finish.
Check Bubble Vials
You'll rely on check bubble vials to guarantee your planter construction stays on track with precise leveling and accurate alignment. These tools are essential for ensuring your planters are perfectly level, which is vital for proper water drainage and plant growth.
To get the most out of your check bubble vials, it's important to understand the significance of bubble vial accuracy and calibration techniques.
Here are three key reasons why check bubble vials are a must-have for planter construction:
-
Accurate leveling: Check bubble vials provide a precise reading of your planter's levelness, ensuring you can make adjustments to achieve perfect alignment.
-
Reliable calibration: By calibrating your check bubble vials regularly, you can trust the accuracy of your readings and avoid costly mistakes.
-
Efficient construction: With check bubble vials, you can quickly identify and correct any leveling issues, streamlining your construction process and saving you time and resources.
Angle Measurement Tool
To guarantee your planter's frame is precisely aligned, an angle measurement tool is essential for taking accurate readings and making adjustments to achieve a perfect 90-degree angle.
You can't afford to eyeball it, as even a slight deviation can throw off the entire structure. With an angle measurement tool, you'll be able to detect even the slightest misalignment and make precise adjustments.
When selecting an angle measurement tool, consider digital angle finders, which provide quick and accurate readings.
These tools often feature angle calibration techniques that verify precise measurements. Some models even offer advanced features like hold functions, which allow you to lock in a reading while you make adjustments.
Plumb Line Indicator
A plumb line indicator, also known as a precise level, guarantees your planter's frame is accurately aligned vertically and horizontally, preventing even the slightest deviation that can compromise the entire structure.
With a plumb line indicator, you can ascertain that your planter's corners are square and its walls are straight, which is vital for maintaining the planter's integrity and preventing water leakage.
Here are three reasons why a plumb line indicator is a must-have tool for fast planter construction:
-
Accurate alignment: A plumb line indicator guarantees that your planter's frame is perfectly aligned, preventing any deviations that can lead to structural weaknesses.
-
Efficient construction: With a plumb line indicator, you can quickly identify and correct any alignment issues, saving you time and effort in the long run.
-
Professional results: A plumb line indicator helps you achieve professional-looking results, giving you confidence in your planter's construction and guaranteeing it will stand the test of time.
When it comes to plumb line usage, it's critical to choose high-quality plumb line materials that can withstand the elements and provide precise readings.
Heavy-Duty Gloves for Protection
Wearing heavy-duty gloves protects your hands from punctures, cuts, and abrasions when handling rough materials and tools during planter construction. You'll be working with sharp objects, rough wood, and heavy equipment, so it's essential to have a reliable barrier between your skin and the hazards.
When choosing heavy-duty gloves, consider the materials they're made of. Look for gloves with a mix of synthetic and natural materials, like nylon, polyester, and leather. These combinations provide durability, flexibility, and breathability.
Additionally, consider gloves with advanced grip technology, such as textured palms or silicone coatings, which enhance your grip on slippery surfaces.
With the right gloves, you'll be able to handle even the toughest planter construction tasks with confidence. You'll be able to grip tools securely, even in wet or oily conditions, and protect your hands from the rigors of physical labor.
Measuring Tape for Accurate Cuts
When building a planter, you need a measuring tape that provides precise length measurements to guarantee your cuts are accurate.
A tape with easy readability features, such as clear markings and a standout blade, will make your job easier and faster.
Precise Length Measurements
You'll get accurate cuts in your planter construction project by using a reliable measuring tape to take precise length measurements. A good measuring tape is vital for guaranteeing length accuracy, which is fundamental in planter construction. Without it, you risk making costly mistakes that can ruin your project.
Here are three reasons why precise length measurements are important:
-
Accurate fits: With precise measurements, you can make sure that all the components of your planter fit together seamlessly, giving your project a professional finish.
-
Waste reduction: Measuring accurately helps you cut your materials to the right size, reducing waste and saving you time and money.
-
Error minimization: Precise length measurements minimize the risk of errors, allowing you to focus on other aspects of your project and enjoy the process of creating something beautiful.
Easy Readability Features
A measuring tape with easy readability features, such as large, bold numbers and clear markings, guarantees that you can quickly and confidently take precise length measurements, even in low-light conditions or at awkward angles. This is vital when building planters, where accuracy is key to achieving professional-looking results.
With a user-friendly layout and simplified instructions, you can easily navigate the tape's features, focusing on the task at hand rather than struggling to decipher complex markings. As you work, the clear and concise markings will help you identify measurements at a glance, reducing errors and saving you time.
Additionally, the easy readability features enable you to work efficiently, even in challenging conditions, giving you more control over your project. By using a measuring tape with easy readability features, you can guarantee accurate cuts and precise measurements, resulting in beautiful, well-crafted planters that meet your high standards.
Durable Design Matters
Most planter construction projects require a measuring tape that can withstand rough handling and harsh job site conditions, guaranteeing it remains a reliable tool for accurate cuts and precise measurements throughout the build process. You can't afford to have your measuring tape breaking or malfunctioning in the middle of a project, causing delays and inaccuracies.
When choosing a measuring tape, consider the following key factors to guarantee you get a durable design that meets your needs:
-
Rugged construction: Look for tapes with fiberglass or nylon blades that can withstand rough handling and harsh weather conditions.
-
Water and dust resistance: A tape with a water-resistant coating or sealed housing can protect it from moisture and debris.
-
High-visibility markings: Bright, clear markings make it easier to read measurements, even in low-light conditions.
Safety Goggles for Debris Protection
When hammering, sawing, or drilling into planter materials, safety goggles shield your eyes from flying debris that can cause serious injury. You can't afford to take chances with your vision, especially when working with power tools or handling materials that can splinter or shatter.
Debris hazards are a real concern, and eye protection is vital to prevent corneal abrasions, retinal damage, or even blindness.
Investing in a good pair of safety goggles is a no-brainer. Look for ones with impact-resistant lenses, a snug fit, and a comfortable design that allows you to wear them for extended periods.
It's also important to confirm the goggles meet the ANSI Z87.1 standard for impact resistance. Don't compromise on your safety – choose goggles that provide 100% optical clarity and won't fog up or obstruct your view.
Wheelbarrow for Material Transport
You'll need a reliable wheelbarrow to efficiently transport heavy planter materials around the construction site, saving you time and energy. A sturdy wheelbarrow will enable you to move bulky items like soil, plants, and construction materials with ease, allowing you to focus on the construction process.
To get the most out of your wheelbarrow, consider the following:
-
Regular wheelbarrow maintenance: Regularly clean and lubricate the wheelbarrow's wheel and axles to guarantee smooth movement and prevent rust.
-
Essential wheelbarrow accessories: Invest in wheelbarrow accessories like a waterproof cover, a tool tray, and a load strap to enhance its functionality and keep your tools organized.
-
Proper loading techniques: Learn proper loading techniques to prevent materials from shifting during transport, reducing the risk of accidents and damage to the wheelbarrow.
Block Lifter for Easy Handling
By incorporating a block lifter into your planter construction toolkit, you can effortlessly lift and place heavy blocks, reducing strain on your back and saving valuable time. This essential tool enables you to work efficiently, ensuring your planter construction project stays on track.
One of the significant block lifter benefits is that it allows you to handle blocks of varying sizes and weights with ease, eliminating the need for manual labor or additional equipment.
There are different block lifter types to choose from, depending on your specific needs. You can opt for a manual or hydraulic block lifter, each offering unique advantages. Manual block lifters are cost-effective and ideal for smaller projects, while hydraulic lifters provide more lifting power and are suitable for larger, commercial projects.
Regardless of the type you choose, a block lifter will streamline your planter construction process, enabling you to complete tasks quickly and efficiently. By investing in a block lifter, you'll experience reduced fatigue, increased productivity, and improved overall results.
Weather-Resistant Mortar Mixer
Two key components of a successful planter construction project are the blocks and the mortar that holds them together, which is where a weather-resistant mortar mixer comes in, guaranteeing a strong and durable bond between the blocks.
You know that a mixer that can withstand harsh weather conditions is essential to achieving the perfect mortar consistency. With the right mixer, you can be confident that your planter will stand the test of time.
Here are three reasons why a weather-resistant mortar mixer is a must-have tool for your planter construction project:
-
Consistency matters: A weather-resistant mixer guarantees that your mortar mix is consistent, even in extreme weather conditions, resulting in a strong and durable bond between the blocks.
-
Effortless mixing: With a mixer that can handle tough weather, you can focus on perfecting your mixing techniques, rather than worrying about the mixer itself.
-
Durability guaranteed: A weather-resistant mixer is built to last, giving you peace of mind that your planter will remain stable and secure for years to come.
Spirit Level for Perfect Plumb
With a level foundation vital to a sturdy planter, a spirit level verifies your blocks are perfectly plumb, preventing a weak structure that can lead to costly repairs or even collapse. You can't afford to skip this essential step, as it's the backbone of your planter's stability.
To confirm accuracy, you'll need to master leveling techniques, which involve checking the level in multiple directions to account for any subtle deviations. Before you start, make sure to perform spirit calibration to verify the level is accurate. This involves turning the level upside down and checking if the bubble returns to the same position. If it doesn't, you'll need to adjust the level accordingly.
With a calibrated spirit level, you'll have the confidence to construct a planter that's rock-solid and built to last. Remember, a level planter is a strong planter, and with the right techniques and tools, you'll be well on your way to creating a beautiful and durable outdoor feature.
Frequently Asked Questions
How Often Should I Clean and Maintain My Planter Construction Tools?
You should establish a regular cleaning schedule to keep your planter construction tools in top condition. This habit will greatly impact tool longevity, saving you time and money in the long run.
Aim to clean your tools after each use, and perform deep cleaning every few weeks. By doing so, you'll prevent rust, remove debris, and maintain their performance, ensuring your planters turn out beautifully and efficiently.
Can I Use a Regular Drill Instead of a High-Torque Drill?
Imagine struggling to drive large screws into dense wood, feeling your drill bog down and slow your project to a crawl. You can't afford that frustration.
When it comes to choosing a drill, you're wondering if a regular drill will cut it. The truth is, high-torque drills are designed for heavy-duty tasks, producing up to 1,000 in-lbs of torque compared to regular drills' 300-400 in-lbs.
Don't risk stripping screws or burning out your drill - invest in a high-torque drill for reliable, efficient planter construction.
Are There Any Specific Safety Protocols for Using a Block Lifter?
When using a block lifter, you'll want to prioritize safety above all.
Make certain you follow lifting equipment guidelines to avoid accidents.
First, inspect the lifter before each use, checking for signs of wear or damage.
Always maintain a firm grip and keep your body positioned away from the lifting path.
Never exceed the lifter's weight capacity, and always lower blocks slowly and controlled.
What Type of Material Is Best for Building a Planter Box?
When building a planter box, you'll want to choose a material that's durable and weather-resistant.
Wood is a popular choice, but make certain you select a type that's rot-resistant, like cedar or redwood.
Consider wood selection carefully, as it'll impact the lifespan of your planter.
Don't forget to think about drainage options, too - you'll want to make sure excess water can escape to prevent waterlogged soil.
How Do I Properly Store My Tools When Not in Use?
When you're not using your tools, proper storage is key to maintaining their condition and your sanity!
You'll want to invest in tool organization systems and storage solutions that keep everything tidy and within reach.
Consider a tool chest or cabinet with labeled drawers, or a pegboard with hooks for hanging frequently used items.
This way, you'll always know where to find what you need, and you'll avoid wasting time searching for misplaced tools.
Conclusion
You've gathered the essential tools for fast planter construction, and now you're ready to build like a maestro conducting an orchestra.
With these 10 must-haves, you'll be in perfect harmony, moving in rhythm from one task to the next.
Your project will come together seamlessly, like the final notes of a symphony.
So, get to work and let these tools be your instruments, creating a beautiful melody of efficiency and productivity.
Related Posts
-

5 Best DIY Planter Ideas to Upcycle Concrete
You're about to breathe new life into discarded concrete blocks by transforming them into functional and visually app...
-
5 Best DIY Planter Ideas to Upcycle Concrete
You're about to breathe new life into discarded concrete blocks by transforming them into functional and visually app...
-
5 Best DIY Planter Ideas to Upcycle Concrete
You're about to breathe new life into discarded concrete blocks by transforming them into functional and visually app...
-
5 Best DIY Planter Ideas to Upcycle Concrete
You're about to breathe new life into discarded concrete blocks by transforming them into functional and visually app...
-
5 Best DIY Planter Ideas to Upcycle Concrete
You're about to breathe new life into discarded concrete blocks by transforming them into functional and visually app...
-
5 Best DIY Planter Ideas to Upcycle Concrete
You're about to breathe new life into discarded concrete blocks by transforming them into functional and visually app...
-
5 Best DIY Planter Ideas to Upcycle Concrete
You're about to breathe new life into discarded concrete blocks by transforming them into functional and visually app...
-
5 Best DIY Planter Ideas to Upcycle Concrete
You're about to breathe new life into discarded concrete blocks by transforming them into functional and visually app...
-
5 Best DIY Planter Ideas to Upcycle Concrete
You're about to breathe new life into discarded concrete blocks by transforming them into functional and visually app...
-
5 Best DIY Planter Ideas to Upcycle Concrete
You're about to breathe new life into discarded concrete blocks by transforming them into functional and visually app...
-
5 Best DIY Planter Ideas to Upcycle Concrete
You're about to breathe new life into discarded concrete blocks by transforming them into functional and visually app...
-
5 Best DIY Planter Ideas to Upcycle Concrete
You're about to breathe new life into discarded concrete blocks by transforming them into functional and visually app...
-
5 Best DIY Planter Ideas to Upcycle Concrete
You're about to breathe new life into discarded concrete blocks by transforming them into functional and visually app...
-
5 Best DIY Planter Ideas to Upcycle Concrete
You're about to breathe new life into discarded concrete blocks by transforming them into functional and visually app...
-
5 Best DIY Planter Ideas to Upcycle Concrete
You're about to breathe new life into discarded concrete blocks by transforming them into functional and visually app...
-
5 Best DIY Planter Ideas to Upcycle Concrete
You're about to breathe new life into discarded concrete blocks by transforming them into functional and visually app...
-
5 Best DIY Planter Ideas to Upcycle Concrete
You're about to breathe new life into discarded concrete blocks by transforming them into functional and visually app...
-
5 Best DIY Planter Ideas to Upcycle Concrete
You're about to breathe new life into discarded concrete blocks by transforming them into functional and visually app...
-

3 Best Space-Saving Gardening Ideas for Urban Renters
You can turn even the smallest urban space into a lush oasis by utilizing clever space-saving gardening ideas. Maximi...
-
3 Best Space-Saving Gardening Ideas for Urban Renters
You can turn even the smallest urban space into a lush oasis by utilizing clever space-saving gardening ideas. Maximi...
-
3 Best Space-Saving Gardening Ideas for Urban Renters
You can turn even the smallest urban space into a lush oasis by utilizing clever space-saving gardening ideas. Maximi...
-
3 Best Space-Saving Gardening Ideas for Urban Renters
You can turn even the smallest urban space into a lush oasis by utilizing clever space-saving gardening ideas. Maximi...
-
3 Best Space-Saving Gardening Ideas for Urban Renters
You can turn even the smallest urban space into a lush oasis by utilizing clever space-saving gardening ideas. Maximi...
-
3 Best Space-Saving Gardening Ideas for Urban Renters
You can turn even the smallest urban space into a lush oasis by utilizing clever space-saving gardening ideas. Maximi...
-
3 Best Space-Saving Gardening Ideas for Urban Renters
You can turn even the smallest urban space into a lush oasis by utilizing clever space-saving gardening ideas. Maximi...
-
3 Best Space-Saving Gardening Ideas for Urban Renters
You can turn even the smallest urban space into a lush oasis by utilizing clever space-saving gardening ideas. Maximi...
-
3 Best Space-Saving Gardening Ideas for Urban Renters
You can turn even the smallest urban space into a lush oasis by utilizing clever space-saving gardening ideas. Maximi...
-
3 Best Space-Saving Gardening Ideas for Urban Renters
You can turn even the smallest urban space into a lush oasis by utilizing clever space-saving gardening ideas. Maximi...
-
3 Best Space-Saving Gardening Ideas for Urban Renters
You can turn even the smallest urban space into a lush oasis by utilizing clever space-saving gardening ideas. Maximi...
-
3 Best Space-Saving Gardening Ideas for Urban Renters
You can turn even the smallest urban space into a lush oasis by utilizing clever space-saving gardening ideas. Maximi...
-
3 Best Space-Saving Gardening Ideas for Urban Renters
You can turn even the smallest urban space into a lush oasis by utilizing clever space-saving gardening ideas. Maximi...
-
3 Best Space-Saving Gardening Ideas for Urban Renters
You can turn even the smallest urban space into a lush oasis by utilizing clever space-saving gardening ideas. Maximi...
-

10 Essential Tips to Prevent Disease in Vertical Gardens
You're about to discover the essential strategies to protect your vertical garden from disease, ensuring a thriving a...
-
10 Essential Tips to Prevent Disease in Vertical Gardens
You're about to discover the essential strategies to protect your vertical garden from disease, ensuring a thriving a...
-
10 Essential Tips to Prevent Disease in Vertical Gardens
You're about to discover the essential strategies to protect your vertical garden from disease, ensuring a thriving a...
-
10 Essential Tips to Prevent Disease in Vertical Gardens
You're about to discover the essential strategies to protect your vertical garden from disease, ensuring a thriving a...
-
10 Essential Tips to Prevent Disease in Vertical Gardens
You're about to discover the essential strategies to protect your vertical garden from disease, ensuring a thriving a...
-
10 Essential Tips to Prevent Disease in Vertical Gardens
You're about to discover the essential strategies to protect your vertical garden from disease, ensuring a thriving a...
-
10 Essential Tips to Prevent Disease in Vertical Gardens
You're about to discover the essential strategies to protect your vertical garden from disease, ensuring a thriving a...
-
10 Essential Tips to Prevent Disease in Vertical Gardens
You're about to discover the essential strategies to protect your vertical garden from disease, ensuring a thriving a...
-
10 Essential Tips to Prevent Disease in Vertical Gardens
You're about to discover the essential strategies to protect your vertical garden from disease, ensuring a thriving a...
-
10 Essential Tips to Prevent Disease in Vertical Gardens
You're about to discover the essential strategies to protect your vertical garden from disease, ensuring a thriving a...
-
10 Essential Tips to Prevent Disease in Vertical Gardens
You're about to discover the essential strategies to protect your vertical garden from disease, ensuring a thriving a...
-
10 Essential Tips to Prevent Disease in Vertical Gardens
You're about to discover the essential strategies to protect your vertical garden from disease, ensuring a thriving a...
-
10 Essential Tips to Prevent Disease in Vertical Gardens
You're about to discover the essential strategies to protect your vertical garden from disease, ensuring a thriving a...
-
10 Essential Tips to Prevent Disease in Vertical Gardens
You're about to discover the essential strategies to protect your vertical garden from disease, ensuring a thriving a...
-
10 Essential Tips to Prevent Disease in Vertical Gardens
You're about to discover the essential strategies to protect your vertical garden from disease, ensuring a thriving a...
-
10 Essential Tips to Prevent Disease in Vertical Gardens
You're about to discover the essential strategies to protect your vertical garden from disease, ensuring a thriving a...
-
10 Essential Tips to Prevent Disease in Vertical Gardens
You're about to discover the essential strategies to protect your vertical garden from disease, ensuring a thriving a...
-
10 Essential Tips to Prevent Disease in Vertical Gardens
You're about to discover the essential strategies to protect your vertical garden from disease, ensuring a thriving a...
-
10 Essential Tips to Prevent Disease in Vertical Gardens
You're about to discover the essential strategies to protect your vertical garden from disease, ensuring a thriving a...
-
10 Essential Tips to Prevent Disease in Vertical Gardens
You're about to discover the essential strategies to protect your vertical garden from disease, ensuring a thriving a...
-
10 Essential Tips to Prevent Disease in Vertical Gardens
You're about to discover the essential strategies to protect your vertical garden from disease, ensuring a thriving a...
-
10 Essential Tips to Prevent Disease in Vertical Gardens
You're about to discover the essential strategies to protect your vertical garden from disease, ensuring a thriving a...
-
10 Essential Tips to Prevent Disease in Vertical Gardens
You're about to discover the essential strategies to protect your vertical garden from disease, ensuring a thriving a...
-
10 Essential Tips to Prevent Disease in Vertical Gardens
You're about to discover the essential strategies to protect your vertical garden from disease, ensuring a thriving a...
-
10 Essential Tips to Prevent Disease in Vertical Gardens
You're about to discover the essential strategies to protect your vertical garden from disease, ensuring a thriving a...
-
10 Essential Tips to Prevent Disease in Vertical Gardens
You're about to discover the essential strategies to protect your vertical garden from disease, ensuring a thriving a...
-
10 Essential Tips to Prevent Disease in Vertical Gardens
You're about to discover the essential strategies to protect your vertical garden from disease, ensuring a thriving a...
-
10 Essential Tips to Prevent Disease in Vertical Gardens
You're about to discover the essential strategies to protect your vertical garden from disease, ensuring a thriving a...
-
10 Essential Tips to Prevent Disease in Vertical Gardens
You're about to discover the essential strategies to protect your vertical garden from disease, ensuring a thriving a...


